• About
    • About Blue i Style
    • Tour Our Home
    • Free Organizing eBook
    • Blogging Resources
  • Work With Me
    • Interior Decor & Organizing Services
    • Partnerships & Collaborations
    • Blogging Resources
  • Features & Press
  • Policies & Disclosures
  • Contact

Blue i Style

Creating an Organized & Pretty, Happy Home

  • Decor
    • Tour Our Home
    • Room Makeovers & Design Plans
    • Decorating Tips & Tutorials
    • Outdoor Decor
    • One Room Challenge
  • Organizing and Cleaning
    • Organizing Tips & Tutorials
    • Organizing By Room
    • Organizing on the Go
    • Cleaning
  • DIY
    • DIY Tips & Tutorials
    • Smart Home & Safety
    • Paint Tips & Projects
    • Crafts
    • Cricut Projects
  • Kids
    • Decor & DIY for Kids
    • Organizing Kids
    • Life With Kids
  • Five Minute Projects
  • Holidays & Entertaining
    • Seasonal & Holiday Decor
    • Entertaining
    • DIY Gifts & Gift Guides
    • Facebook
    • Instagram
    • Pinterest
    • Twitter
    • YouTube

DIY Tips & Tutorials· Paint

When and Why to Prime Before Painting

  • Facebook
  • Twitter
This post is sponsored by Rust-Oleum, whose products make almost all of my DIY projects look better!

Do you ever ask yourself, do I need to prime before paining this or is primer really necessary? I know I do! Back in law school I spent many hours painting a laminate bookshelf for my apartment, only to have the paint peel right off because I didn’t prime it first. I’m a much savvier DIYer now than I was back then, but I still find myself questioning when I need to use primer for projects around my house.

Take our recent bathroom mess for example…

A few days before Christmas, I went upstairs to the guest room to wrap all of the boys Christmas presents. I had a cup of hot chocolate, turned a holiday movie on the TV, and got out all the paper and bows. I was ready for a relaxing, festive afternoon.
But things went wrong when I walked into the attached guest bathroom and felt a drip hit my head. I looked up, and saw another drip of brownish water forming on the door frame above my head, just waiting to fall. I grabbed out a step ladder and felt the wall above the door – it felt dry. I felt all around on the ceiling – if felt dry, too. But drops kept falling from the center of the door frame. For an hour or so, and then they stopped.
I thought about what was above me on the third floor, and realized the master bathroom shower was aligned pretty closely with this mysterious leak. I was able to get a plumber out that afternoon, but after more than an hour, he couldn’t recreate the leak. No matter how much water he ran in the shower – and down every other drain in the master bathroom – no more water dripped from the door frame below.
The plumber left and about an hour later… Drip. Drip. Drip.
I called the plumber back and he returned the next morning. He told me the only way he was going to be able to find the leak was to cut a hole in the bathroom ceiling and look for the source. I gave him the go ahead, and he started with a small hole on the ceiling just above the door. As he traced the water, the hole kept getting bigger, and bigger, and BIGGER, until it almost reached the other side of the bathroom.
In the end, we determined that the water was not coming from the bathroom above. It was instead coming from a leak in the deck that wraps around our master bedroom and bathroom. The water was then running along the top of some steel beams before finally finding the path of least resistance through the doorway about 5 feet away from the original source of the water.
So on Christmas Eve, Scott and my dad started pulling up the deck boards one by one in search of the leak. Santa was smiling on us, because after removing a relatively small number of boards, they found a tiny puncture in the deck lining where a screw had popped through.
Once the hole in the deck was patched, repairing the hole in the bathroom ceiling took a backseat. We celebrated Christmas and then our son’s birthday, and then got back to our regular routine in the new year. I don’t go into the guest room all that often, and when I do, I tried not to look up at the hole, and I ignored the slightly musty smell.
Finally I hired a drywall professional to come and repair the giant hole in the ceiling.
The new drywall was then covered in a thick layer of drywall joint compound to match the hand-troweled texture throughout our house.
As soon as the drywall repair work was finished, I pulled out the matching paint colors from my storage room, eager to make the bathroom pretty again. But then I started to question whether I could paint directly onto the newly repaired surface, or if I needed to prime first.
I did some research and found out that primer is necessary to seal and prepare new drywall and joint compound painting. Unprimed drywall and joint compound will soak up multiple coats of paint, requiring a lot more coats and often resulting in uneven color-coverage. And to answer the first question you’re probably asking, no, it is not advisable to use a paint-and-primer-in-one on new drywall.
I’ve been doing DIY projects for many years, but I still find myself often wondering when I should use primer. If you’ve ever asked the same question, I’ve put together a quick resource at the end of this post to help you know when and why to use primer. 
 

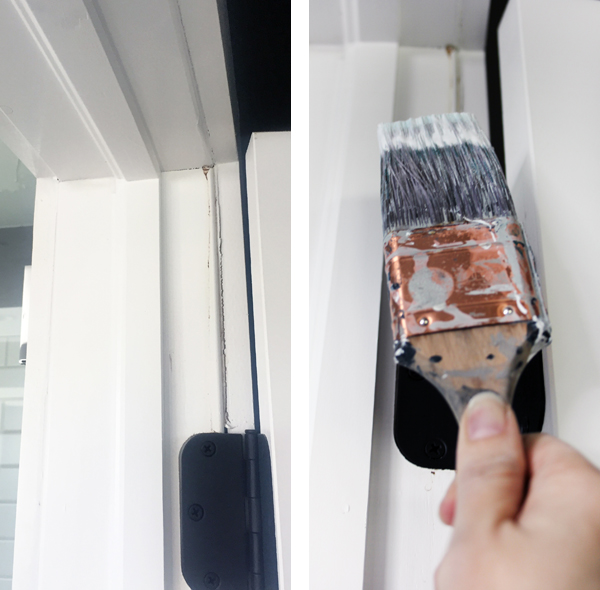
I asked my friends over at Rust-Oleum to recommend the right type of primer to use on new drywall and drywall compound in my bathroom, and they recommended Zinsser Bull’s Eye 1-2-3.

When to prime before painting
Ok, so now I knew I needed to prime before painting my drywall repair, but I still wasn’t ready to dip my paint brush in and get started just yet.
Drywall Repair and Painting - Prime Before Painting Repaired Drywall
Before priming, it’s important to wipe down the wall because if there’s a lot of loose dust on the wall {and drywall is a dusty business}, it can prevent even the primer from sticking appropriately. I used a slightly damp rag to wipe down the repaired surfaces, and then allowed it time to totally dry before starting to apply the primer.
Priming Repaired Drywall

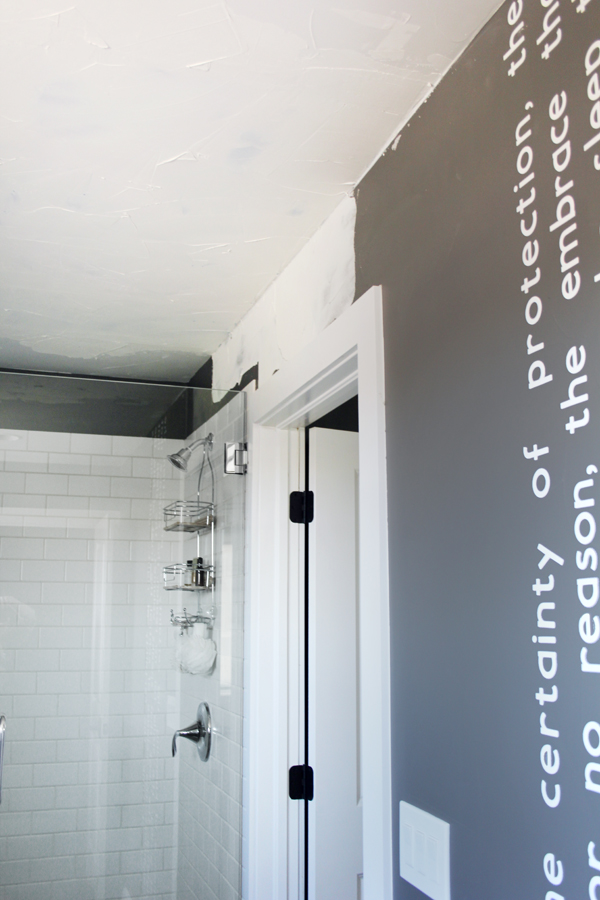
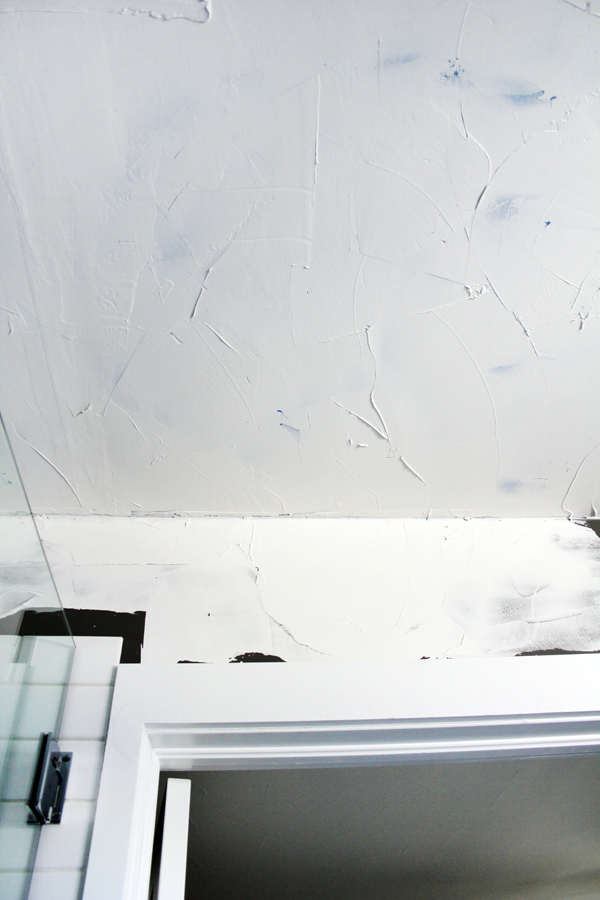
I used a brush to prime the small area of wall above the door and shower, and then used a roller to prime the ceiling.

Rolling Primer on Repaired Ceiling
We were very fortunate that we didn’t need to replace the door frame. The water damage was limited to a tiny bit of swelling in one spot and a just a bit of water staining. I applied a coat of primer to block these stains before touching up the paint on the door frame.
Almost no DIY project gets done around here without at least one little helper. Cooper is an expert with a dry paint brush, and insisted that his contributions needed to be documented for this post!
After allowing the primer to dry, I was ready to repaint. I again used a roller with an extension rod to paint the ceiling, which made it much faster and easier than climbing on and off my step ladder.
Painting Ceiling with Roller

Once the ceiling paint was dry, I used painters tape to prep the section of wall before touching up the charcoal gray paint. Some people have a steady enough hand to cut-in without tape, but I always spend the extra few minutes to tape before painting in order to get a nice, crisp paint line.

Painting Repaired Drywall
I removed the tape as soon as I finished my second coat of the gray paint. Removing the tape while the paint is still wet is always best, because once the paint dries, you run the risk that some may peel off with the tape. Always peel painters tape off at a 45 degree angle for the best result.
And just like that … our bathroom is as good as new. I much prefer when the quote on the wall is the focal point of the bathroom, rather than a giant hole in the ceiling!
Bathroom white subway tile gray walls Cricut wall quote
I’m so glad to no longer see the torn apart ceiling reflected back in the bathroom mirror, especially since the mirror is visible from the guest room. Our beautifully repaired space is much more welcoming for guests.
Bathroom white subway tile grey walls
I’ve always found this bathroom to be a calming and relaxing space, and I’m so relieved that it’s finally been returned to its spa-like state. Future guests, start making your reservations now. 😉
Gray walls in bathroom white trim. Cricut cut wall quote
Ok, so now that I’ve learned the importance of priming drywall repair before painting, let’s chat about other projects that call for primer!
Knowing when to use primer often comes down to understanding why it’s necessary. Primers can make your paint project easier and provide better finished results. Primers make painting easier by promoting topcoat adhesion, providing better coverage, blocking stains, blocking odors, and more. 
When to use paint primer Why use primer before painting
In a recent interview, I was asked about my favorite way to spend $50, and without hesitation I responded, “Paint!” Whether it’s a gallon of paint for your walls, or a can of spray paint for just about anything else, paint is an affordable way to make a big impact on a small budget.
I’m always surprised when I talk to people who are intimated to paint, because I don’t hesitate to paint anything and everything. But I think it comes down to the fact that many of us have had bad painting experiences at one time or another, and more often than not, that comes down to improper preparation and skipping important steps, like priming!
Priming before painting can feel like an extra step, but taking the time to do the project right the first time will eliminate many DIY mishaps! Using a primer as the starting point will also help avoid common painting issues that make projects take longer and add to the overall frustration of painting such as: 
  • applying too much paint that then runs and sags
  • applying paint that starts to peel when you brush back over it
  • having to put on 3-4 coats to cover stains
  • being able to tell you put on 3-4 coats with a thick, uneven finish
  • finished look is not the true color you were going for
Starting with primer also extends the longevity, washability, and durability of your final painted surface!

So what about using a “paint with primer in one” product? These work best if you are painting the walls the same color, keeping the same paint sheen, and if the walls and existing paint are in good condition. But in most other situations, starting with primer will give you better results the first time. While paint and primers in one can seem to save you time, skipping the step of priming can lead to many DIY mishaps.

Here’s a list from the experts at Rust-Oleum outlining the common DIY situations that call for primer:
  • Use primer to seal porous surfaces such as: 
    • builder’s flat paint, bare drywall, and spackled areas
    • stucco, concrete and masonry
    • raw wood
    • weathered aluminum
  • Permanently block out odors and stains, preventing bleed through the topcoat: 
    • Tannin bleed, food and beverage stains
    • Knots and sap streaks
    • Graffiti, ink and crayon
  • Hide dark colors and surfaces: 
    • Decorative colors and faux finishes
    • Panelling, wallcovering and borders
    • Stained cabinets
  • Create a layer to which paint will adhere, such as glossy, hard-to-paint surfaces, without sanding: 
    • Finished woodwork, shelving
    • Old glossy paints, varnished trim
    • Laminate furniture
    • Glass, ceramic tile, decorative tile, formica
    • Vinyl siding, shutters
    • PVC piping, finished metals
And with the returning popularity of wallpaper, also keep in mind that you should always prime wallboard before hanging wallpaper. When using traditional wallpaper with glue, the primer will seal the wallboard and joint compound so that the wallpaper glue doesn’t soak in and dry out. For temporary, removable wallpapers, you want a fresh clean surface to apply the paper to, but one to which the adhesive won’t adhere too strongly. For wallpaper applications, use a specific wallpaper primer.
Consult Rust-Oluem’s complete Guide to Primers and Sealers when determining which type of primer is right for your next DIY project. I have it bookmarked as my go-to resource!
 
Here are some related posts from the blog that you might find helpful:
  • Best Tips & Tricks for Painting Any Space
  • Spray Paint Organization
  • Utility Room Paint Supply Storage & Organization
  • Tips for Proper Paint Storage, Recycling, and Disposal
  • How to Install Temporary, Removable Wallpaper
  • Facebook
  • Twitter

04.18.18

« Kitchen Dining Design Decisions
Slowing Our Kitchen Roll »

Meet Angela

Angela, the founder of Blue i Style, strongly believes that decor should be functional, organizing can be beautiful, smart DIYs help stretch your budget, and an organized and stylish home can still be practical for life with kids.

Her work has been featured in print in Better Homes & Gardens and 5280 Home magazine, and online by HGTV, the Today Show, Good Housekeeping, and more. She was also named a 2018 Stylemaker by Better Homes & Gardens.

You can reach Angela at angela@blueistyle.com

COPYRIGHT & PHOTO SHARING POLICY

All text, images, and other content that are part of this blog are the property of Blue i Style, unless otherwise noted. All material is copyright protected.

If you wish to feature one of my projects, feel free to share a single photo (no collaged images, or images with text overlays) as long as the no pin code is used to prevent my image from being pinned from your site.

All features must include credit to Blue i Style with a link back to the original content (not just to the homepage). The project steps, supply list, and/or sources may not be disclosed.

Please read my full content and photo sharing policy to ensure you comply with all guidelines. Failure to do so constitutes copyright violation.

Create At Your Own Risk

Any and all content on this website is for personal use only and created exclusively for inspiration purposes.

Creating with my suggested methods, products used, and tools is at your own risk.

Please ensure you are following proper guidelines with anything used, and you receive professional guidance when necessary.

Read my complete disclosure at: Policies & Disclosures.

Sponsorships & Affiliations

To help fund this blog, I accept some forms of advertising, sponsorships, and affiliate links.

If you buy something that I recommend, you pay the same price, but I may receive a small commission. As always, all opinions are my own.

Blue i Style is a participant in the Amazon Services LLC Associates Program, an affiliate advertising program designed to provide a means for sites to earn advertising fees by advertising and linking to amazon.com.

I use an affiliate marketing service which may automatically put links into some posts, so please assume any/all links may be affiliate links.

Read my full Disclosure Statement.

Copyright © 2023 · Dazzling Theme theme by Restored 316

  • Facebook
  • Twitter
  • Pinterest