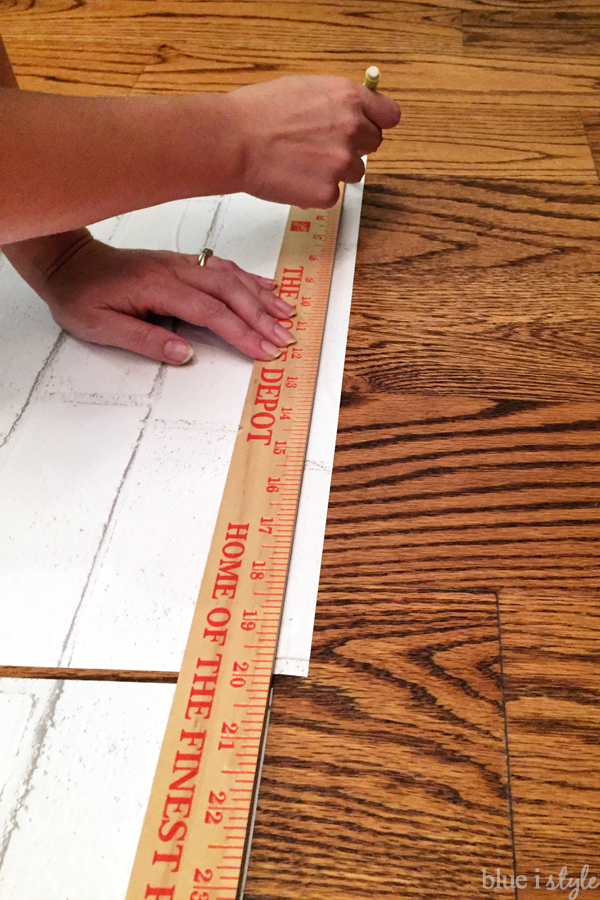
• About
    • About Blue i Style
    • Tour Our Home
    • Free Organizing eBook
    • Blogging Resources
  • Work With Me
    • Interior Decor & Organizing Services
    • Partnerships & Collaborations
    • Blogging Resources
  • Features & Press
  • Policies & Disclosures
  • Contact

Blue i Style

Creating an Organized & Pretty, Happy Home

  • Decor
    • Tour Our Home
    • Room Makeovers & Design Plans
    • Decorating Tips & Tutorials
    • Outdoor Decor
    • One Room Challenge
  • Organizing and Cleaning
    • Organizing Tips & Tutorials
    • Organizing By Room
    • Organizing on the Go
    • Cleaning
  • DIY
    • DIY Tips & Tutorials
    • Smart Home & Safety
    • Paint Tips & Projects
    • Crafts
    • Cricut Projects
  • Kids
    • Decor & DIY for Kids
    • Organizing Kids
    • Life With Kids
  • Five Minute Projects
  • Holidays & Entertaining
    • Seasonal & Holiday Decor
    • Entertaining
    • DIY Gifts & Gift Guides
    • Facebook
    • Instagram
    • Pinterest
    • Twitter
    • YouTube

Decorating Tips & Tutorials· DIY Tips & Tutorials· Paint· Reader's Favorite

How to Install Temporary, Removable Wallpaper

  • Facebook
  • Twitter
Don’t you just love when a DIY project that totally intimidates you turns out to be much easier than you expected? That’s the story of the temporary, removable wallpaper that I installed in our laundry/linen closet!
How to install temporary wallpaper

I partnered with Tempaper – maker of self-adhesive, repositionable, temporary wallpaper – during our laundry closet makeover, so some of the tips in this tutorial are based on my experience with this brand specifically, but the steps will be the same for any similar temporary wallpaper.
TOOLS NEEDED:

Measuring Tape

Yard Stick
Scissors
Pencil
Exacto Knife
Squeegee

RECOMMENDED SURFACES:
Self-adhesive, temporary wallpaper is not recommended for all surfaces. Before purchasing removable wallpaper, check the specific instructions from the brand to confirm if the surface you have in mind is appropriate for installation.
I used Tempaper brand, which is recommended for surfaces that have been primed and painted with eggshell, satin, or semi-gloss paint (not matte or flat – to which it can adhere too strongly). It is also not recommended for placement on glass or mirrors.
I was concerned about whether temporary wallpaper would be appropriate in a laundry room, where there can be some humidity, but I confirmed with Tempaper that, because their product is vinyl it can be safely applied in bathrooms and other areas with steam or indirect moisture. Since it is a water-based product, it’s adhesive is not adversely affected by humidity. This may not be true of all temporary wallpaper brands, however, so definitely double check!
Tempaper strongly recommends that their wallpaper only be used on smooth surfaces, not on textured walls. The walls of my laundry/linen closet are smooth but for a light trowel texture {like the one called “medium custom smooth” in this wall texture guide}. As a result, my walls did not fit the “smooth surface” guideline. Because my texture is so minimal, it did not impact that ability of the paper to adhere properly, but the texture of the wall does leave visible ridges in the wallpaper. Because I had chosen the wallpaper in a textured white brick pattern, I made the conscious decision that I was ok with the impact the texture of my walls would have on the appearance of the installed wallpaper – but I don’t think this texture would look good with most wallpaper patterns.
I would definitely recommend ordering a small sample of any temporary wallpaper you are thinking of using, and test it in an inconspicuous area to ensure that it properly sticks to your surface and removes cleanly and easily.
PREPARING FOR TEMPORARY WALLPAPER INSTALLATION:
Before installing temporary wallpaper, you’ll want to make sure your walls are nice and clean. When I pulled out the washer and dryer, the wall behind was definitely NOT clean, so I scrubbed off all of the baked on lint, then used a damp cloth to wipe down all of the walls and allowed them to dry completely.
Prior to brightening up the space with the white brick wallpaper, our laundry room was bright red. I was concerned that the red might show through the white paper, but after testing a small area, I was pleasantly surprised to find that this was not the case. None the less, I decided to use white primer to paint a couple of inches around the ceiling, baseboards, and in the corners of the space.
I did this simply to prevent any red from peeking through if I didn’t manage to get the wallpaper aligned just perfectly. I know it sounds a little crazy, and I could have just painted the whole room, but I’ll save that job for the next laundry room makeover in another decade.
CALCULATING HOW MUCH WALLPAPER YOU NEED:
 
To determine how much wallpaper you’ll need, begin by calculating the square footage of your wall space. Tempaper has a handy-dandy wallpaper calculator that will tell you how many rolls you’ll need based on your square footage and the size of their rolls.
Based on my square footage, I needed barely over two rolls of wallpaper. But the difference between buying two rolls and three rolls at $125 per roll is a major cost difference! {Tempaper ended up offering me a generous discount as a sponsor of my One Room Challenge laundry room makeover, but even still, the cost of two rolls versus three was significant.} As a result, I decided to get creative and figure out how to use less paper.
Since I was installing the wallpaper in our laundry closet, I knew that the wall behind washer and dryer would never been seen {except on the rare occasion that I clean behind it, but even then, only I would see it}. That being the case, I decided there was no need for the wallpaper to go all the way to the floor behind the machines. Eliminating this small amount of square footage was the difference between needing two rolls and three, and saved me a ton of money.
Installing temporary wallpaper
Even though I had calculated that I could get away with two rolls of paper, I ordered three just to be safe {after confirming with Tempaper that I could return the third roll if it was unopened}. If by chance my calculations were off, I didn’t want to wait for another roll to be shipped to me, plus I had read that the lot numbers are important to avoid color variance, so it was easier to order all the rolls I might need at once ensuring that the lot numbers would all be the same.
MEASURING AND CUTTING WALLPAPER PANELS:
After all this planning and decision making, I was finally ready to start installing wallpaper, and the first step was to cut the panels. The instructions from Tempaper suggest pre-cutting all of the panels, but this made me a bit nervous… what if I cut one wrong and then cut all the others the same?! Instead, I decided to cut the panels just three at a time.
I measured the height of the wall, then added 2 inches for extra to trim around the baseboard. I unrolled the wallpaper on floor of our entryway, where I had plenty of room to work, then measured, marked, and cut the first panel. I used a pencil to make a note on the backing as to which end of the panel I intended to be the top.
Here’s where it gets tricky. You can’t simply cut a second wallpaper panel of the same length – you must first line up the pattern with the first panel! I unrolled a length of paper, and laid it out right next the first panel, moving it up and down until I got the pattern to line up as closely as possible. I learned quickly that the brick pattern is impossible to align exactly along the full length of the panel, so I just adjusted it until the match was close enough. Fortunately, with the brick pattern, when up on the wall you really don’t notice the slight imperfections in the way the pattern aligns.
Once I had the pattern of the second panel aligned with the first, I used a yard stick to mark and trim off the excess at the top of panel two. I again noted “top” on the back of this second panel. By doing this, I ensured that the two panels would match up nicely when installed side by side.
Once I had the top of the panels aligned so that the patterns matched, I measured and cut the length of panel number 2, and then proceeded to use the same method to align and cut a third panel.
Cutting wallpaper panels
I then took the first two panels upstairs to install them in the laundry room, leaving the third panel on the floor to use as the template for the next panels.

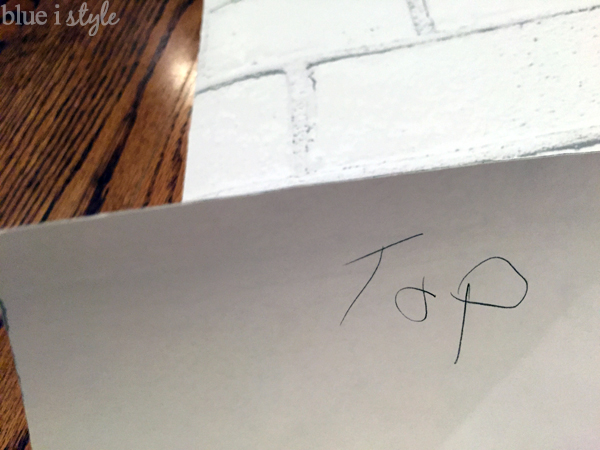
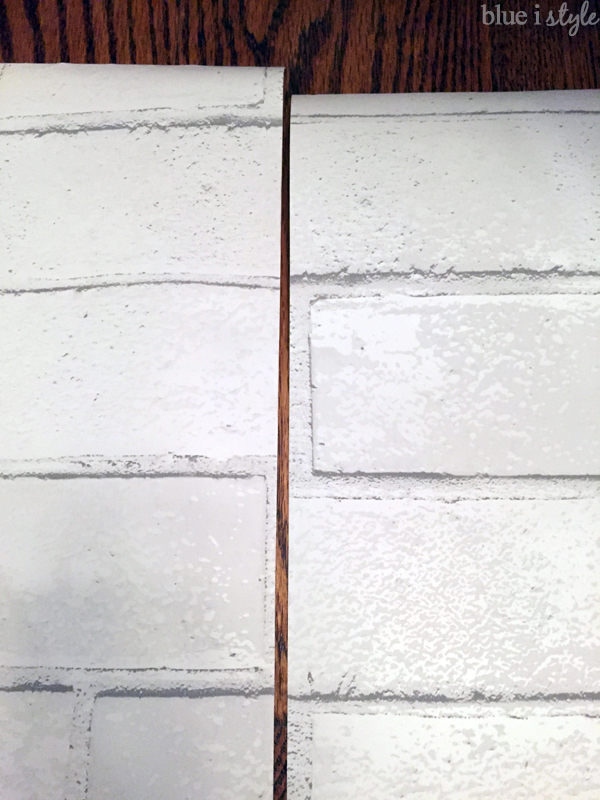
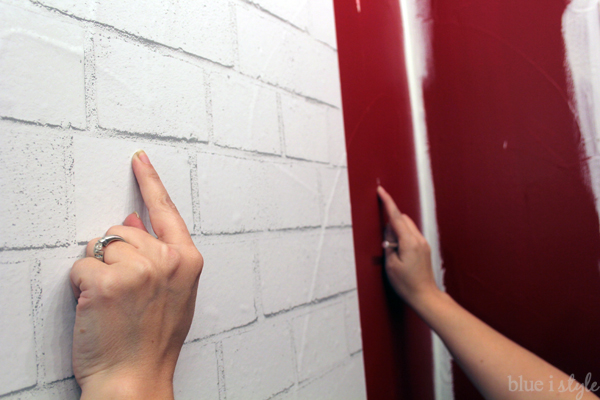
INSTALLING {AND REPOSITIONING} SELF-ADHESIVE WALLPAPER PANELS:

I wasn’t really sure what to expect when I got ready to put the first panel on the wall. I understood that it was supposed to be easy to remove and reposition – but I wasn’t sure how easy it would be. I had also read that it was important not to pull to had, or the wallpaper could stretch. I decided to be extra cautious until I had a better feel for the process, so after aligning the first panel with the ceiling and abutting wall, I used delicate surface painter’s tape to hold the first panel before peeling off any of the backing.
Installing temporary wallpaper
After the first panel, however, I realized that the installation was much easier than I expected, and the tape was unnecessary.
Begin by peeling of the about a foot of the backing at the top of the panel. Align the panel with the ceiling and adhere it to the wall.
Installing temporary removable wallpaper
I first used my hand to smooth down the wallpaper, working from the center out to the edges. Then I used a squeegee {as recommended by Tempaper} to smooth out any air pockets – again working from the center and guiding the air out to the sides. It worked perfectly!
Installing self-adhesive wallpaper
I continued peeling the backing down a couple of feet at a time, smoothing it out as I went. A few times, after getting about half way down the panel I would realize that it was a bit crooked, or just wasn’t aligning properly with the adjacent panel. This meant I got to test out how easy to remove and reposition that wallpaper really is… turns out, extremely easy! I never had any problem taking a panel down, realigning it, and putting it back in place. In fact, have used a lot of shelf liner and contact paper over the years, I can safely say this wallpaper was much easier to work with! It doesn’t stick to itself, and it sticks just as well on the second {or third, or fourth} try.
When hanging each new panel, I overlapped it with the adjacent panel my about an inch – both to ensure there would be no gaps, and also to avoid splitting seams since the laundry room is an environment that can be subjected to temperature variances.
Installing removable wallpaper
Additionally, when wallpapering in the corners, I positioned the paper on one side of the corner to wrap around the corner by about half an inch. When I first tried to match two pieces up without wrapping either around the corner, I couldn’t avoid slight gaps.

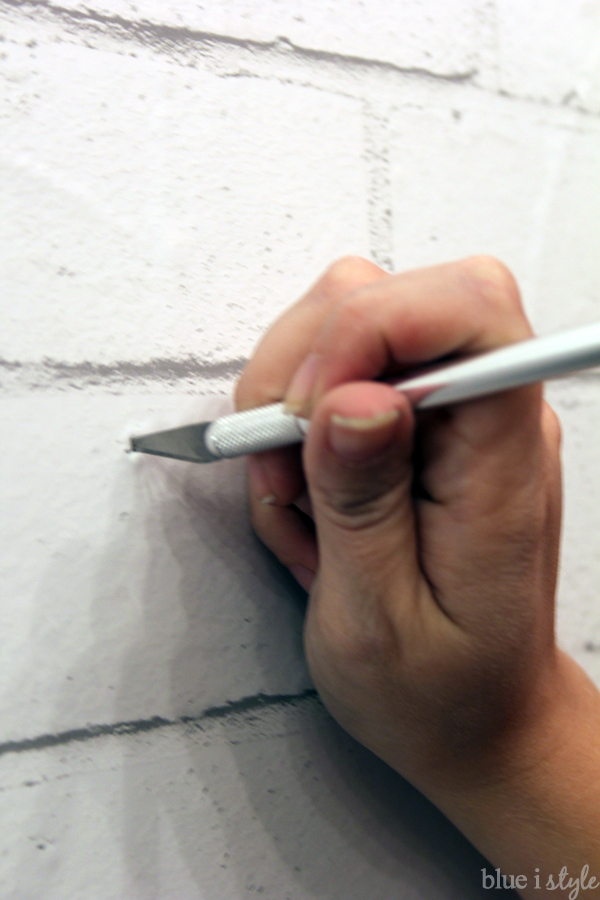
TRIMMING AT BASEBOARDS AND AROUND FIXTURES
 
Once each panel was fully attached to the wall, I used an exacto knife to trim it at the baseboard – pressing hard enough to cut through the wallpaper, but not so hard as to cut into the wall or the trim.
Trimming temporary wallpaper
Then I carefully removed the excess. If you find a spot that is not cut all the way through – use the knife to cut it rather than just pulling, as the paper will stretch if you pull too hard.
Trimming temporary wallpaper at baseboard
I also used an exacto knive to trim around fixtures in the wall – like our electrical box. I smoothed the wallpaper onto the wall just as far as the bottom of the electrical box {leaving the backing on the paper below the level of the box}.
Installing wallpaper around fixtures and outlets
The I used my thumbnail to press the paper against the edge of the electrical box as tightly as possible.
Installing temporary wallpaper around fixtures and outlets
Finally, I used my exacto knife to trim right along the edge of the electrical box, and then carefully removed the excess paper.
Installing temporary wallpaper around fixtures and outlets
CREATING HOLES TO REINSTALL SHELVES:
I had to remove the linen closet shelves in order to install the wallpaper, but I wanted to easily be able to put the shelves back up using the same screw holes after completing the wallpaper. When I removed the shelf support rails, I measured and noted the distance between the holes from left to right.
As I papered over one set of holes, I measured over from the remaining uncovered holes to determine the approximate location of the holes I had covered up. Then I was able to use my finger to feel for the indentation in the wall below the paper.
Once I identified the location of the holes I had paper over, I used an exacto knife to poke through the paper into the hole.

Then I used the end of a skinny paint brush to fully press the paper into the holes to opening them up completely.

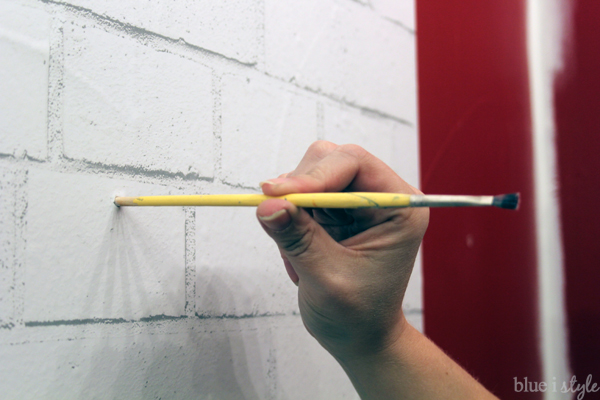
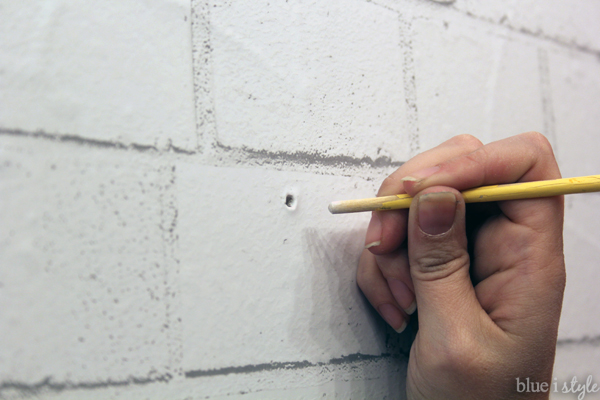
I picked the paintbrush to open up the holes because the end was just the right size, but you could use anything that fit. By identify and marking the hole locations as I went, it made it super quick and easy to rehang the shelves once the closet was fully wallpapered.

THAT’S IT…EASY & DONE!


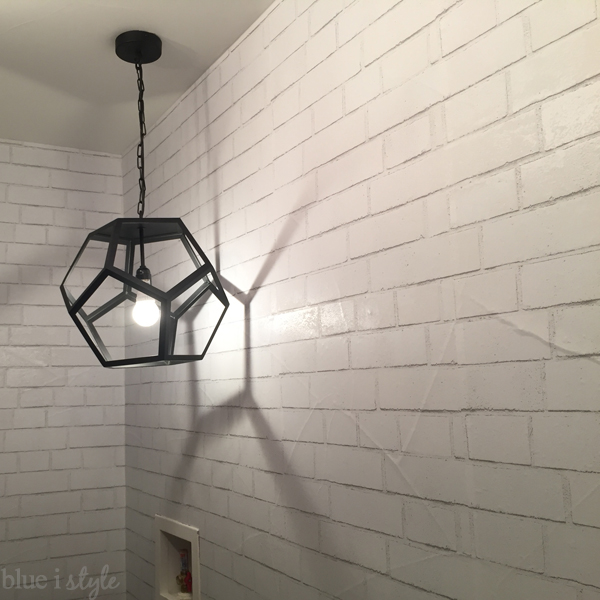
When the last piece of wallpaper was up, I stood back to admire my work, and breathed a sigh of relief that the process was so much easier than I had expected. Now that I’ve used temporary, removable wallpaper once, I’m eager to try it again in another space!

Installing temporary, removable wallpaper

The Tempaper textured brick white wallpaper makes such a big impact, but I’m happy to know that when we decide to update the space again someday in the future, it won’t be a major headache to remove, and it’s not going to cause any damage to our walls!

The wallpaper has been up for almost four months now, and its still looking great and holding strong. I’ll certainly report back if anything changes over time!

Installing self adhesive removable wallpaper
I am so in love with how our new laundry and linen space came together, and the brick wallpaper is definitely star of the show!

Tutorial for installing temporary, removable wallpaper

Be sure to come see how the full laundry room and linen closet makeover turned out!

  • Facebook
  • Twitter

02.18.16

« {link party} The Creative Circle – Week 53
Add Extra Storage without Damaging Your Doors »

Meet Angela

Angela, the founder of Blue i Style, strongly believes that decor should be functional, organizing can be beautiful, smart DIYs help stretch your budget, and an organized and stylish home can still be practical for life with kids.

Her work has been featured in print in Better Homes & Gardens and 5280 Home magazine, and online by HGTV, the Today Show, Good Housekeeping, and more. She was also named a 2018 Stylemaker by Better Homes & Gardens.

You can reach Angela at angela@blueistyle.com

Get Email Updates!

Thanks for subscribing! Check your email a welcome message and your free organizing eBook!

Get Email Updates!

Plus a bonus free organizing eBook!

COPYRIGHT & PHOTO SHARING POLICY

All text, images, and other content that are part of this blog are the property of Blue i Style, unless otherwise noted. All material is copyright protected.

If you wish to feature one of my projects, feel free to share a single photo (no collaged images, or images with text overlays) as long as the no pin code is used to prevent my image from being pinned from your site.

All features must include credit to Blue i Style with a link back to the original content (not just to the homepage). The project steps, supply list, and/or sources may not be disclosed.

Please read my full content and photo sharing policy to ensure you comply with all guidelines. Failure to do so constitutes copyright violation.

Create At Your Own Risk

Any and all content on this website is for personal use only and created exclusively for inspiration purposes.

Creating with my suggested methods, products used, and tools is at your own risk.

Please ensure you are following proper guidelines with anything used, and you receive professional guidance when necessary.

Read my complete disclosure at: Policies & Disclosures.

Sponsorships & Affiliations

To help fund this blog, I accept some forms of advertising, sponsorships, and affiliate links.

If you buy something that I recommend, you pay the same price, but I may receive a small commission. As always, all opinions are my own.

Blue i Style is a participant in the Amazon Services LLC Associates Program, an affiliate advertising program designed to provide a means for sites to earn advertising fees by advertising and linking to amazon.com.

I use an affiliate marketing service which may automatically put links into some posts, so please assume any/all links may be affiliate links.

Read my full Disclosure Statement.

Copyright © 2025 · Dazzling Theme theme by Restored 316

  • Facebook
  • Twitter
  • Pinterest