Babies may be little, but their stuff sure can take up a lot of space! That’s why I knew that the small closet in our nursery was going to need some upgrading in order to be functional both now, and in the future.
The closet is narrower than a typical reach in closet, and it originally had sliding doors which only allowed half of the closet to be accessed at one time. Each sliding closet door was only 17.5 inches wide, making it very difficult to access the closet in a useful way, so the first thing we did was to enlist the help of a contractor friend to remove the sliding doors and replace them with two doors that pull open.

The closet originally had just one clothing rod with one shelf above the rod – which was just not going to do! With the new doors in place, I started to plan out the interior of the closet. Fortunately the timing of this project coincided with the annual Elfa sale at the Container Store, so I decided to splurge on an Elfa shelving system in order to make the absolute most of the available space. I drew up what I had in mind and took my sketch and my measurements to the Container Store where they helped me determine exactly what I needed to make it all work.
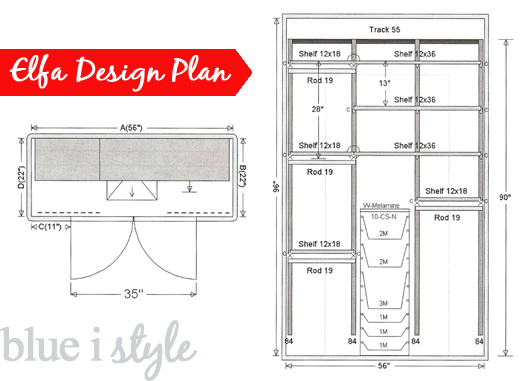
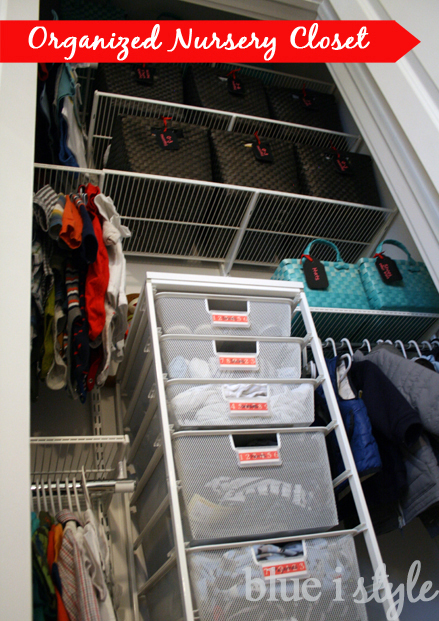
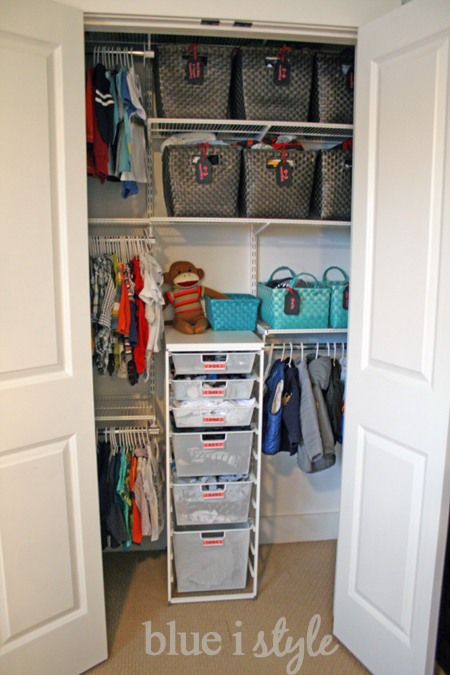
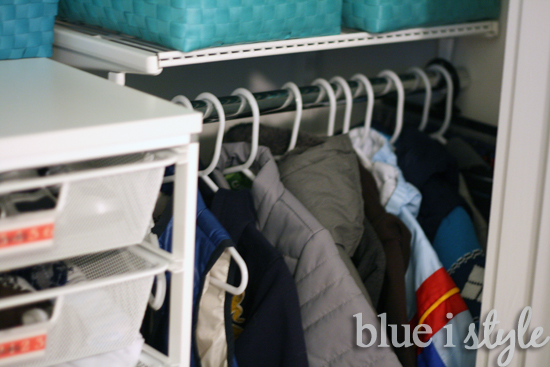
Wanting to maximize the usable space in the closet, I opted for a combination of hanging space, shelving and drawers. Since baby and toddler clothes are small, I determined I could fit three rows of hanging space on the left side. The lower middle of the closet houses a narrow bank of drawers, and on the right side I opted for just one hanging rod at a mid-height. The remainder of the closet is open shelving.
My number one goal in organizing the nursery closet was to keep track of all the different sizes of clothes. When Beckett was born, so many generous friends and family gave us clothes for him in a wide variety of sizes ranging from newborn up through 18-24 months. And when I see a clearance rack, I like to pick up cute items that I know Beckett will eventually grow into. But having so many different sizes in one closet can be a challenge and I knew that without some sort of organization I would run the risk that he might outgrow something before I realized it was the right size.
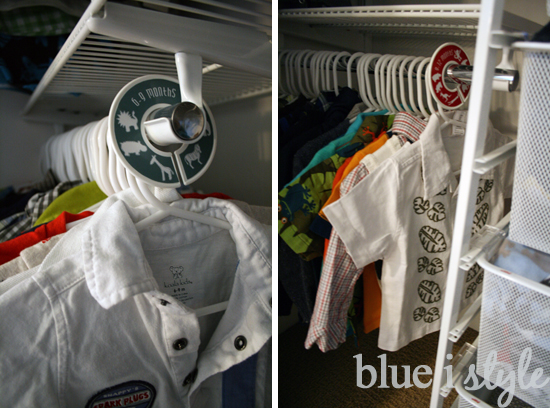
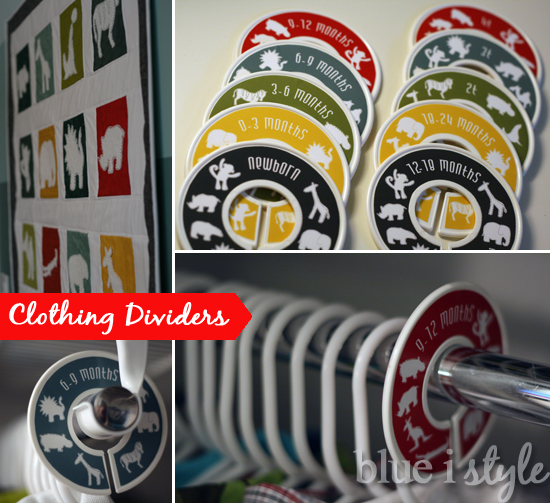
I tackled this challenge by utilizing the three rows of hanging rods to separate sizes, and by further dividing the various sizes with custom-made labels.
I hang all of the clothes in the size Beckett is currently wearing in the middle row, right at my eye level, which makes it quick and easy to get him dressed in the mornings (and yes, out little 3rd percentile kiddo still fits in his 6-9 month clothes even though he is nearly 16 months old). I use the lowest rod to hang all of the clothes in the next size that he’ll be growing into – this allows me to see what we have in the next size to make sure that I don’t over buy.
Since I am short, the highest of the three rods is just out of easy reach, but it works great for storing the larger clothing sizes that Beckett won’t grow into for some time.
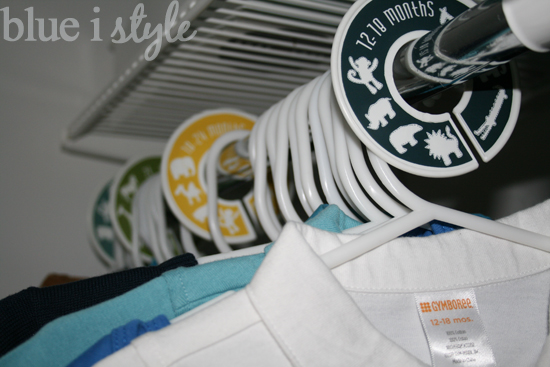
To keep track of the various sizes of clothes, I also created custom-made divider labels, which I designed with the same animal silhouettes that I drew for the quilt above the crib. UPDATE: You can now download my free clothing rod divider template and read the full tutorial to make your own!
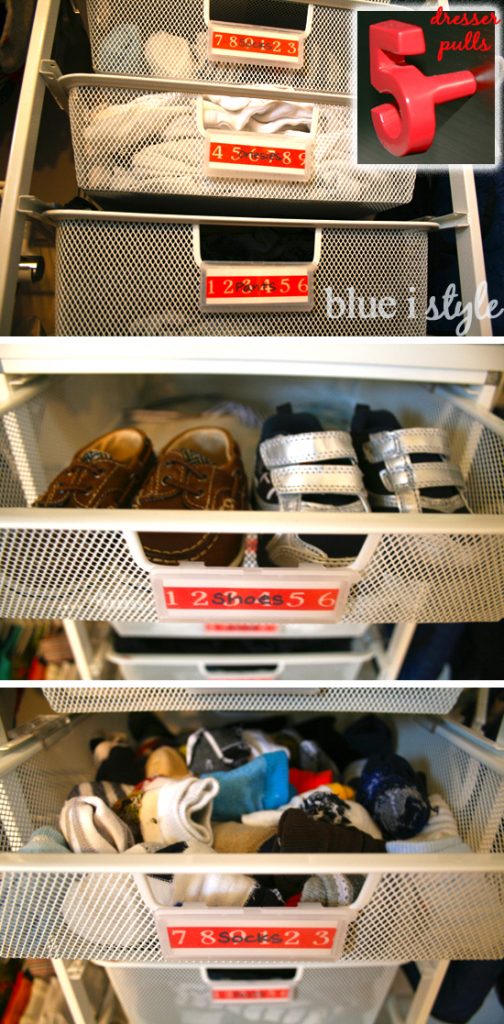
The drawers in the center of the closet are perfect for sorting and storing the remainder of Beckett’s clothes, including pants and shorts, white onesies, socks, shoes, and pajamas. And the deep bottom drawer holds extra crib sheets.
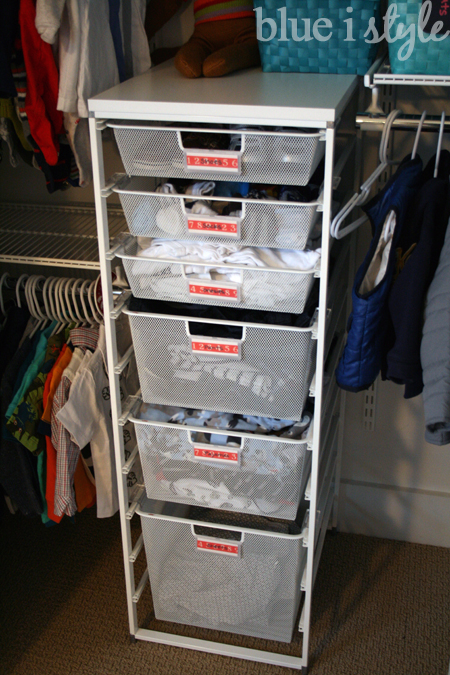
I labeled each drawer using some adorable red washi tape with white numbers, which by no coincidence ties in with the red numbered drawer pulls I used on the nursery dresser (little details like that make me smile!).
There is also the challenge, of course, of storing all of the clothes that Beckett has outgrown, but that we might be able to reuse for baby number 2, or might want to later pass along to friends or family. This is where the open shelving in the closet comes in – with baskets for sorting and storing different sizes.
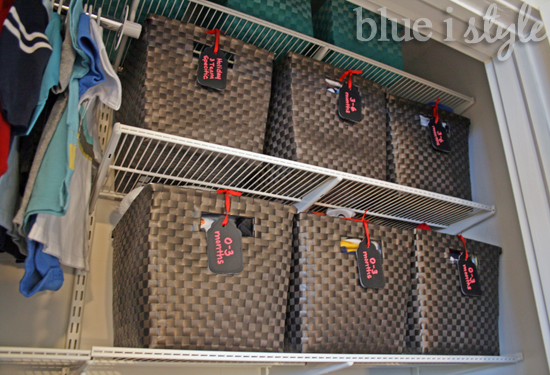
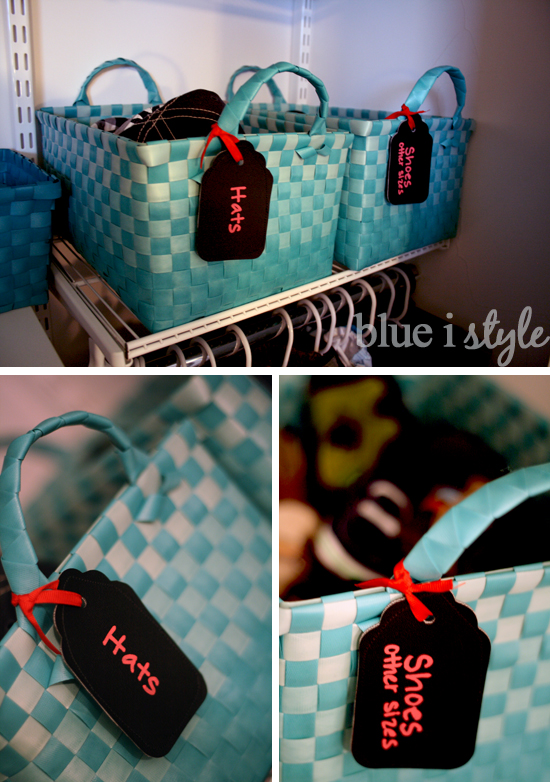
The baskets are from The Land of Nod, and the tags are made from chalk board fabric {thanks to my mom}. I wrote on the chalk board tags with bistro chalk markers and tied them to the baskets with some red ribbon. The bistro makers are ideal because they don’t rub off or leave any chalk dust in the closet, but the tags can be easily cleaned with a Magic Eraser.

Several smaller baskets store Beckett’s hats, as well as shoes in sizes that don’t currently fit him.
Finally, the clothing rod on the right side of the closet is where we hang all of Beckett’s coats and jackets.
The nursery closet is functioning very well for us so far, and best of all it should provide enough flexibility to adapt with our kids as they grow. In the future, I think that the high-up clothing rod on the left will be an ideal place to hang out-of-season clothing, while the clothing rod on the right will work well for longer clothing items (or we can add a shoe rack on the floor below this hanging space).
Additionally, because the entire Elfa system is hung on a series of tracks mounted to the walls, the positioning of any of the shelves or clothing rods can be rearranged to suit our changing needs. For example, we can remove one of the clothing rods on the left if we later determine that it would be better to just have two rows of hanging clothes, rather than three. In my opinion, the combination of functionality and flexibility made this Elfa system a worthwhile investment!
Check out these links for all of the posts about the nursery…
Are you looking for more tips for organizing your life with kids? Here are some great posts that you might be interested in:

