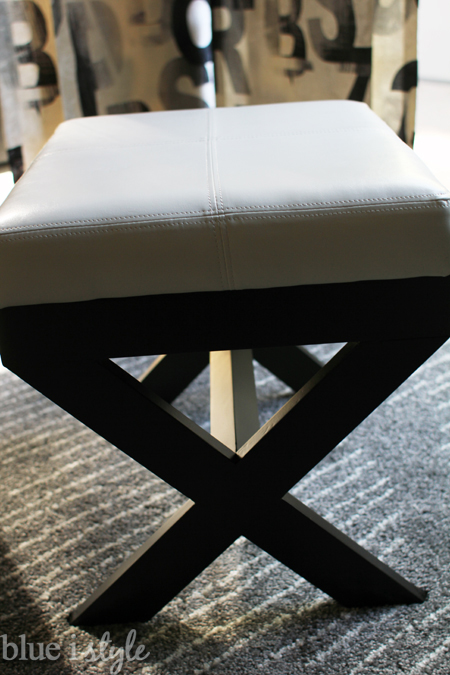
If you are following along with my One Room Challenge progress, then you know that I am redesigning our master bedroom and that one of my goals was to create a comfortable reading nook in the corner of the room. I picked a cozy new chair as well as an ottoman so that I could kick back and put my feet up.
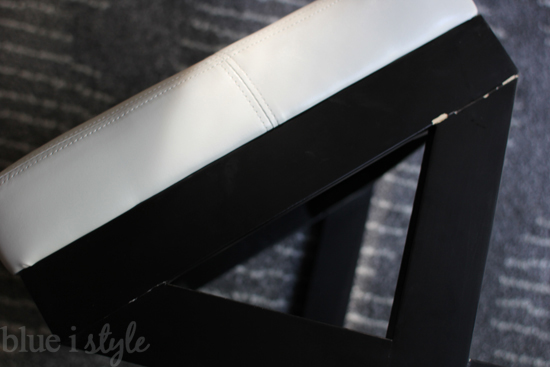
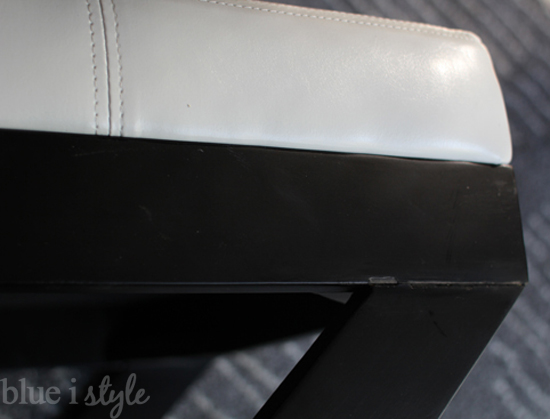
Since my budget is tight, I did a lot of online shopping to find an inexpensive ottoman – but sometimes when you go cheap, you get what you pay for. When the ottoman arrived, it was quite chipped up around the edges in numerous places. I thought about sending it back and finding a different option, but I really liked the style of this one and didn’t want to start over searching for another good looking ottoman that would fit the style of the room and that wouldn’t break the bank.
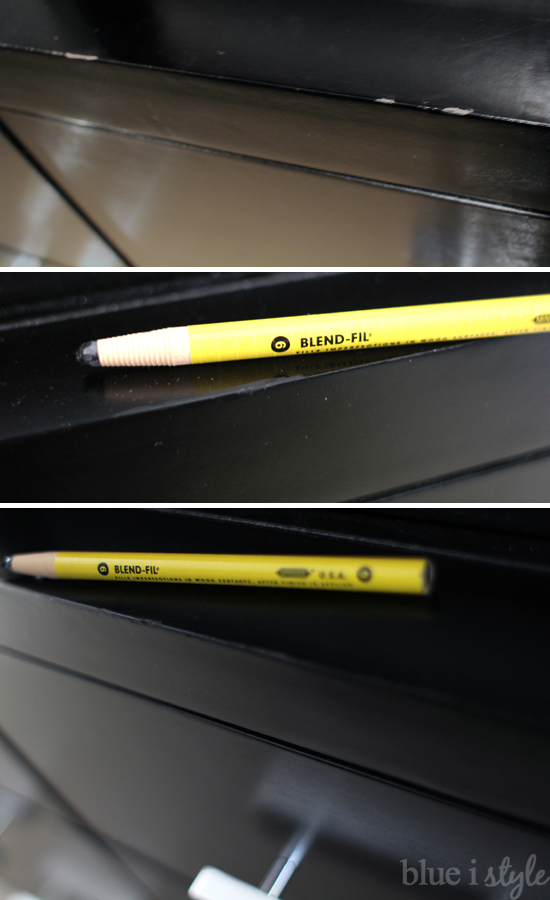
After some debate, I decided to keep the ottoman and simply touch it up using two of my favorite products – a Minwax Blend-Fil Pencil and a Minwax Stain Marker. This is not a sponsored post. I am choosing to share information about these products simply because I love them and use them regularly.
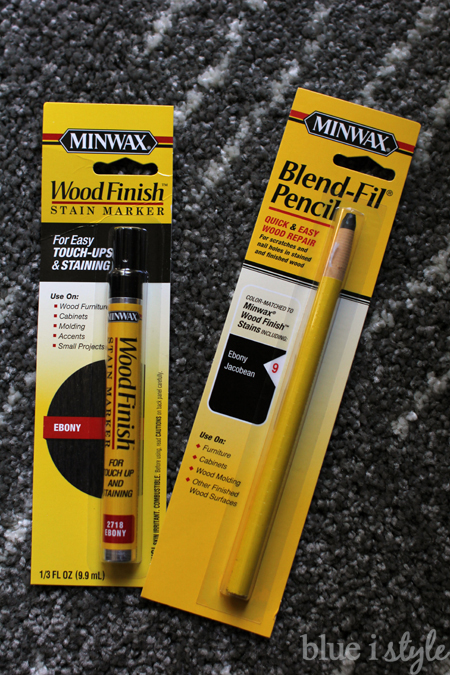
I have used these products for years to touch up my wood floors, baseboards and doors – so I knew they would be perfect for touching up my ottoman. The ones I already own are for lighter colors of stain, so I ran to Home Depot to purchase each in the darkest color option – Ebony.
Both of these products help you to touch-up the stain on wood furniture, cabinets, floors and moldings – but generally the stain markers work best when touching up shallow scratches, whereas the Blend-Fil pencil is better when you are dealing with a deeper scratch, knick or chip. I wasn’t sure which would be better for my ottoman – so I picked up one of each.
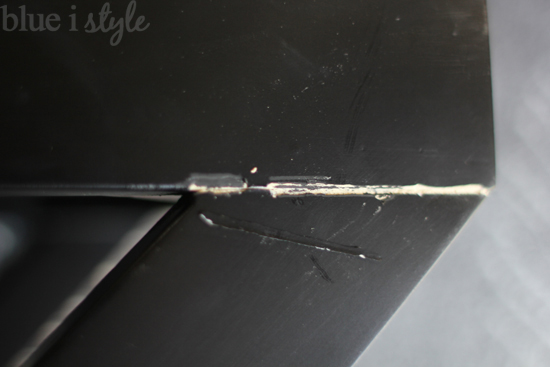
I tried the pencil first, but as soon as I applied some pressure to begin filling in the damage on one of the legs of the ottoman, I realized that the finish was cracked all the way along the edge, and another long piece of the finish chipped right off.
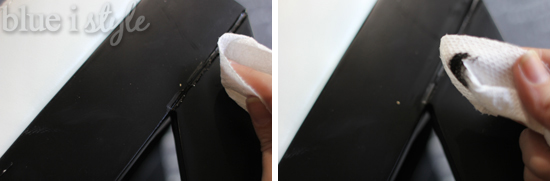
Because I had such a large area to touch up, I decided that I would instead begin with the stain marker. I shook the marker well, then depressed the tip to start the flow of the stain. I used the stain marker to color in the entire area.
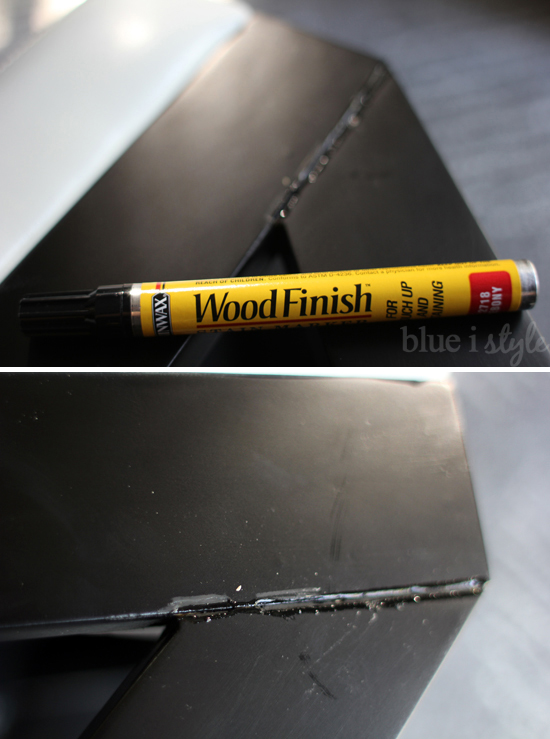
I let it sit for about 20 seconds so that the stain could soak in, and then I used a paper towel to wipe the excess off of the surrounding areas. Like all stain, the sooner you wipe it off, the lighter the stain will appear – and the longer you let it sit before wiping off the excess, the darker it will be. When using one of these stain markers for the first time, I typically err on the side of wiping it off too soon, and then repeat the process if it needs to be darker.
The stain marker did a great job of fixing the color of the chipped areas – but because of the depth of the chips, they still seemed quite visible.
Since the Blend-Fil Pencil is especially good for filling in deeper chips and scratches, I used it as my second step.
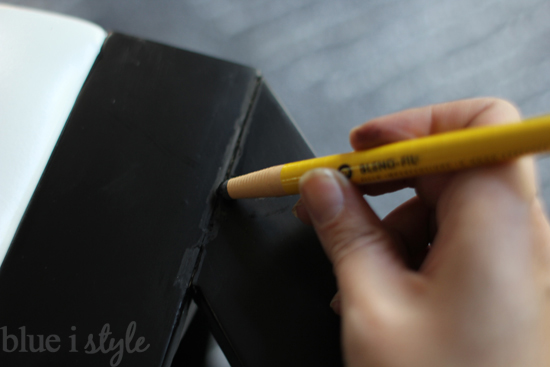
The pencil tip is fairly soft, so you simply use pressure to work the pencil into the imperfection. Unlike the marker that simply fixed the color – the pencil actually filled in the chipped areas. Once I had filled in the entire area, I again used a paper towel to wipe of the excess.
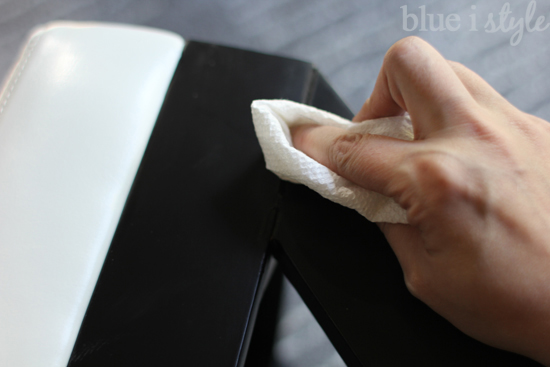
After using both the marker and the pencil, the large chipped area on the leg of the ottoman was virtually undetectable!

This is such a quick and easy thing to do, but it makes a big impact! The entire room looks nicer when the furniture doesn’t show its age!
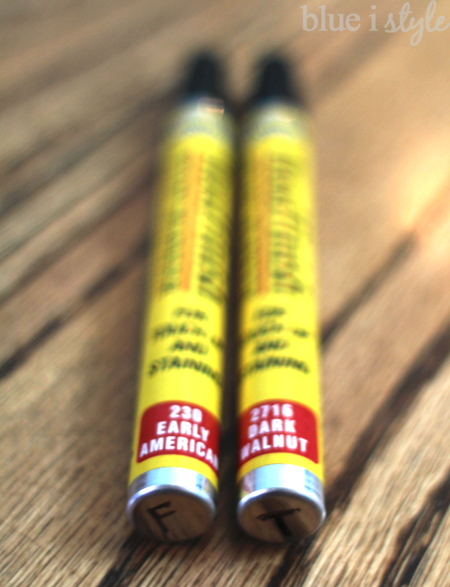
Let me also give you a quick example of when the stain marker works best. I have two stain markers that match the wood floors and wood trim on my main floor. I keep them under the kitchen sink and pull them out at least once a month to touch up any little scratches or marks that occur through daily wear and tear. I labeled the bottom of the pens with a T for trim and an F for floors to help me keep track of which color is which.
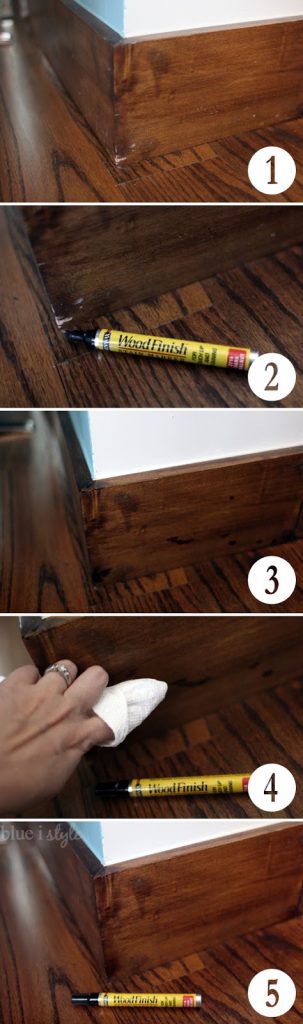
If you’ve never touched up your wood baseboards – you’ll be amazed at how much better they can look in just a few short minutes. The process is the same as I used on the ottoman, but here’s a quick run down: (1) identify an area that needs some touch up; (2) shake the stain marker well before use; (3) depress the marker tip to start the flow of stain and color over each of the scratches and imperfections in the trim; (4) use a paper towel to wipe away the excess stain (repeat is necessary); (5) admire the difference!
Here’s a side-by-side before and after so you can see how much better the trim really looks:
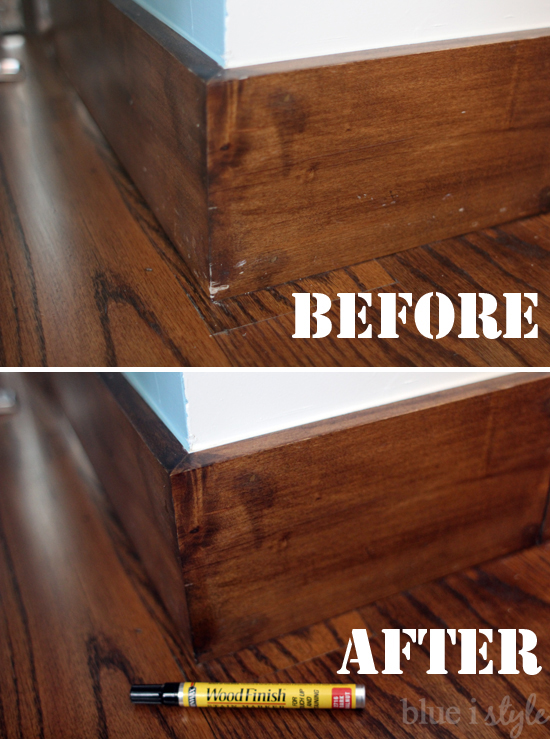
I love any project that I can complete in just five minutes, and this is definitely five minutes well spent!

This is not a sponsored post. I am choosing to share information about these products simply because I love them and use them regularly.