• About
    • About Blue i Style
    • Tour Our Home
    • Free Organizing eBook
    • Blogging Resources
  • Work With Me
    • Interior Decor & Organizing Services
    • Partnerships & Collaborations
    • Blogging Resources
  • Features & Press
  • Policies & Disclosures
  • Contact

Blue i Style

Creating an Organized & Pretty, Happy Home

  • Decor
    • Tour Our Home
    • Room Makeovers & Design Plans
    • Decorating Tips & Tutorials
    • Outdoor Decor
    • One Room Challenge
  • Organizing and Cleaning
    • Organizing Tips & Tutorials
    • Organizing By Room
    • Organizing on the Go
    • Cleaning
  • DIY
    • DIY Tips & Tutorials
    • Smart Home & Safety
    • Paint Tips & Projects
    • Crafts
    • Cricut Projects
  • Kids
    • Decor & DIY for Kids
    • Organizing Kids
    • Life With Kids
  • Five Minute Projects
  • Holidays & Entertaining
    • Seasonal & Holiday Decor
    • Entertaining
    • DIY Gifts & Gift Guides
    • Facebook
    • Instagram
    • Pinterest
    • Twitter
    • YouTube

Organizing

Charger Cord Organizer with Custom Icon Labels

  • Facebook
  • Twitter
Technology has become such an essential part of our every day lives that I feel like I’m totally drowning in cords, cables, and chargers lately! The kitchen is the heart of our home, and I typically wind up working at the kitchen table rather than my home office in order to be closer to the kids, so I was desperately in need of a charger cord organizer to contain and organize all of technology in this space.
I finally came up with a phone charger organizer that is not only functional, but also stylish enough that I don’t mind having it on display on my kitchen counter! It even has enough extra space to organize headphones, portable speakers, camera batteries, USB drives, and more!

Thank you to Cricut for sponsoring this post, and thank you for supporting the brands that make this blog possible. As always all opinions are my own. This post also contains affiliate links.

A couple of years ago I showed you my quick and easy solution for labeling all of my cords and cables so I could keep track of what goes with which electronics, but I was still struggling with where to store all of the cables that we use on a daily basis.

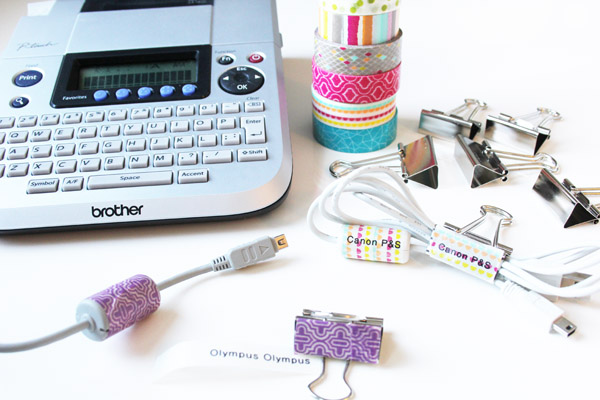
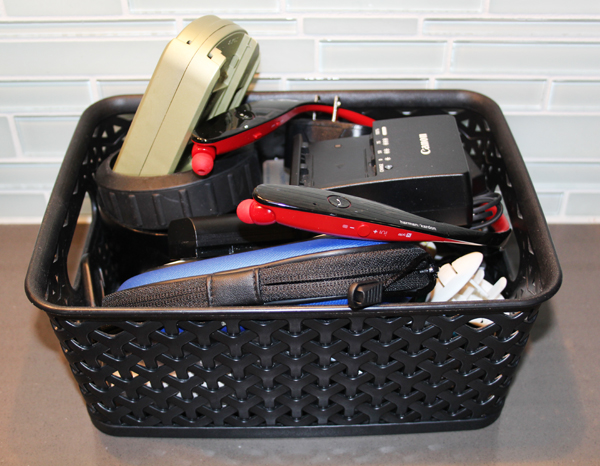
Let’s go back in time one week so I can show you how I was dealing with this problem previously. You know that I’m a fan of using baskets to organize, but I’m also the first to admit when a basket just isn’t getting the job done. This was one of two baskets full of charging cords and small electronics that were junking up my kitchen counter, and digging through the baskets to find what I needed was driving me crazy!

While shopping at IKEA last week, I spotted a set of mini chest of drawers, that I realized could be the perfect solution! This product, called Moppe, has been popular on Pinterest for quite a while because it is raw wood – lending itself to being easily customized to fit the style of any space. But until recently it wasn’t available in the US. 

I brought the Moppe home, sat it on the counter and started filling up the drawers to test it out. It was the perfect size for everything I needed to organize, so it was time to get creative and decide how to make these drawers look nicer in my kitchen. I started by giving the outer frame a coat of stain, and then spray painted the drawers using left over paint from my garage pegboard.

DIY cord organizer drawers

The stain and paint immediately made my mini chest of drawers look pretty, but it’s the labels that really give it a polished look. This is one of my best organizing tips – LABEL EVERYTHING! Not only do labels allow you to add a little extra style, they also make it easy for everyone in the house to find what they need {and it takes away any excuse for people to not put things away}.

There are so many ways to create DIY labels, but one of my favorite ways has always been to use my Cricut electronic cutter. Until recently, I was still using the original, decade old version of the machine. But a few months ago, my friends at Cricut sent me the updated Explore Air machine to try out, and wow!

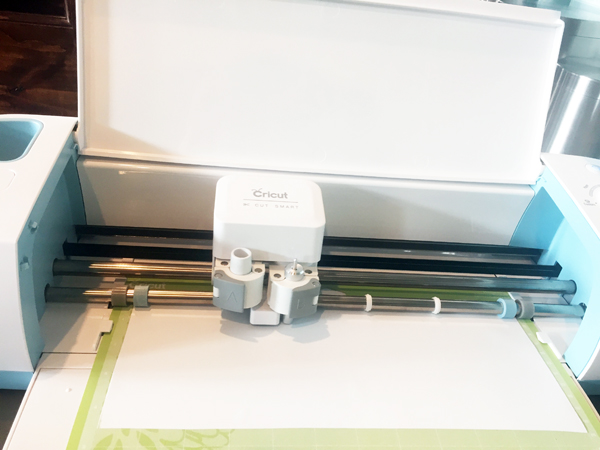
With my old machine, I was limited to cutting with the fonts and graphics available on Cricut cartridges. But with my new machine I can cut anything that I can dream up! Not only can I use all of the fonts on my computer {as I showed you on the custom wood sign I created for my garage} – I can also upload my own designs and use Cricut Design Space to covert my JPEGs into cutable files.

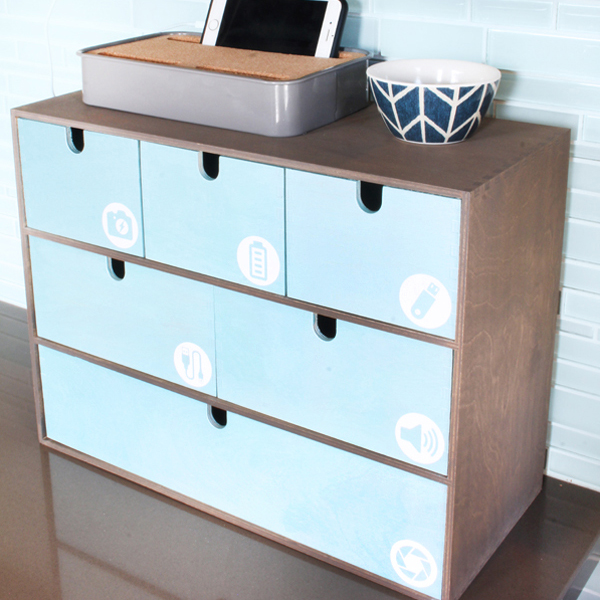
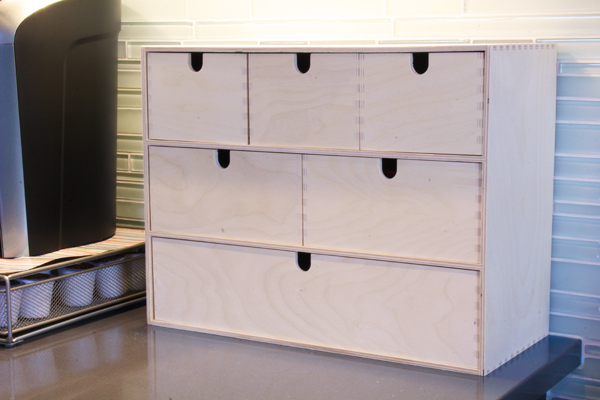
Rather than labeling the drawers of my Moppe with words, I decided to create some simple icon labels that I cut out of white adhesive vinyl with my Cricut Explore Air.


If you want to learn how to upload and convert your images into files that Cricut can cut, I’ve got the full tutorial for you at the end of this post. But first, I want to show you how I put the custom icons stickers on the drawers, and what I organized inside those drawers.

After cutting the icons using my Cricut, I began peeled away the excess vinyl from around the round icons, and then began “weeding” the vinyl from the center of each icon to create negative space.

Weeding Vinyl Cricut Cut Icon Labels

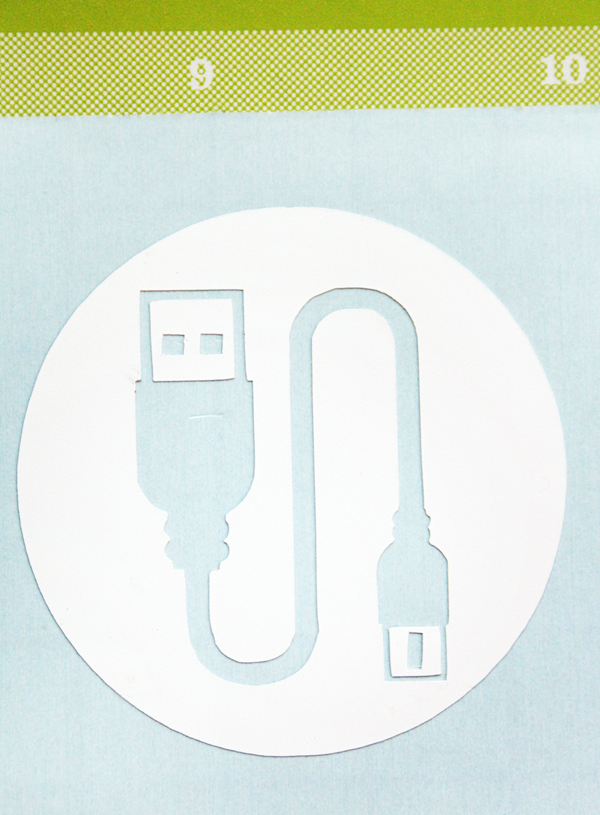
Each of my icon labels is just 1.5 inches in diameter, and some of the icons have very fine details – so I was a bit nervous about how well they would cut. But the precision of the cuts was spot on!

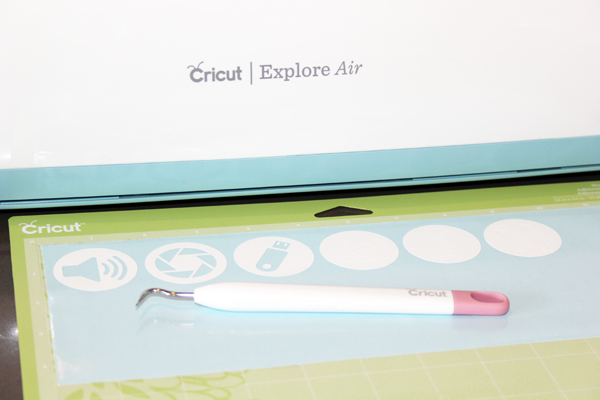
After I finished weeding they vinyl from the center of each icon, I strip of vinyl transfer tape over the icons, smoothing it down to burnish the vinyl onto the surface of the transfer tape.

Using Cricut Transfer Tape for Custom Icon Labels

I then slowly peeled the transfer tape away from the Cricut mat, ensuring that the vinyl lifted up with the transfer tape.

Using Cricut Transfer Tape for Icon Labels

I used scissors to cut the icons apart in preparation for applying each to one of the newly painted drawers.

Electronic Icon Labels for Organized Drawers

I positioned the first icon in the bottom right corner of one of the drawers and used a craft stick to burnish the vinyl to the drawer.
Applying Icon Labels with Cricut Transfer Tape

I then slowly peeled back the transfer tape, ensuring that the vinyl was firmly adhered to the drawer.

Applying icon labels with Cricut Transfer Tape

With all of my vinyl icon labels on the drawers, I was ready to fill up my mini chest of drawers.
Organizing cords and chargers IKEA Moppe

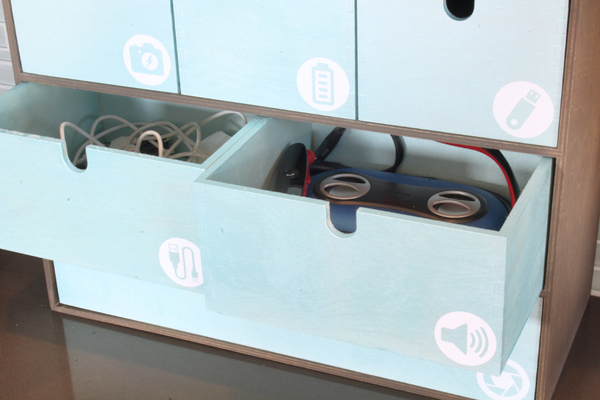
From the top left, the drawers contain:

  • Camera batteries and chargers
  • Power banks and portable chargers
  • USB storage devices / Flash drives
  • Charging cords and cables
  • Portable speakers and my favorite bluetooth headset
  • Camera lenses and lens hoods

I am so excited about how this project turned out! It has allowed me to organize all of our chargers, cords, and even camera lenses in the place where I spend most of my working hours – then kitchen. And best of all, it actually looks nice sitting on the kitchen counter right next to our “mudroom” bench.

Organizing camera lenses in IKEA Moppe

The stain is a nice match to our cabinets and the light teal spray paint that I used on the drawers looks great with our glass tile backsplash – both of which help the chest of drawers to blend in a bit. And the custom vinyl icon labels on each drawer are subtle but stylish, and ensure that everyone in the family can find what they need! That’s an organizing win/win/win!

Organizing cords and phone chargers in the kitchen or mudroom
I love this organizing solution so much that I’ve already bought a few more of these Moppe mini-drawer sets to organize some other challenging spaces! And you can be sure that I’ll be using my Cricut Explore Air to customize those as well.
DIY Charger Cord Organizer

HOW TO CUT CUSTOM LABELS USING CRICUT DESIGN SPACE


Ok, so now let’s get into the nitty gritty details! The following is a quick tutorial for how to upload and cut your own images using the Cricut Explore Air.

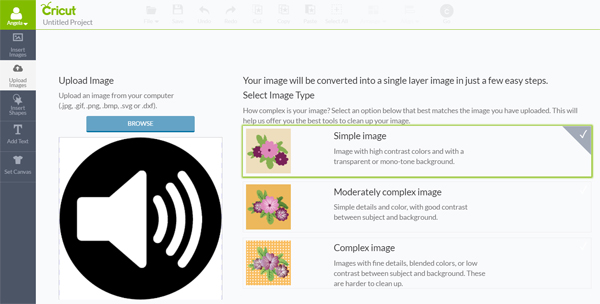
In order to create the icon labels on the drawers, I began by downloading some simple icon images from the internet and using Photoshop to overlay the icons onto black circles, saving each images as a JPEG. 

Then, to turn the round icons into cut-files, I signed in to Cricut Design Space and began by uploading the image files.

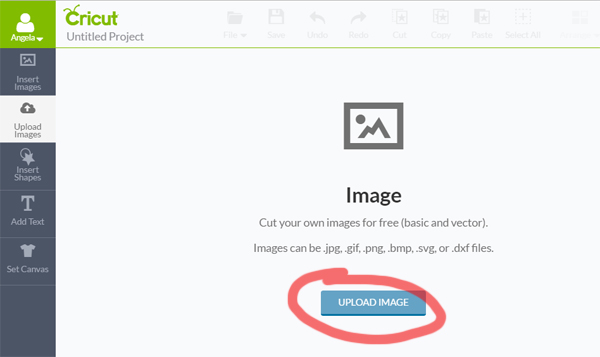
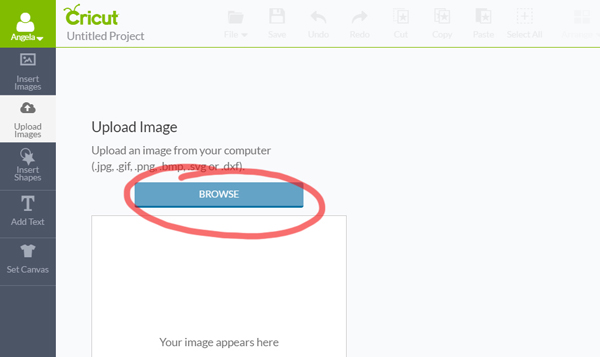
Click UPLOAD IMAGES > UPLOAD IMAGE > BROWSE. Then choose the first file you want to upload from the files on your computer.

Once the file is uploaded, select whether it is a “Simple Image,” “Moderately Complex Image,” or “Complex Image,” based on the provided descriptions.  Each of my icons were “Simple Images.”
I wanted the cut the black portion of each icon image from adhesive vinyl to be applied to my drawers, and I wanted the white portion of each image to become negative space through which the color of the drawer would show through. I used the “Select & Erase” tool to click on and remove each white area of the design. The checkerboard pattern indicates transparency, and shows the areas of of the design that I removed.

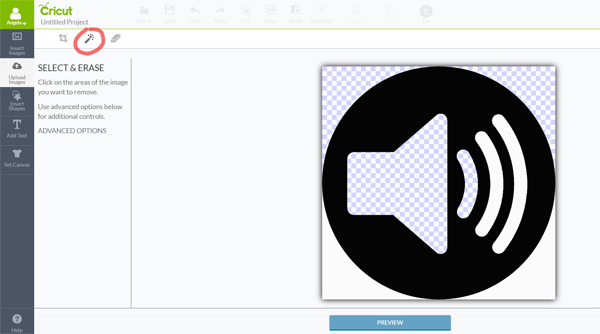
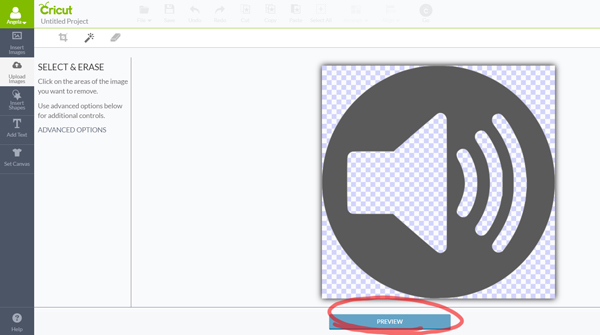
After selecting and erasing each white portion of the icon designs, I clicked on the “Preview” button. The dark gray area that remains shows my design as it will be cut by the Cricut machine.

In the next step, the program prompted me to select whether I wanted to save the icon as a “Print Then Cut” image, or as a “Cut Image.” Since I wanted to cut the icon out of white vinyl, I chose the “Cut Image” option.
After uploading all six of my icon images, I added all of them to the canvas, where I resized each to 1.5″ – the final size that I wanted to cut.

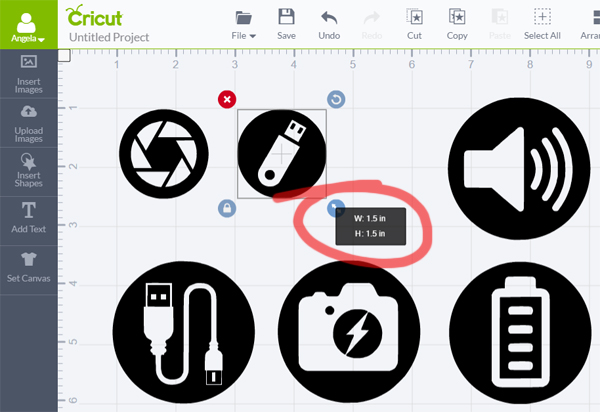
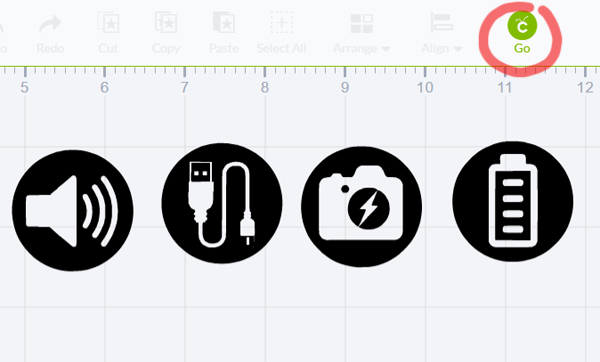
After resizing each of the images, I clicked on the GO button and proceeded to connect my Cricut Explore Air to my computer, loaded the mat, and cut the icons from my white adhesive vinyl {as shown above}.

This was my first time cutting one of my own files using my Cricut, and it couldn’t have been easier. I expected there to be a steep learning curve like there is with most design software, but Cricut Design Space walked me through each step, making it simple and easy, and completely removing the intimidation factor! Now that I know how easy it is to cut anything I want using my new Cricut, my mind and my Explore Air are both going to be working overtime!
Organize with Cricut - How to Cut Labels on Cricut

This is a sponsored conversation written by me on behalf of Cricut. The opinions and text are all mine. Comments submitted may be displayed or featured on other websites owned by Cricut.

var ts=document.getElementById(‘ti-pixel-tracker’); var axel = Math.random() + “”; var num = axel * 1000000000000000000; var ti=document.createElement(“img”); ti.style.display=”none”; ti.src=”https://tracking.tapinfluence.com/trk/P5Af4/SLO4P/p.png?p=vHQPZ” + String.fromCharCode(38) + “i=tThdX” + String.fromCharCode(38) + “ord=”+ num + String.fromCharCode(38) + “s=” + encodeURIComponent(document.referrer); ts.parentNode.replaceChild(ti,ts); new TAP.CogFrame(‘/v1/cogs/60486ef0-75ea-11e6-8eea-22000a7d00a4/comments’).drop({“program_id”:”60475ab0-75ea-11e6-8eea-22000a7d00a4″,”post_id”:”fba9f208-b788-11e6-8fb0-22000a7d00a4″,”host”:”api.tapinfluence.com”,”apiHost”:”api.tapinfluence.com”,”sort_order”:”desc”,”limit”:”20″,”offset”:”0″,”sort_by”:”created_at”,”protocol”:”https://”});

  • Facebook
  • Twitter

01.31.17

« {style inspiration} Dare to Go Bold: Volume 1
DIY Photo Transfer Tray »

Meet Angela

Angela, the founder of Blue i Style, strongly believes that decor should be functional, organizing can be beautiful, smart DIYs help stretch your budget, and an organized and stylish home can still be practical for life with kids.

Her work has been featured in print in Better Homes & Gardens and 5280 Home magazine, and online by HGTV, the Today Show, Good Housekeeping, and more. She was also named a 2018 Stylemaker by Better Homes & Gardens.

You can reach Angela at angela@blueistyle.com

COPYRIGHT & PHOTO SHARING POLICY

All text, images, and other content that are part of this blog are the property of Blue i Style, unless otherwise noted. All material is copyright protected.

If you wish to feature one of my projects, feel free to share a single photo (no collaged images, or images with text overlays) as long as the no pin code is used to prevent my image from being pinned from your site.

All features must include credit to Blue i Style with a link back to the original content (not just to the homepage). The project steps, supply list, and/or sources may not be disclosed.

Please read my full content and photo sharing policy to ensure you comply with all guidelines. Failure to do so constitutes copyright violation.

Create At Your Own Risk

Any and all content on this website is for personal use only and created exclusively for inspiration purposes.

Creating with my suggested methods, products used, and tools is at your own risk.

Please ensure you are following proper guidelines with anything used, and you receive professional guidance when necessary.

Read my complete disclosure at: Policies & Disclosures.

Sponsorships & Affiliations

To help fund this blog, I accept some forms of advertising, sponsorships, and affiliate links.

If you buy something that I recommend, you pay the same price, but I may receive a small commission. As always, all opinions are my own.

Blue i Style is a participant in the Amazon Services LLC Associates Program, an affiliate advertising program designed to provide a means for sites to earn advertising fees by advertising and linking to amazon.com.

I use an affiliate marketing service which may automatically put links into some posts, so please assume any/all links may be affiliate links.

Read my full Disclosure Statement.

Copyright © 2023 · Dazzling Theme theme by Restored 316

  • Facebook
  • Twitter
  • Pinterest