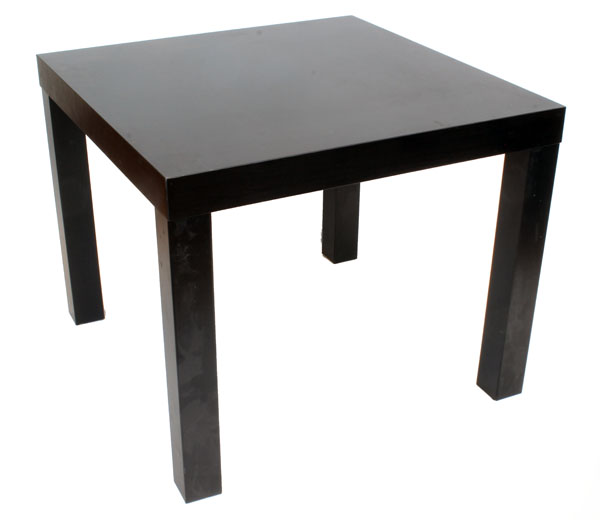
I’ll walk you through the whole transformation process, but let’s start with a reminder of what the table looked like when I picked it up from my neighbor.
- Rust-Oleum Universal Pure Gold spray paint
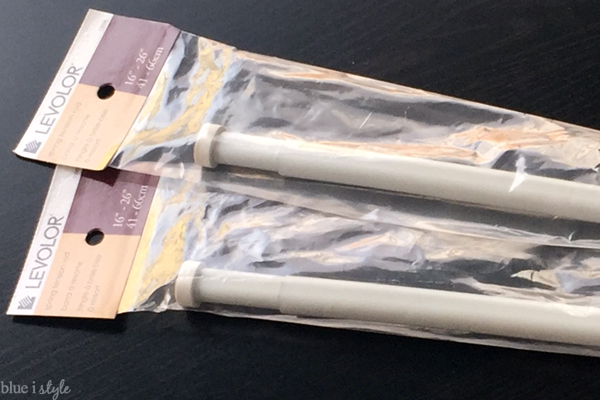
- 2 Tension Rods
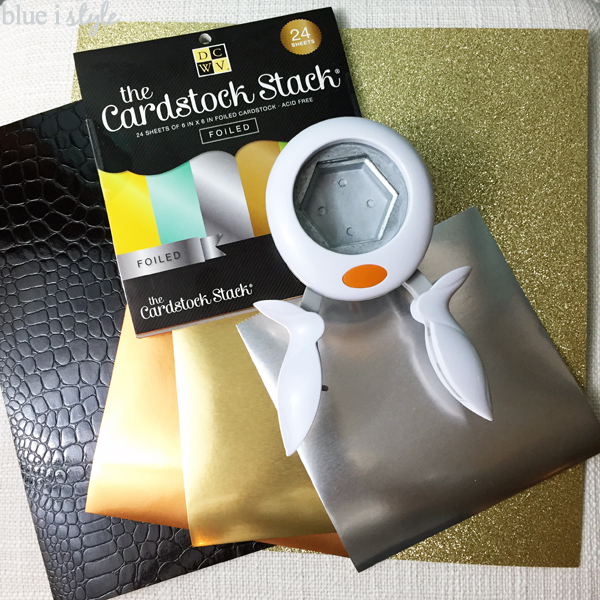
- Variety of scrapbook paper
- Mod Podge
- Rust-Oleum Ultra Cover 2X Clear Spray
- 20 x 60 inch vinyl fabric and matching thread {for magazine sling}
- Painter’s tape
- Pencil
- Drill
- Sand paper
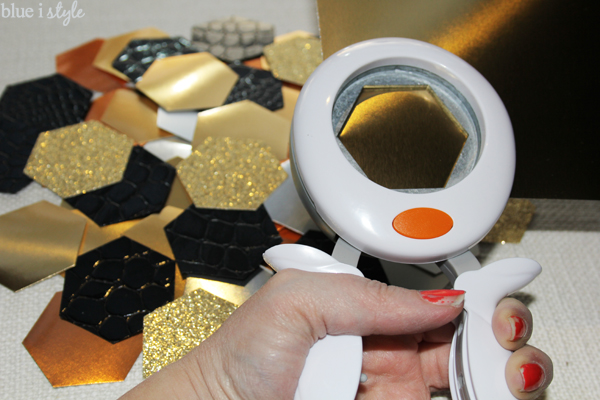
- Fiskars XL Hexagon Squeeze Punch
- Paint brush
- Scissors
- Foam Brush
- Sewing machine
- Sewing pins or wonder clips
STEP 1: PREPARE TABLE FOR MAGAZINE SLING
When coming up with a plan for creating a magazine sling under the table, my first thought was to use tension rods {like you’d use to hang curtains} to hold the sling in place. But I was concerned that the tension might not be sufficient when the sling was full of heavy magazines of books.

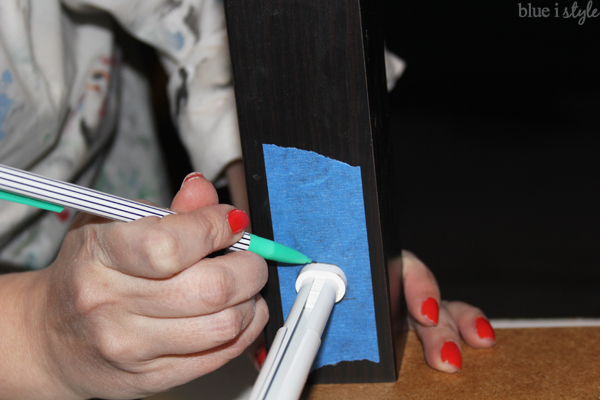
I then placed the two tension rods between the table legs in line with the center marks.
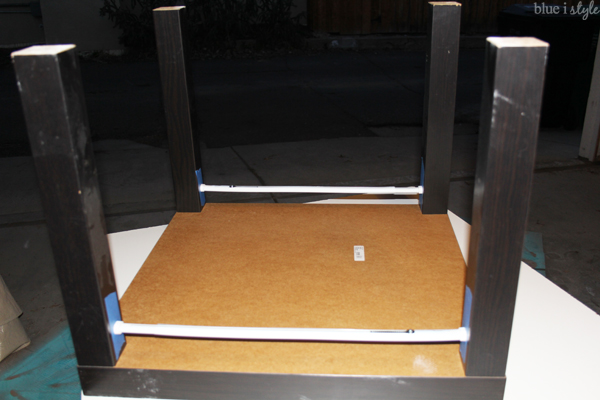
I used a pencil to trace around the end of each tension rod, and then removed the tension rods, leaving a template for where to create the notch in each leg.
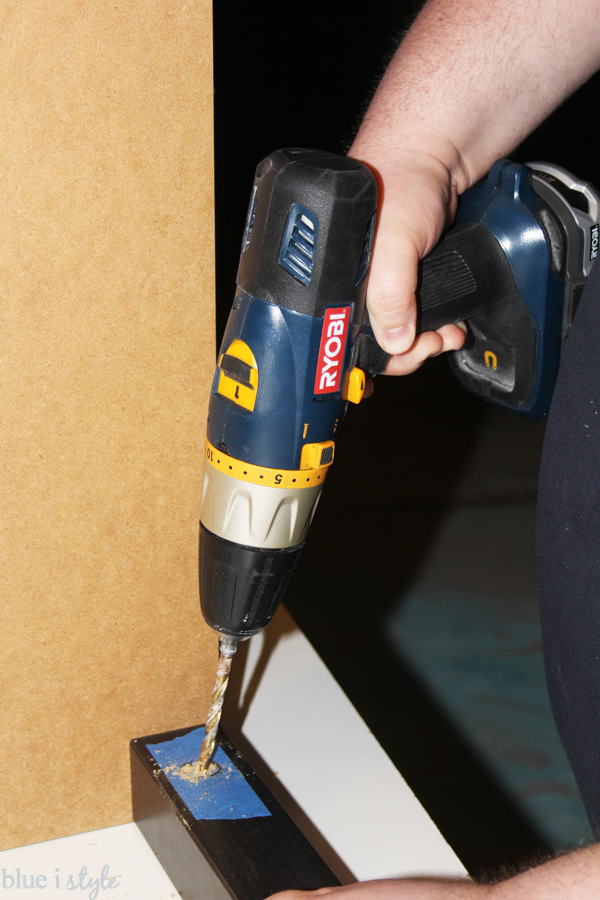
My husband used a large drill bit and drilled multiple holes side by side until he had created a notch the just barely bigger than the tip of the tension rods. Our original plan was to just create and 1/2″ deep notch in each leg, but we then realized the legs of the IKEA Lack are hollow – but this isn’t a problem {I’ll explain further below}.
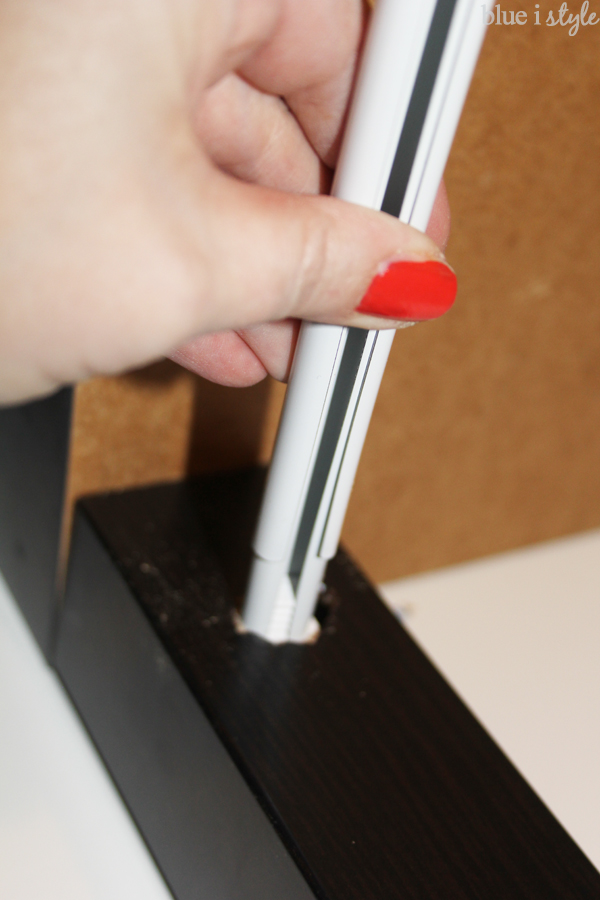
I tested a tension rod in each hole to make sure it could fit through.
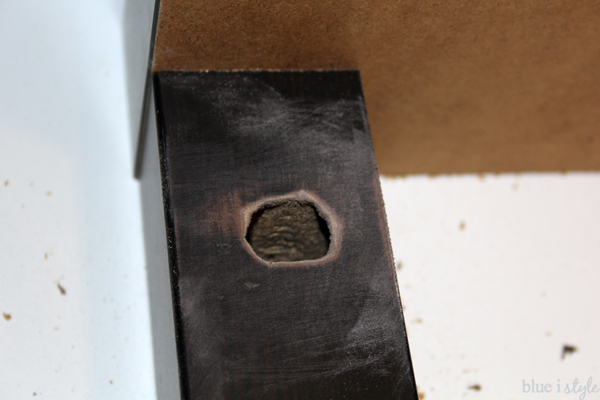
After confirming that the holes were large enough, I needed to file the holes to smooth them out before painting the table.

I used a small nail file to smooth out the inner edges of the holes, and then a piece of sandpaper to smooth the top.
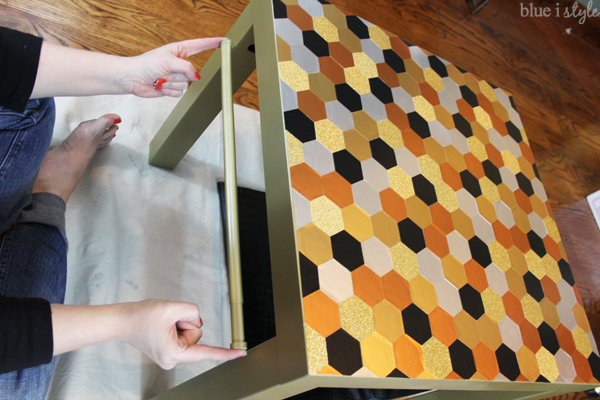
STEP 2: GIVE THE TABLE A GLAM NEW LOOK
Once we had the holes in each table leg, we were ready to move on to the table makeover before creating and installing the magazine sling. I started by painting the entire table with Rust-Oleum Universal Pure Gold spray paint. I also painted the tension rods gold using the same gold spray paint.

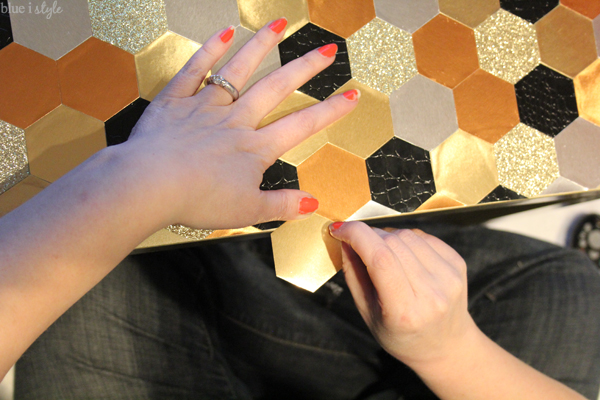
To attach the hexagons to the table, I used matte ModPodge and small paint brush.
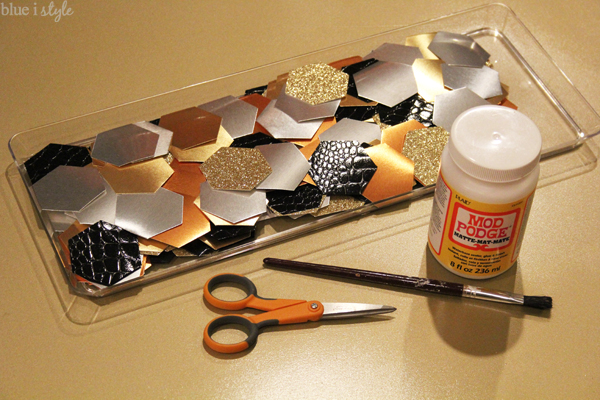
I used the Mod Podge as glue – applying it to the back of each hexagon, and then affixing it to the table. Make sure to get a thin, even coat of Mod Podge on each hex, including all the way to the edges and corners. Put about 5-10 seconds of pressure on each hexagon as you put it in place to prevent the edges from curling up. If you have one that continues to lift at the edges after a few seconds, just place the bottle of Mod Podge on it to hold it in place for a bit longer while you move on to the next hexagon.
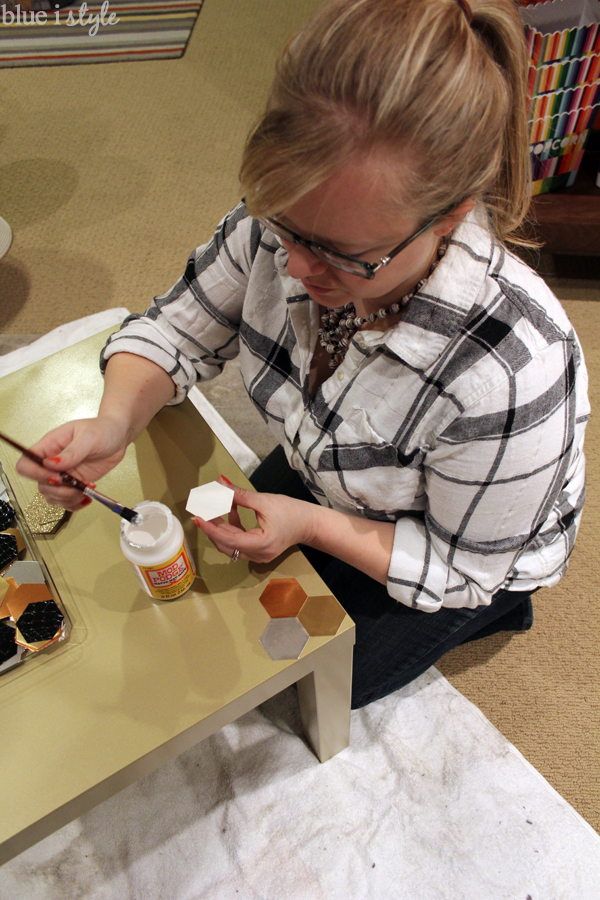
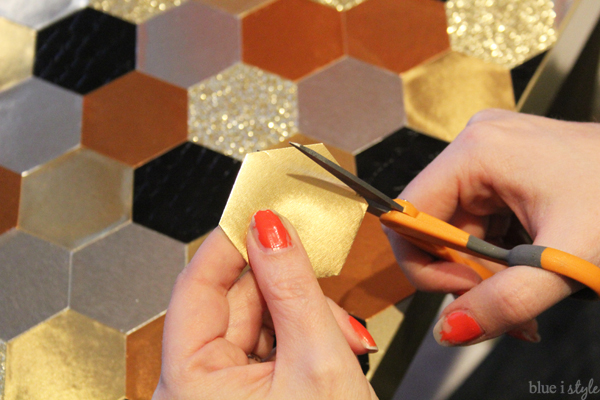
I covered the entire table in whole hexagons first, leaving empty spots along the edges of the table. I saved filling in these small gaps for last. When it was time to finish the edges, I found a pretty easy way to cut just the right size piece to fill the gaps. I held a hex in a gap, and used my finger nail to make a mark in the paper right at the edge of the table.
I then used the marks to cut a straight line across each hexagon – cutting it down to the perfect sized triangle. Once again, I used the Mod Podge to glue these pieces in place.
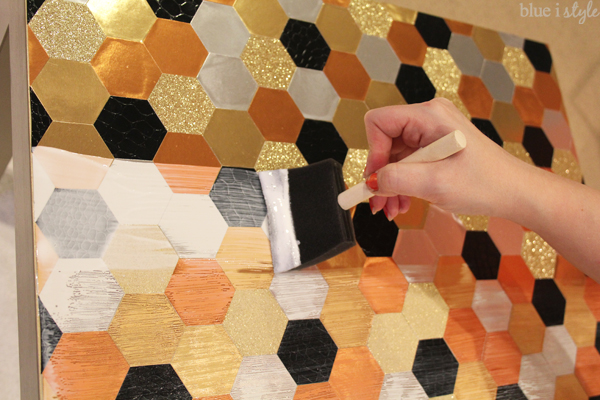
A few hours later, I had a gorgeous, glam new tabletop. To ensure that it would be durable enough to hold up to daily use, I needed to seal over the paper. I first applied a coat of coat of Mod Podge over the entire tabletop using a wide foam brush. It goes on looking very white and streaky, but it dries smooth and clear. After the Mod Podge dries, you’ll be able to see if there are any spots that didn’t cover well, in which case you can apply a second coat.
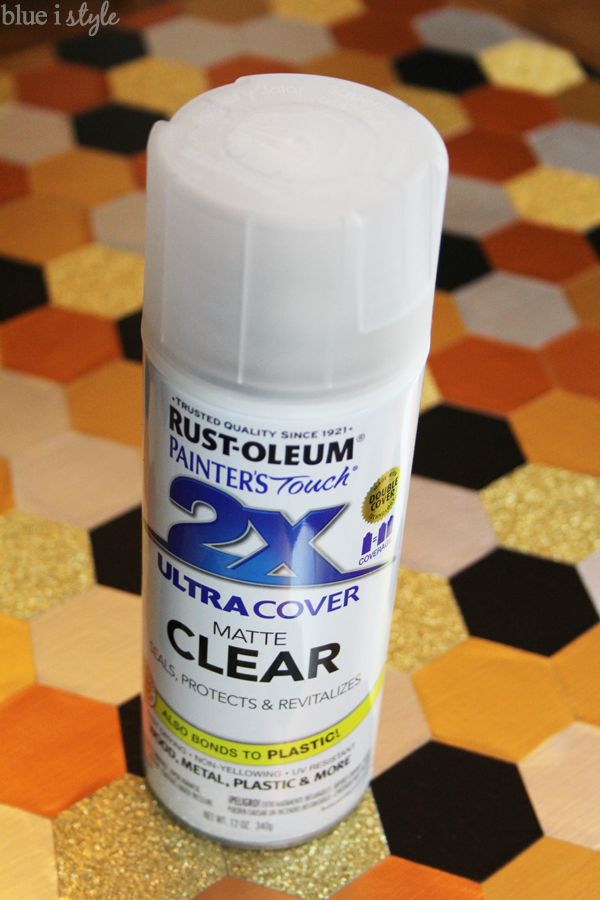
After the Mod Podge dried, I gave the entire table – top and legs – a final sealer coat using Rust-Oleum Ultra Cover 2X Clear Spray.
STEP 3: SEW THE MAGAZINE SLING
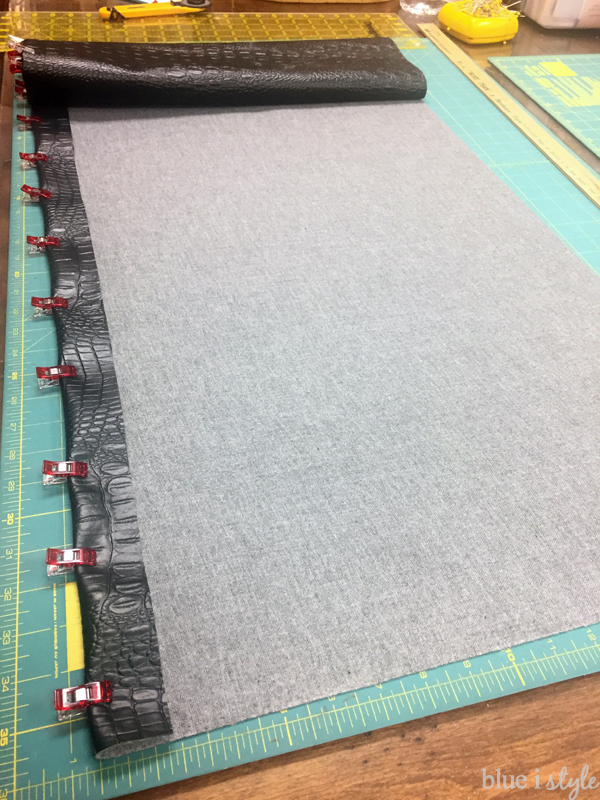
For the magazine sling, I selected a black vinyl fabric from Joann Fabric & Crafts that had a similar snake skin texture to the black paper I used on the tabletop. Based on the measurements of the IKEA Lack table, I needed a piece of fabric approximately 21.5″ wide and 55″ long.
The IKEA Lack table legs are 17.5 inches apart, so this is the finished width of the magazine sling – allowing a few extra inches for seams along the edges, we cut the fabric to 21.5 inches wide. I used a cloth measuring table to visualize how low I wanted the sling to hang below the table. I determined that the finished length of 26″ would be perfect for the sling, allowing it to swap between the table legs for magazine storage without hanging too low.
Because of the way the sling hangs, you can see both the “top” and “bottom” – so I wanted it to have a nice finished look on both sides. This meant I needed to double the length of fabric for the sling. Taking into account a few inches for overlap and seems, this meant the fabric needed to be 55′ long.
I’ll walk you though the steps, but created a little diagram to help you follow along.
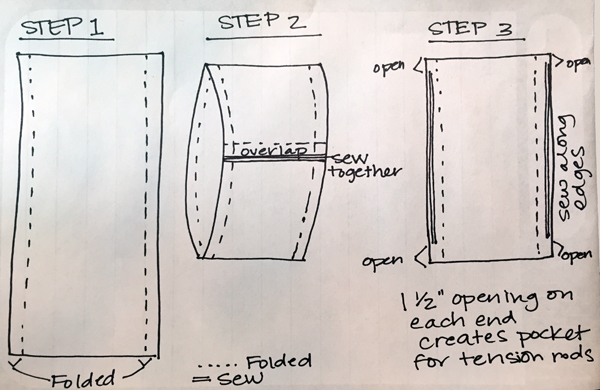
After cutting the fabric to size, we began by folding each long edge of the fabric in 2 inches. Since regular pins would leave holes in the vinyl, we instead used wonder clips to hold the hem in place.
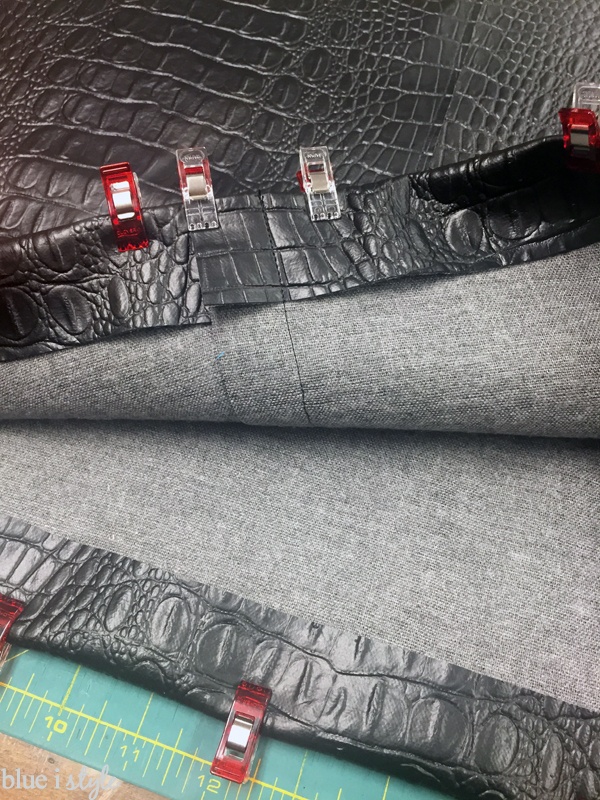
Once both long sides were folded in, we folded the length of the fabric in from each end, creating an overlap in what would become the bottom center of the sling.
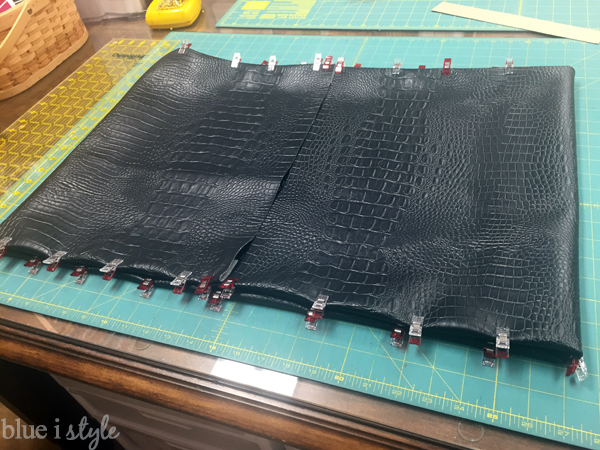
We sewed along that overlap {as illustrated as “Step 2″ in the drawing above.” As you can see in the photo below, we sewed the overlapping fabric together, but did not sew through the layer of fabric that would become the top of the sling. In doing so, we created one continuous circle of fabric.
Finally, we sewed the top and bottom layers of fabric together right along the long edges of the sling {see “step 3” in the illustration above}.
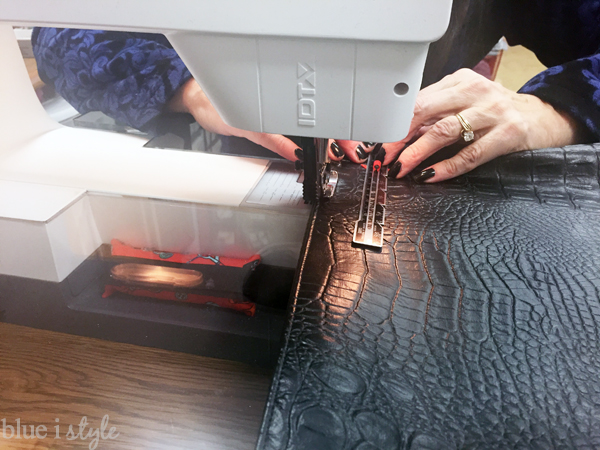
We started and and stopped the side seams about 1.5″ inches from each end of the sling. This created a pocket along each end for us to insert the tension rods though.

This method of sewing the magazine sling minimizes the number of seams, providing the most professional, finished look, with the fewest seams.
STEP 4: INSTALL THE MAGAZINE SLING
The final step was to install the magazine sling on the table. I shortened each tension rod to about one inch longer than the length of the distance between the legs {using the adjustment screw on the back}.
I inserted one of the tension rods through one of the pockets in the vinyl sling.
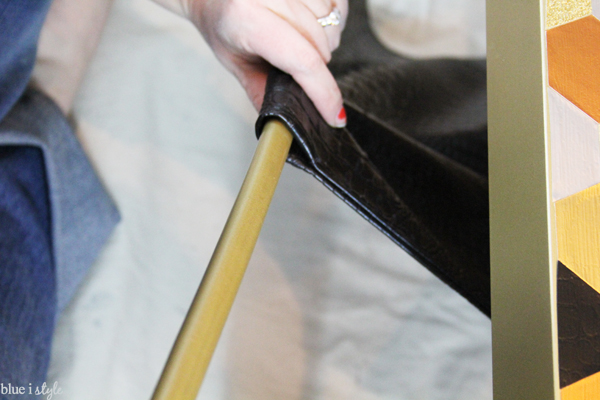
I then placed the ends of the tension rod into the holes in the table legs. At this point, each tension rod rested just inside the holes.
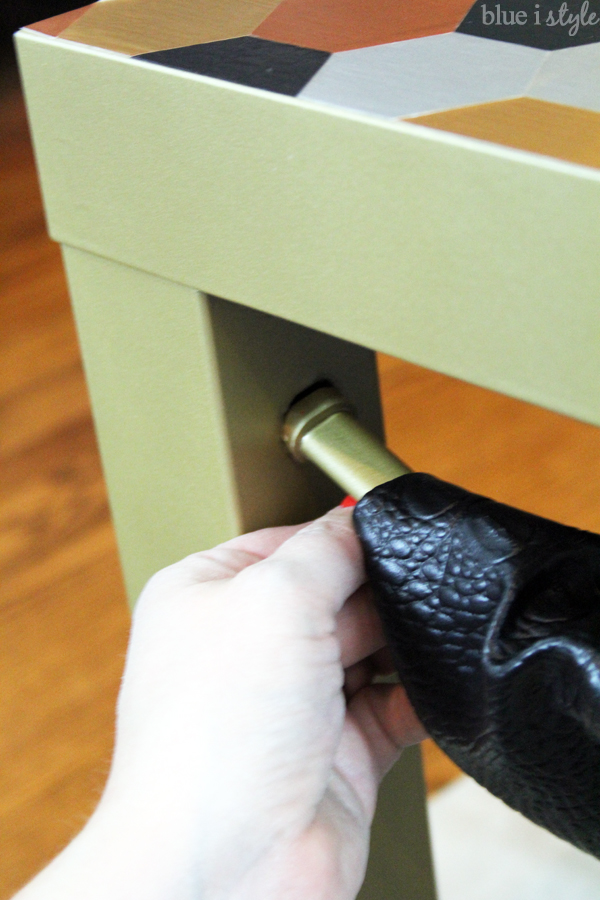
To add the tension to hold the legs securely in place, I pulled the fabric back to reveal the adjustment screw on the back of the tension rod. I loosened the screw, and lengthened the rod until it was pressing firmly on the inside of each table leg. I then tightened the screw in place.

After doing this on each side of the table, the magazine sling was securely held in place!
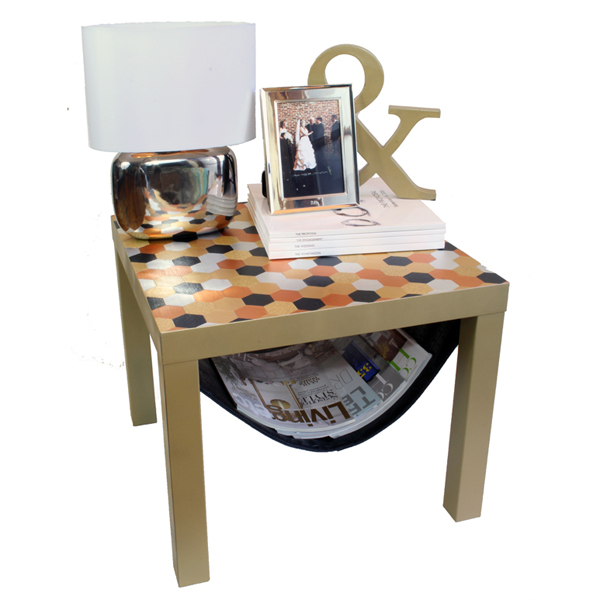
Here’s what the completed table looks like! Quite a difference, right?!


I love the glam look that the gold paint and metallic hexagons add to the table. And of course, I love the added function of the magazine rack!

I think this definitely qualifies as a Drab to Fab transformation!