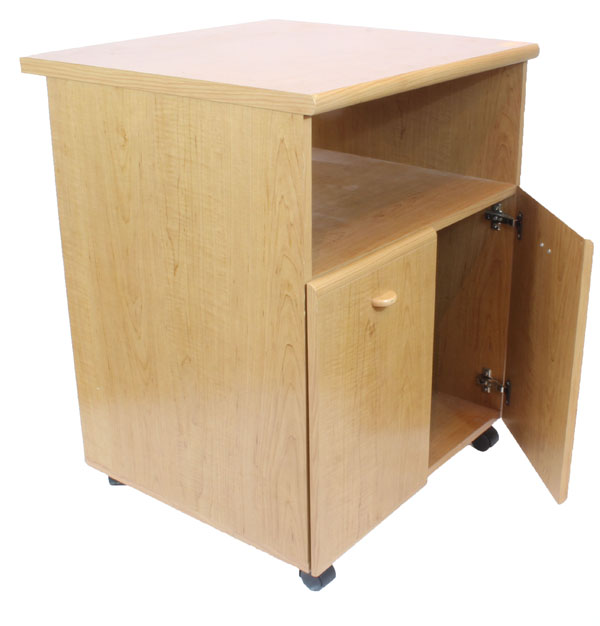
I was originally on the hunt for a short bookshelf to convert to a bar cart, but after hitting up quite a few thrift stores with no luck, I was excited to find a printer stand at the Habitat Re-Store with bar cart potential.
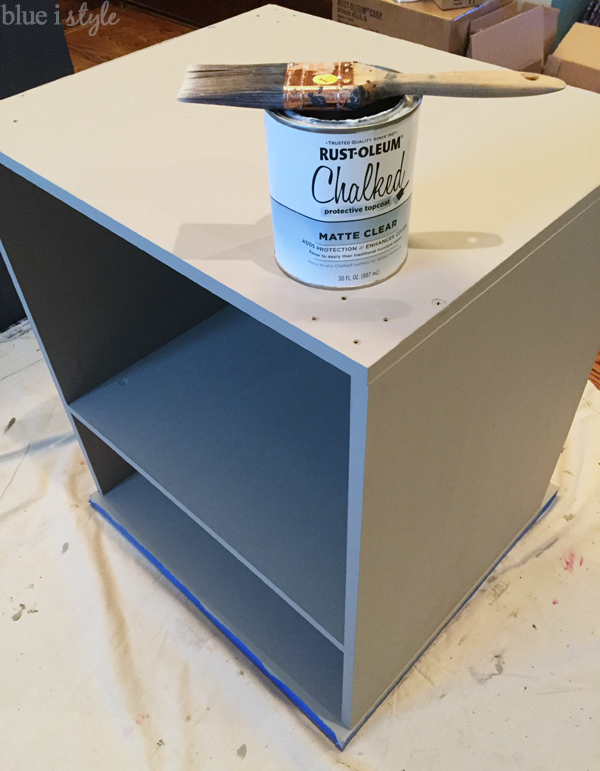
- Rust-Oleum Chalked Paint in Windsor Gray
- Rust-Oleum Chalked Protective Topcoat, Matte Clear
- Rust-Oleum Universal Pure Gold spray paint
- Rust-Oleum Countertop Transformations Kit
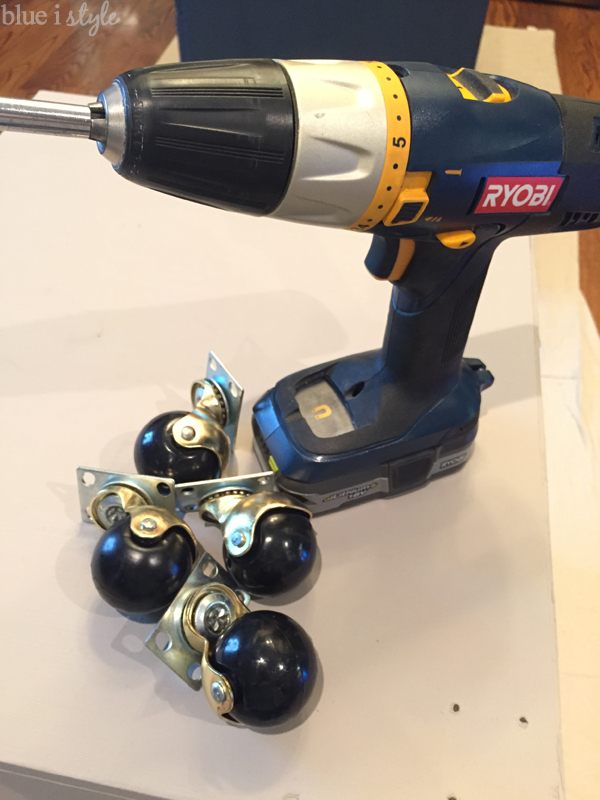
- 4 Plate Mount Gold Casters (2 inch)
- Hutton Wine Rack
- 2 Stemware Holders
- 2 Drawer Pulls {similar to these}
- Screwdriver
- Wood filler
- Painter’s tape
- Paint Brush
- Foam Roller
- Paint tray and liners
- Pencil
- Drill
- Sand paper
- Plastic Drop Cloth
STEP 1: PREPARE PRINTER STAND FOR MAKEOVER
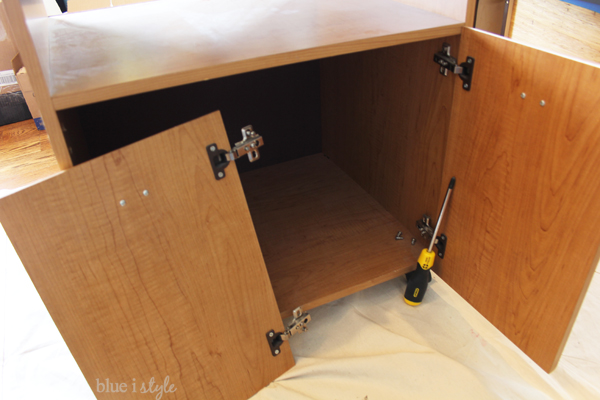
Before beginning to paint the printer stand, I started by removing the doors.
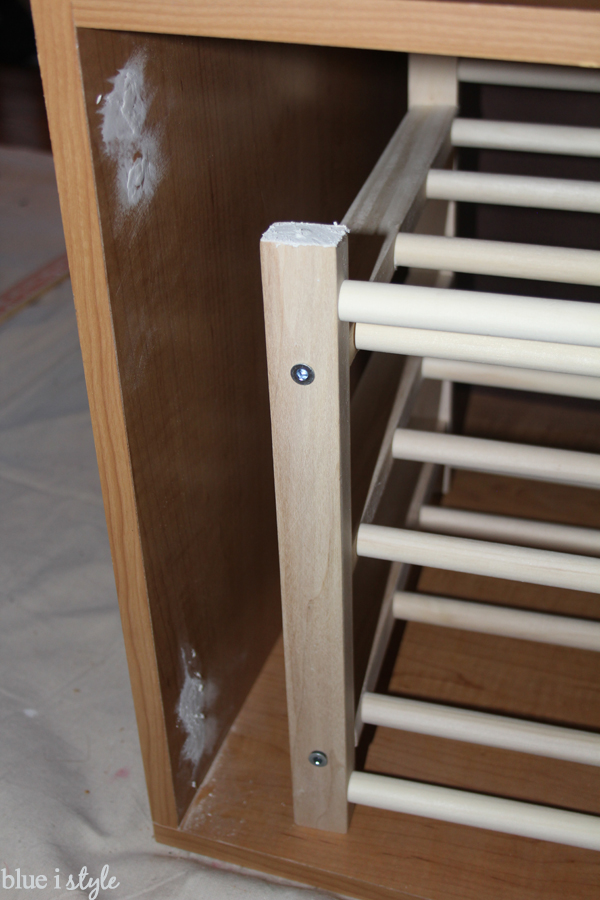
I assembled an inexpensive Hutton wood wine rack from IKEA and placed it in the lower opening of the cabinet to test the size – perfect fit!

I used a bit of wood filler to patch the holes left by the door hinges, and then sanded them smooth.
The printer stand was on casters, but some were broken, so I removed and replaced them.
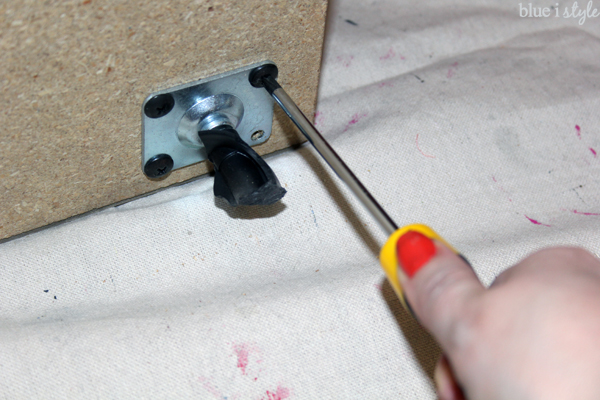
Replacing the casters gave me the chance to pick a more stylish option. I didn’t want to spend much, but found a simple set of casters with gold hoods – perfect for tying it the other gold accents I had planned for the bar cart.
STEP 2: PAINT PRINTER STAND
After cleaning the cabinet and taping of the top, I was ready to start painting. That’s right – no sanding required because I used Rust-Oleum Chalked Paint. Yay for that! I chose Windsor Gray, which turned out to a little lighter than I expected based on the color swatch, but I am actually really happy with the way it coordinates with the countertop {I’ll get to that soon!}.
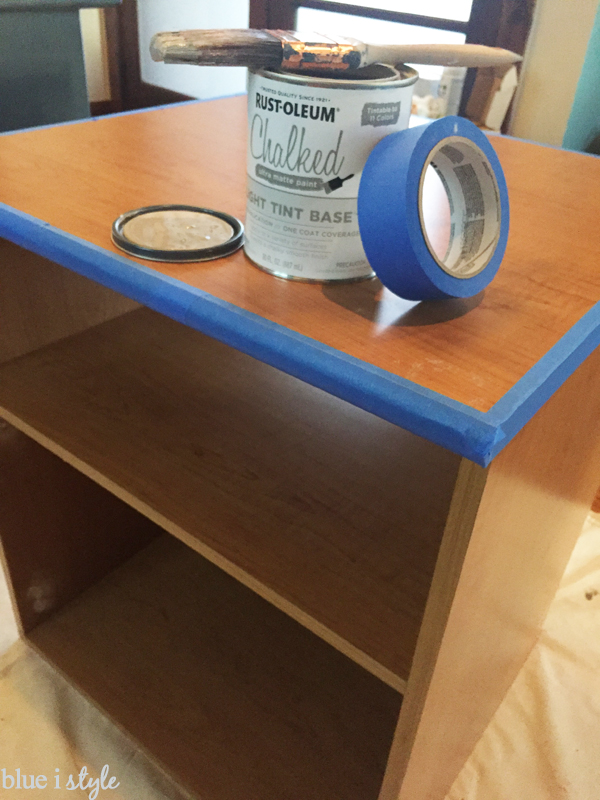
I applied two coats of Chalked Paint, then two coats of Rust-Oleum Chalked Matte Clear Protective Topcoat. You can read my full tutorial and tips for using Rust-Oleum Chalked Paint and protective top coat in my desk makeover post from last week.
STEP 3: PAINT & PREPARE BAR CART ACCESSORIES
In between coats of paint on the bar cart, I was running out the garage to spray paint all of the bar cart accessories. I used Rust-Oleum Universal Pure Gold spray paint {check out that trigger – no more spray paint finger cramps!} to paint the wine rack, two stemware holders, and two hooks.

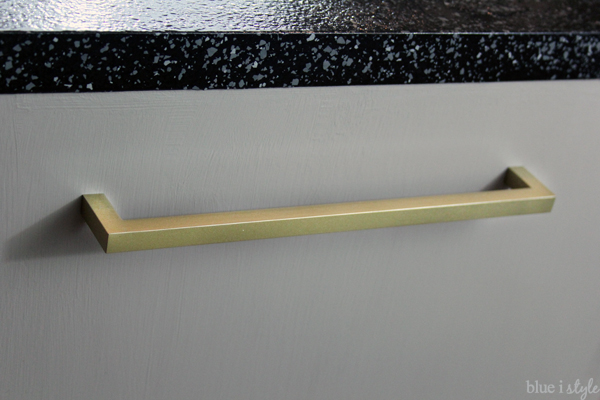
I originally intended to use the hooks to hold dish towels. But then I decided that I wanted a handle of some sort on one end of the bar cart to make it easy to push and pull around. I remembered that I had a set of IKEA two cabinet pulls {similar to these} left over from a project a couple of years ago, so I painted both gold to install on each end of the cart – one to use as a handle, the other serve as a towel bar. That meant I didn’t end up using the hooks I had painted… but I have no doubt the gold hooks will find a good home very soon.
I wanted to install the stemware holders in the shorter, upper opening of the cart, but getting a drill into the space to create the pilot holes was going to be very tricky. My husband came up with a great solution – drilling the pilot holes from the top!
Before staring to paint the counter top, we determined the placement of stemware holders below the counter, and then laid them in the same position on top of the counter.

I marked the location of the stemware holders with a pencil…
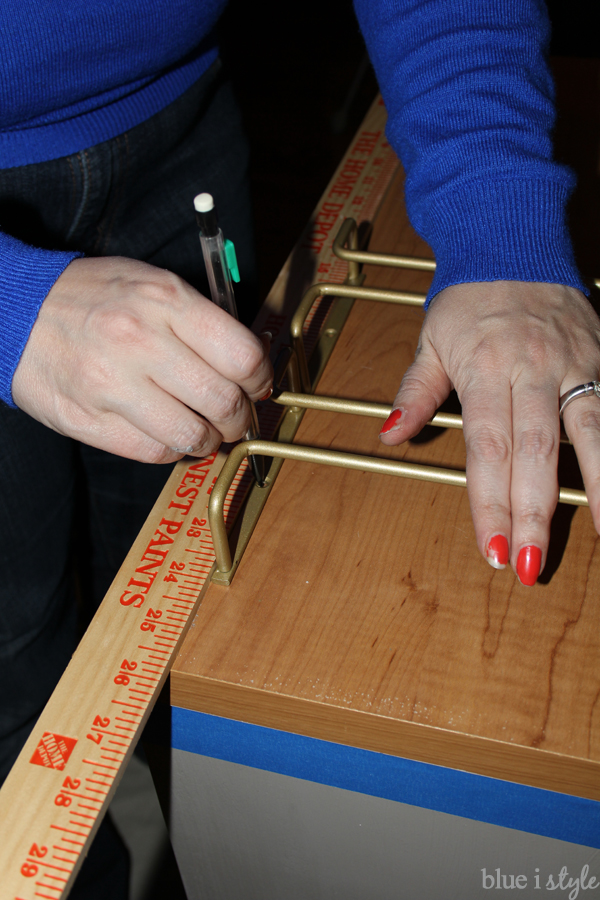
…and then Scott used a small drill bit to drill pilot holes for the stemware holders all the way through the top of the bar cart.
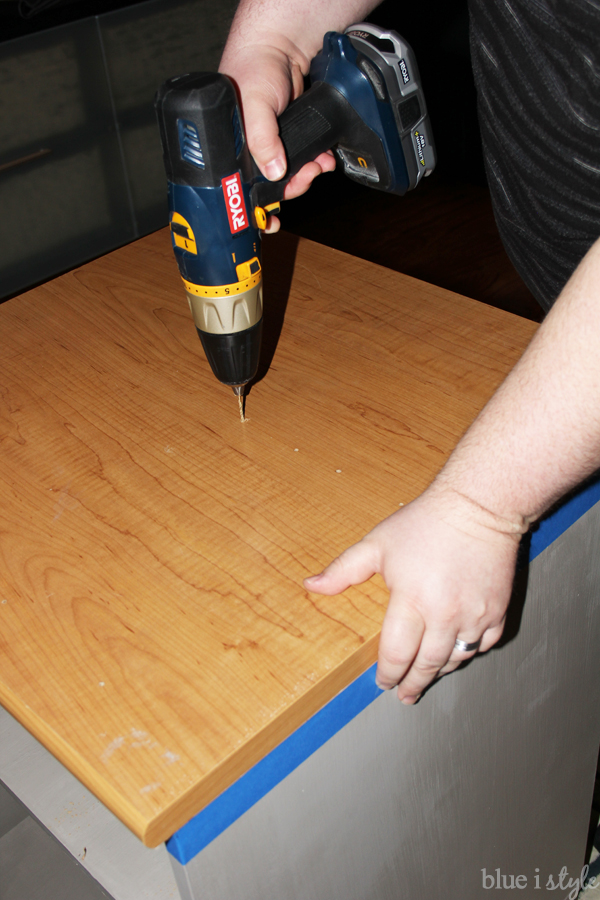
We then used wood filler to patch the holes in the top of the counter, leaving accessible the holes on the bottom for easy stemware holder installation when the time came. I’m sure glad that Scott came up with this plan before we started painting the countertop because it avoided later headaches!
STEP 4: TRANSFORM COUNTERTOP
Ok, now this is the part I’m really excited to tell you about! To give the bar cart a high end look – far from its printer stand roots – I wanted to make it look like it had nice, stone countertop. I’d seen Rust-Oleum Countertop Transformations Kit at my local hardware store, and I was super curious to give it a try. It’s a multi-step process that creates the look of real granite!

This Countertop Transformations Kit is enough to cover 50 square feet, but since my tiny bar cart top was only a whopping 4 square feet, I didn’t come close to using the full kit. That being the case, I can’t say that this is the most affordable solution for such a tiny countertop, but Rust-Oleum was kind enough to send me a kit to try out. While I wouldn’t recommend you buy the kit just for a small project like mine, it is a fantastic option to give an outdated kitchen or bathroom a brand new look, and then any left overs are perfect for dressing up the laminate top of a bar cart, portable kitchen island, or even a dresser.
The Countertop Transformations Kit comes with lots of supplies, and it is a very specific, multi-step process. It comes with an instruction guide, as well as a short DVD tutorial {you can watch the video here}. It’s not difficult at all – but it’s very important to follow all of the instructions carefully! I’m going to share an overview of the process only to help you understand what is involved, but I’m not covering every details you’ll need to accomplish this project.
We started by roughing up the top of the bar cart using the diamond embedded sanding block that came with the kit – sanding it until none of the shiny appearance remained. Then we wiped it down to remove all the dust.
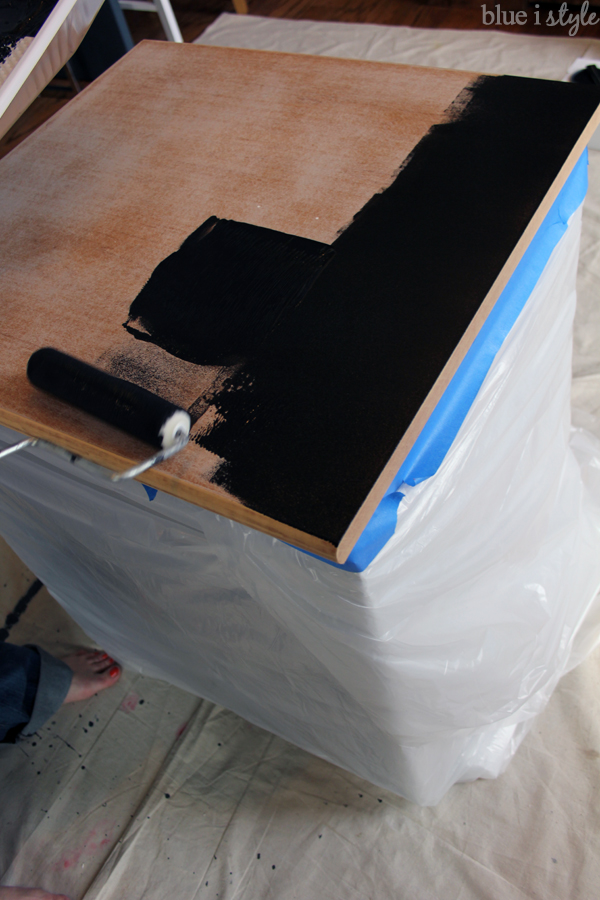
Before moving on to the painting step, we used a plastic drop cloth and painter’s tape to cover the rest of the bar cart.
We used a dense foam roller to coat the countertop with the black adhesive base coat. Since I was working on such a small surface, I was able to paint the entire top at once, but if you were working on a larger project, you’d need to work in sections.
Working quickly, while the adhesive base coat remained tacky, we used the dispenser tool to spread the decorative color chips, heavily coating the entire counter surface. This was definitely the most fun {and messiest} part of the process.
We were working inside because it was too cold in the garage, so we had covered the floor of our living room in a large drop cloth, which made clean up easy. But I can definitely put this on the list of things I never thought I’d do in the living room. Here’s a quick little video to show you what it looks like when you spread the decorative color chips.
We waited 12 hours, then moved on to the next step. We used a small hand broom to brush away all the loose, excess decorative chips. Then we used the plastic scraper tool {which came with the kit} to smooth the chip edges and remove any loose chips.
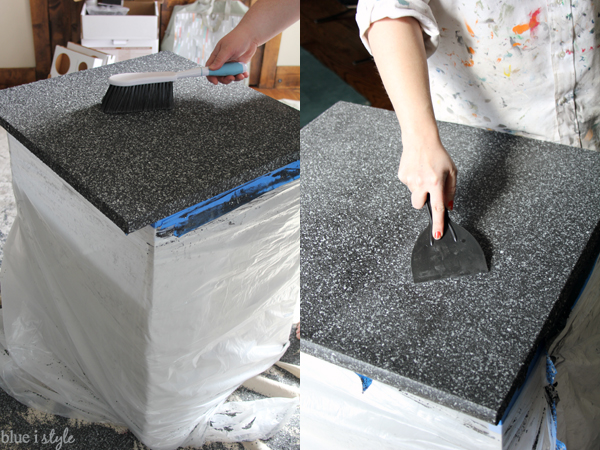
Then we sanded the counter until it was extremely smooth. To make it easy, the kit includes a sample piece that shows exactly what the surface should look and feel like after sanding.
Once the counter was totally smooth, we were ready to apply the protective top coat, which is a two part formula. The instructions call for mixing all of the activator {part A} into the base {part B}. However, once mixed, the protective top coat must be used within a limited time frame.
Since I had only used a small portion of the total Countertop Transformations Kit, I wanted to save the rest for another project in the future. That meant I couldn’t mix the entire protective coat all at once. Instead I calculated the ratio of Part A to Part B, and used a syringe to measure and mix just enough for sealing my small bar cart countertop.
I then used a dense foam roller to apply the protective top coat, and then rolled the bar cart to a safe location {out of reach of the kids} to allow it to dry for 48 hours. After two days, the counter was dry enough to touch, and ready for light use {longer dry time is required before resuming full use in a kitchen or bathroom}.
STEP 5: INSTALL BAR CART ACCESSORIES
Once the counter was dry enough for us to touch, we were ready install all the accessories to complete the bar cart. We installed the cabinet pulls on each end of the cart, then screwed the stemware holders in place {using the pilot holes we had pre-drilled}. We also used a few long screws to attach the wine rack to the side of the cabinet to keep it securely in place.