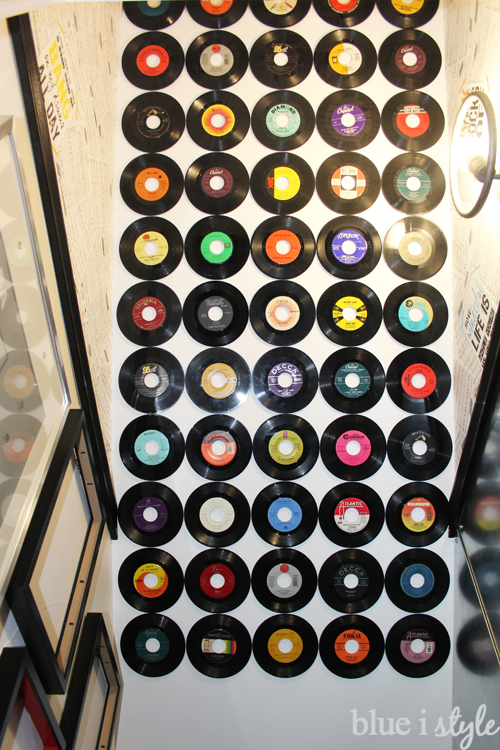
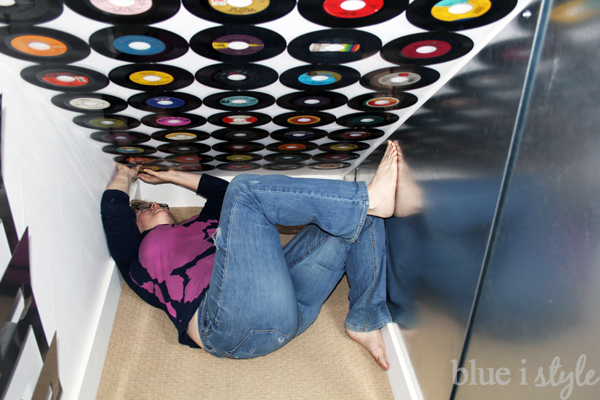
Feature walls can make a huge statement in any space, but they can also be a big commitment. However, with a little forethought and planning, it’s possible to create a feature wall that can be easily removed – damage-free – when you’re ready for a design update! Yes, even 135 records can be mounted on the ceiling or wall without a single nail, screw, or dab of glue!
While a lot of kids these days may not even know what a record is, our kids probably think they are the latest and greatest technology because most of the music we listen to in our house is in vinyl form. Between the 1955 Wurlitzer jukebox in our living room {which is the site of our daily family dance parties} and the 1980’s Fisher-Price record player in Beckett’s “big boy” room {which was mine as a kid}, in our house – records rule.
As soon as we began brainstorming plans for the playroom under our basement stairs, I knew that the ceiling {which slopes all the way down to the floor} had major potential and I wanted it to be the main focal point of the room. Once we decided on a music theme for the space, I knew what we had to do… cover the ceiling in records, of course!
But how? I found a few examples on Pinterest, but the tutorials recommended affixing the records with screws or liquid nails, and that just wasn’t going to work for us! As much as I love the look of the records on the ceiling, I didn’t want to make them a permanent fixture in the room! I hope the under stair playroom with grow with our boys for many years, but I also know that a day will come when we’ll want to update the space. When we do eventually remove the records, I don’t want the ceiling to look like Swiss cheese, nor do I want to be pulling down big chunks of wallboard with the records!
This post is sponsored by Command Brand, but as always, all opinions are my own. This post also contains some affiliate links. Click here to read my full disclosure.
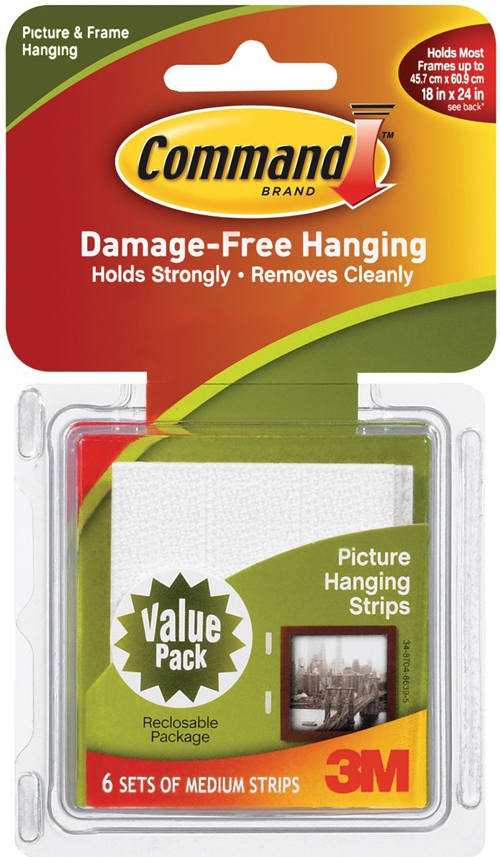
Then it dawned on me that the answer was as simple as the product that I already use to hang most of the picture frames and canvas art in our home – Command™ Picture Hanging Strips. I’ve been using these Picture Hanging Strips for years, so I already knew that they would hold strong, but would also allow me to quickly and easily remove the records in the future, without causing any damage to the ceiling or the vinyl records. I also knew that the Picture Hanging Strips would make the installation a breeze and allow me the flexibility to re-position them if needed in order to line the records up in nice, straight rows.
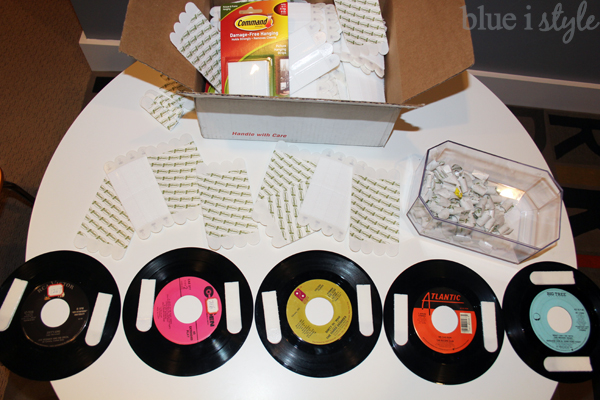
Command™ sells a wide variety of damage-free products, but the Picture Hanging Strips have quickly become my favorite! Unlike traditional Command™ Strips that are adhesive on both sides {which are perfect for mounting Command™ Hooks like the ones I use to hang the kids’ lunch bags in the pantry}, the Picture Hanging Strips work in sets. One strips mounts to the wall, the other to your picture {or in this case – a record}, and then the two strips snap together to create a super strong hold.
I’ll show you exactly how we used these Picture Hanging Strips to hang the records on the ceiling {and how we got the records lined up so perfectly} – but let’s start at the beginning…
STEP 1: BUYING RECORDS WITHOUT BREAKING THE BANK
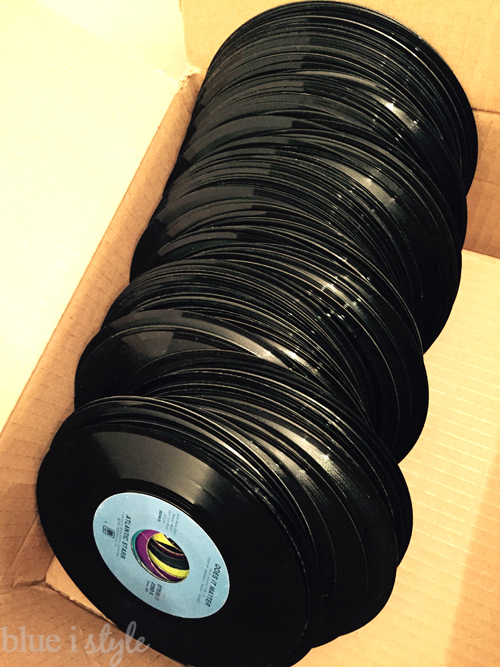
Getting our hands enough records to cover the entire ceiling of the playroom proved to be more challenging than we first anticipated, so let me save you some time. Skip the thrift stores, and start with a call to your local used music dealer!
Scott and I spent an entire afternoon driving from one thrift store to the next with little luck – just a few records here and there. At $.50 to $.70 each, the price was right – but most had black labels {I was picturing a vibrant rainbow on the ceiling}, and even those that were colorful had badly damaged labels that weren’t going to look good on the ceiling anyway. Giving up on the thrift store route, we headed to a used music store where we found a large collection of 45 in the basement.
I had a great time searching through this vinyl, and I found some great new additions to our jukebox collection, but at an average price of $2 each, we just could afford to stock up on the 100+ records we need for the ceiling.
We talked to an employee at the music store about our dilemma, and he offered up the perfect solution. He told us to head to their downtown location where they have large stacks of little-known records that have come in with no sleeves. These sleeveless records are hard for them to sell because most are pretty scratched up – but since we are using them for decoration only, it makes no difference to us if they don’t play well, as long as the labels look good.
The store owner agreed that, since we were going to buy such a large quantity, he’d sell them to us for a mere $.25 each! BINGO! So we dug through the piles of sleeveless records and filled an entire box with vinyl featuring bright, colorful labels.
STEP 2: DECIDING ON A RECORD LAYOUT
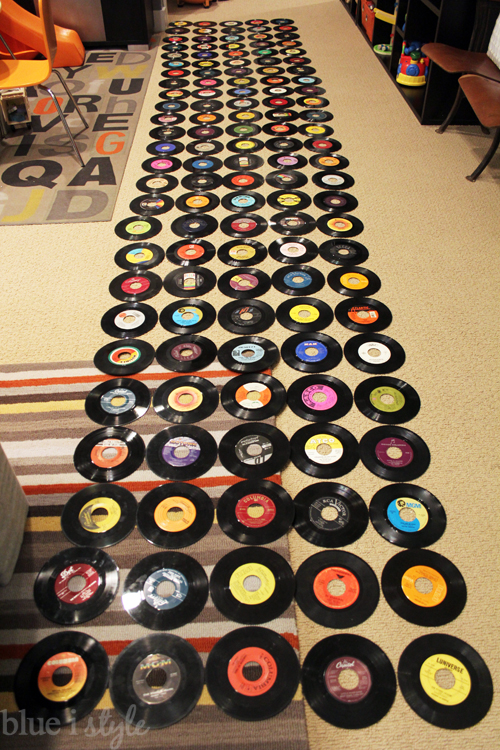
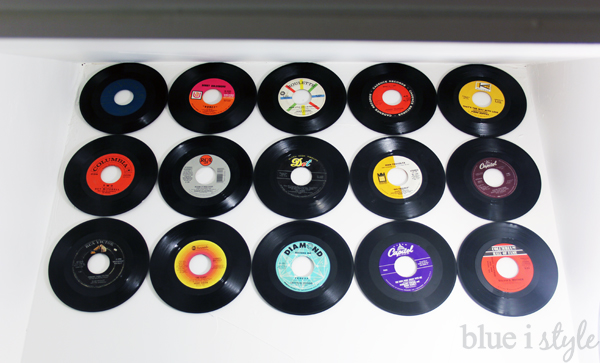
Before shopping for the records, we had measured the ceiling and determined that we could fit 27 rows of 45 RPM records on the ceiling, with five records in each row. In this configuration, they would fit with only a fraction of an inch to spare – it’s almost like the ceiling was made to be covered in records! But after purchasing 135 records with brightly colored labels, I realized that we couldn’t just start putting them on the ceiling without more of a plan!
Even though we really made an effort to choose records with a wide variety of colors and styles of labels, we still ended up with a lot more of some colors than others, so if we wanted to get a good distribution of colors on the ceiling, we would have to decide on the layout in advance.
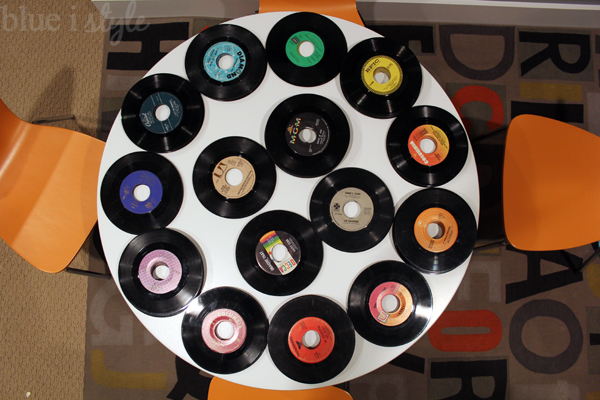
Since I wanted to make sure we got a good distribution of colors on the ceiling, we started by sorting the records into piles by color. My husband made fun of me for how much I enjoyed this part of the process, but ever since I was a little kid I’ve loved putting things in rainbow order.
After sorting the records by color, we realized that red, orange, and yellow piles had more than 20 records each – far more than any other color. That immediately told us that we would need a red, an orange, and a yellow in nearly every single one of our 27 rows.
Next, we began laying out rows on the floor. We started with the center row, and then Scott and I worked outward in opposite directions. We were careful to make sure that no two abutting rows had the same color layout – swapping records and rearranging as necessary until we had a good color distribution across every row.
STEP 3: TEST THE RECORD SPACING WITH TAPE
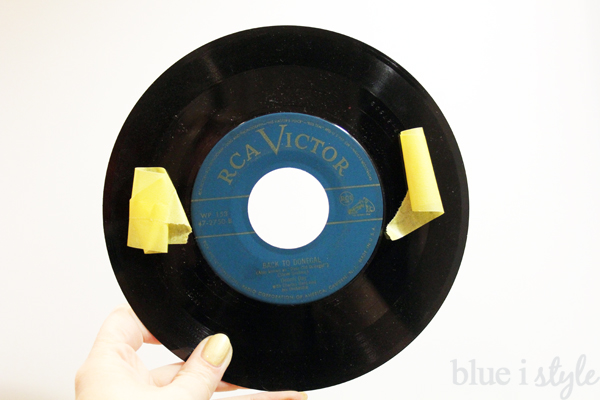
With the layout decided on, we were eager to start putting the records on the ceiling, but we wanted to make sure we had a good plan in place to ensure we could get all 27 rows up nice and straight. Rather than using the Command™ Picture Hanging Strips right away, we started by taping the first few records to the ceiling using rolled-up strips of painter’s tape.
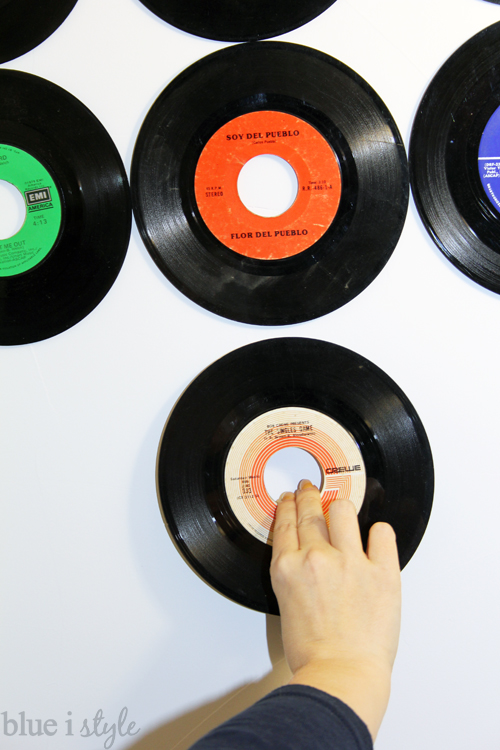
We started on the top of the slanted ceiling and measured and marked the center with a light pencil line. We then lined up the hole in the center of the very first record with that pencil mark. Once the first record was stuck to the ceiling with tape, we used the measuring tape to double-check that it was, in fact, centered {measure twice is my motto}. Then we taped two more records to the ceiling – to the right and left of center the center record – with each just touching the adjacent records.
Once we had one entire row up on the ceiling, we eyeballed row 2 – simply doing our best to line up the center record of row 2 with the center record of row 1. And then once again we added records to the left and the right.
Once we had three rows on the ceiling, we were able to see that our eyeballing-it method was working out just fine, and that we wouldn’t have to measure each row. This was a major time saver, and also took a lot of the stress out of the project.
The painter’s tape worked well enough to hold the records up for a quick check, but I could already tell that it wouldn’t hold the records on the ceiling for long, so we removed all 15 records from the ceiling before they started falling down on their own. We were ready to move on to the final step.
STEP 4: AFFIXING THE RECORDS TO THE WALL WITH PICTURE HANGING STRIPS
After testing our methodology for record placement, we were ready to start affixing them to the ceiling using the Command™ Picture Hanging Strips. We used two sets of Picture Hanging Strips per record – not because two the weight of the records required two {each set of Medium Picture Hanging Strips can hold three pounds}, but simply because the hole in the center of the records prevented us from placing one strip set in the very middle of each record.
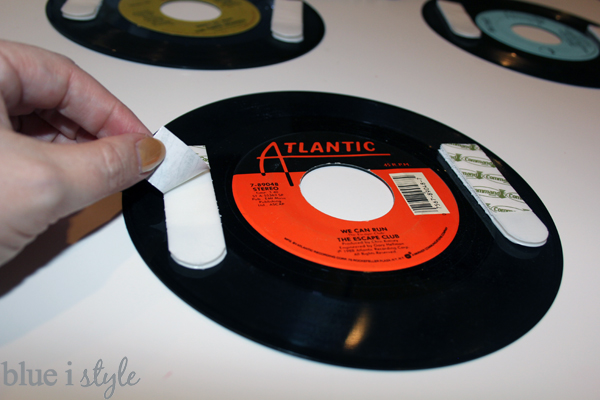
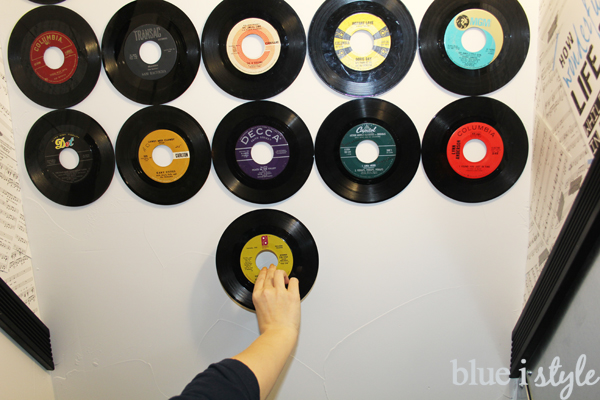
For each record, we snapped two sets of picture hanging strips together, then removed the adhesive backing from one side of each set and pressed them to the vinyl records – placing one set to the left of the label and one to the right.
We then removed the adhesive backing from the other side of the strips and placed the first record on the top center of the slanted ceiling, using the pencil mark from step 3 to line it up just right. We pressed the record to the ceiling, putting pressure at the location of the two Picture Hanging Strips for about 10 seconds. We continued the same way, adding one record at a time, always starting in the center of each row, and working our way out to the left and right.
Because the records weigh so little, we were able to simply stick them to the ceiling with the Picture Hanging Strips, apply pressure for 10 seconds, and then move on. However, keep in mind that when using Picture Hanging Strips to hang photo frames – or anything else with more weight – be sure to closely follow Command’s installation instructions. The instructions call for pressing each set of strips firmly to the wall for 30 seconds, then removing the frame from the wall, pressing down on the strips again for another 30 seconds, and then waiting one hour before rehanging the frame by clicking the strips back together. Be sure also to follow Command’s guidelines regarding the ideal placement of the strips and the weight each strip can support.
Since we had so many records to affix to the ceiling, Scott and I worked together in an assembly line fashion to speed up the process. We would lay out a full row of records on a table, affix the Picture Hanging Strips to the back of all five, remove the adhesive backing from all the strips, and then I would get up on the ladder and Scott would bring the records to me one by one {starting with the center} so that I didn’t have to climb up and down or keep track of the order.
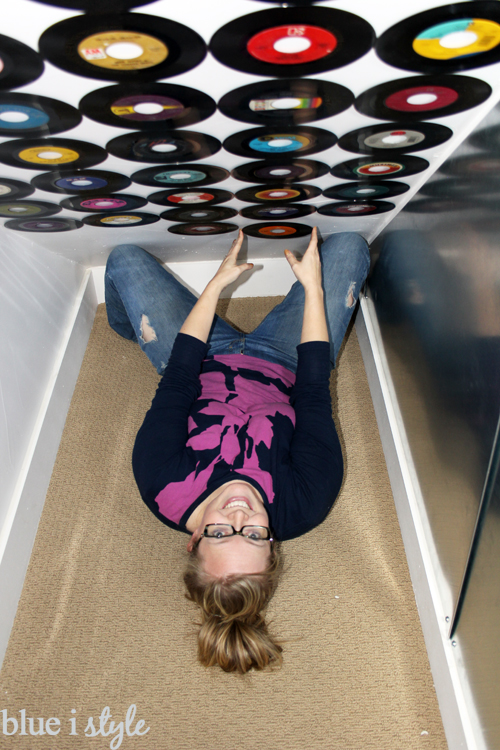
When we got to the lower rows, I no longer needed the ladder – instead I wound up lying on the floor.
In this position, it was actually much harder to eyeball the placement of the records. Fortunately, the Picture Hanging Strips are forgiving in that way! On several of the lower rows, I realized that I didn’t have the middle record well centered, so as I worked my way out the records got too close to one wall, and left a gap by the other wall. Fixing this problem was as easy as grabbing the bottom edge of a record with both bands and gently peeling it off of the wall, which separated the two halves of the Picture Hanging Strips. {Always avoid pulling straight down – or you may end up pulling both sides of the strip of the wall}. Then I could adjust the records slightly to the right or left, and could click the record back onto the strips on the wall in a better position.
Since the lowest rows of records are within the kids’ reach, we know we run the risk that a couple might get broken over time. Thanks to the Picture Hanging Strips, if this happens we can quickly and easily remove the broken record, affix strips to a new record, and snap it back in place using the strips already on the ceiling. {UPDATE: 7 years later, and not a single record has ever been broken or pulled of of the ceiling despite the boys spending many hours playing in this space!}
And someday, when the time comes to update this space for the boys, or to find a whole new use for this under stair closet, we can simply remove the records from the ceiling and use the tabs on the Picture Hanging Strips to cleanly remove the strips from both the records and the ceiling. When removing the strips, be sure to press on the top of the strip and pull the tab straight down {never toward yourself}. Continue stretching the tab down until the strip releases from the wall {or record} DAMAGE FREE!
If you’d like to learn more about this fun and colorful playroom, you’ll find all the details and lots of photos in the Under Stair Playroom reveal post. And for a list of all the specific products used to create the playroom, check out the complete playroom source list.
