• About
    • About Blue i Style
    • Tour Our Home
    • Free Organizing eBook
    • Blogging Resources
  • Work With Me
    • Interior Decor & Organizing Services
    • Partnerships & Collaborations
    • Blogging Resources
  • Features & Press
  • Policies & Disclosures
  • Contact

Blue i Style

Creating an Organized & Pretty, Happy Home

  • Decor
    • Tour Our Home
    • Room Makeovers & Design Plans
    • Decorating Tips & Tutorials
    • Outdoor Decor
    • One Room Challenge
  • Organizing and Cleaning
    • Organizing Tips & Tutorials
    • Organizing By Room
    • Organizing on the Go
    • Cleaning
  • DIY
    • DIY Tips & Tutorials
    • Smart Home & Safety
    • Paint Tips & Projects
    • Crafts
    • Cricut Projects
  • Kids
    • Decor & DIY for Kids
    • Organizing Kids
    • Life With Kids
  • Five Minute Projects
  • Holidays & Entertaining
    • Seasonal & Holiday Decor
    • Entertaining
    • DIY Gifts & Gift Guides
    • Facebook
    • Instagram
    • Pinterest
    • Twitter
    • YouTube

DIY Tips & Tutorials· Organizing

How to Install a Wall of Garage Shelving and Drawers

  • Facebook
  • Twitter
In the past few weeks, I’ve received the same question from several different readers asking for more specifics on how we installed our garage shelving system. I realize now that I clearly didn’t provide enough information about our wall-mounted shelves and drawers in my previous garage organizing posts, so today I’m going to break down all the details.
 
Wall-Mounted Garage Shelving


This post contains affiliate links. If you purchase something I recommend, you’ll pay the same price, but I may receive a small commission.


HOW TO ORGANIZE A MESSY GARAGE:
START WITH THE RIGHT SHELVING SYSTEM

 
Let’s go way back to where it all began about two years ago – with a very messy garage. It’s not that I hadn’t tried to organize it. We had a few free standing metal shelving systems and lots of totes. The totes even had labels.
 
If you’ve spent time organizing your garage in the past just to have it turn into a disaster again, ask yourself why the past organizing system didn’t work before you start again.
 
The real problem for us was that we had so much stuff piled in front of the shelves, which made it hard to get to what we needed, and even harder to put it away. I’m sure you can see where I’m going with this… if it’s too hard to put things away on the shelves, you don’t, and then the mess just get’s bigger and the cycle continues.
 

I knew that in order to come up with an organizing system that we could keep up with in the garage, we we needed to clear the floor space to make shelving accessible. In order to clear the floor, I needed to employ my organizing mantra – use every available space! In the garage, that meant thinking more creatively about how to use the vertical wall space, and even the ceiling.

 
MORE GARAGE ORGANIZATION TIPS:This post is focused on how we installed and utilize the wall-mounted shelves and drawers in our garage, but you can read tons of other garage storage ideas and see the details of the rest of our garage makeover in this post: Brilliant Ways to Organize the Garage


GARAGE ORGANIZATION PLANS: WALL STORAGE

I started by making a list of everything in the garage. Then I identified what should stay and what should go. Some items I categorized for donation or recycling, others I determine would be bettered stored elsewhere. Next I took stock of all the things inside the house that I would prefer to store in the garage. I even added a few wish list items, like an extra fridge and freezer for the garage.

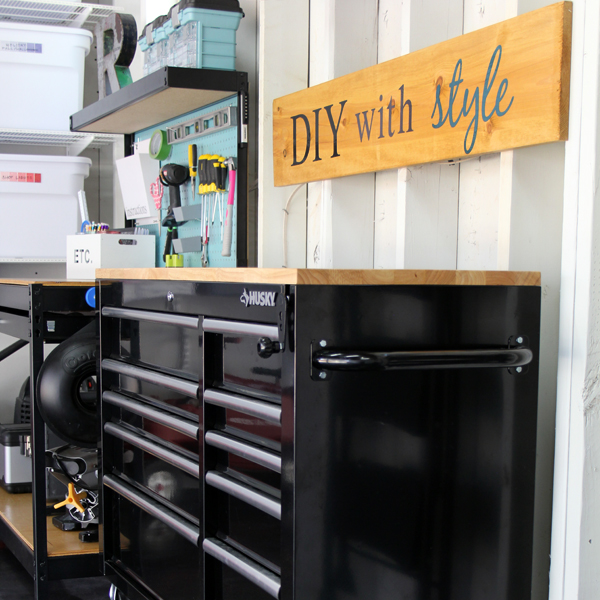
Once I had a complete list of what I needed to organize in the garage, I began to create a plan with a focus on utilizing all the wall space. I decided to use the front wall of the garage as a workshop, with our saw horses hanging above the workbench. On the other side of the front wall I planned to hang our bikes above a storage box for all of our seasonal patio cushions and decor.

Garage organization plans for wall storage
 

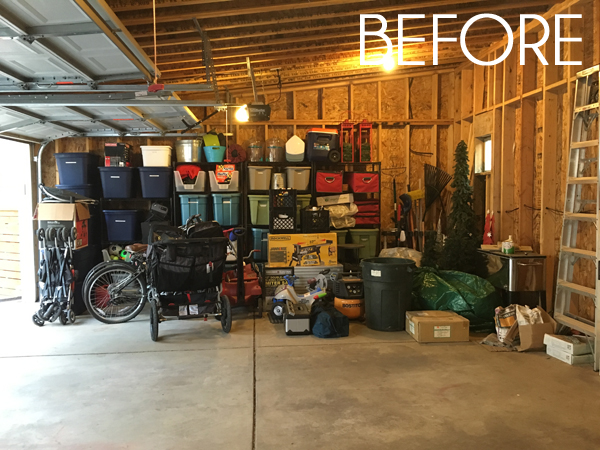
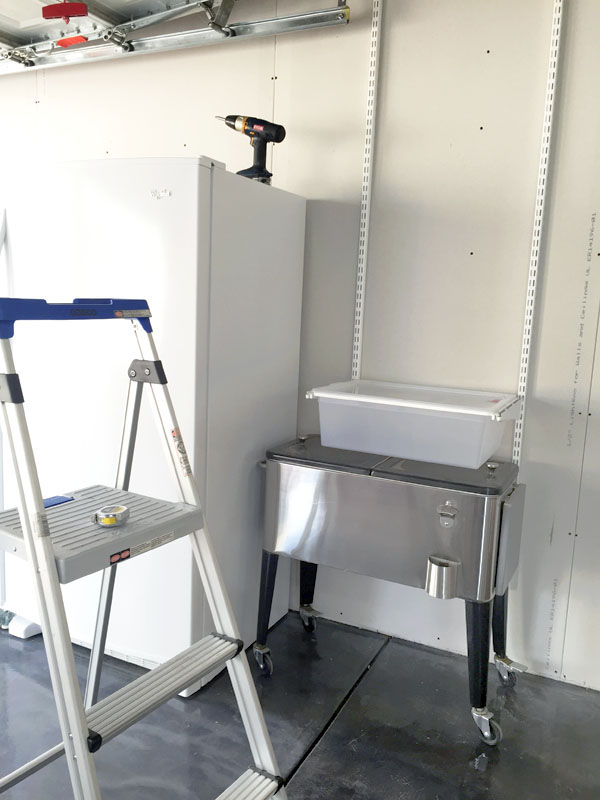
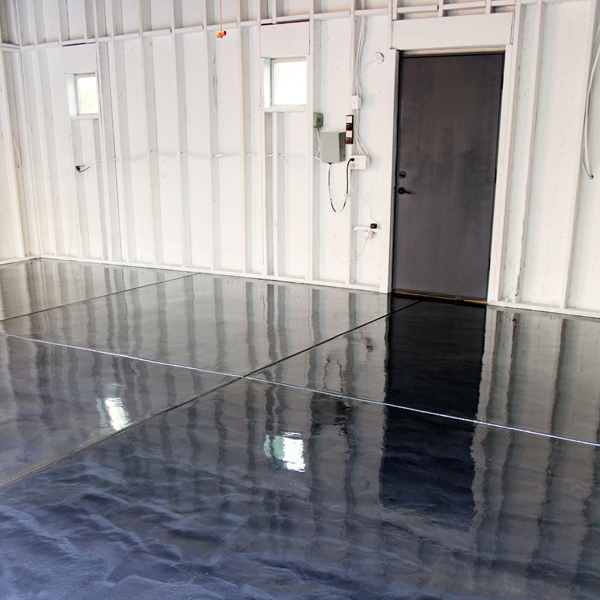
Getting our saw horses, step ladder, and bikes up on the front wall of the garage was certainly going to help, but the side wall – where the old shelves were – needed the most help! I knew that ditching the metal shelf units was going to be the key to our success. They originally seemed like a great solution, but over time their flaws became obvious. They didn’t allow us to take full advantage of the height of the garage, and because they sat on the floor, we ended up stacking all of the larger items in front of them.

I realized that no amount of organization was going to make our garage work for us until we could figure out a way to keep the floor space under the shelves clear for larger items, like our rolling cooler, the kids trikes and wagons, and our over sized tools.


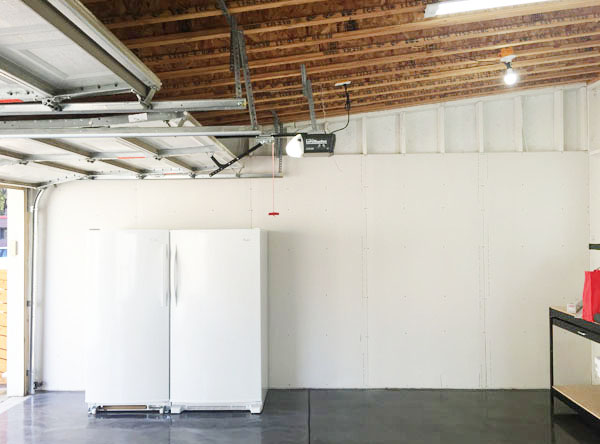
HANGING DRYWALL IN THE GARAGE

After researching lots of hanging shelving systems from a variety of stores, I realized that the unfinished walls of our detached garage were going to be a bit limiting. Most of the hanging shelf systems I found needed to anchored or screwed to the wall at fixed increments that didn’t match up exactly with the distance between the wall studs.

Finally I realized that installing drywall would be the best solution to provide us flexibility to install the system that best fit our needs, without being confined by the distance between the studs. Fortunately, my dad had hung drywall before so he taught Scott this valuable DIY skill, which turned out to be pretty easy. Since we were working in the garage, we decided it wasn’t necessary to tape and mud the drywall, but we did add insulation which also made it feasible for us to add a fridge and freezer along this same wall.

Install drywall in garage
 
It would have looked nice to drywall the entire garage, but to keep our costs down, we decided to just drywall the one side wall that we planned to use for the majority of the garage storage. Painting the studded walls in the rest of the garage white helped to brighten up the space and give it an overall consistent appearance.


CHOOSING A GARAGE WALL SHELVING SYSTEM

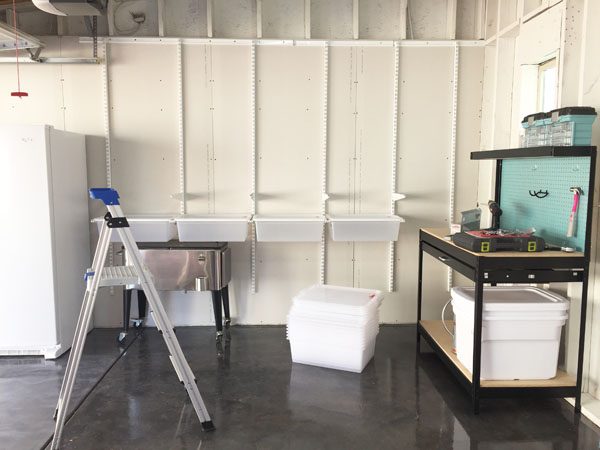
There are a lot of wall-mounted garage shelving options out there, but after weighing my options, I decided I liked the Elfa system from The Container Store best. I like that it’s flexible (allowing us to change the configuration in the future if our needs changed), but mostly it was the hanging drawers that won me over!

Garage wall-mounted drawers
 

Bins on shelves work great for storing some things, but these large drawers are so much more convenient for many of the items that we need access to on a regular basis {like car washing sponges and towels}. The drawers are strong and durable, and they have lids keep out the dust and dirt. At the end of the post, I’ll provide a full list of what we store in each drawer.

Since I really wanted to be able to maximize every bit of space on the garage wall, I took my measurements with me to The Container Store and asked one of their Elfa designers to help me come up with the best configuration. This is the plan we came up with:

Elfa garage organizing plan


Determining the Drawer Height. When deciding how many drawers to use and how high to hang them, I started by measuring the tallest item I wanted to store beneath the drawers {our rolling beverage cooler} and determined that I wanted to leave about 32 inches of space below the handing drawers.

Next, I considered the highest level of drawer that I would be able to easily see and reach inside. I’m pretty short {only 5’2″} and determined the top of the highest drawer shouldn’t be higher than about 55 inches off the ground.

 
With these measurements in mind, I was able to fit three rows of drawers into our storage plan. We could have fit one more column of drawers on the far right, but the placement of our workbench on the adjacent wall would have made them in accessible.
 
Here’s the more detailed plan that shows the measurements for the final shelf and drawer configuration.
 
The Container Store Elfa garage organizing plan


GARAGE WALL-MOUNTED SHELVING COMPONENTS

Once we had the plan in place, we purchased all of the components required to install our Elfa garage shelves and drawers.
  • Easy Hang Top Tracks
    • The horizontal top tracks come in 80″, 56″ and 36″ lengths, which can be cut to the appropriate lengths to fit your space.
    • We used three pieces of top track to span our full 132″ width.
    • Shown in blue across the top of the diagram above
  • 84″ Easy Hang Standard Rails that attach to the top tracks
    • The vertical hang standard rails come in 5 different lengths.
    • We used 6 of the 84″ rails for our configuration
    • Shown in blue from top to bottom on the diagram above
  • 16″ Deep Ventilated Wire Shelves
    • The shelves come in 12″, 16″, and 20″ depths. We chose the 16″ depth shelves because the match up with the depth of the drawers.
    • For our configuration, we used three 16″x4′ shelves, which span most of the distance on each row of shelving; and then a 16″x3′ shelves cut down to 30″ to fill the remaining distance on the far right of each row of shelves.
    • Shown in aqua on the diagram above
  • 16″ Ventilated Wire Shelf Brackets
    • The brackets attach to the Hang Standard Rails and support the ventilated wire shelves.
    • For our configuration, we used 34 shelf brackets (19 for support the shelves, and 15 to attach the drawer frames)
  • 16″ Left & Right Bracket Covers and Center Bracket Covers
    • These bracket covers are optional. They make the exposed side of the bracket look more finished, and more importantly for the garage, they keep out dust, dirt, and bugs.
    • Choose the correct number of left, right and center bracket covers, depending on your shelving configuration.
  • 18 gal. White Lidded Totes
    • These totes come in 10 gal., 18 gal., and 30 gal. sizes.
    • We used 11 of the 18 gal. totes, and set the height between the shelves at 17″ to accommodate these totes.
  • 2′ Translucent Solid Hanging Drawers with Lids
    • The drawers come in 18″ and 2′ widths, and depths of 3.25″ and 7.25″. In addition to translucent, the drawers are also available in smoke color and mesh.
    • We used 12 of the 2′ wide x 7.25″ deep drawers.
    • The drawers are labeled CHD-2 in the diagram above.
  • Translucent Solid Hanging Drawer Lids
    • The drawer lids are sold separately in sizes that correspond with the drawers.
  • 2′ White Hanging Drawer Frame White
    • The frame correspond to the drawer sizes.
    • We used 12 of the 2′ wide drawer frames
  • Drywall/Plaster Anchors & Screws
    • For use attaching the rails where they do not align with studs
  • Wood Screws
    • For use attaching the rails where they align with studs
 
THE COST OF OUR GARAGE WALL-MOUNTED SHELVING

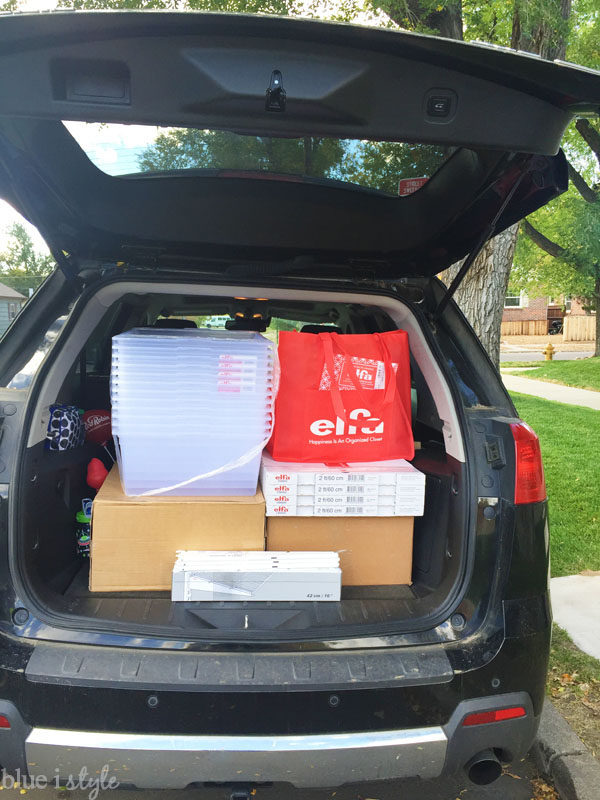
We purchased our Elfa garage shelving and drawer system in October of 2016 during a 25% of sale, which brought the total cost of our entire system down to about $1,050. If we had opted for wall-mounted shelves alone, without the drawers, our cost would have been about half. But for me, the drawers were well worth the added price because of their ease of use! They make our new garage storage system much more functional than our old system of shelves and bins alone.

 
After purchasing all of the components, we were ready to install our Elfa garage shelves and drawers.


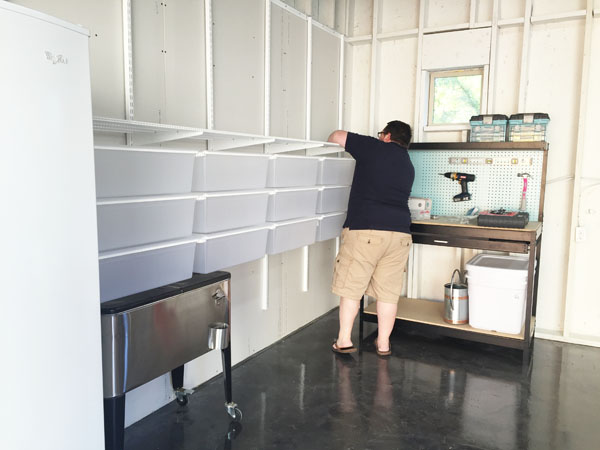
HOW TO INSTALL GARAGE WALL SHELVES

One of the great things about Elfa shelving systems is that you can choose to DIY the installation, or you can pay The Container Store’s installers to do it for you. We have Elfa systems in both of our boys’ bedroom closets, and paid for the installation in those spaces, but after seeing how those systems went in, we were pretty confident that we could install the wall of garage shelving and drawers on our own. DIY’ing the installation saved us approximately $260, and it only took us about 2 hours to install the full wall of Elfa shelves and drawers.

The Container Store Elfa Organize Garage Shelving and Drawers

To install the garage hanging shelves and drawers, start by screwing the Easy Hang Top Tracks horizontally to the top of the wall, or in the position of the highest shelf. Then attach the Easy Hang Standard Rails the Top Track so that they hang down vertically on the wall. Space the Hang Standard Rails two feet apart if you are using the same 2′ wide drawers that I used.


Once all the Easy Hang Standard Rails are spaced evenly across the wall, we needed to determine the height for the bottom row of drawers. We put our rolling cooler in place, since it was the  tallest thing we planned to store under the drawers. We placed one of the Translucent Drawers into a Hanging Drawer Frame and held it up to determine the right height. Then we attached Shelf Brackets to the hanging rails and installed the drawer frames in the position the allowed just enough clearance for the cooler to beneath.
 
Here’s a brief video from Elfa that shows how to install the drawer frames:
 
 
Once we confirmed that the first drawer was positioned correctly, we installed the rest of the lower row of drawers at the same height. We then began positioning the brackets for the next row of drawer frames.
 
 
After all the drawers were in place, we used shelf brackets to position the lowest shelf just above the top row of drawers.
 
 
With the bottom row of shelves in place, we sat one of the White Lidded Totes on the shelf to determine the correct height for the next row of shelves. We did the same to determine the placement of the top shelf.
How to install garage shelving and drawers Elfa Container Store
 
And that’s all there is to it. Once the final brackets were positioned, and the final ventilated shelves snapped in place, I was ready to start filling up the drawers and tote bins.
 
Garage drawers to store car wash towels
Without a doubt, the drawers are my favorite part of our garage storage wall because they provide us with easy, eye-level access to many of the things that we use on a regular basis. The translucent plastic drawers with snap on lids keep everything inside clean and free from dust and bugs.
 
Elfa wall mounted shelves Elfa hanging drawers for garage organization
 
Regardless of whether drawers are the right option for your needs, definitely opt for adjustable hanging shelves that allow you to clear the floor space and adjust the spacing between the shelves as your future needs change. Unlike free standing shelf units, hanging the shelves on the wall also
allow you to take full advantage of the height of the garage.


In our garage, extending the shelving all the way up to the ceiling allowed us to free up additional wall space for other things {like the extra fridge and freezer we had been wanting}.
 
Organize the garage with a wall of adjustable shelves and drawers
 
Choosing matching white lidded totes for the shelves helps keep the garage looking fresh and clean. Adding labels to the front of each bin and drawer makes it easy for everyone to find what they need, and to know where to put thing away {which is the real key to maintaining our organized garage}. The DIY Paint Chip Labels also add a fun touch of color to the wall of white bins and drawers.
 
 
So what did we put in all the bins and drawers?
  • UPPER SHELF BINS: Holiday and seasonal decor that’s only accessed a couple of times a year
  • LOWER SHELF BINS: Tarps; Moving blankets; Beverage dispensers for entertaining; Shop lights; Shop vac accessories
  • DRAWERS: Reusable shopping bags; BBQ tools; Picnic backpack & blanket; Gardening gloves & tools; Extra trash bags; Car wash tools & towels; Ropes & cords; Shop rags; Extra light bulbs; Small balls and sporting equipment
 
Moving everything up onto the walls cleared the floor space and provided room for us to tuck a lot of the bulky and heavy stuff underneath, including our rolling beverage cooler, wagon, trike, scooter, shop vac and air compressor.
 
Drawers on the garage wall leave room for bulky and heavy tools and toys beneath
 
Now that the kids have outgrown the trike and wagon, their two wheeled bikes fit nicely in this space. Someday, when they have full sized bikes, we’ll hang them with the bike pulley system that we use for my husband’s and my bike, but for now, it works perfectly to have their small bikes right under the drawers.


WANT TO SEE THE REST OF THE GARAGE?
This post is focused on how we installed and utilize the wall-mounted shelves and drawers in our garage, but you can read tons of other garage storage ideas and see the details of the rest of our garage makeover in the posts below.


OTHER GARAGE PROJECTS
 
Brilliant Ways to Organize the Garage
Metallic Garage Floor Finish
Nails & Screw Organization
Paint Chip Labels
Framed Paint Brushes
DIY Wood Sign
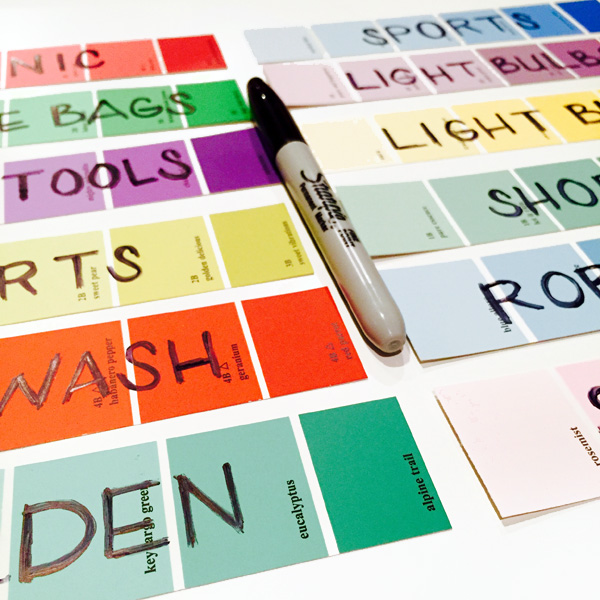
Paint Chip Fridge – Coming Soon
Better Homes & Gardens Photo Shoot
 
  • Facebook
  • Twitter

09.10.18

« Kids’ Art Display & Organizing School Papers
Planning Our Dining Room Facelift »

Meet Angela

Angela, the founder of Blue i Style, strongly believes that decor should be functional, organizing can be beautiful, smart DIYs help stretch your budget, and an organized and stylish home can still be practical for life with kids.

Her work has been featured in print in Better Homes & Gardens and 5280 Home magazine, and online by HGTV, the Today Show, Good Housekeeping, and more. She was also named a 2018 Stylemaker by Better Homes & Gardens.

You can reach Angela at angela@blueistyle.com

COPYRIGHT & PHOTO SHARING POLICY

All text, images, and other content that are part of this blog are the property of Blue i Style, unless otherwise noted. All material is copyright protected.

If you wish to feature one of my projects, feel free to share a single photo (no collaged images, or images with text overlays) as long as the no pin code is used to prevent my image from being pinned from your site.

All features must include credit to Blue i Style with a link back to the original content (not just to the homepage). The project steps, supply list, and/or sources may not be disclosed.

Please read my full content and photo sharing policy to ensure you comply with all guidelines. Failure to do so constitutes copyright violation.

Create At Your Own Risk

Any and all content on this website is for personal use only and created exclusively for inspiration purposes.

Creating with my suggested methods, products used, and tools is at your own risk.

Please ensure you are following proper guidelines with anything used, and you receive professional guidance when necessary.

Read my complete disclosure at: Policies & Disclosures.

Sponsorships & Affiliations

To help fund this blog, I accept some forms of advertising, sponsorships, and affiliate links.

If you buy something that I recommend, you pay the same price, but I may receive a small commission. As always, all opinions are my own.

Blue i Style is a participant in the Amazon Services LLC Associates Program, an affiliate advertising program designed to provide a means for sites to earn advertising fees by advertising and linking to amazon.com.

I use an affiliate marketing service which may automatically put links into some posts, so please assume any/all links may be affiliate links.

Read my full Disclosure Statement.

Copyright © 2023 · Dazzling Theme theme by Restored 316

  • Facebook
  • Twitter
  • Pinterest