• About
    • About Blue i Style
    • Tour Our Home
    • Free Organizing eBook
    • Blogging Resources
  • Work With Me
    • Interior Decor & Organizing Services
    • Partnerships & Collaborations
    • Blogging Resources
  • Features & Press
  • Policies & Disclosures
  • Contact

Blue i Style

Creating an Organized & Pretty, Happy Home

  • Decor
    • Tour Our Home
    • Room Makeovers & Design Plans
    • Decorating Tips & Tutorials
    • Outdoor Decor
    • One Room Challenge
  • Organizing and Cleaning
    • Organizing Tips & Tutorials
    • Organizing By Room
    • Organizing on the Go
    • Cleaning
  • DIY
    • DIY Tips & Tutorials
    • Smart Home & Safety
    • Paint Tips & Projects
    • Crafts
    • Cricut Projects
  • Kids
    • Decor & DIY for Kids
    • Organizing Kids
    • Life With Kids
  • Five Minute Projects
  • Holidays & Entertaining
    • Seasonal & Holiday Decor
    • Entertaining
    • DIY Gifts & Gift Guides
    • Facebook
    • Instagram
    • Pinterest
    • Twitter
    • YouTube

Holidays & Seasons

DIY Ornament Magnets for a Chalkboard Christmas Tree

  • Facebook
  • Twitter
Christmas is right around the corner, and in between the hectic last minute shopping and present wrapping, I found time for one more fun project for my boys to enjoy in this final week of the season. The magnetic chalkboard wall in our kitchen is a family favorite, and we often incorporate it into our seasonal decor by adding chalk drawings and countdown calendars, but this week we’ve stepped it up a notch by adding magnets as well!  
Last week I talked a bit about my favorite DIY tool – my Cricut electronic cutter, and today I’ve got a quick tutorial to show you how I used my newly upgraded machine to create these glittery ornament magnets for my boys to decorate our simple chalkboard Christmas tree. Thank you to Cricut for sponsoring this post, and thank you for supporting the brands that make this blog possible. As always all opinions are my own. This post contains also affiliate links.


I shared a post a couple of years ago with my honest review of the magnetic primer that we used under the chalkboard paint on our kitchen wall. You can read all the details in that post, but the short story is that the magnetic primer is not very strong, and most magnets won’t stick to it {although I have heard that the strength of the primer has been drastically improved over the last couple of years}. I did discover, however, that those thin, flexible magnets – like the type you might get in the mail with a calendar or football schedule on them – would stick to the magnetic primer. 
That discovery led me to create my own alphabet magnets for my boys using thin sheets of printable magnets, which I cut with my old Cricut. And this year, I wanted to use the same method to create magnetic Christmas ornaments using my new Cricut machine. 
I picked up a package of Cricut Printable Magnet Sheets and tested to confirm that they would stick to the chalkboard wall. The hold wasn’t super strong, but I determined it would be just fine for this project since the ornament magnets would be used for decorative purposes only, not to hold up drawings or other papers. I also confirmed that I had an appropriate “StrongGrip” cutting mat for cutting magnets.
With my supplies figured out, I was ready to search for a cute ornament shape to cut the magnets using my Cricut. With my old machine, I would have needed to have a cartridge with an ornament shape on it, but my new Cricut Explore Air connects to the free Cricut Design Space software where I can simply search for any image I want to use, or I could even design my own.
I began by opening the software, starting a new project, and searching for a good ornament shape. To do this, I (1) clicked “Insert Image” and (2) typed “ornament” into the search box. I then (3) used the filter feature to narrow my search results (4) to only those images containing a single layer.
This resulted in 56 images, and I quickly found the perfect shape for my ornament magnets.
I inserted the ornament image into my project, and then used the duplicate button {in the bottom right corner} to create many more of the same shape. 
At first I started to try to arrange the ornaments in to neat rows, but then I realized I didn’t need to do this because when I clicked to “GO” button to set the cut settings, the software would automatically arrange all the ornaments for me to the best fit the size of my material. I chose 8.5×11 as the material size {because this is the size of the magnetic sheets} and the could see that 12 ornaments would fit on each sheet.
Next, I connected my Cricut Explore Air to my computer, turned it on, and set the dial on the right to “custom” for the material type.

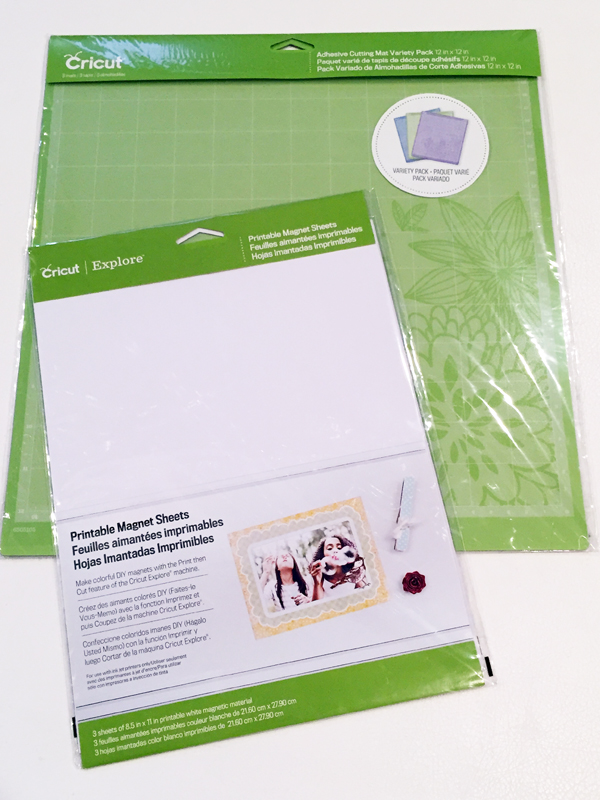
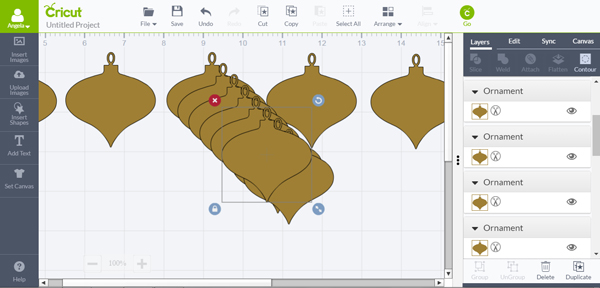
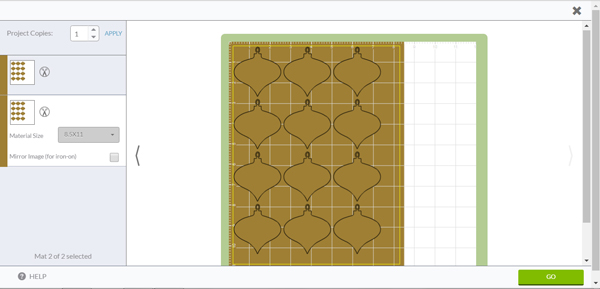
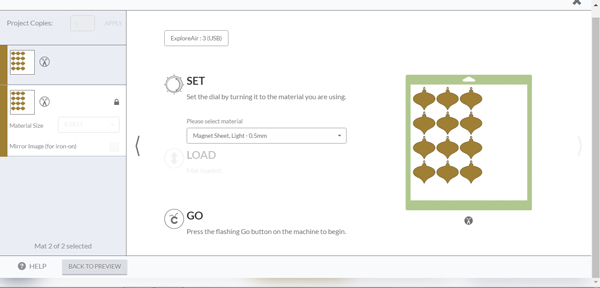
With the dial on the machine set to “Custom,” the software prompted me to choose the material type from a drop down menu. I chose “magnet sheet, light.”

I loaded the mat with the magnet sheet into the machine and pressed the “GO” button. A minute or two later I had 12 identical ornament magnets. After removing them from the mat, I affixed another sheet of magnet and cut 12 more.
Cutting ornament magnets on Cricut
These magnet sheets are printable, so I could have easily designed a pretty pattern for my ornament magnets to print on the sheets before cutting out the ornaments, but I really wanted the ornaments to be sparkly {for more of a Christmas-y feel}, so I decided to cut the shape of the ornaments from the plain white magnet sheets and cut the same shape from glitter scrapbook paper, and then glue the two layers together. 
Cutting ornaments on Cricut
I cut 12 red glitter scrapbook paper ornaments, and 12 teal, and then I grabbed out my Mod Podge to attach the glitter paper to the magnets. I used a small paint brush to apply a thin layer of Mod Podge to the white front of each ornament magnet, matched up a piece of glitter paper, and smoothed it down to remove any wrinkles.
DIY Ornament Magnets

Once I had glued all 24 glitter paper ornaments to the magnets {about 15 minutes}, I let them sit for about an hour to make sure they were totally dry.

In the meantime, I cleaned our chalkboard wall {here’s my trick for getting the chalkboard really clean without lots of white streaks} and then drew a simple chalk Christmas tree.
Chalkboard Christmas Tree
Then I let the kids takeover and decorate the tree with their new ornament magnets.
Putting ornament magnets on chalkboard Christmas tree
I mentioned at the beginning that the Cricut magnet sheets didn’t hold very strongly to the magnetic primer of our chalkboard wall. Well, it turns out that glueing a piece of glitter paper to the front of each magnet, I added just enough weight to them that they barely stick to the wall. We were able to make it work, but it was a bit frustrating for the boys to get them to stay in place. 
The magnets stick just fine to the side of the fridge, and to the metal wall in the boys’ under stair playroom, just not to our the weak magnetism of our chalkboard wall. If I were to make more of these ornaments, I would simply choose magnetic sheets with a stronger hold, like this brand that I used when I created the boys alphabet magnets.
I just love how festive and fun the chalkboard tree looks covered in glittery magnet ornaments!
Chalkboard Wall Christmas Tree with Ornament Magnets

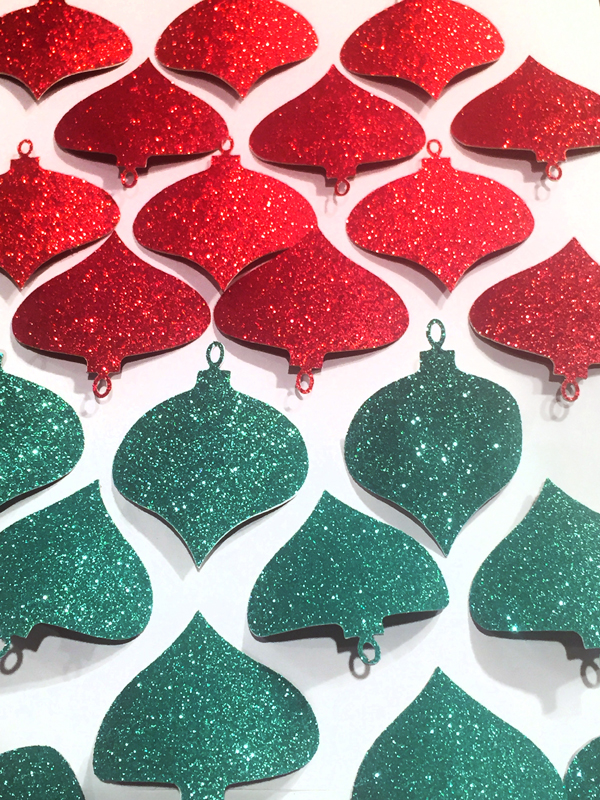
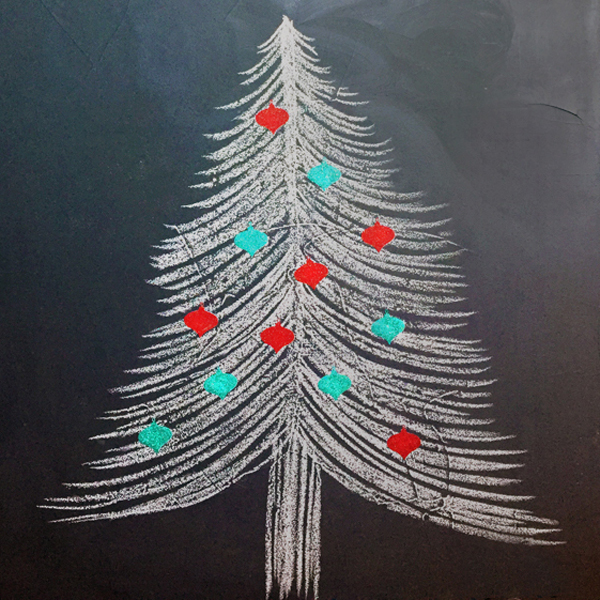
I know time is running short for this Christmas season, but be sure to pin this idea for next year! No magnetic chalkboard wall required – these ornaments would be just as fun for kids to add to the front of the fridge!

DIY Christmas Ornament Magnets
If you are still looking for a last minute gift idea {maybe even for yourself}, any DIYer or crafter would love a Cricut! You can get 10% off of your purchase plus free shipping from now through the end of the year using code 12DAYS.

This is a sponsored conversation written by me on behalf of Cricut. The opinions and text are all mine.

var ts=document.getElementById(‘ti-pixel-tracker’); var axel = Math.random() + “”; var num = axel * 1000000000000000000; var ti=document.createElement(“img”); ti.style.display=”none”; ti.src=”https://tracking.tapinfluence.com/trk/P5Af4/SLO4P/p.png?p=cK2SR” + String.fromCharCode(38) + “i=tThdX” + String.fromCharCode(38) + “ord=”+ num + String.fromCharCode(38) + “s=” + encodeURIComponent(document.referrer); ts.parentNode.replaceChild(ti,ts); new TAP.CogFrame(‘/v1/cogs/60486ef0-75ea-11e6-8eea-22000a7d00a4/comments’).drop({“program_id”:”60475ab0-75ea-11e6-8eea-22000a7d00a4″,”post_id”:”fba402a8-b788-11e6-8fb0-22000a7d00a4″,”host”:”api.tapinfluence.com”,”apiHost”:”api.tapinfluence.com”,”sort_order”:”desc”,”limit”:”20″,”offset”:”0″,”sort_by”:”created_at”,”protocol”:”https://”});

  • Facebook
  • Twitter

12.19.16

« Snowflake Tic Tac Toe
Genius Wrapping Paper Organizer Ideas »

Meet Angela

Angela, the founder of Blue i Style, strongly believes that decor should be functional, organizing can be beautiful, smart DIYs help stretch your budget, and an organized and stylish home can still be practical for life with kids.

Her work has been featured in print in Better Homes & Gardens and 5280 Home magazine, and online by HGTV, the Today Show, Good Housekeeping, and more. She was also named a 2018 Stylemaker by Better Homes & Gardens.

You can reach Angela at angela@blueistyle.com

COPYRIGHT & PHOTO SHARING POLICY

All text, images, and other content that are part of this blog are the property of Blue i Style, unless otherwise noted. All material is copyright protected.

If you wish to feature one of my projects, feel free to share a single photo (no collaged images, or images with text overlays) as long as the no pin code is used to prevent my image from being pinned from your site.

All features must include credit to Blue i Style with a link back to the original content (not just to the homepage). The project steps, supply list, and/or sources may not be disclosed.

Please read my full content and photo sharing policy to ensure you comply with all guidelines. Failure to do so constitutes copyright violation.

Create At Your Own Risk

Any and all content on this website is for personal use only and created exclusively for inspiration purposes.

Creating with my suggested methods, products used, and tools is at your own risk.

Please ensure you are following proper guidelines with anything used, and you receive professional guidance when necessary.

Read my complete disclosure at: Policies & Disclosures.

Sponsorships & Affiliations

To help fund this blog, I accept some forms of advertising, sponsorships, and affiliate links.

If you buy something that I recommend, you pay the same price, but I may receive a small commission. As always, all opinions are my own.

Blue i Style is a participant in the Amazon Services LLC Associates Program, an affiliate advertising program designed to provide a means for sites to earn advertising fees by advertising and linking to amazon.com.

I use an affiliate marketing service which may automatically put links into some posts, so please assume any/all links may be affiliate links.

Read my full Disclosure Statement.

Copyright © 2023 · Dazzling Theme theme by Restored 316

  • Facebook
  • Twitter
  • Pinterest