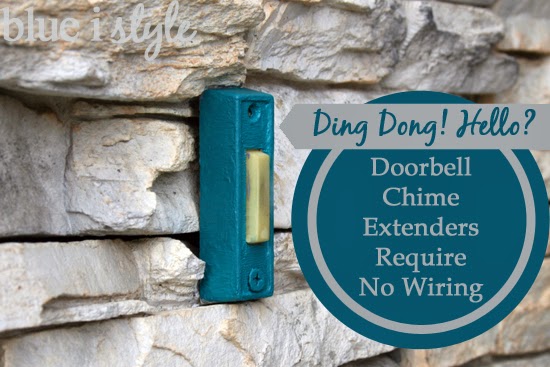
For five years we’ve been unable to hear our doorbell throughout most of our narrow, but tall house. The doorbell chime is located on the first floor, and could really only be heard on the first and second floors. This meant that we couldn’t hear the doorbell in the basement family room/playroom where we spend most of our time, nor could we hear it in our master bedroom on the third floor. We were constantly telling family to call when they arrived, and leaving notes on the front door for the pizza delivery man letting him know we might not be able to hear the bell and to please call our cell phones. Certainly not the most convenient scenario for anyone involved, and who knows what visitors we may have missed simply because we didn’t ever know they were standing on our front porch.
We’ve been saying for the entire five years that we’ve lived here that we need to add a doorbell chime in the basement and one on the third floor. We even made it as far as watching YouTube videos about how to install an additional doorbell chime. Each of these videos went into painstaking detail about the wiring process, and that was enough to scare us into moving this project lower on our list. Until this past weekend when we finally learned what many of you probably already know. There is no need to install additional wired doorbell chimes throughout the house – all we really needed was a simple doorbell chime extender and two plug-in chimes (one for upstairs and one for down). It was an “ah-ha!” moment, but also a “doh!” moment. Why did it take us so long to figure this out?!
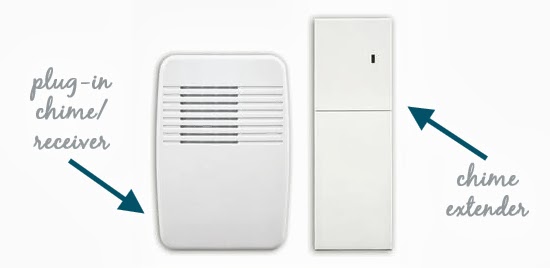
We compared the options for doorbell extenders at Home Depot and Lowe’s, and ended up selecting the Utilitech brand sold at Lowe’s because it allowed us to purchase one package with a chime extender and a chime/receiver, and a second package that contained an additional chime/receiver only. At Home Depot we would have been forced to buy two complete chime extender/receiver packs, making the Lowe’s option about $10-15 cheaper.
Once we got home with the hardware, this was a VERY quick and easy project! It was simply a matter of selecting the chime sound that we wanted for each (from only two or three options), and then placing the extender near the original wired doorbell chime in our entryway to ensure that the extender was picking up the signal and transmitting it to the two new plug-in chimes/receivers. When we first tested the extender, we were holding it about a foot away from the original wired doorbell chime and it was not working. Once we actually sat the extender directly on top of the wired doorbell chime it worked just fine, so we quickly realized that the extender needs to be located extremely close to the wired chime – even a foot away is too far.
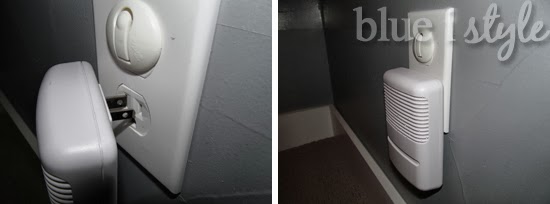
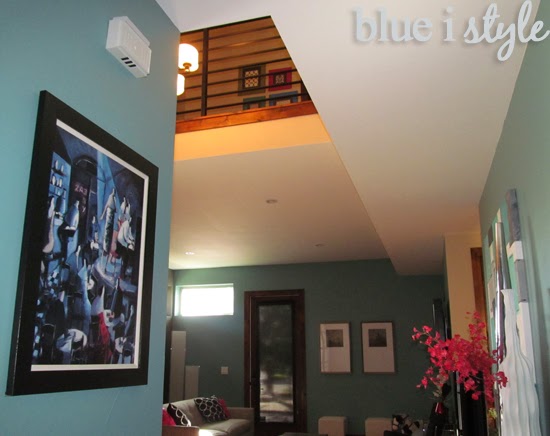
One of our plug-in chimes said it had a range of up to 100 feet, so this is the one we plugged in on our third floor (two floors up). The other plug-in chime (the one we purchased separately) said it had a lesser range of 75 feet, so we plugged this receiver in the basement (only one floor down).
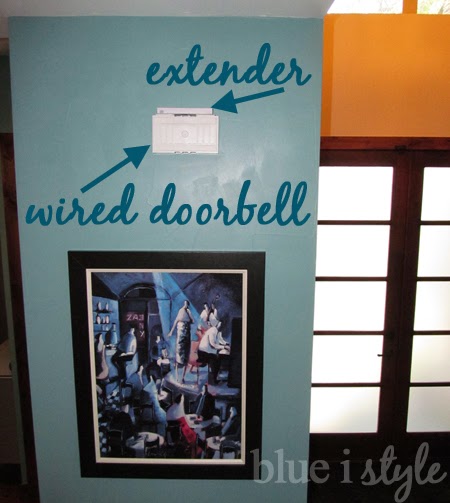
Once we had confirmed that the extender was picking up the signal and transmitting it to each plug-in chime/receiver, and that both receivers would chime when someone rang the doorbell on the front porch, then the final step was to “install” the extender. The instructions suggested screwing the extender to the wall near the wired-doorbell chime, but we wanted didn’t want to drill holes in the wall and also wanted to minimize the appearance of the extender, so we simply used two 3M Command velcro strips to affix the extender to the top of the existing wired doorbell chime.
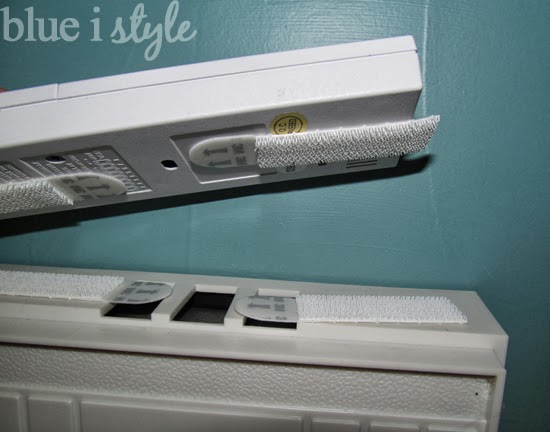
We could have simply sat the extender on top of the wired doorbell chime without the Command velcro strips, but we wanted to ensure that it wouldn’t suddenly come tumbling down on someone’s head. Additionally, because the extender requires batteries, the velcro strips will make it easy to take it down for battery replacement. If we had instead used regular double-sided adhesive Command strips, we would have to remove and replace the Command strips each time the batteries were changed.
Best of all, now that the doorbell chime extender is in place on top of the wired doorbell chime, it is barely noticeable.
If only we had known there was a solution to our doorbell woes that only required two plug in units, absolutely no wiring, and only a few minutes of our time, we certainly wouldn’t have waited five years. A lot of frustration could have been saved, not just for us, but for all of our guests and the poor delivery drivers, if only we had done more research and learned about this option sooner! So, if you are having trouble hearing the doorbell throughout your house, learn from our mistake and take 15 minutes to solve your problem rather than waiting any longer!