When it comes to our home, I obviously like to make things pretty, but two of our top priorities are always safety and cost-savings. Until recently, however, our front porch was a major fail in both of these areas!
We are fortunate to have a small covered porch that shields our front door from the crazy Colorado weather, but the two outdoor lights on the front of the house (to either side of the porch) didn’t provide any light near the front door. As a result, our porch was very dark at night, causing us to leave our front entry chandelier on all night long so that a light from indoors could shine through the windows and provide a little light on the porch. But even then, the porch was largely in shadow. Clearly, having a dark porch wasn’t very safe, and crertainly, leaving our nine-light chandelier on all the time wasn’t the most cost-effective or energy efficient! Add to that the fact that, during the winter months when it gets dark early, we would often leave our outdoor lights on all day in order to ensure that we wouldn’t come home to a dark house after work. Talk about NOT green!
Well, we finally found solutions to both of those problems, one of which is an affordable DIY project that could help you reduce your home energy bill while making your home safer!
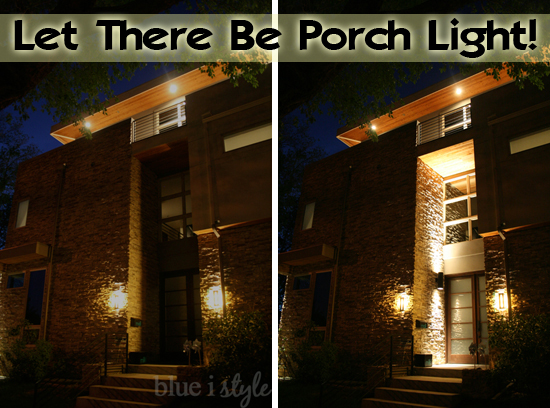
Let’s start by talking about our new front porch light, and then we’ll get to the part that will probably interest you more – the installation of our digital timer light switches!
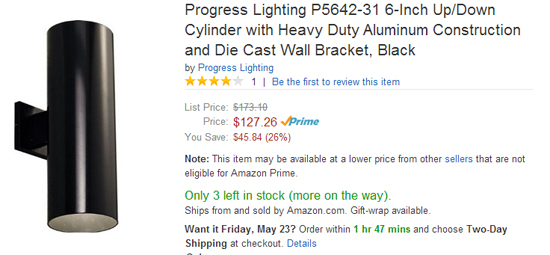
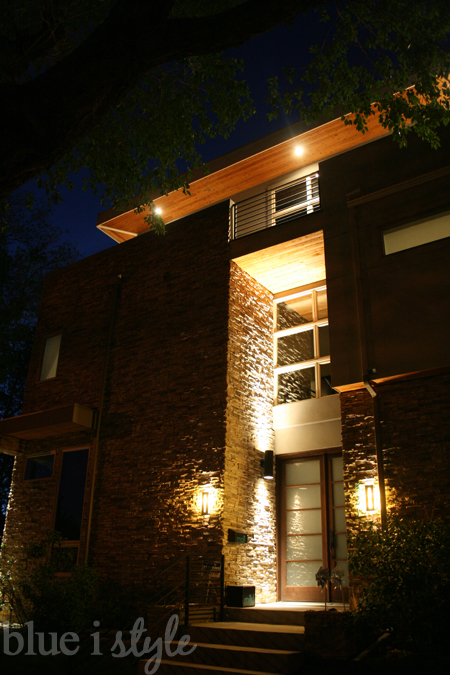
Ever since we moved in to our home, we’ve talked about adding a light to our front porch, but we feared it would be very difficult to get electricity to the porch because of the stone facade. Then it occured to me that we had an electric outlet on our living room wall that backs up to the porch, and that an electrician could probably draw power from that outlet to add a porch light. Turns out I was right {and it only took me five years to think of it}! We scheduled an electrican to do the work, and then went shopping for a light fixture! We found a light from Progress Lighting at our local hardware store that we liked because it was simple and steamlined, but we decided to price compare on Amazon before making the purchase. And it’s a good thing we did, because it turns out that we found a version of the same light fixture that shines light both down and up – perfect for our two story entry!
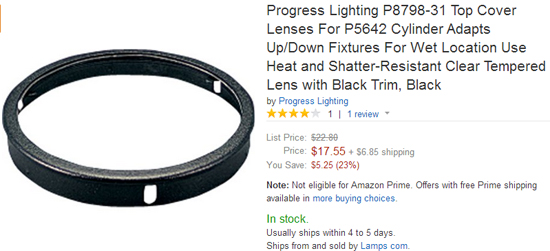
To keep water out of the upward-shining light, we also purchased the recommended top cover lens.
The electrician was able to simply cut away a small area of stone {the same size as the mounting plate on the light}, and install the fixture.
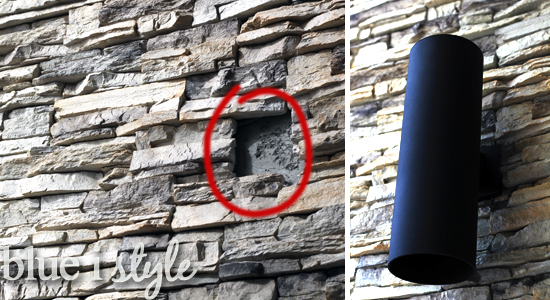
Here’s a picture to give you a better idea of the scale of the light fixture. You can see how nice it looks with our black mailbox, and it also matches the black railing along our front steps.
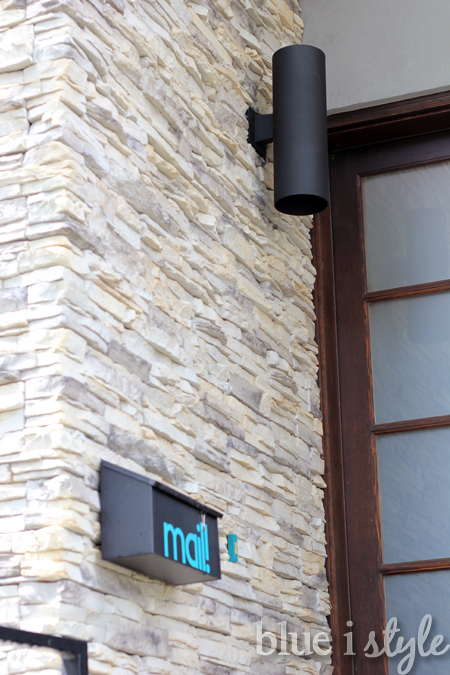 |
| {click here for details about how I labeled our mailbox} |
Hiring an electrician to install this new light solved our safety issue, because we now have adequate light on our front porch.
But we still needed to address our desire to reduce our electricity bill and be more energy efficient. That’s were our digital timer light switches come in!
Ok, before we move on, I must confess that this we didn’t actually install these digital timer switches ourselves, but I’m labeling it a DIY project because we COULD have, and you could too. My father-in-law installed his own timer switches, and I’ve found numerous online tutorials that show it is a fairly simple project {like this tutorial}. We had planned for this to be a DIY, but once we hired the electrician for the new front porch light, it just made sense to let him also install all of our digital timer switches {especially since the new light fixture required the installation of a brand new light switch anyway}.
After doing some research and reading reviews, we decided on the GE Sunsmart brand of digital timers. Our local hardware stores sold this brand of switches, but only for single-pole, and we needed three way wiring {keep reading, I’ll explain}, so we ended up purchasing them on Amazon.
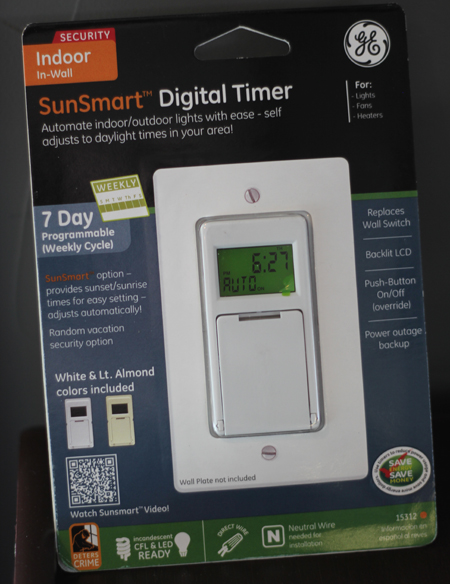
A single-pole light switch turns on a light from a single location, while three way switches are always used in pairs and allow you to turn a light on or off from two different locations. This is an important distinction because a single-pole digital timer switch cannot replace a three way light switch. If the light you want to set to a timer can be controlled from more than one light switch in your house, be sure to buy a digital timer switch with the phrase “single-pole or three way wiring options.” You will only need one digital timer switch for each three way setup {i.e., you only have to replace one of the two switches in the three way pair}.
The other important thing to note is that in each pair of three way light switches, one switch is wired as the primary switch, and one as the auxilary switch. The digital timer switch must replace the “primary” light switch. You will be able to identify which is which because only the primary switch will have wiring that matches the diagram in the digital timer installation instructions.
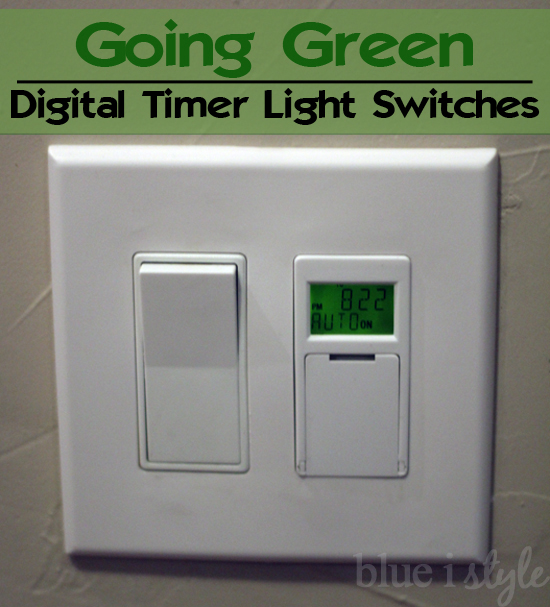
Ok, so that’s the how-to on the digital timer installation, but let’s talk about what they actually do. These digital light switches are pretty darn smart! You program the time and tell it what time zone you are located in, and then these smart little computers know what time the sun rises and sets in your region, and turn lights on and off accordingly. It also automatically adjusts for daylight savings. Of course, you can program it further if you want your lights to come on at times that don’t correspond with dusk and dawn. We installed these digital timer switches to control all of our outdoor lights – including those on our front porch, our side porch, our backyard, and along our third floor deck. While we want our front porch lights to stay on all night, we prefer to have the third floor lights go off around the time we go to bed because we don’t need them to stay on all night for safety purposes {besides the fact that they would also shine too much light into our bedroom when we are trying to sleep}. My husband was able to quickly and easily program each timer switch according to our preferences, but any time we want to, we can also manually turn the ligths on and off using the push button switch below the digital display.

These light switches are great for safety because they ensure that we never come home to a dark house, and they also help us to save money and reduce our energy consumption. Now the lights are on only when they need to be – no forgetting to turn them off in the morning, and no leaving them on all day if we aren’t going to be home in time to turn them on at dusk.
We used these timer switches for our outdoor lights, but there is no reason you couldn’t do the same for some of your indoor lights. If you travel a lot, this could be a perfect solution to allow you to have lights on inside the house in the evenings while you are away, without having to leave the lights on all day and all night.
Someday we would love to have a full smart-home system – one that would allow us to control our lights remotely – but that’s not in the budget now {or any time in the near future}, so these digital timer switches are an affordable DIY alternative!