• About
    • About Blue i Style
    • Tour Our Home
    • Free Organizing eBook
    • Blogging Resources
  • Work With Me
    • Interior Decor & Organizing Services
    • Partnerships & Collaborations
    • Blogging Resources
  • Features & Press
  • Policies & Disclosures
  • Contact

Blue i Style

Creating an Organized & Pretty, Happy Home

  • Decor
    • Tour Our Home
    • Room Makeovers & Design Plans
    • Decorating Tips & Tutorials
    • Outdoor Decor
    • One Room Challenge
  • Organizing and Cleaning
    • Organizing Tips & Tutorials
    • Organizing By Room
    • Organizing on the Go
    • Cleaning
  • DIY
    • DIY Tips & Tutorials
    • Smart Home & Safety
    • Paint Tips & Projects
    • Crafts
    • Cricut Projects
  • Kids
    • Decor & DIY for Kids
    • Organizing Kids
    • Life With Kids
  • Five Minute Projects
  • Holidays & Entertaining
    • Seasonal & Holiday Decor
    • Entertaining
    • DIY Gifts & Gift Guides
    • Facebook
    • Instagram
    • Pinterest
    • Twitter
    • YouTube

DIY Tips & Tutorials

How to Create an Easy DIY Wood Sign with Cricut

  • Facebook
  • Twitter
Thank you to Cricut for sponsoring this post, and thank you for supporting the brands that make this blog possible. As always all opinions are my own. This post contains also affiliate links.
People often ask me for advice about DIY supplies and crafting tools, and hands down, one of my very favorites is my Cricut electronic cutting machine. My mom bought be the original model Cricut back when I was in law school {more than a decade ago}, and I’ve been using the heck out of that thing ever since, including for lots and lots of organization projects featured here on the blog. 
I’ve been thinking about getting an updated Cricut machine for a long time, but I was so comfortable with the one I had that I just never got around to buying a new one. But when my friends at Cricut offered to send me the Explore Air to try out, how could I say no?! 
Favorite DIY Tool Cricut

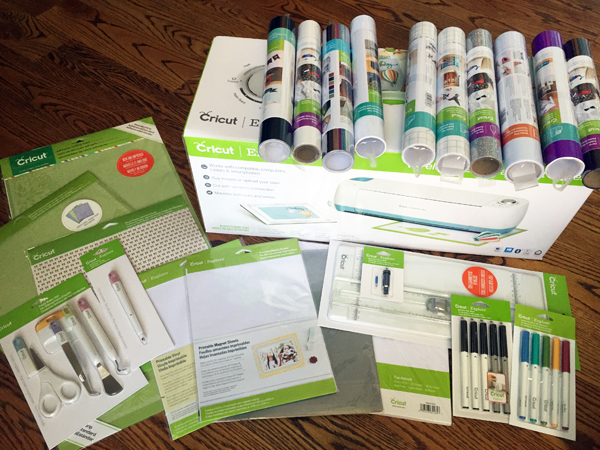
Let’s back up a second and start at the beginning. If you aren’t familiar with Cricut, let me show you just a few of the ways that I used my original machine…

Projects made with the original Cricut electronic cutting machine
(1) Under Sink Organization; (2) Quote on Guest Bathroom Wall; (3) Organized Coat Closet Makeover;
(4) Bathtub Toy Storage; (5) Original Machine; (6) L-O-V-E Scrabble Tile Coasters;
(7) Champagne Bucket and Ice Bucket; (8) Labeled Trash/Recycling/Compost; (9) DIY Alphabet Magnets
You might notice a couple of things in the projects above… (1) they are all letters/words, and (2) they are all the same font. Yep, a wide variety of projects using the same Cricut font cartridge over, and over, and over. That’s not to say that’s all my old machine was capable of, I just kept doing the same thing over and over because everything else I really wanted to do was hindered by the size of my old machine, which couldn’t cut anything larger than 6″ x 12″.
When my brand new Cricut Explore Air arrived in the mail, I was over the moon and my mind was reeling with ideas of all the projects I would finally be able to do! First of all, the Explore Air can cut up to 12″ x 24″ – that’s a huge improvement right off the bat. And it can cut a much wider variety of materials than my old machine, over 60 materials in fact – everything from vellum to leather. The Explore Air is more than just a cutting machine – it can write and score as well.  
Unlike my old machine that operated using cartridges that each had a limited number of images on them, the Explore Air utilizes Cricut Design Space, which is online software that includes over 60,000 images, fonts, and patterns. Plus I can also use all of the fonts on my own computer as well, which is a huge bonus!
I was crazy excited to use my new machine, but I’ll admit that I was also a bit intimidated about needing to learn the software. So I put it off and put it off, until finally I decided to just go for it. I thought the best place to start would be with a project similar to what I would have done with my old machine – but on a bigger scale. I planned to make a 60″ long sign to hang above the workbench in my recently renovated garage. 
I downloaded the software and sat down to figure out how to size the letters to fit my sign. I immediately realized that I had been putting this off for no reason. In a matter of only five minutes, I was able to figure out this simple first task in the software and I was ready to cut the letters for my sign using the same fonts that I use in my blog logo. 
I cut each word out of metallic adhesive foil, and then placed them on a stained wood board. 
Start to finish, it took me about half an hour to complete my “DIY with Style” sign, including the time it took me to figure out the software. And look how fabulous it looks! It’s one of the pieces that really pulls together the entire look of the garage makeover! {And, as a bonus, the sign also covers up a whole bunch of wires running through the studs, giving the garage a cleaner look.}
DIY Wood Sign made with Cricut
Obviously cutting out these letters was a very simple first project, but, because of the size of the letters and fonts matching my logo, it’s a project that I would not have been able to do with my old machine. By choosing to start with a project similar to one I would have made with my old Cricut, I was able to quickly see the advantages of my Cricut Explore Air, and now I’m so motivated to experience everything else it can do! 
How to Make a DIY Wood Sign
I have a fun project in mind using images from the Cricut Design Space software, and I’ll show you how it turns out next week! In the meantime, if you are thinking of giving Cricut as a gift this season {maybe even as a gift to yourself}, you can get 10% off of your purchase plus free shipping from now through the end of the year using code 12DAYS. Be sure to order by Friday, December 16th to get your order in time for Christmas!

This is a sponsored conversation written by me on behalf of Cricut, but as always, all opinions are my own. 
Read my full disclosure statement here.

var ts=document.getElementById(‘ti-pixel-tracker’); var axel = Math.random() + “”; var num = axel * 1000000000000000000; var ti=document.createElement(“img”); ti.style.display=”none”; ti.src=”https://tracking.tapinfluence.com/trk/P5Af4/SLO4P/p.png?p=XEXDw” + String.fromCharCode(38) + “i=tThdX” + String.fromCharCode(38) + “ord=”+ num + String.fromCharCode(38) + “s=” + encodeURIComponent(document.referrer); ts.parentNode.replaceChild(ti,ts); new TAP.CogFrame(‘/v1/cogs/60486ef0-75ea-11e6-8eea-22000a7d00a4/comments’).drop({“program_id”:”60475ab0-75ea-11e6-8eea-22000a7d00a4″,”post_id”:”fb9deb66-b788-11e6-8fb0-22000a7d00a4″,”host”:”api.tapinfluence.com”,”apiHost”:”api.tapinfluence.com”,”sort_order”:”desc”,”limit”:”20″,”offset”:”0″,”sort_by”:”created_at”,”protocol”:”https://”});

  • Facebook
  • Twitter

12.13.16

« Why You Need a Five Minute To Do List
Snowflake Tic Tac Toe »

Meet Angela

Angela, the founder of Blue i Style, strongly believes that decor should be functional, organizing can be beautiful, smart DIYs help stretch your budget, and an organized and stylish home can still be practical for life with kids.

Her work has been featured in print in Better Homes & Gardens and 5280 Home magazine, and online by HGTV, the Today Show, Good Housekeeping, and more. She was also named a 2018 Stylemaker by Better Homes & Gardens.

You can reach Angela at angela@blueistyle.com

Get Email Updates!

Thanks for subscribing! Check your email a welcome message and your free organizing eBook!

Get Email Updates!

Plus a bonus free organizing eBook!

COPYRIGHT & PHOTO SHARING POLICY

All text, images, and other content that are part of this blog are the property of Blue i Style, unless otherwise noted. All material is copyright protected.

If you wish to feature one of my projects, feel free to share a single photo (no collaged images, or images with text overlays) as long as the no pin code is used to prevent my image from being pinned from your site.

All features must include credit to Blue i Style with a link back to the original content (not just to the homepage). The project steps, supply list, and/or sources may not be disclosed.

Please read my full content and photo sharing policy to ensure you comply with all guidelines. Failure to do so constitutes copyright violation.

Create At Your Own Risk

Any and all content on this website is for personal use only and created exclusively for inspiration purposes.

Creating with my suggested methods, products used, and tools is at your own risk.

Please ensure you are following proper guidelines with anything used, and you receive professional guidance when necessary.

Read my complete disclosure at: Policies & Disclosures.

Sponsorships & Affiliations

To help fund this blog, I accept some forms of advertising, sponsorships, and affiliate links.

If you buy something that I recommend, you pay the same price, but I may receive a small commission. As always, all opinions are my own.

Blue i Style is a participant in the Amazon Services LLC Associates Program, an affiliate advertising program designed to provide a means for sites to earn advertising fees by advertising and linking to amazon.com.

I use an affiliate marketing service which may automatically put links into some posts, so please assume any/all links may be affiliate links.

Read my full Disclosure Statement.

Copyright © 2025 · Dazzling Theme theme by Restored 316

  • Facebook
  • Twitter
  • Pinterest