• About
    • About Blue i Style
    • Tour Our Home
    • Free Organizing eBook
    • Blogging Resources
  • Work With Me
    • Interior Decor & Organizing Services
    • Partnerships & Collaborations
    • Blogging Resources
  • Features & Press
  • Policies & Disclosures
  • Contact

Blue i Style

Creating an Organized & Pretty, Happy Home

  • Decor
    • Tour Our Home
    • Room Makeovers & Design Plans
    • Decorating Tips & Tutorials
    • Outdoor Decor
    • One Room Challenge
  • Organizing and Cleaning
    • Organizing Tips & Tutorials
    • Organizing By Room
    • Organizing on the Go
    • Cleaning
  • DIY
    • DIY Tips & Tutorials
    • Smart Home & Safety
    • Paint Tips & Projects
    • Crafts
    • Cricut Projects
  • Kids
    • Decor & DIY for Kids
    • Organizing Kids
    • Life With Kids
  • Five Minute Projects
  • Holidays & Entertaining
    • Seasonal & Holiday Decor
    • Entertaining
    • DIY Gifts & Gift Guides
    • Facebook
    • Instagram
    • Pinterest
    • Twitter
    • YouTube

Decorating Tips & Tutorials· DIY Tips & Tutorials

How to Create a Custom Door Label with Cricut

  • Facebook
  • Twitter
A year after completing the makeover of our master bathroom, the barn door on our closet remains one of my favorite details of the space! Based on your comments, it seems to be one of your favorite features as well. Over time, a lot of you have asked me how we added the “Dressing Room” label to the barn door, so today I wanted to share the easy DIY tutorial.
I created this custom door label using my Cricut electronic cutter, which is one of the most versatile and fun tools I own for decor, organizing, and crafting! Thank you to Cricut for sponsoring this post, and thank you for supporting the brands that make this blog possible. As always all opinions are my own. This post also contains affiliate links.
SUPPLY LIST
Cricut Explore Air (electronic cutter)
Cricut Design Space (online)
12 x 24 Cutting Mat
Black Adhesive Vinyl
Weeding Tool
Transfer Tape
Scraper Tool
HOW TO CREATE A CUSTOM DOOR LABEL
My Cricut cutting machine can do so may things, but from the very beginning {way, way back when I got the original Cricut as Christmas gift more than a decade ago}, I’ve used it to cut words and labels more than anything else. It’s the organizer in me. With my original machine, I was limited to cutting fonts available on Cricut cartridges, and I’m kind of cheap, so I only purchased a few and just made those work for every project. But not anymore!
When I got my new Cricut Explore Air, the thing I was most excited about was that I no longer have to use font cartridges! Instead, the Cricut Design Space software allows me to use any font installed on my computer. Of course, that’s the just the tip of the iceberg, as I’ve shown you recently, I can also create my own custom design projects now as well … but the organizing nerd in me still gets really excited about choosing my own fonts and adding borders to create any kind of label I want.
Below, I’ll walk you through the simple process of designing a custom door label using Cricut Design Space software and my Cricut Explore Air.
Start by opening the Cricut Design Space software, and creating a new project.
CREATE THE BORDER FIRST
Since I knew the total size that I wanted the label to be {based on the width and height of the glass panels on my closet door}, I decided to start with the border first, and then add text inside to fit.
Click “Insert Shape” and choose Square.
To change it from a square to a rectangle, click the “lock” icon in the bottom left corner, which unlocks the proportions.

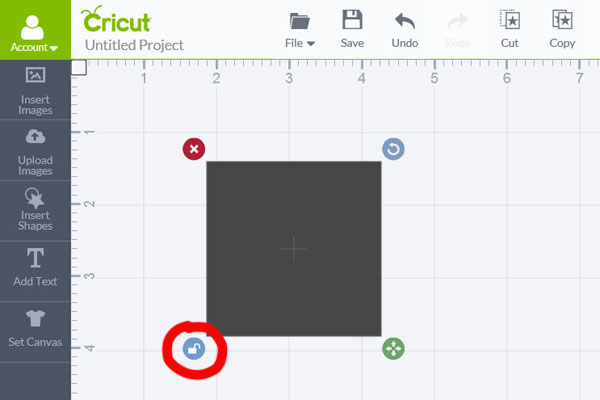
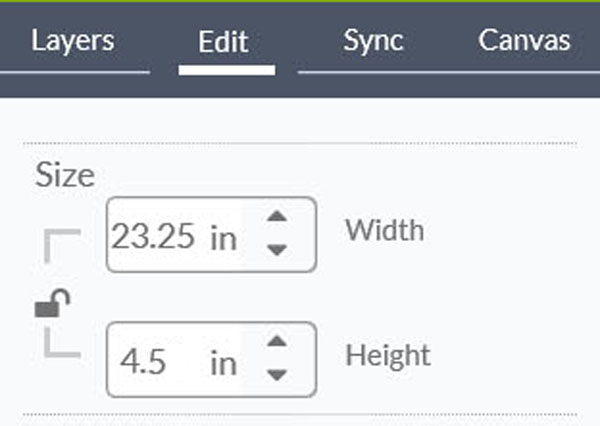
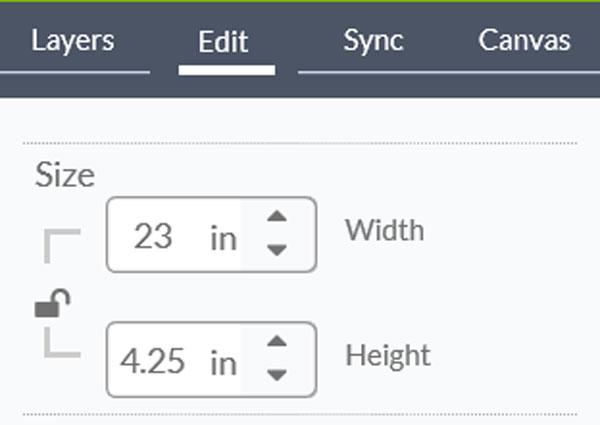
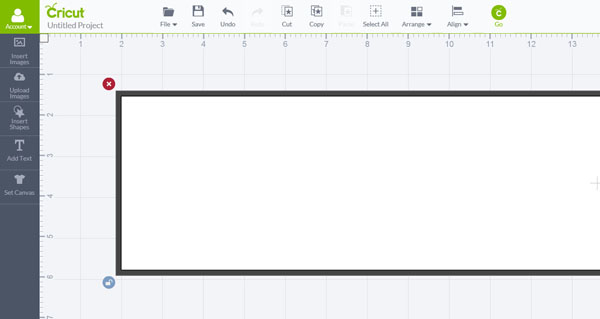
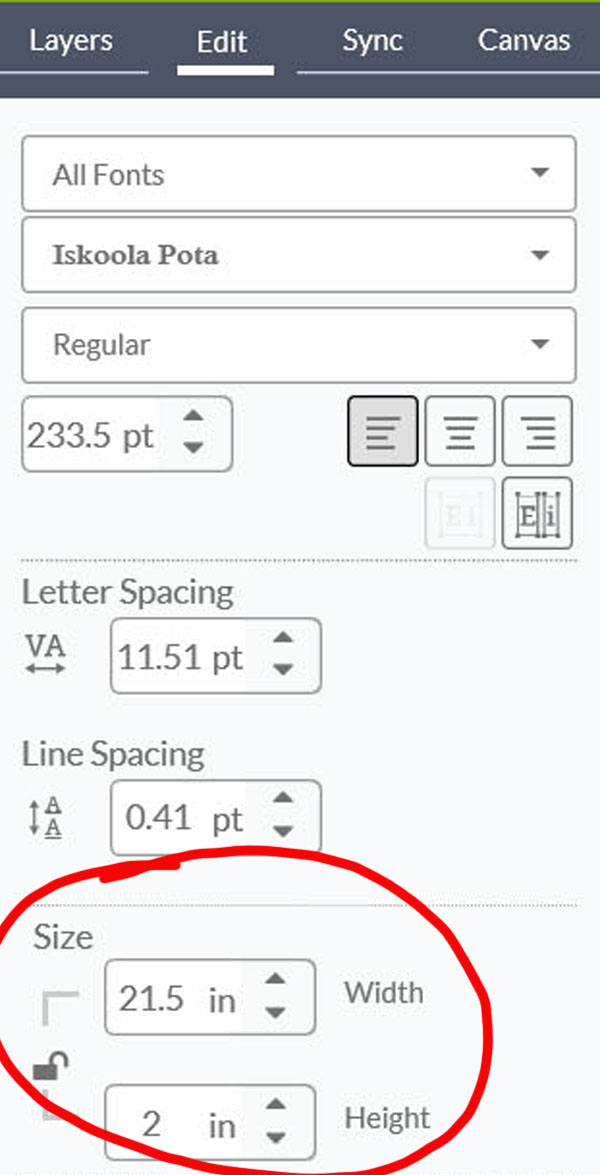
Since I knew exactly the size I wanted, I used the Edit tab on the far right of the screen to set the exact dimensions.

I then followed the steps above to create a second rectangle which I made 1/4″ smaller in eahc direction.

I then changed the color of the second rectangle to white, to make the two easy to tell apart.

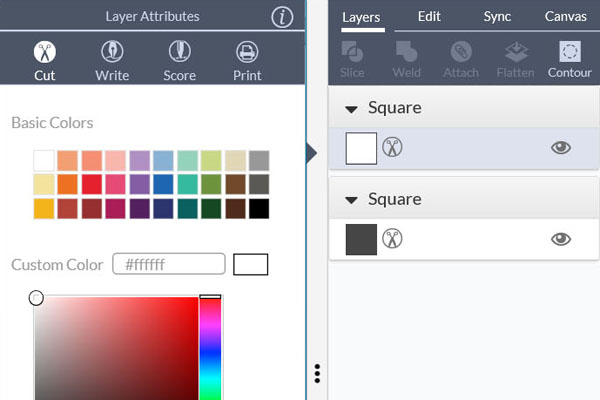
I dragged the smaller, white rectangle on top of the original, larger black rectangle.

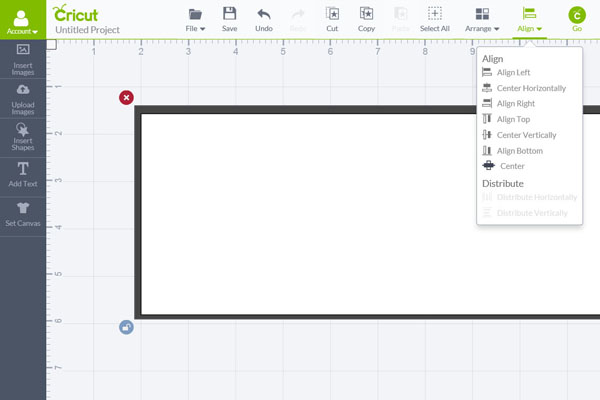
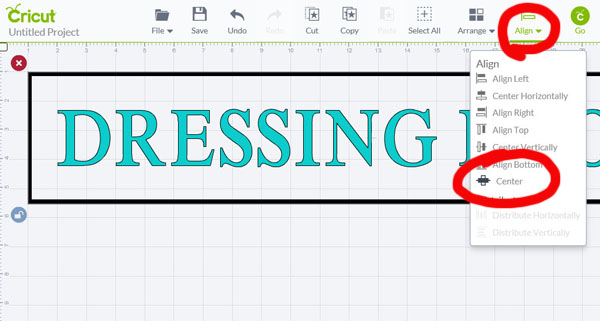
I selected “Center” from the “Align” menu.

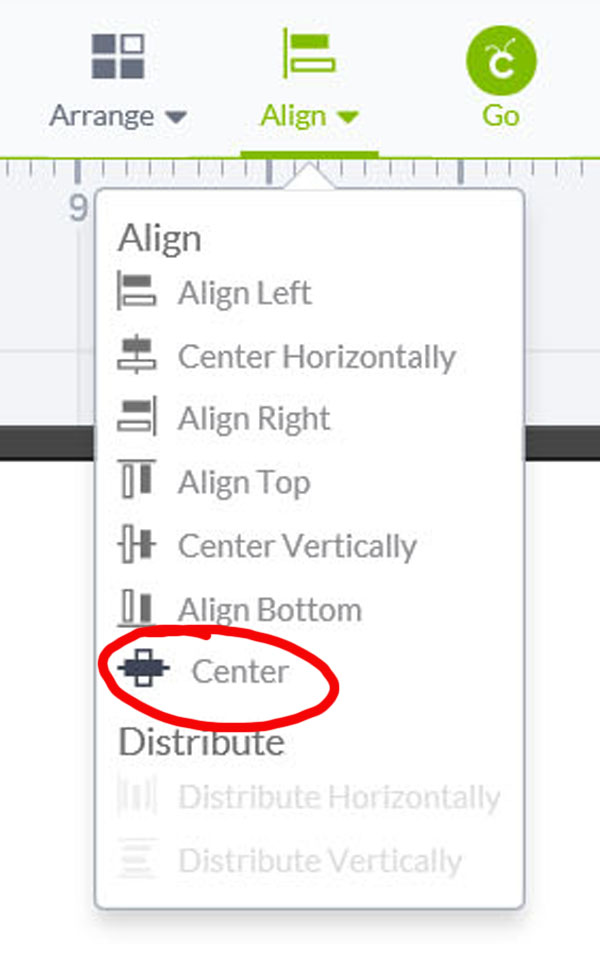
This perfectly centered the white rectangle on top of the black, creating an even border all the way around.

Next, I clicked on the “Slice” tool on the Layers tab.

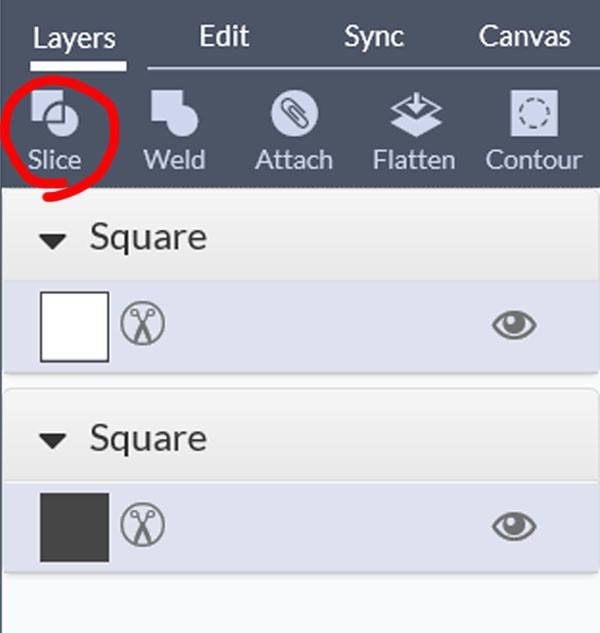
This had the effect of separating the black board showing around the white rectangle from the remainder of the black rectangle, allowing me to drag them apart.

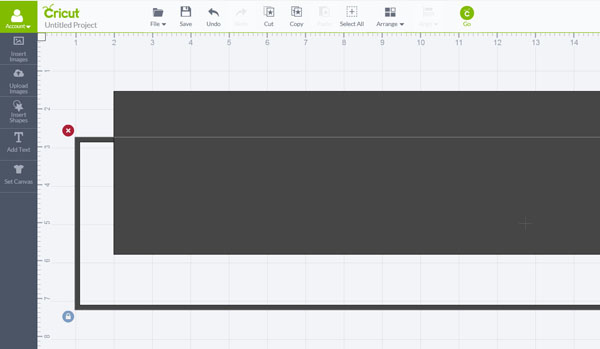
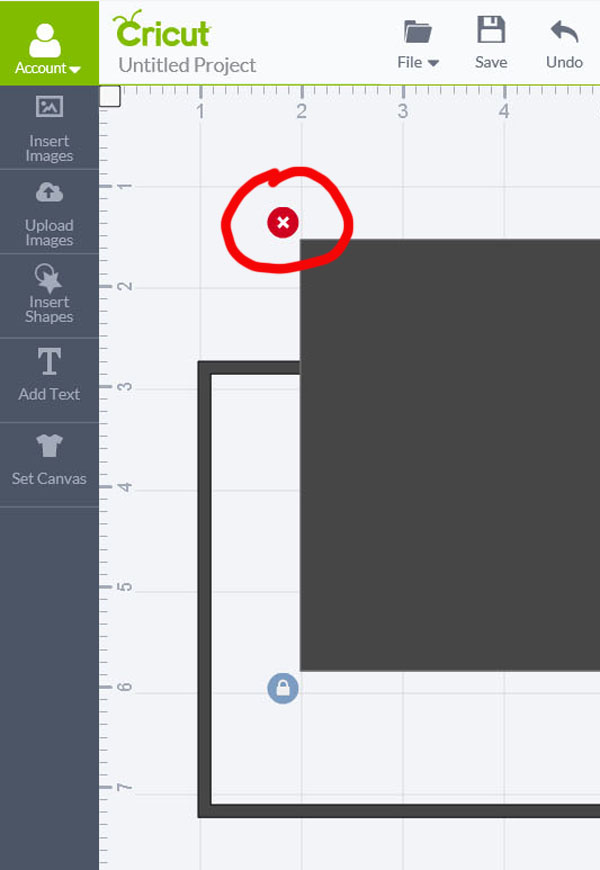
I used the red X in the top left corner to delete the center of the black rectangle, leaving just the border that I wanted.

ADD THE TEXT

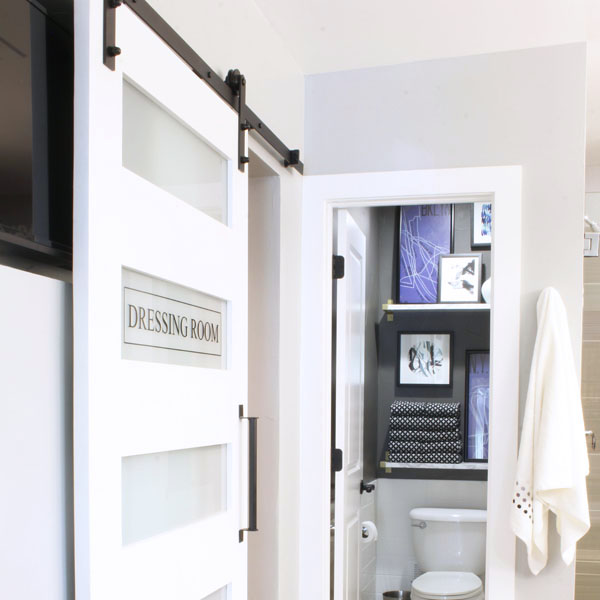
Now I was ready to add the text inside the border. I began by clicking “Add Text” on the left menu bar, and then typed in “Dressing Room.”

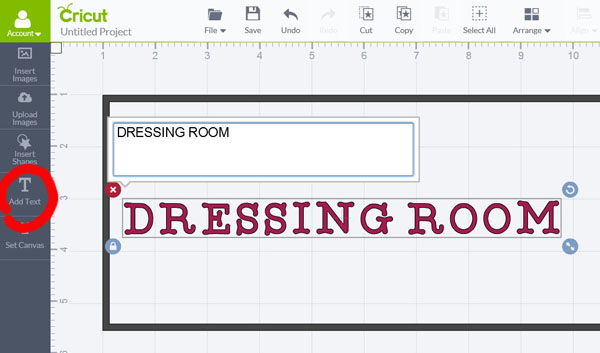
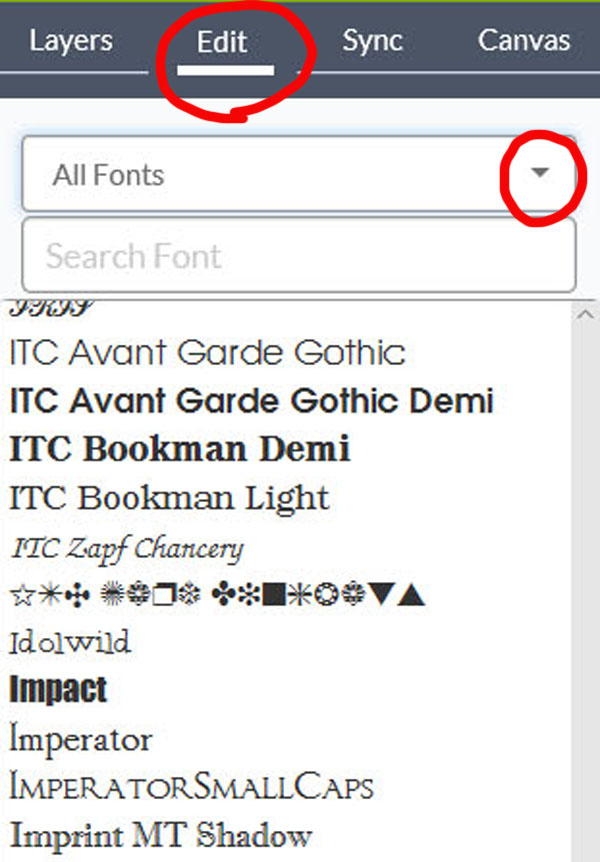
I wanted to use a different font than the default on, so I click on the “Edit” tab on the far right side of the screen, and then clicked on the Font drop down menu. I scrolled down and tried out a few fonts until I found one that I liked.

Once I’d picked a font, I adjusted the size several times until I liked the way the text fit inside the border.

I then used the “Align > Center” tool once again to center the text perfectly inside of the border.

Now I was ready to cut this custom door label. I clicked on the “GO” button in the Cricut Design Space software, connected by computer to my Circut Explore Air, and cut the label from black vinyl.

This was my first time cutting text with a border around it, and I was surprised how easy it was to quickly design it as one cut file with everything perfectly aligned! By cutting and applying the text and border as one piece, I didn’t have to worry about getting things lined up properly when I placed them on the door.
HOW TO APPLY A CUSTOM DOOR LABEL
 
All that was left was to put the label on our closet door. After weeding away all of the black vinyl around the letters and border, I applied a piece of clear transfer tape over the label. I used a piece of painter’s tape to loosely hold the label in place while I measured to center the label within one of the frosted glass door panels.

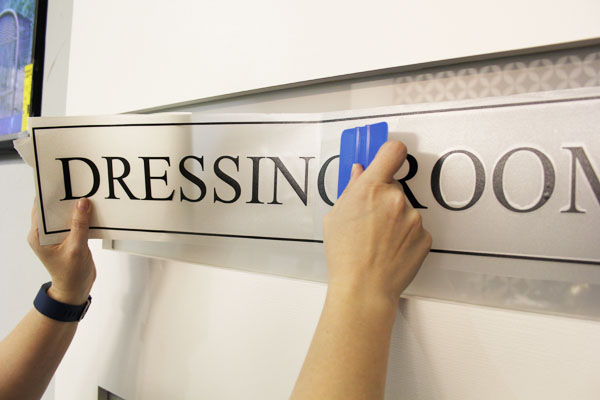
Once I had the positioning about right, I began peeling the transfer tape and label away from the backing.

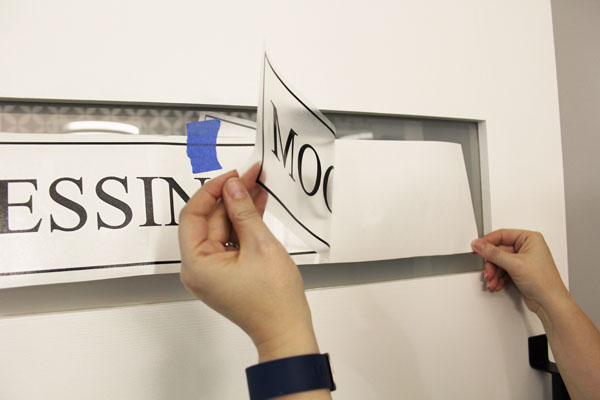
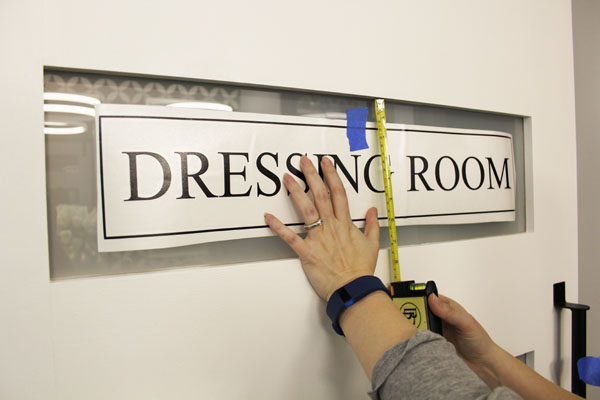
I tore away about 1/3 of the backing, being careful that the transfer tape didn’t yet stick to the door.

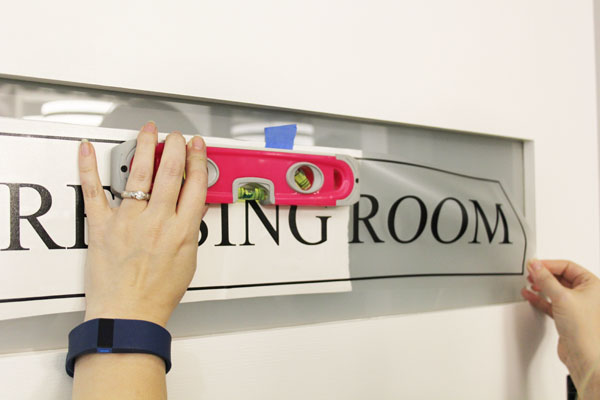
Holding the transfer tape away from the glass, I used a level to ensure that the border was still perfectly straight.

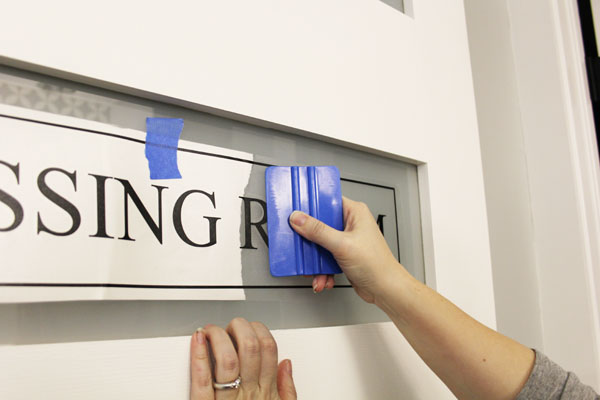
I then placed the left end of the label against the glass, and used a scraper tool to burnish (rub) that portion of the label onto the glass.

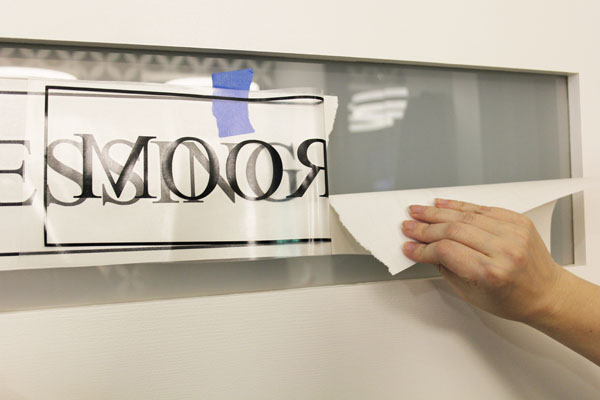
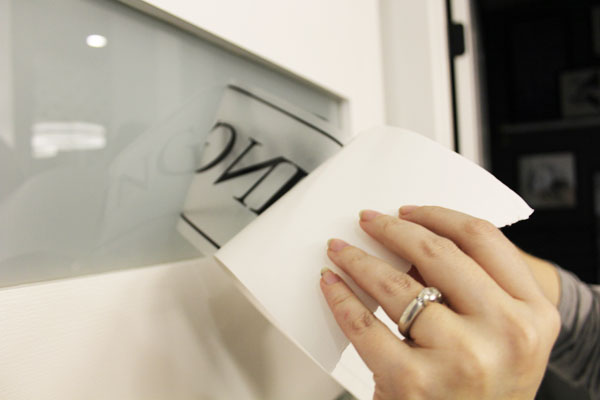
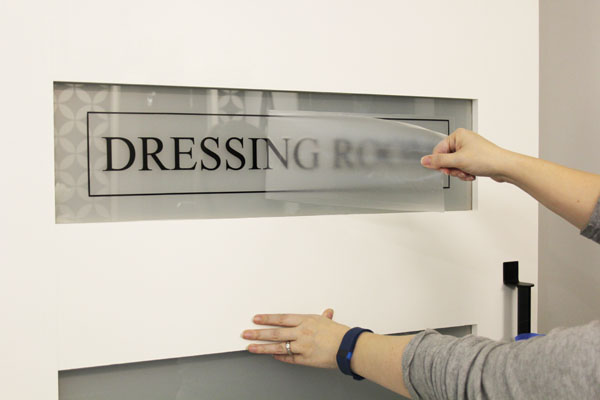
I then removed the painter’s tape and carefully began removed the remainder of the backing.

I continued using the scraper tool to smooth the rest of the label down moving from the center to the left side, removing the backing little by little.

Once the entire backing was removed, I went back over the entire label again, pressing it down firmly to ensure that none of the letters would peel off when I removed the clear transfer tape.

I began slowly removing the transfer tape. If the border or letters begin peeling up when you start to remove the tape, stop and burnish again with your scraper tool before continuing.

Continue peeling away the transfer tape, pulling at a 45 degree angle.

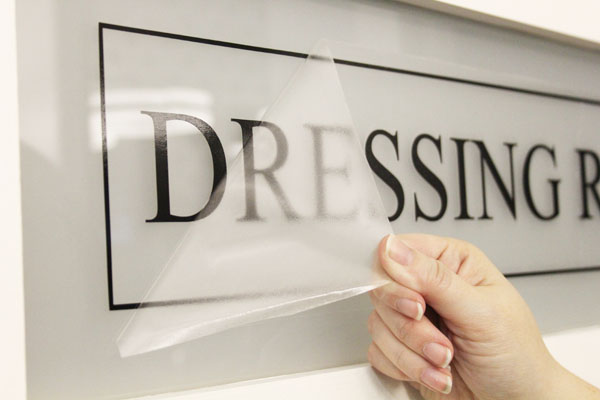
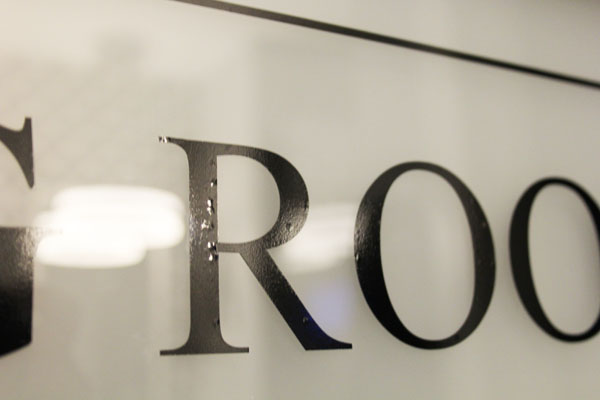
Once the transfer tape was all removed, I had a few small bubbles in the vinyl on the letter R.

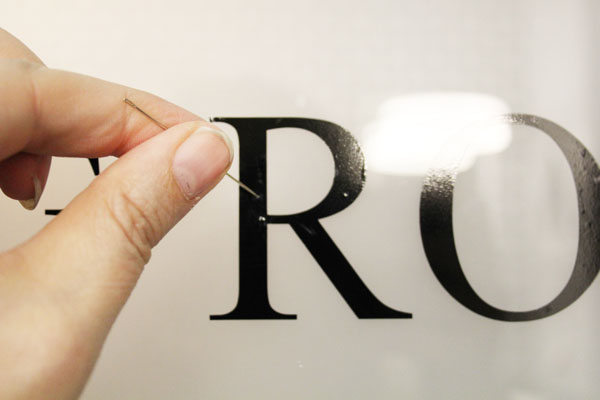
After smoothing out as many bubbles as I could using the vinyl applicator tool, I then used a thin needle to poke a tiny hole in the remaining bubbles to release the air underneath, and again smoothed down the vinyl.

I am thrilled with the way it turned out, and it still looks perfect a year later!
How to Create a Custom Door Label
I think “Dressing Room” is such a fun label for our closet, but I think it would just as fun to create a “Laundry” or a “Pantry” label for other doors around the house!
Dressing Room Closet Door Label
This closet door label was really the final detail that made the new barn door a major feature in the overall master bathroom design!
Dressing Room Closet Door Label
If you’d like to see rest of the photos of this bathroom makeover and learn how we inset the TV to allow the barn door to open in front of it, be sure to check out the full GRAPHIC GLAM BATHROOM REVEAL.

This is a sponsored conversation written by me on behalf of Cricut. As always, all opinions are my own.

 
  • Facebook
  • Twitter

05.03.17

« {one room challenge} Week 4: Getting Down to Business in the Boys’ Room
{outdoor style} 6 Favorite Lawn Games for Young Kids »

Meet Angela

Angela, the founder of Blue i Style, strongly believes that decor should be functional, organizing can be beautiful, smart DIYs help stretch your budget, and an organized and stylish home can still be practical for life with kids.

Her work has been featured in print in Better Homes & Gardens and 5280 Home magazine, and online by HGTV, the Today Show, Good Housekeeping, and more. She was also named a 2018 Stylemaker by Better Homes & Gardens.

You can reach Angela at angela@blueistyle.com

Get Email Updates!

Thanks for subscribing! Check your email a welcome message and your free organizing eBook!

Get Email Updates!

Plus a bonus free organizing eBook!

COPYRIGHT & PHOTO SHARING POLICY

All text, images, and other content that are part of this blog are the property of Blue i Style, unless otherwise noted. All material is copyright protected.

If you wish to feature one of my projects, feel free to share a single photo (no collaged images, or images with text overlays) as long as the no pin code is used to prevent my image from being pinned from your site.

All features must include credit to Blue i Style with a link back to the original content (not just to the homepage). The project steps, supply list, and/or sources may not be disclosed.

Please read my full content and photo sharing policy to ensure you comply with all guidelines. Failure to do so constitutes copyright violation.

Create At Your Own Risk

Any and all content on this website is for personal use only and created exclusively for inspiration purposes.

Creating with my suggested methods, products used, and tools is at your own risk.

Please ensure you are following proper guidelines with anything used, and you receive professional guidance when necessary.

Read my complete disclosure at: Policies & Disclosures.

Sponsorships & Affiliations

To help fund this blog, I accept some forms of advertising, sponsorships, and affiliate links.

If you buy something that I recommend, you pay the same price, but I may receive a small commission. As always, all opinions are my own.

Blue i Style is a participant in the Amazon Services LLC Associates Program, an affiliate advertising program designed to provide a means for sites to earn advertising fees by advertising and linking to amazon.com.

I use an affiliate marketing service which may automatically put links into some posts, so please assume any/all links may be affiliate links.

Read my full Disclosure Statement.

Copyright © 2025 · Dazzling Theme theme by Restored 316

  • Facebook
  • Twitter
  • Pinterest