• About
    • About Blue i Style
    • Tour Our Home
    • Free Organizing eBook
    • Blogging Resources
  • Work With Me
    • Interior Decor & Organizing Services
    • Partnerships & Collaborations
    • Blogging Resources
  • Features & Press
  • Policies & Disclosures
  • Contact

Blue i Style

Creating an Organized & Pretty, Happy Home

  • Decor
    • Tour Our Home
    • Room Makeovers & Design Plans
    • Decorating Tips & Tutorials
    • Outdoor Decor
    • One Room Challenge
  • Organizing and Cleaning
    • Organizing Tips & Tutorials
    • Organizing By Room
    • Organizing on the Go
    • Cleaning
  • DIY
    • DIY Tips & Tutorials
    • Smart Home & Safety
    • Paint Tips & Projects
    • Crafts
    • Cricut Projects
  • Kids
    • Decor & DIY for Kids
    • Organizing Kids
    • Life With Kids
  • Five Minute Projects
  • Holidays & Entertaining
    • Seasonal & Holiday Decor
    • Entertaining
    • DIY Gifts & Gift Guides
    • Facebook
    • Instagram
    • Pinterest
    • Twitter
    • YouTube

Decorating Tips & Tutorials· DIY Tips & Tutorials

Easy Bookshelf Style Upgrade

  • Facebook
  • Twitter
About a year ago, I added a bookshelf to our second floor hallway, but I’ve never really loved it. It was budget friendly, and it’s perfectly functional, but it’s not super stylish. I have big plans to transform this bookshelf though with some simple changes, and I’ll be sharing each step. Today – in part one of the makeover – I’ve added a vinyl detail down the side of the bookshelf, and I’m excited to show you how easy it is to do!

Thank you to Cricut for sponsoring this post, and thank you for supporting the brands that make this blog possible. As always all opinions are my own. This post also contains affiliate links.

Here’s a look back at how our second floor hall looked about a year ago… lots of beige and lots of doors. The piece of art at the left of the photo hung at the bottom of the stairs leading up to our master bedroom on the third floor. 
I had always wanted to replace that piece of art with a shallow bookshelf to make better use of the space, but all the bookshelves I found were too wide or too expensive. Finally I found a simple black bookshelf that was right on budget at less than $150.

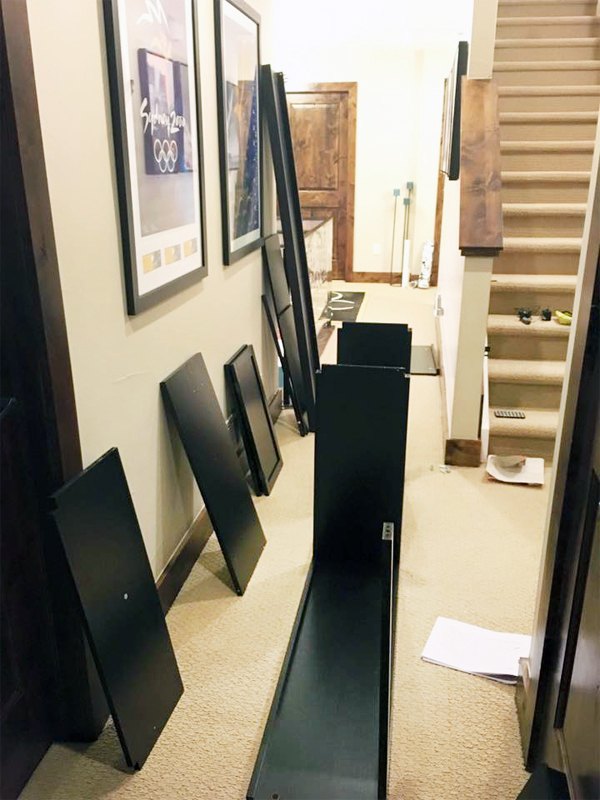
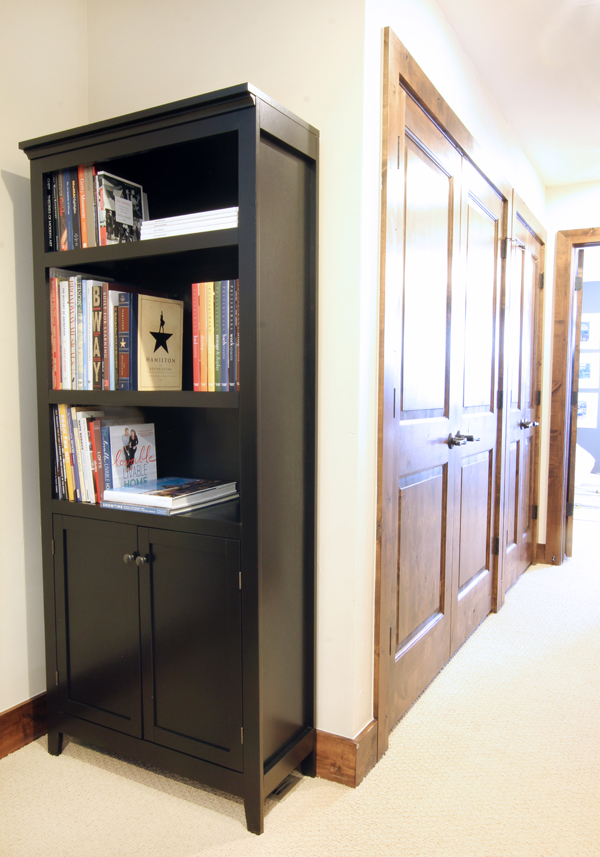
Once I decide on something, I tend to have a one track mind. So we picked up the bookshelf after dinner one night and spent all night assembling it after the kids went to bed.

Once we had it put together and placed at the bottom of the stairs, I stepped back to see how it looked from further down the hall. I loved how it fit the space, but it kind of looked like a black hole.
Filling the shelf with books helped a bit, but I knew this bookshelf had a lot more potential, so I started making plans:
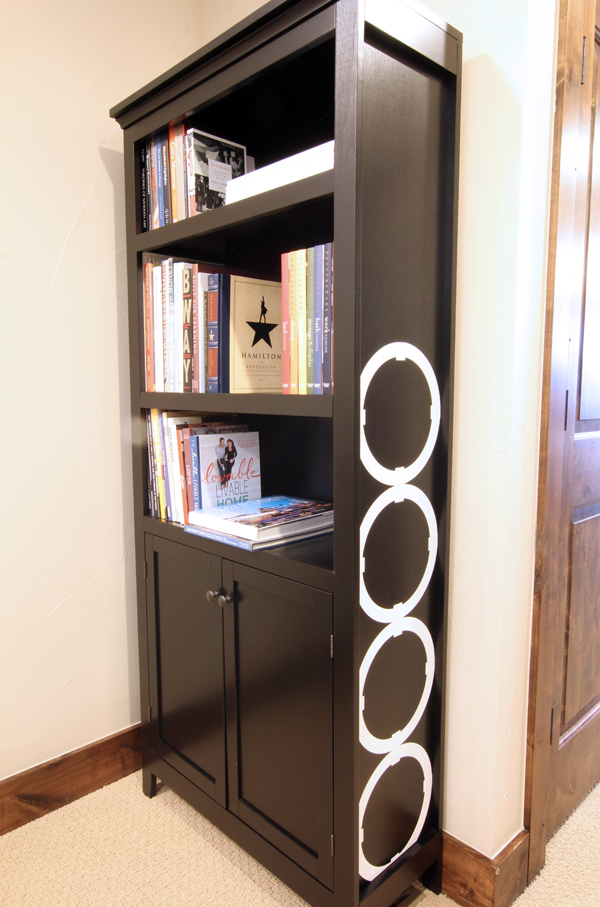
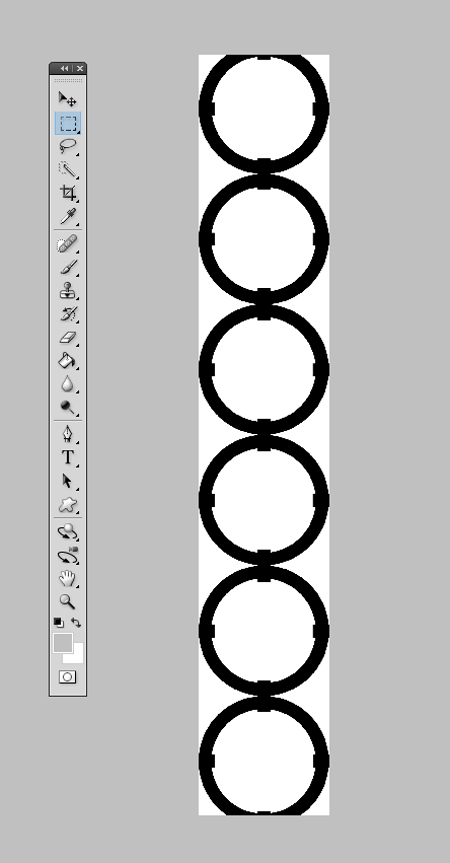
  1. Add interlocking circle detail down the side of the bookshelf for added style
  2. Line the back of the bookshelf with fabric to brighten it up
  3. Swap out the handles on the bottom doors
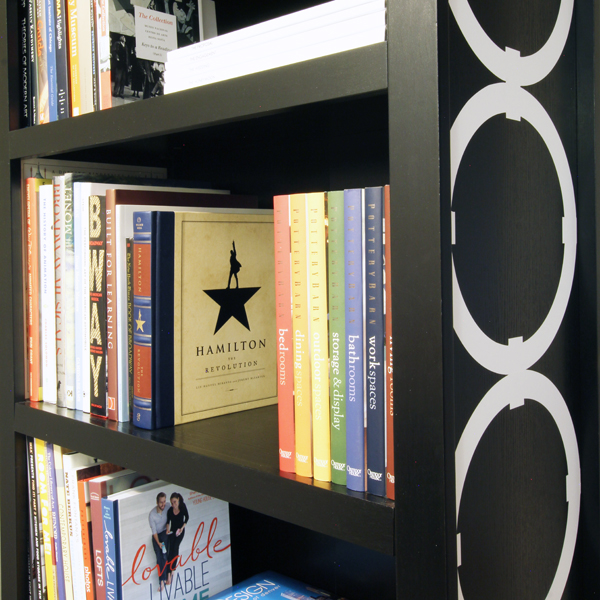
  4. Style the shelves
The first item on the list – adding an interlocking circle detail to the side of the bookshelf – was inspired by my favorite black and white pillow on my living room couch. Since the railing in the second floor hall looks down onto the living room, I thought it would look nice to tie this circle pattern in upstairs as well. 
Today, I’m excited to show you just how easy it was to recreate this pattern using my Cricut Explore Air to cut the interlocking circles from white adhesive vinyl and apply it to the bookshelf. 
At the end of this post, I’ll walk you through all the steps to design and cut this vinyl pattern using the Cricut Explore Air.

Cricut Interlocking Circles Vinyl Pattern
I cut a three sets of two circles from white adhesive vinyl, and applied them to the side of the bookshelf, starting at the bottom.
I place a strip of vinyl transfer tape down the center of each set of circles, which made it much easier to position the circles just right. After getting each set of circles positioned and adhered to the side of the bookshelf, I simply peeled away the strip of transfer tape.
Applying interlocking circle detail to bookshelf
Just like that, for the cost of about 60″ of white vinyl (around $12) I was able to totally change the look of this simple bookshelf! But best of all, the vinyl is not permanent and can easily be removed without damaging the wood if I tire of the circles at some point in the future.
Bookshelf Makeover with Adhesive Vinyl Cricut
This is just the first step in the makeover I’ll be giving this bookshelf over the next few weeks, but you can see what a difference it has made already!
Bookshelf Makeover Cricut Design Space
I am seriously giddy about how this giant white interlocking circles look on the side of the bookshelf. They brighten it up and add so much character and style!
Bookshelf Vinyl Circles Cricut Design Space
Keep an eye out for part two of this bookshelf makeover in the coming weeks. I plan to line the back of the bookshelf with fabric, and I’ll be testing a couple of methods to find the one that works best.
HOW TO CUT THE INTERLOCKING VINYL CIRCLES
When I first started using the Cricut Explore Air, I was nervous about whether it would be hard for me to learn to use the Cricut Design Space software for me to create my own custom projects. I’m happy to report that it has actually be very easy to learn! This was my second custom project, and my first time using the slicing tool in the software. Design Space walks you through each project step by step, so it’s very easy to learn as you go. 
Below, I’ll walk you through the whole process of designing the interlocking vinyl circles for the bookshelf and cutting them using the Cricut Design Space software and my Cricut Explore Air. 
I started by designing the circles in Photoshop, but you can use any design program. I simply drew one circle with a 10.75 inch diameter (the width of the inset on the side of my bookshelf). I then duplicated the circle six times and place them in a column. I then drew a thin rectangle overlapping the connection between each circle to create the interlocking detail. I then cropped the top and bottom circles to fit the exact height of the bookshelf inset.
Once I had the interlocking circles designed, I saved the image as a JPG, and then opened Cricut Design Space. I chose “Upload Images.”

I then browsed to the file where my circle pattern was save.
Once my file was uploaded, I was asked to select whether it is a “Simple Image,” “Moderately Complex Image,” or “Complex Image,” based on the provided descriptions.  My circle pattern was a “Simple Images.”
I also clicked to indicate that this was an image I wanted to cut only, not print then cut.
Next, since I wanted to cut only portion of the image from adhesive vinyl to be applied to my bookshelf, I used the “Select & Erase” tool to click on and remove each white area of the design. The checkerboard pattern indicates transparency, and shows the areas of of the design that I removed.
Because the total height of my circles pattern was just over 60″, I needed to crop it into three portions to cut on my 12″ x 24″ long cutting mat. To do this, I began by covering the middle two circles with a rectangle using the “draw shape–>square” tool.

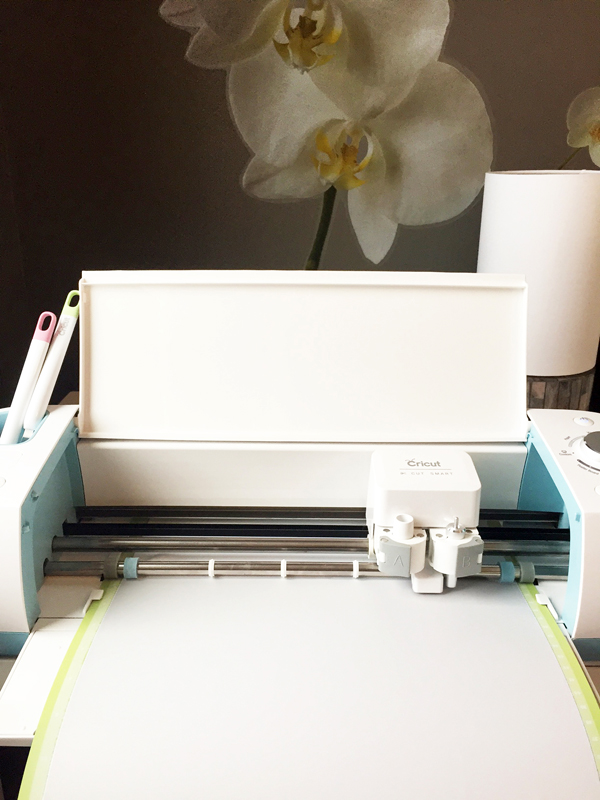
In order to change the shape from a square to a rectangle, I clicked to unlock the proportions in the bottom left corner.

This then allowed me to drag the corners to create a rectangle to cover the center two circles.

With these circles covered, I used the “select all” button at the top, and then chose the “Slice” tool on the layers menu. 
This action separated the center two circles into a separate layer that I was able to move independently.

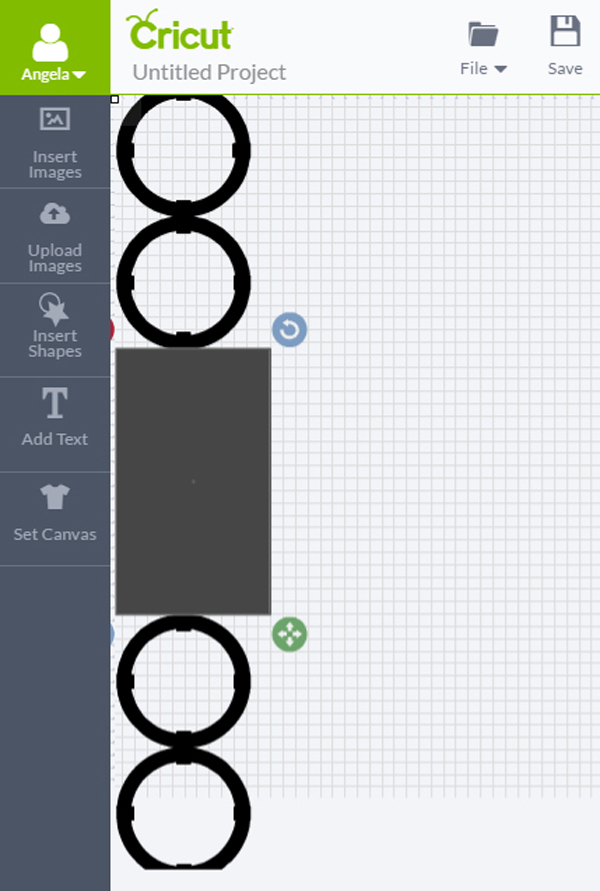
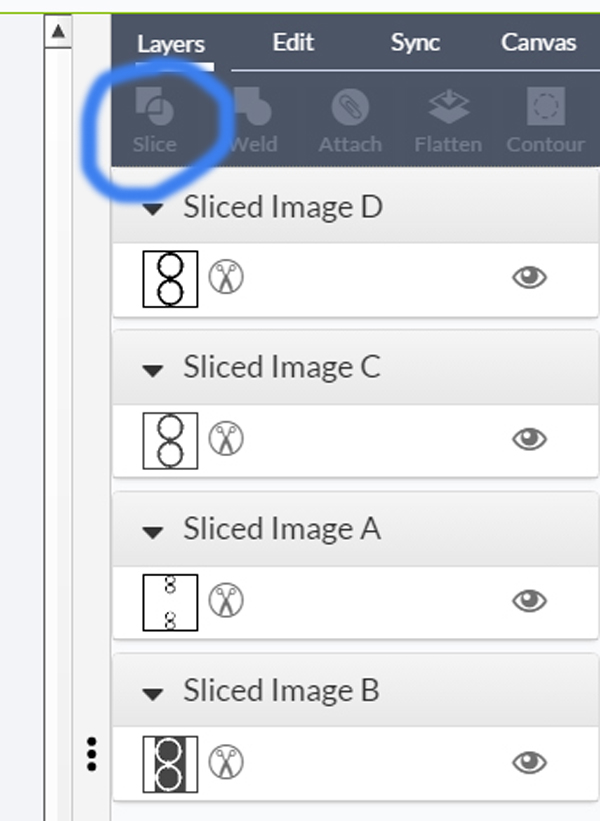
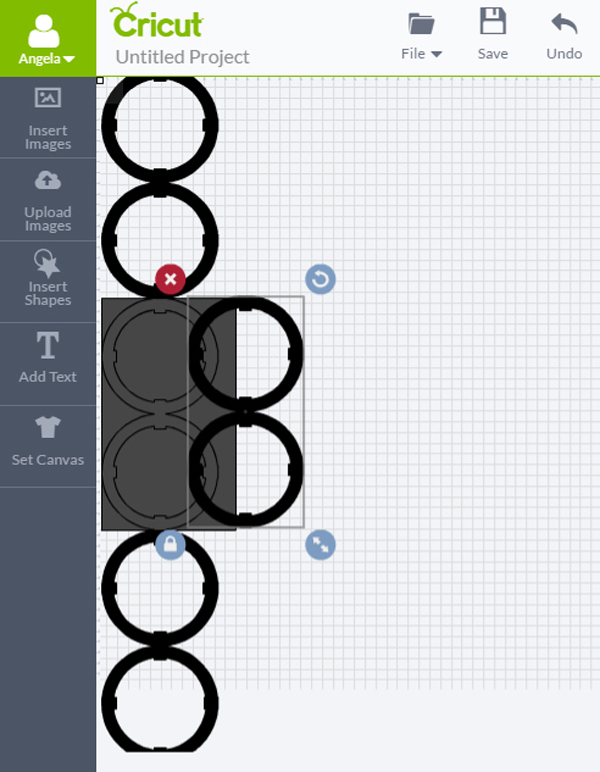
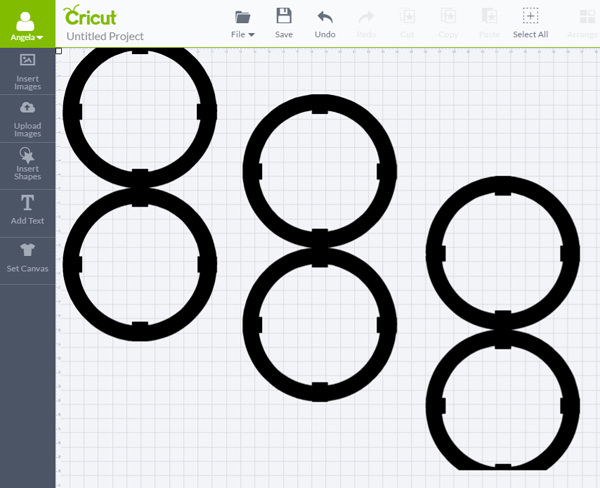
I deleted the grey rectangle, and then repeated the same steps to separate the bottom two circles into a separate layer as well. I was then left with three separate layers, each with two interconnected circles.

At this point, I was ready to cut the circles. Once I clicked the cut button, the Cricut Design Space program did the rest of the work for me, laying out the three sets of circles to be cut one at a time on my 12″ x 24″ cutting mat.
This was my first time using the slice tool to separate layers, and I loved how easy it made it for me to take this very large image and break it into sections sized appropriate for cutting on my Cricut.

This is a sponsored conversation written by me on behalf of Cricut. The opinions and text are all mine. Comments submitted may be displayed on other websites owned by the sponsoring brand.

var ts=document.getElementById(‘ti-pixel-tracker’); var axel = Math.random() + “”; var num = axel * 1000000000000000000; var ti=document.createElement(“img”); ti.style.display=”none”; ti.src=”https://tracking.tapinfluence.com/trk/YzWEs/viQRz/p.png?p=ZOPCX” + String.fromCharCode(38) + “i=tThdX” + String.fromCharCode(38) + “ord=”+ num + String.fromCharCode(38) + “s=” + encodeURIComponent(document.referrer); ts.parentNode.replaceChild(ti,ts); JSON.stringify({“program_id”:”e616f1e8-034b-11e7-b5bb-22000a7d00a4″,”post_id”:”719654f6-0497-11e7-9253-22000a7d00a4″});

  • Facebook
  • Twitter

04.04.17

« {diy with style} Curb Appeal Dreaming…
{one room challenge} Week 1: Brotherly Love »

Meet Angela

Angela, the founder of Blue i Style, strongly believes that decor should be functional, organizing can be beautiful, smart DIYs help stretch your budget, and an organized and stylish home can still be practical for life with kids.

Her work has been featured in print in Better Homes & Gardens and 5280 Home magazine, and online by HGTV, the Today Show, Good Housekeeping, and more. She was also named a 2018 Stylemaker by Better Homes & Gardens.

You can reach Angela at angela@blueistyle.com

Get Email Updates!

Thanks for subscribing! Check your email a welcome message and your free organizing eBook!

Get Email Updates!

Plus a bonus free organizing eBook!

COPYRIGHT & PHOTO SHARING POLICY

All text, images, and other content that are part of this blog are the property of Blue i Style, unless otherwise noted. All material is copyright protected.

If you wish to feature one of my projects, feel free to share a single photo (no collaged images, or images with text overlays) as long as the no pin code is used to prevent my image from being pinned from your site.

All features must include credit to Blue i Style with a link back to the original content (not just to the homepage). The project steps, supply list, and/or sources may not be disclosed.

Please read my full content and photo sharing policy to ensure you comply with all guidelines. Failure to do so constitutes copyright violation.

Create At Your Own Risk

Any and all content on this website is for personal use only and created exclusively for inspiration purposes.

Creating with my suggested methods, products used, and tools is at your own risk.

Please ensure you are following proper guidelines with anything used, and you receive professional guidance when necessary.

Read my complete disclosure at: Policies & Disclosures.

Sponsorships & Affiliations

To help fund this blog, I accept some forms of advertising, sponsorships, and affiliate links.

If you buy something that I recommend, you pay the same price, but I may receive a small commission. As always, all opinions are my own.

Blue i Style is a participant in the Amazon Services LLC Associates Program, an affiliate advertising program designed to provide a means for sites to earn advertising fees by advertising and linking to amazon.com.

I use an affiliate marketing service which may automatically put links into some posts, so please assume any/all links may be affiliate links.

Read my full Disclosure Statement.

Copyright © 2025 · Dazzling Theme theme by Restored 316

  • Facebook
  • Twitter
  • Pinterest