This post contains affiliate links. If you buy something that I recommend, you pay the same price, but I may receive a small commission.
Baby Gates for Difficult Areas

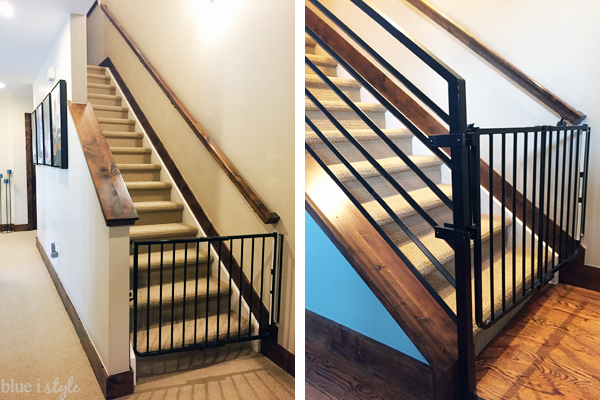
Most safety gates can’t attach properly at an angle – but due to the height of our baseboards and the positioning of our hand rails, an angle was a must. I finally found super sturdy option that gave us the flexibility we needed and we installed these baby gates on all three sets of stairs in our house.
Thanks to these gate clamps {which we painted black} we were even able to attach a gate to our black banister without drilling into our metal railings. Best of all, the latches on these gates are secure enough that the kids have never been able to crack them!
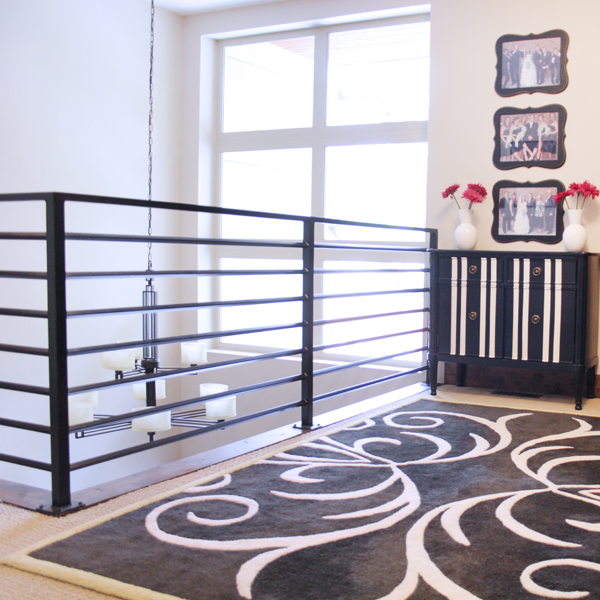
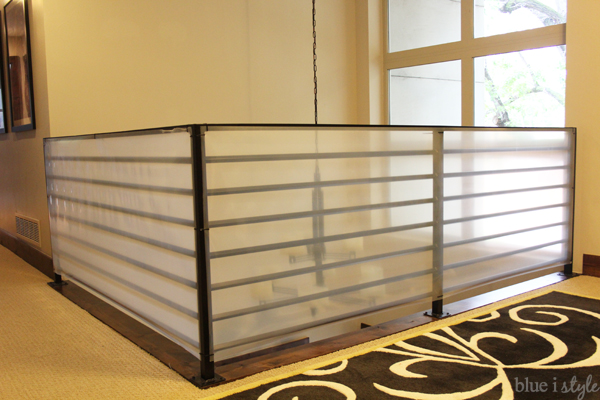
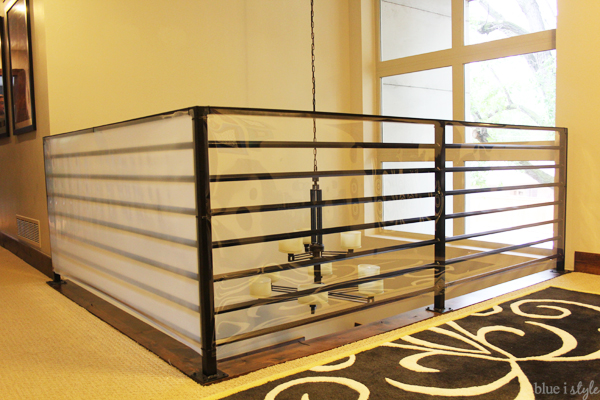
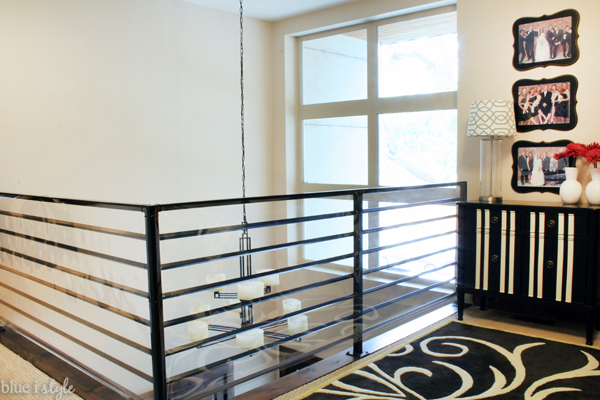
Child Proofing Railings: Works for Horizontal Railings, Cable Railings, and Unsafe Railing Spacing

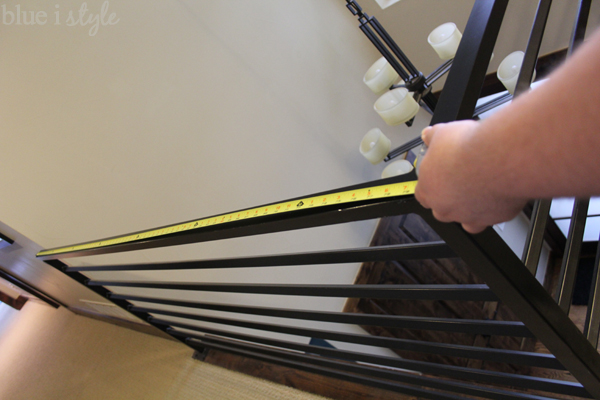

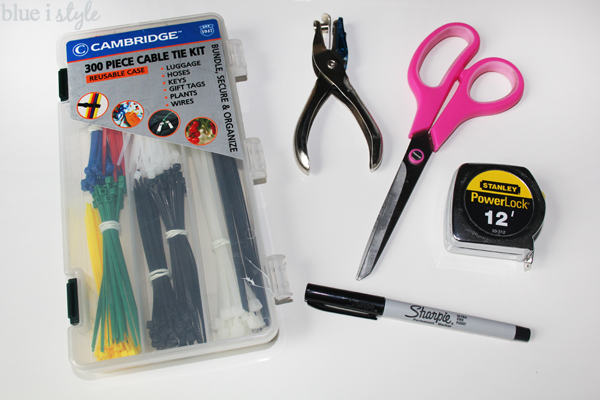
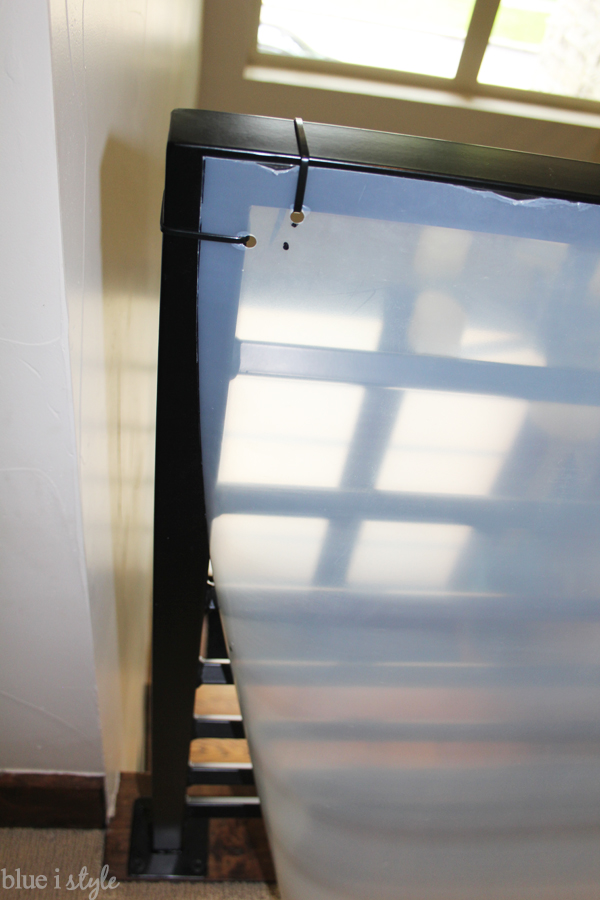
Simple Tools to Install Banister Guard
- Banister Shield
- 11″ Black Zip Ties (or other color to match your railings)
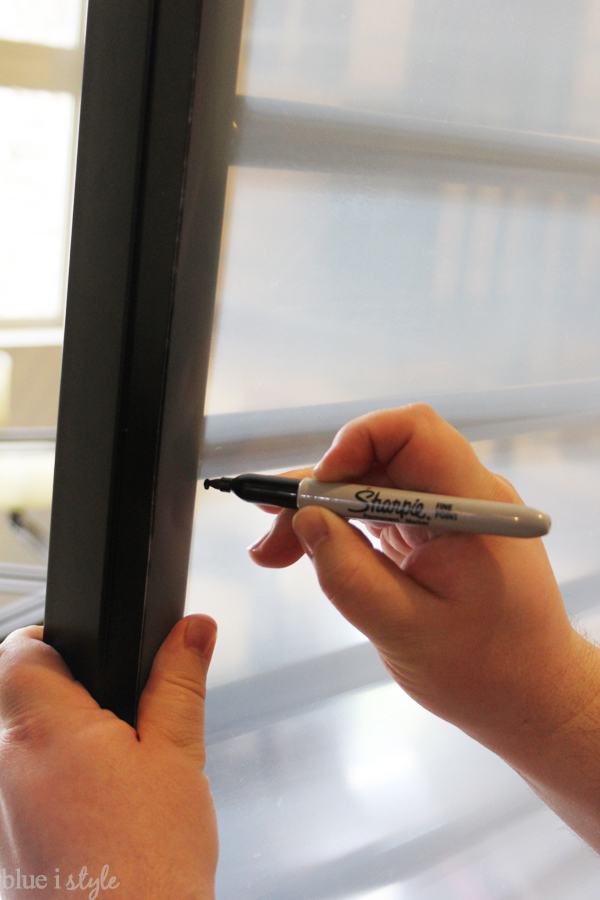
- Sharpie
- Measuring Tape
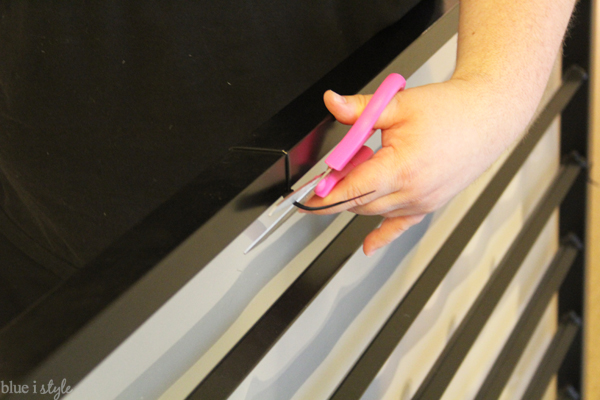
- Scissors
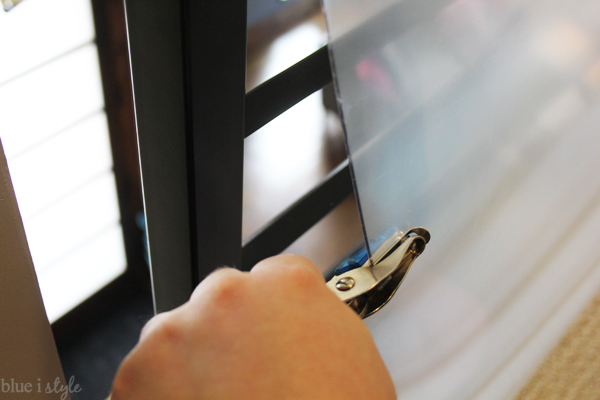
- Hole Punch (use your own, not the flimsy one that comes with it)
- Yard Stick
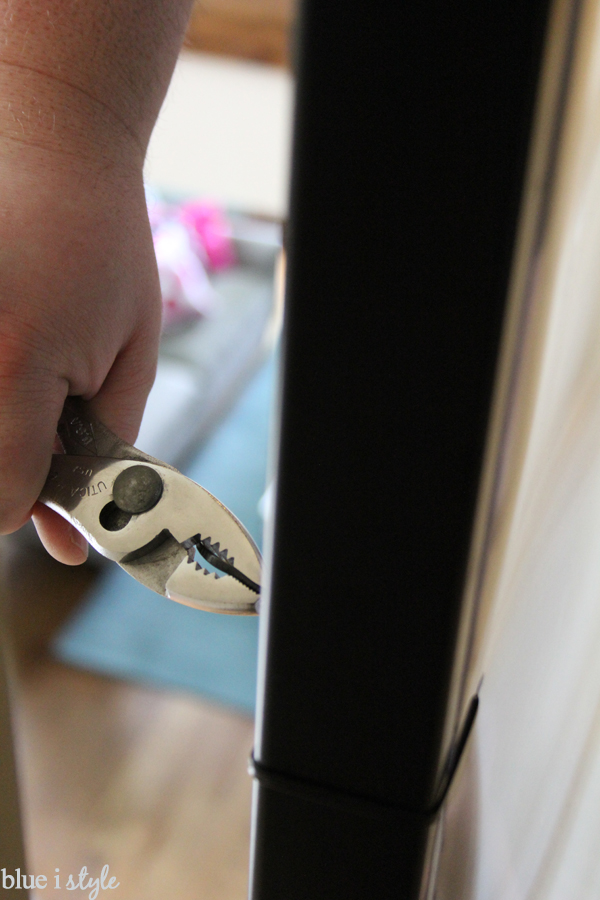
- Pliers
How to Install Banister Shield

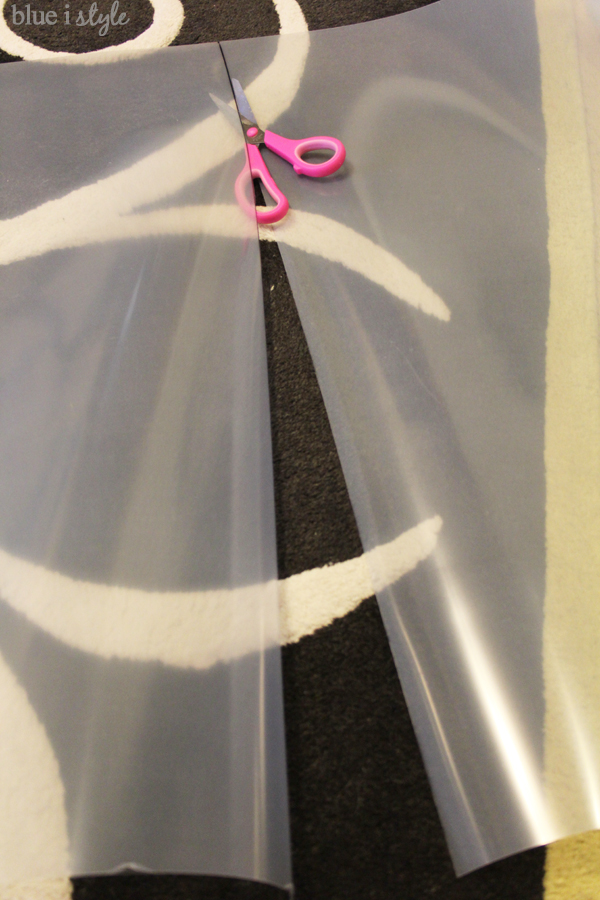
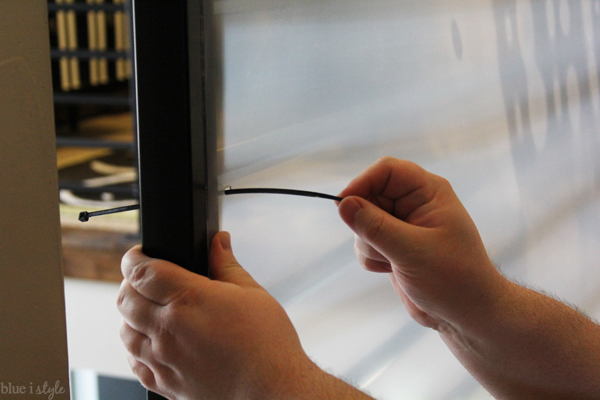
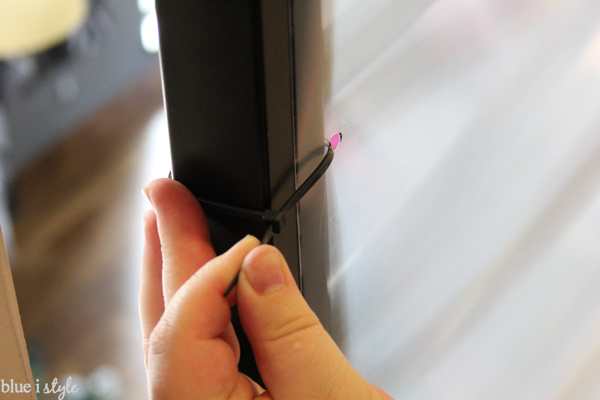
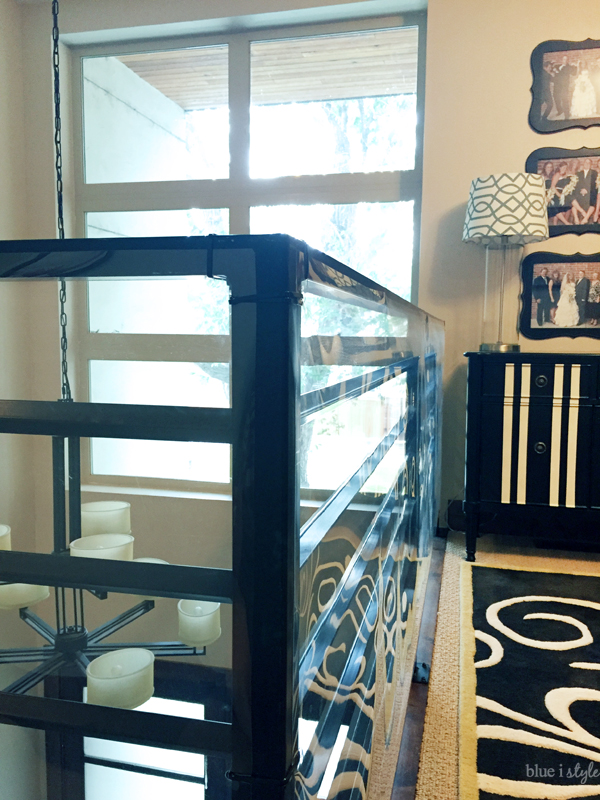
Once the zip tie is secure, use your scissors to trim of the excess. I recommend positioning the trimmed end on the outside of the railing to ensure that there are no potentially sharp spots in reach of little fingers.


Update Five Years Later:
December 2019: We’ve had this banister shield in place for five and a half years. Our boys are now six and eight, and I trust them not to climb the railings, but since we still have friends with younger kids visit often. The railing shield still looks as good as new – meaning it’s still nearly invisible – so I don’t plan to take these railing guards down anytime soon.
Frequently Asked Questions About Cardinal Gates Banister Shield:
I get emails and questions about this banister shield fairly often, so I thought it would be helpful to address some of the FAQs here:
- Is this plastic flexible enough for curved railings? Yes! This product comes in a roll and is very flexible. It is much thinner than plexiglass, but is still plenty strong to stand up to kids and pets.
- How durable is it? Does the plastic bend or tear easily? It has been very durable for our family. Our boys are not overly rough, but after five and a half years, including adding a dog to the family two years ago, this plastic shield has shown no signs of wear or damage. We’ve had no tearing at all, and no cracks or bends in the plastic, despite the kids liking to “drum” on it frequently.
- Does the plastic scratch easily or show finger prints? After more than five years with two boys and a dog, our banister shield does not have any scratches. I assumed it would show a lot of finger prints (and nose prints), but finger prints are much less noticeable here than on our stainless steel fridge. We clean it once every couple of weeks with a soft cleaning cloth and that’s really all it needs.
- Does the banister shield make a lot of noise? If our boys, or our dog, hit the banister shield directly, it does make noise, but it’s nothing that has been a problem for us. I’ve read Amazon reviews that say it makes noise if you even brush lightly against it, but we’ve not had that experience at all. We made sure the plastic was very taut when we installed it, and I think that has probably prevented any excess noise. If it were installed more loosely, I suspect that might lead to more noise issues because the plastic would move much more easily.