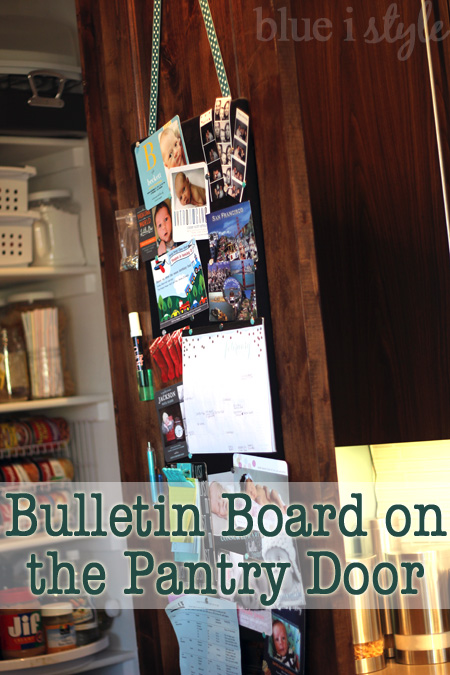
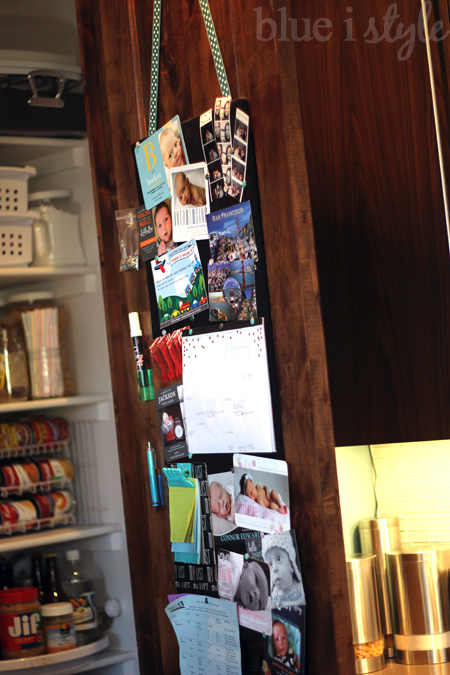
For years I’ve been in need of a bulletin board – a place to keep important papers, cards and invitations, and all those adorable baby announcements. I knew I wanted this bulletin board to be in my kitchen – somewhere that I would see it daily, and I finally found the perfect spot – the back of my pantry door!
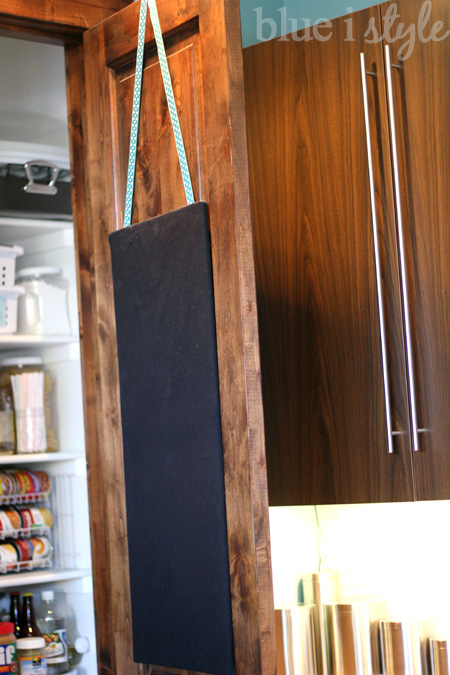
I love to use the inside of doors to maximize my storage space, and I considered a lot of other ways that I could utilize the pantry door to add more food storage. However, because of the placement of the pantry door, it doesn’t even quite open a full 90 degrees (the door stopper prevents it from banging into the kitchen cabinets). This meant that putting any kind of shelves or hanging baskets on the back of the pantry door – even very shallow ones like these – would limit my access to the pantry, making the opening even narrower. That made the inside of the pantry door the perfect place for a bulletin board! The bulletin board wouldn’t sit out far enough to hinder my ability to reach into the pantry, but it allows me to take full advantage of what would otherwise be unused space.
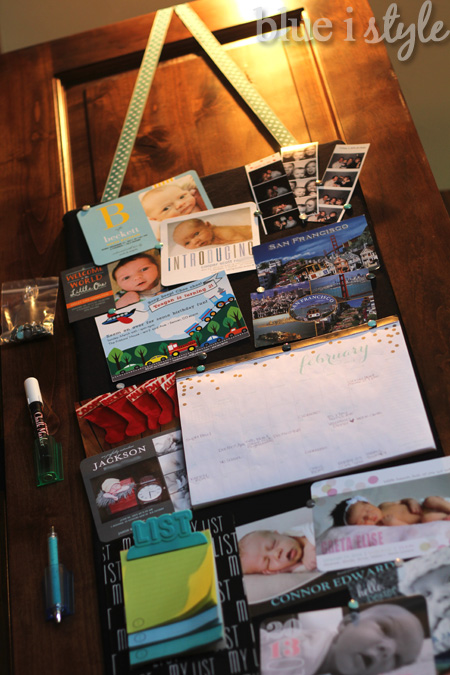
I wanted the bulletin board to have a finished/tailored appearance, so my mom and I purchased an unframed piece of corkboard at Hobby Lobby and covered it with fabric. I love patterned fabrics, but ended up deciding to cover the cork board with solid black fabric so as to not compete with all of the pretty cards and photos that I knew would be displayed here.
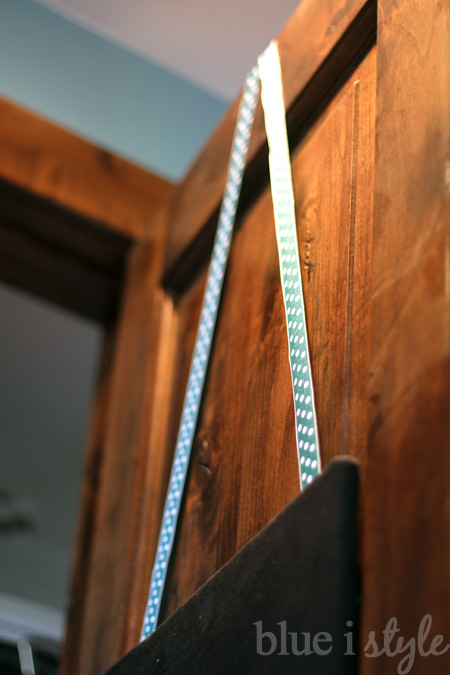
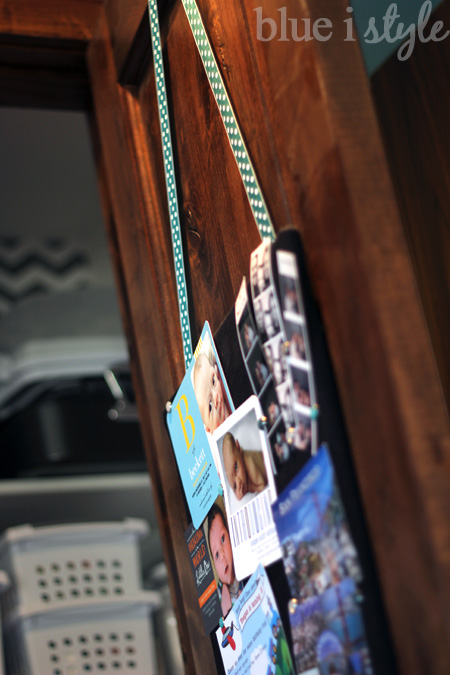
I didn’t take any photos of the steps involved in covering or hanging the bulletin board {bad blogger!}, but it was a very simply process. We cut the fabric about six inches larger than the cork board in each direction, and then wrapped it tightly around the cork and secured to the back with hot glue. I didn’t want to put any nail holes in our solid, alder wood door, so my original plan was to simply mount the bulletin board to the door with 3M Command Strips. But with the weight of the bulletin board, the Command Strips just didn’t stick well enough to fabric and cork board and it kept falling down. The solution was easy, and actually made the entire thing much prettier. I stapled some cute teal and white polka dot ribbon to the back of the bulletin board, and then used a flat head thumbtack to tack the ribbon to the top of the pantry door {the tack only makes a tiny hole, and because the hole is in on the top edge of the door, it will never be seen}.
I didn’t want the bulletin board to swing around every time the door was opened and closed {especially since Beckett is a typical two year old who is still learning how to close doors gently}, so I again turned to 3M Command Strips to secure the top and bottom of the bulletin board to the door. This time the Command Strips worked great because they were no longer having to support all of the weight.
I found an adorable package of black, white and teal decorative thumb tacks at Target – a perfect compliment to the polka dotted ribbon!
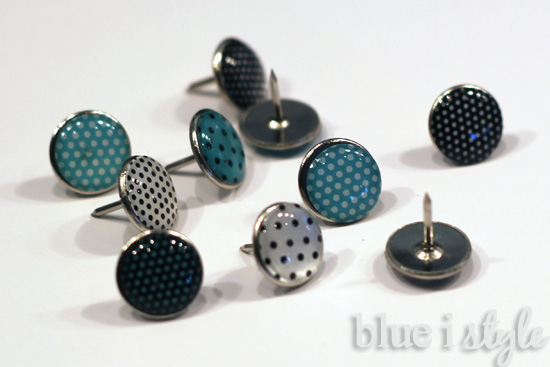
I love the travel themed reference calendar that I made for my kitchen counter (which can be downloaded and printed here), but I also wanted to add a calendar to the bulletin board where we could jot down important dates and appointments. I found this awesome Sugar Paper calendar on clearance for just a few dollars at Target (since it was after the first of the year). The calendar had three holes along the top, making it quick and easy to hang on the bulletin board with my cute thumb tacks.

I also wanted to provide a space on the bulletin board to keep a running grocery list so that either my husband or I can quickly jot down items that are needed as we use up items from the pantry or fridge. I love this mini clipboard that I picked up in the dollar section at Target, which works perfectly when paired with the notepad that I also found in the Target dollar section {oh how I love the Dollar Spot}.
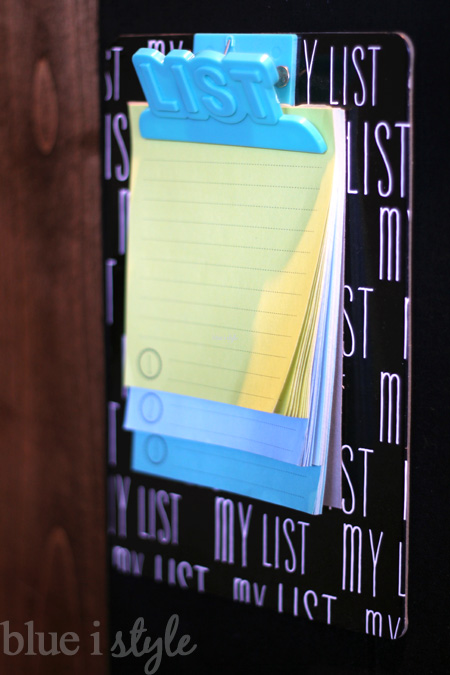
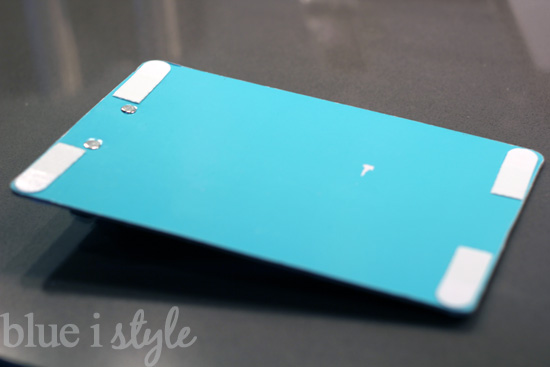
I placed four small 3M Command Strips on the back of the clipboard, and stuck it on to the bulletin board. I wasn’t sure the Command Strips would stick well enough to the fabric, but it’s been weeks, and they are still holding strong.
It didn’t take long for the entire bulletin board to be filled up with birth announcements, invitations, postcards, photos and important papers.

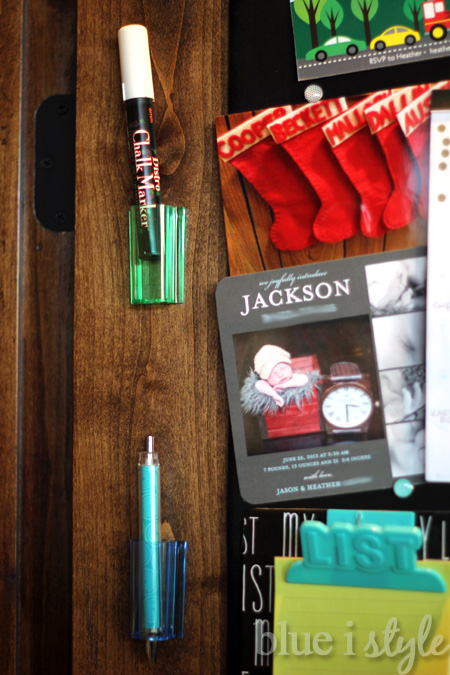
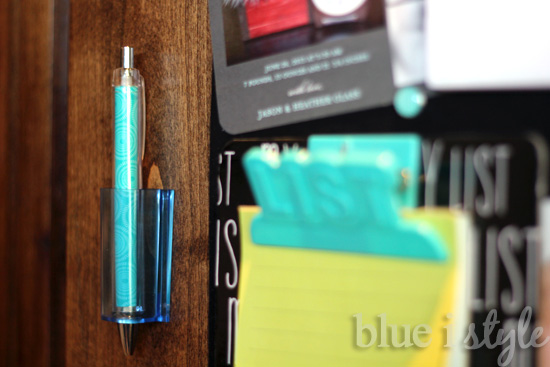
Once the bulletin board was in use, I realized how nice it would be to have a pen right there next to the calendar and the grocery list. I thought about tying string around a pen and tacking the string the bulletin board. Then I remembered these StickOnPods tooth brush holders that I had purchased but never used.
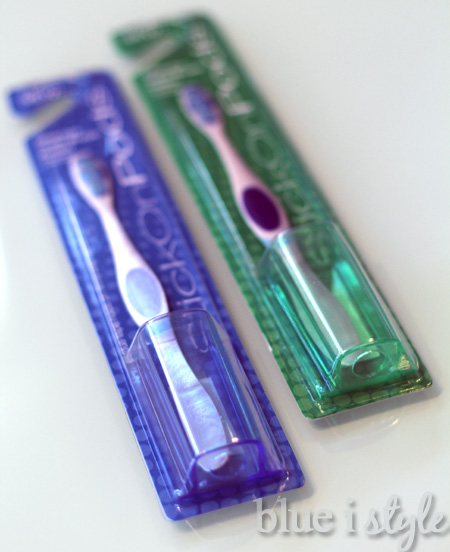
I love when I am able to find a way to repurpose items, and it turns out that these toothbrush holders also make perfect pen holders! I stuck both StickOnPods onto the pantry door along side the bulletin board. One holds a regular pen, and the other holds the chalk marker that I use for labeling canisters in my pantry.
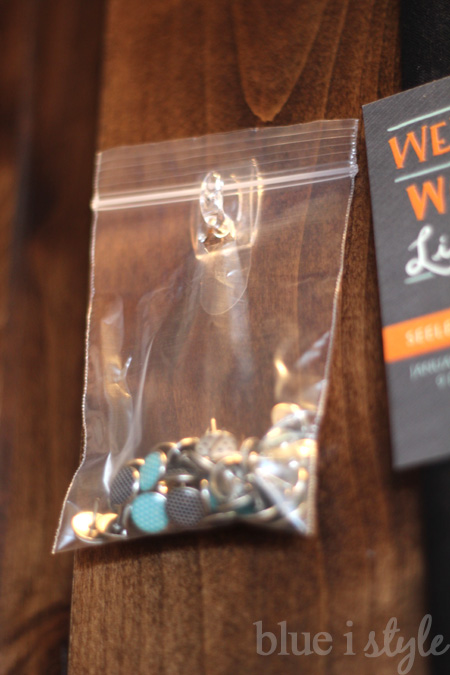
Finally, I needed a place to keep our extra thumb tacks close at hand. Punching a hole through a small Ziploc bag and hanging it from a clear Command hook was the easy answer to this challenge.
This bulletin board has been such a great addition to our kitchen, and makes perfect use of the prime real estate on the inside of our pantry door.
Visit my guest blog over at Pretty Well Organized if you’d like to see the rest of my pantry makeover!