• About
    • About Blue i Style
    • Tour Our Home
    • Free Organizing eBook
    • Blogging Resources
  • Work With Me
    • Interior Decor & Organizing Services
    • Partnerships & Collaborations
    • Blogging Resources
  • Features & Press
  • Policies & Disclosures
  • Contact

Blue i Style

Creating an Organized & Pretty, Happy Home

  • Decor
    • Tour Our Home
    • Room Makeovers & Design Plans
    • Decorating Tips & Tutorials
    • Outdoor Decor
    • One Room Challenge
  • Organizing and Cleaning
    • Organizing Tips & Tutorials
    • Organizing By Room
    • Organizing on the Go
    • Cleaning
  • DIY
    • DIY Tips & Tutorials
    • Smart Home & Safety
    • Paint Tips & Projects
    • Crafts
    • Cricut Projects
  • Kids
    • Decor & DIY for Kids
    • Organizing Kids
    • Life With Kids
  • Five Minute Projects
  • Holidays & Entertaining
    • Seasonal & Holiday Decor
    • Entertaining
    • DIY Gifts & Gift Guides
    • Facebook
    • Instagram
    • Pinterest
    • Twitter
    • YouTube

Uncategorized

{seasonal style} Painted Christmas Trees

  • Facebook
  • Twitter
I can’t believe Christmas is only five days away! I should have been wrapping presents for the last couple of days, but instead I’ve been busy finishing up my decorative Christmas tree craft project. 
Modern Painted Christmas Trees

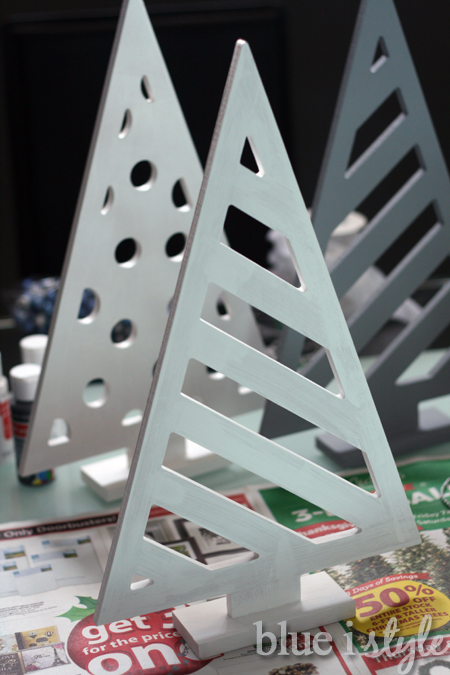
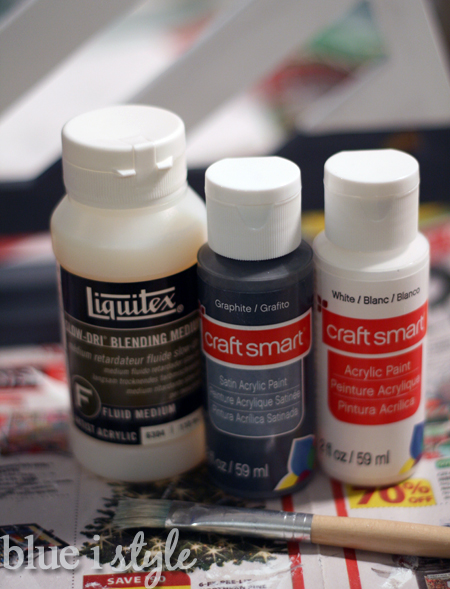
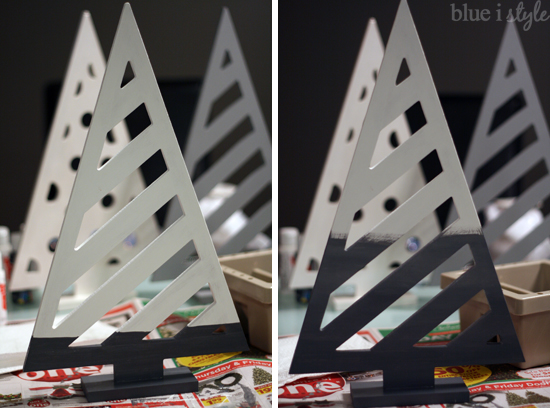
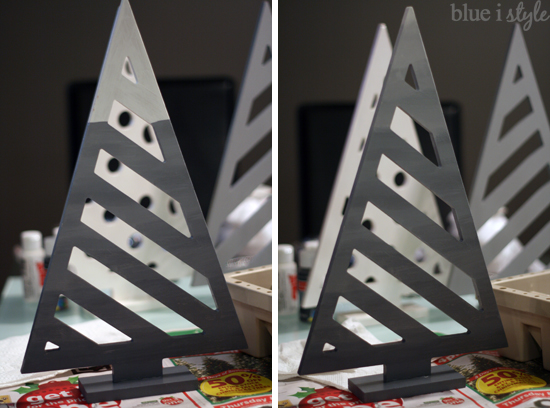
Earlier this week I showed you where this project started – with three paper mache cone Christmas trees, three flat chipboard Christmas trees, and a whole lot of paints and craft supplies. Basically, one big mess on the kitchen table.

I tackled the paper mache Christmas trees first, and they turned out great! You can read all the details about my fur, bead garland, and scrapbook paper Christmas trees in this post.
Modern DIY Christmas Trees
Once I finished the three cone-shaped trees, I got started on the flat chipboard trees that my mom had bought for me during a sale at Hobby Lobby.  Since the shapes of these trees didn’t lend themselves well to being covered in ribbon, beads, or other materials, I decided to simply paint each of the chipboard trees. I used some Christmas ads to cover and protect my kitchen table, then started with a base coat of paint on the trees before giving each a unique paint treatment.
Chalkboard Christmas Tree. First up is my chalkboard Christmas tree. I already had some leftover black chalkboard paint from another project, but I really wanted this tree to be gray, so I made a quick trip to Michael’s for a bottle of CraftSmart brand of acrylic chalkboard paint. After letting two coats of the paint dry for 24 hours, I followed the instructions on the bottle and “primed” the chalkboard finish by using the side of a piece of chalk to fully cover the painted surface. I then rubbed the chalk in with a dry cloth before using a chalkboard eraser to remove the chalk and return the tree to a solid grey finish.
Since I had covered one of my paper mache Christmas trees in music note scrapbook paper, I decided it would be fun to write lyrics from a favorite Christmas song on this chalkboard tree. I used a scrap of paper to jot down several sets of lyrics in order to figure out what would best fit within the lines of my tree.  I settled on “White Christmas,” but I look forward to changing the lyrics from year to year.
White Metallic Christmas Tree with Ornaments. Next up, I worked on the Christmas tree with the circle cutouts. After painting the tree with a base coat of white acrylic, I then applied two coats of Modern Masters brand of shimmer metallic paint in Snowflake White using the leftovers of the sample-sized bottle I had purchased for another project.

I wanted to create the appearance of an ornament hanging within each of the open circles of this tree, so I picked up a bag of small glitter-covered styrofoam spheres for about a dollar at a local craft store. A very fine needle and thin, clear thread completed my supply list.
I threaded the needle and left and equal length of thread on each side of the needle’s eye. I originally tried to knot the thread before pulling it through the sphere, such that the knot would prevent the thread from pulling all the way out, but the thread was too thin and even with two or three knots it still just pulled right through the styrofoam.  Instead, I pushed the needle through the center, then wrapped the thread around the sphere and placed the needle back through the same spot again to make it more secure. I left about a two inch length of string on one side, and trimmed off the excess thread on the other side.  I placed a dab of hot glue over the trimmed off threads on what would be the bottom of the ornaments to ensure that the thread would stay securely in place.

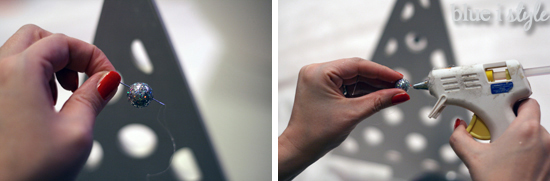
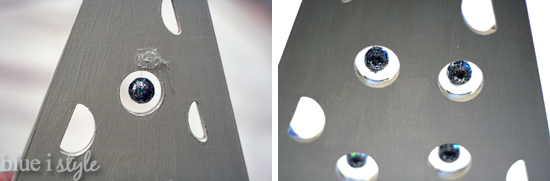
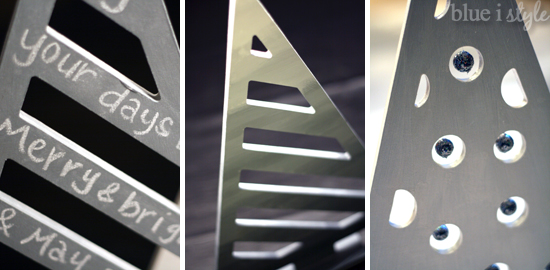
I used the thread on the top of the spheres to suspend the ornaments within each of the full circles on the Christmas tree.  Large gobs of hot glue on back side of the tree holds the threads in place. {And, yes, “dab” and “glob” are very technical hot glue terms!} From the front side of the tree, ornaments appear to be floating in the center of each circular cutout.

Ombre Christmas Tree.  Finally, the Christmas tree I was most excited about, but also the most nervous about – my Ombre tree. I’ve painted ombre stripes before {on a large scale – all the walls of the nursery}, but for this tree I wanted the color to fade from dark to light rather than having stark stripes.
I had already learned that the chipboard absorbed quite a bit of paint and required several coats to cover, so I started by giving the entire tree a two coats of solid white acrylic. Then I selected a charcoal acrylic paint for the darkest grey at the bottom of the tree.
I squeezed out a large amount of the charcoal paint onto my paint palette and mixed in some Liquitex Slow-Dri Blending Medium (to keep the paint from drying to quickly, thus making it easier to blend the colors together as I worked). I started by painting a thick stripe of charcoal gray at the bottom of the tree.  I then added some white paint to the gray on my palette to lighten the gray color just a bit, and painted a second striped on the tree overlapping the first stripe by about a quarter of an inch, blending the two colors together where they met.  I continued to add more white to the gray paint to create increasingly lighter shades and followed the same painting process as I worked my way toward the top of the tree. 
I ended up using a total of eight different shades of gray as I painted from the bottom to the top of the tree. Because I found it to be easier to blend the lighter color of paint into the darker color, when I reached the top of the tree, I added another coat of white paint to the very tip and blended the white down into the shade a light gray below.
After having created such distinctly different looks on the cone shaped Christmas trees (fur, beads and scrapbook paper), I felt challenged to ensure that each of the painted chipboard trees had a very unique finish. I think I accomplished this goal quite well with my chalkboard tree, my ombre tree, and my white metallic tree with glitter ornaments.
I am thrilled with the finished products!  These three painted Christmas trees, when paired with the three cone shape trees I completed earlier this week, will be the perfect holiday decor for our fireplace mantel!
Modern Painted Christmas Trees

Now that all of these Christmas trees are finally complete, I have no more excuses and it’s time to start wrapping presents!  On Christmas…

Looking for more Christmas inspiration? You might be interested in these projects:

  • Facebook
  • Twitter

12.20.13

« {seasonal style} Quick Tip: Using Pipe Cleaners to Hang Garland
{seasonal style} DIY Christmas Stocking Monogram Pins »

Meet Angela

Angela, the founder of Blue i Style, strongly believes that decor should be functional, organizing can be beautiful, smart DIYs help stretch your budget, and an organized and stylish home can still be practical for life with kids.

Her work has been featured in print in Better Homes & Gardens and 5280 Home magazine, and online by HGTV, the Today Show, Good Housekeeping, and more. She was also named a 2018 Stylemaker by Better Homes & Gardens.

You can reach Angela at angela@blueistyle.com

Get Email Updates!

Thanks for subscribing! Check your email a welcome message and your free organizing eBook!

Get Email Updates!

Plus a bonus free organizing eBook!

COPYRIGHT & PHOTO SHARING POLICY

All text, images, and other content that are part of this blog are the property of Blue i Style, unless otherwise noted. All material is copyright protected.

If you wish to feature one of my projects, feel free to share a single photo (no collaged images, or images with text overlays) as long as the no pin code is used to prevent my image from being pinned from your site.

All features must include credit to Blue i Style with a link back to the original content (not just to the homepage). The project steps, supply list, and/or sources may not be disclosed.

Please read my full content and photo sharing policy to ensure you comply with all guidelines. Failure to do so constitutes copyright violation.

Create At Your Own Risk

Any and all content on this website is for personal use only and created exclusively for inspiration purposes.

Creating with my suggested methods, products used, and tools is at your own risk.

Please ensure you are following proper guidelines with anything used, and you receive professional guidance when necessary.

Read my complete disclosure at: Policies & Disclosures.

Sponsorships & Affiliations

To help fund this blog, I accept some forms of advertising, sponsorships, and affiliate links.

If you buy something that I recommend, you pay the same price, but I may receive a small commission. As always, all opinions are my own.

Blue i Style is a participant in the Amazon Services LLC Associates Program, an affiliate advertising program designed to provide a means for sites to earn advertising fees by advertising and linking to amazon.com.

I use an affiliate marketing service which may automatically put links into some posts, so please assume any/all links may be affiliate links.

Read my full Disclosure Statement.

Copyright © 2025 · Dazzling Theme theme by Restored 316

  • Facebook
  • Twitter
  • Pinterest