• About
    • About Blue i Style
    • Tour Our Home
    • Free Organizing eBook
    • Blogging Resources
  • Work With Me
    • Interior Decor & Organizing Services
    • Partnerships & Collaborations
    • Blogging Resources
  • Features & Press
  • Policies & Disclosures
  • Contact

Blue i Style

Creating an Organized & Pretty, Happy Home

  • Decor
    • Tour Our Home
    • Room Makeovers & Design Plans
    • Decorating Tips & Tutorials
    • Outdoor Decor
    • One Room Challenge
  • Organizing and Cleaning
    • Organizing Tips & Tutorials
    • Organizing By Room
    • Organizing on the Go
    • Cleaning
  • DIY
    • DIY Tips & Tutorials
    • Smart Home & Safety
    • Paint Tips & Projects
    • Crafts
    • Cricut Projects
  • Kids
    • Decor & DIY for Kids
    • Organizing Kids
    • Life With Kids
  • Five Minute Projects
  • Holidays & Entertaining
    • Seasonal & Holiday Decor
    • Entertaining
    • DIY Gifts & Gift Guides
    • Facebook
    • Instagram
    • Pinterest
    • Twitter
    • YouTube

Uncategorized

{organizing with style} A Customized Paint Deck and Paint Reference Charts

  • Facebook
  • Twitter

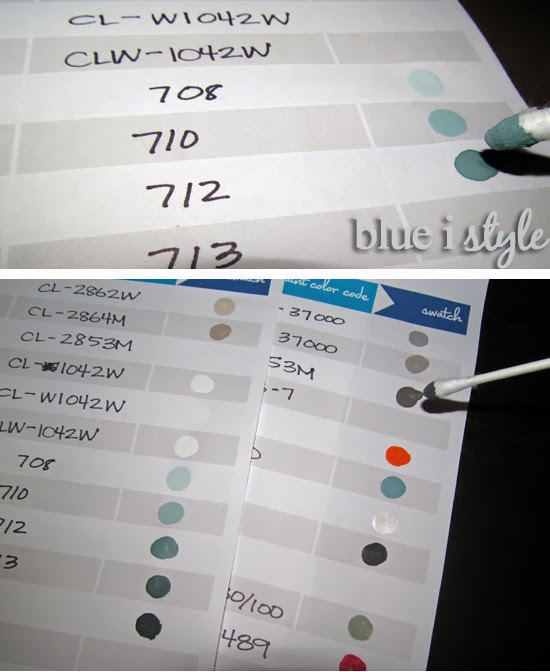
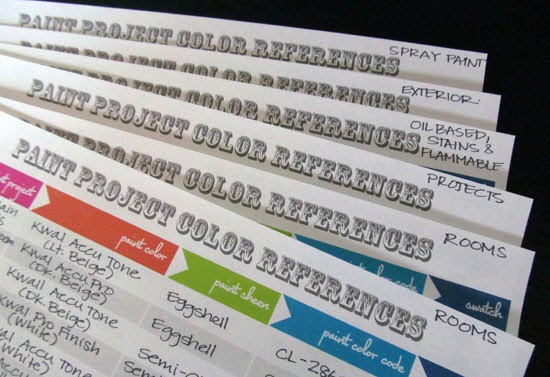
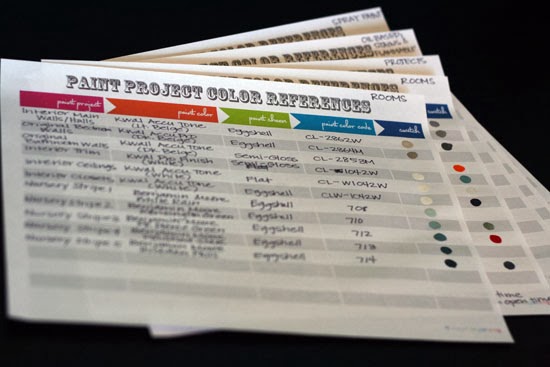
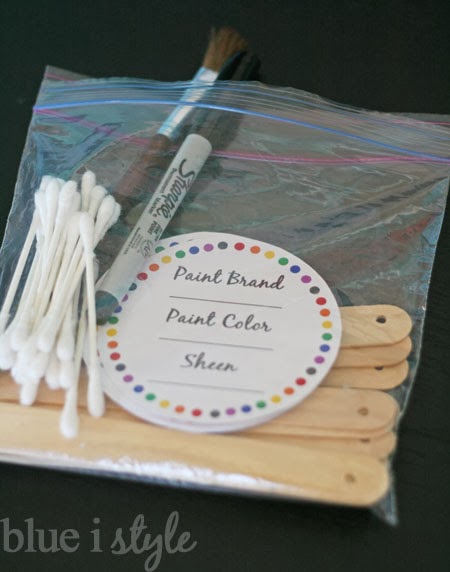
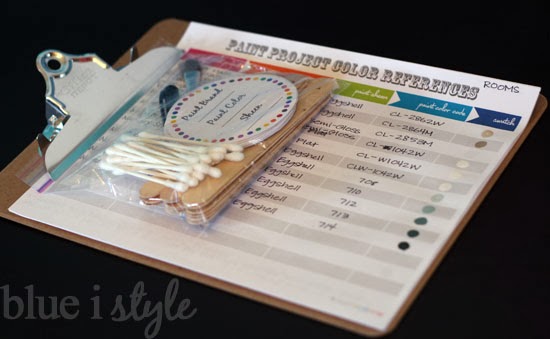
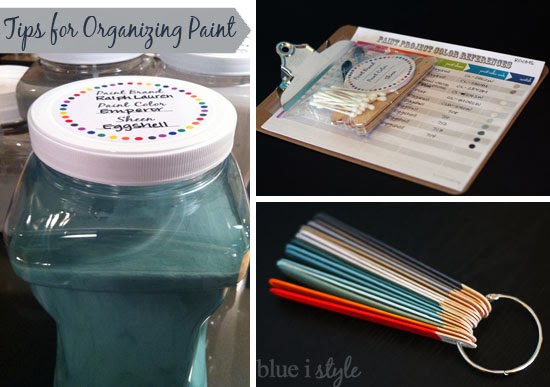
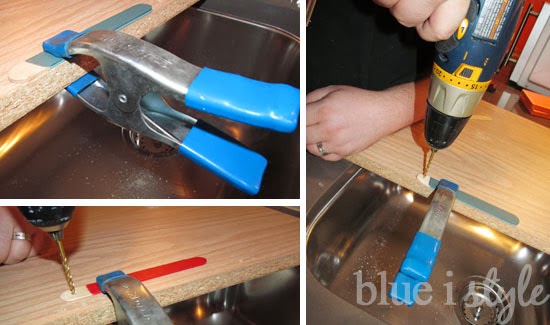
It’s been mission paint organization around our house lately, and last week I showed you how we transferred all of our latex paint out of their rusting cans and into screw top plastic canisters with labels on top {read all about that here}.  On those labels I noted the paint brand, paint color, and sheen, but I also wanted a way to track other details, like the paint color code and any other special instructions.  And while I had all the paint cans open, it seemed like the perfect opportunity to create a quick and easy, portable paint deck.

Let’s talk about the paint deck first.  When I joined Pinterest a couple of years ago, one of the first organizing ideas I ever pinned was a customized paint deck on stir sticks.  I loved the idea, but wanted something a bit more compact and portable, so I opted for craft sticks (aka, Popsicle sticks).
This was a simple project that just involved painting each craft stick with the various colors of paint that adorn the walls of our house, and then drilling a hole in each stick so that I could insert a large book ring to hold them all together. I left Scott in charge of drilling the holes, and he worked out a pretty good system, but no matter how careful he was, some of the craft sticks still cracked.  I ended up only having to repaint a few of them, but learn from my mistake – in retrospect, it would have been much easier to drill the holes before painting the craft sticks. Doh.
The most successful method Scott found for drilling holes in the craft sticks was to use a clamp to secure the sticks to a scrap board and then drill the hole while applying very little pressure.  He used a 5/32″ drill bit and was able to drill through 2 or 3 craft sticks at a time.
I used a thin-tipped Sharpie to write the paint brand and paint color on the back of each paint swatch stick, as well as noting the room or rooms of the house in which the paint color has been used.
With all the painted craft sticks hanging a the book ring, my paint deck is compact and portable, making it easy to take along when shopping for coordinating furniture or fabrics.  Using the book ring to secure the deck together allows for adding additional paint swatch sticks as we paint more rooms in the future.

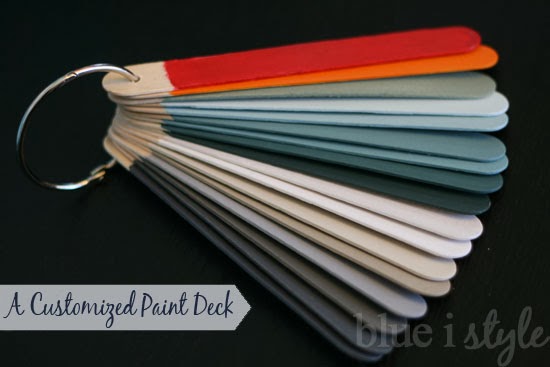
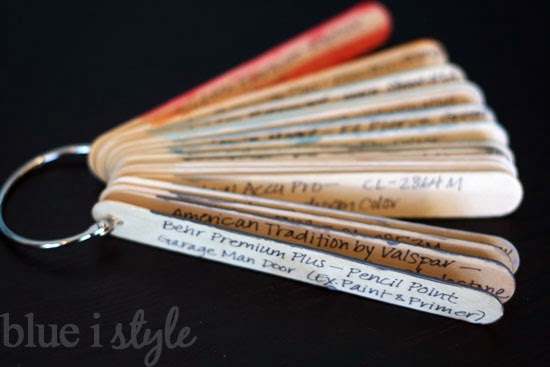
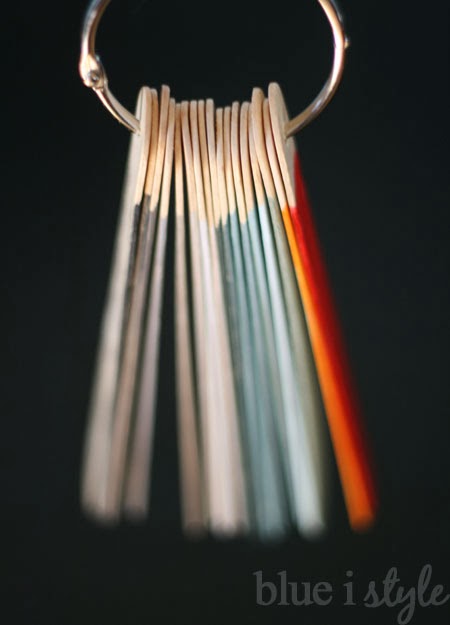
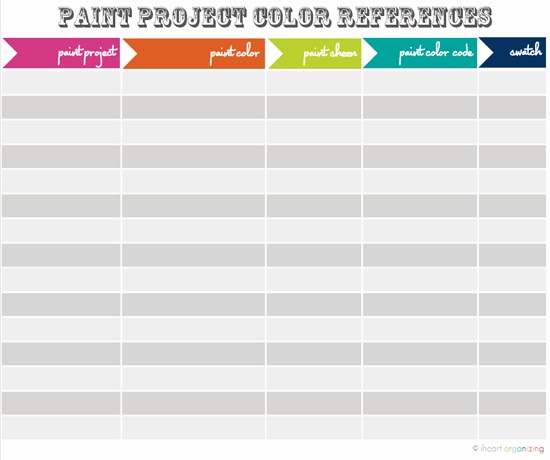
So that’s our customized paint deck!  Then there was the question of how to keep track of all the other paint details.  I remember seeing a great printable that Jen, the genius behind the I Heart Organizing blog, had created last year when she tackled a similar paint organizing project.  I figured why reinvent the wheel when Jen had already done the work of making such a pretty and functional paint reference chart.

So I printed out a handful of copies and set about filling in the details – the location, brand, color, sheen and color code – before discarding any of the paint cans.  Just as Jen did, I also used cotton swabs to add a small paint swatch for each color.
To make things still more organized, in addition to using two charts to record the details of all the paint found on the walls of our home, I also used additional reference chart pages for each distinct category of paint – including project specific paint, oil based paints and stains, exterior paint, and spray paint.  
This was particularly important to my organizing system because, while we are storing all of the latex room and project paints in our utility room, the oil based paints and spray paints can’t safely be stored in our utility room.  Therefore, by listing them on separate reference sheets, it makes it easier for me to keep track of where to find the paint I need as quickly as possible.
Of course, getting all these paint details recorded and creating a paint deck was all well and good, but I wanted to make sure that as we continue to tackle new paint projects (like Beckett’s new big boy room that we’ll be painting soon), we’ll need to keep it up.  To make it as easy as possible to stay organized with this new system, I decided to create a kit with all the supplies we would need each time we use a new color of paint around the house.  The kit contains sticker labels for the plastic canisters that we’ll use to store the extra paint, craft sticks to paint and add to our customized color deck (with the holes already drilled in them – getting smarter this time around), and cotton swabs to add the paint swatches to the reference charts. To make things even quicker and easier, I also added a paint brush and sharpie to my kit.
I tucked all of my paint organizing supplies into a Ziploc bag.  A clipboard now holds all of my paint reference charts as well as the paint organizing kit.  
So there you have it – all the components of my new paint organizing system:  screw top canisters with sticker labels on top; a customized paint deck; a set of paint reference charts; and a paint organizing kit for future projects.  The most challenging part of any organizing system is keeping it up, so this time I’m staying one step ahead! 
UPDATE:  Project Paint Organization is now complete and the utility room is now home to all of our organized paint and paint supplies.  Click here to see the finished product.
  • Facebook
  • Twitter

10.08.13

« {organizing with style} Project Paint Storage and a Free Printable
{organizing with style} Utility Room Paint Supply Organization Reveal and a Printable »

Meet Angela

Angela, the founder of Blue i Style, strongly believes that decor should be functional, organizing can be beautiful, smart DIYs help stretch your budget, and an organized and stylish home can still be practical for life with kids.

Her work has been featured in print in Better Homes & Gardens and 5280 Home magazine, and online by HGTV, the Today Show, Good Housekeeping, and more. She was also named a 2018 Stylemaker by Better Homes & Gardens.

You can reach Angela at angela@blueistyle.com

Get Email Updates!

Thanks for subscribing! Check your email a welcome message and your free organizing eBook!

Get Email Updates!

Plus a bonus free organizing eBook!

COPYRIGHT & PHOTO SHARING POLICY

All text, images, and other content that are part of this blog are the property of Blue i Style, unless otherwise noted. All material is copyright protected.

If you wish to feature one of my projects, feel free to share a single photo (no collaged images, or images with text overlays) as long as the no pin code is used to prevent my image from being pinned from your site.

All features must include credit to Blue i Style with a link back to the original content (not just to the homepage). The project steps, supply list, and/or sources may not be disclosed.

Please read my full content and photo sharing policy to ensure you comply with all guidelines. Failure to do so constitutes copyright violation.

Create At Your Own Risk

Any and all content on this website is for personal use only and created exclusively for inspiration purposes.

Creating with my suggested methods, products used, and tools is at your own risk.

Please ensure you are following proper guidelines with anything used, and you receive professional guidance when necessary.

Read my complete disclosure at: Policies & Disclosures.

Sponsorships & Affiliations

To help fund this blog, I accept some forms of advertising, sponsorships, and affiliate links.

If you buy something that I recommend, you pay the same price, but I may receive a small commission. As always, all opinions are my own.

Blue i Style is a participant in the Amazon Services LLC Associates Program, an affiliate advertising program designed to provide a means for sites to earn advertising fees by advertising and linking to amazon.com.

I use an affiliate marketing service which may automatically put links into some posts, so please assume any/all links may be affiliate links.

Read my full Disclosure Statement.

Copyright © 2025 · Dazzling Theme theme by Restored 316

  • Facebook
  • Twitter
  • Pinterest