• About
    • About Blue i Style
    • Tour Our Home
    • Free Organizing eBook
    • Blogging Resources
  • Work With Me
    • Interior Decor & Organizing Services
    • Partnerships & Collaborations
    • Blogging Resources
  • Features & Press
  • Policies & Disclosures
  • Contact

Blue i Style

Creating an Organized & Pretty, Happy Home

  • Decor
    • Tour Our Home
    • Room Makeovers & Design Plans
    • Decorating Tips & Tutorials
    • Outdoor Decor
    • One Room Challenge
  • Organizing and Cleaning
    • Organizing Tips & Tutorials
    • Organizing By Room
    • Organizing on the Go
    • Cleaning
  • DIY
    • DIY Tips & Tutorials
    • Smart Home & Safety
    • Paint Tips & Projects
    • Crafts
    • Cricut Projects
  • Kids
    • Decor & DIY for Kids
    • Organizing Kids
    • Life With Kids
  • Five Minute Projects
  • Holidays & Entertaining
    • Seasonal & Holiday Decor
    • Entertaining
    • DIY Gifts & Gift Guides
    • Facebook
    • Instagram
    • Pinterest
    • Twitter
    • YouTube

Uncategorized

{organizing with style} Project Paint Storage and a Free Printable

  • Facebook
  • Twitter

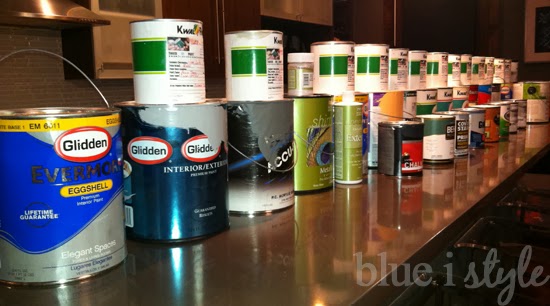
To say we have a lot of latex paint might be an understatement!  When we bought our home, the builder left us a touch up kit with 2 quarts of each color of paint used throughout the house (including the original wall colors, the trim, ceilings, and closet interior paints).  Additionally, we have since repainted many of the rooms in the house, resulting in a lot more leftover paint (and in the case of the ombre stripes in the nursery we used five different colors).

Until a few weeks ago, we didn’t have any storage space in our utility room, we’ve been storing all these cans of paint in a very haphazard manner … lots of cans were stacked up in boxes on the floor of our coat closet (definitely not the best use of that space), while other cans were being stored in our detached garage (not good for the paint to be stored in an unheated garage). 

I have been itching to get our paint situation under control, but I first needed a place to put it all.  We finally found a way to add shelving to our tiny utility room {you can read about that here}, so with those shelves in place, I was ready to embark on Project Paint Storage.  The first step was to gather all the paint into one place.  Wow, that’s a lot of paint!

Once I saw how much paint we had, I realized that I needed to do something more than simply moving all the cans downstairs to our new utility room shelving, so I started doing some research {in blogland of course} to find alternate paint storage ideas.  I very quickly learned that mason jars have become the favorite way to store leftover paint.  And while I can see the appeal, because the paint looks oh so pretty in those little jars, I knew that wasn’t the best solution for me for a couple of reasons.  First, a standard size mason jar holds 16 ounces (or 1 quart), and the majority of my paint cans contained more than a quart. Second, I just don’t trust myself with glass when it comes to something that could be so devastatingly messy if the glass were to break.  Number two was of particular concern to me because our new utility room shelves are attached to the studs, leaving a gap between the studs large enough for a mason jar to be pushed right off the back of the shelf where it would end up crashing down onto the cement floor.

But I liked the concept of transferring my paint to different containers, and I liked the idea of those containers being clear so that I could see the paint color within each.  Since some paint brands have begun switching to plastic cans, it occurred to me that plastic containers would be a good alternative to glass mason jars.  A little shopping turned up what I think is an ideal solution … plastic canisters.

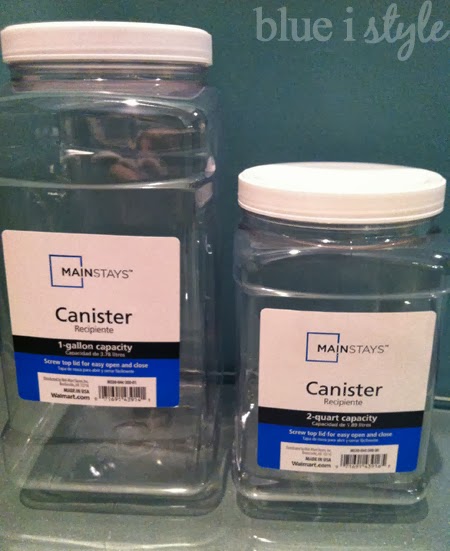
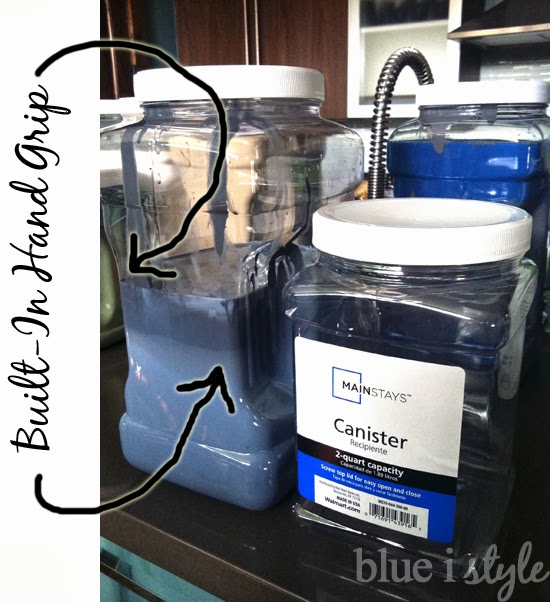
In addition to being plastic, rather than glass, these canisters have several major advantages: (1) they come in two sizes – 1 gallon and 2 quarts, ideal for the quantities of paint I need to store; (2) they have screw tops that create a nice seal; (3) their overall square shape allows them to be lined up side by side while taking up considerably less space than a standard round paint can; (4) they have a great built in hand-grip that makes them easy to lift and pour with one hand; (5) they are a steal of a deal at WalMart – only $1.99 for the small canisters and only $2.99 for the large {say what you will about WalMart, but the price made this project affordable}; and lastly, (6) the canisters can easily be washed out and reused for a different color of paint in the future.

Before I started to transfer the paint from the cans to the canisters, I first wanted to create a record of all the paint details (including specifics like the color number).  Click here for the details on that project.

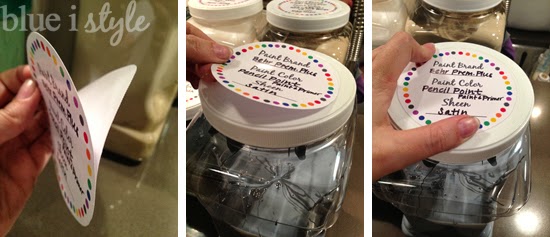
Next, I needed to come up with a way to label the canisters.  Rather than printing pretty labels with all the paint details already included, I instead opted to create a simple label upon which I could hand write the details. This was a forward thinking decision, because I know that, realistically, the next time I buy paint and transfer the leftovers to a canister, I won’t take time to print out a custom label for the paint. By having a simple label template, I can have extras printed up and ready to go, simply requiring me to write in the details when the time comes.

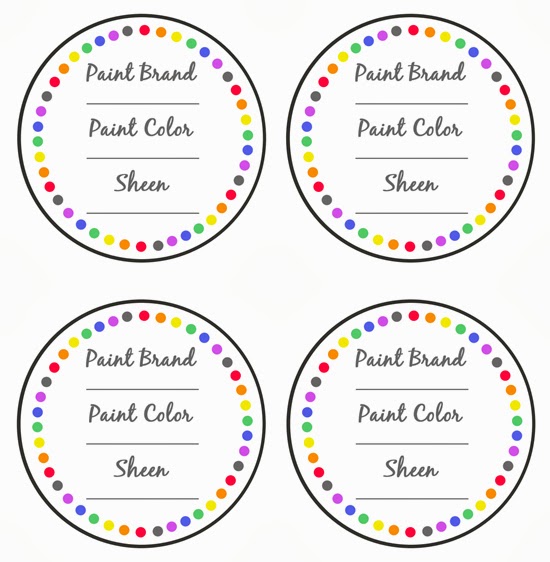
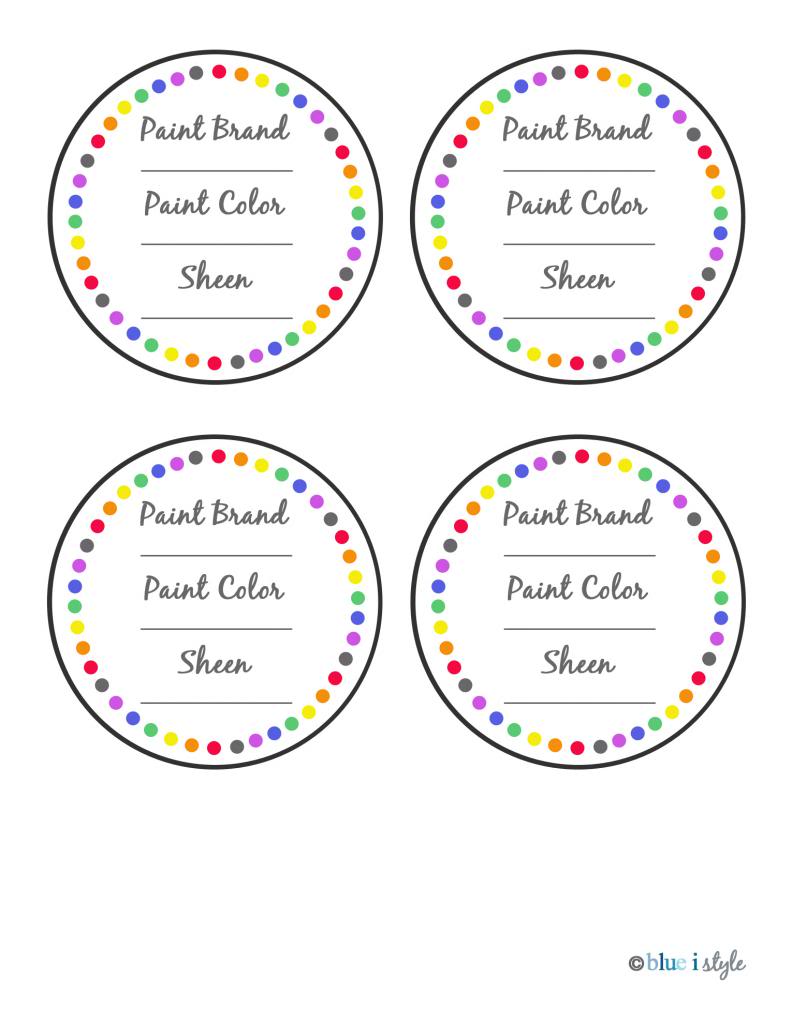
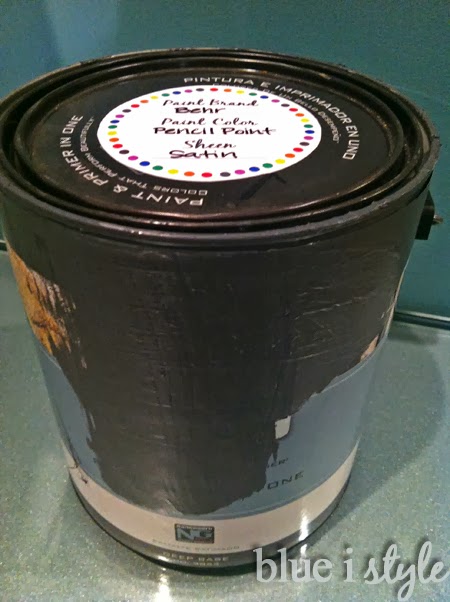
And guess what?  I’m sharing the label template with you! Just click here to download the full-size (8.5 x 11 inch) template as a JPG file from which you can print your own labels.  These labels are perfectly sized to fit the lids of the plastic canisters, but are also an ideal size for placing directly on the top of a paint can (more on that below).

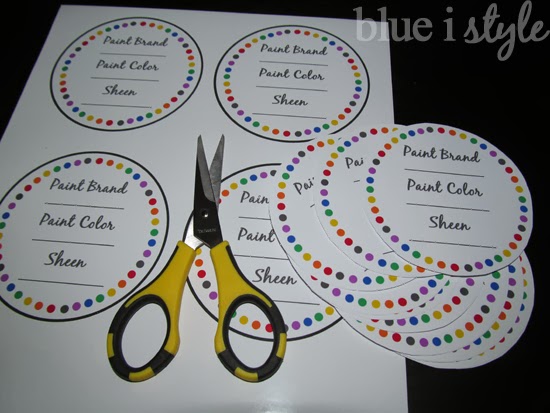
I printed my labels on sticker paper (available at any office supply store, but much cheaper on Amazon if you want to purchase a larger quantity). Then, using the black border as a guide, I cut out the round labels.

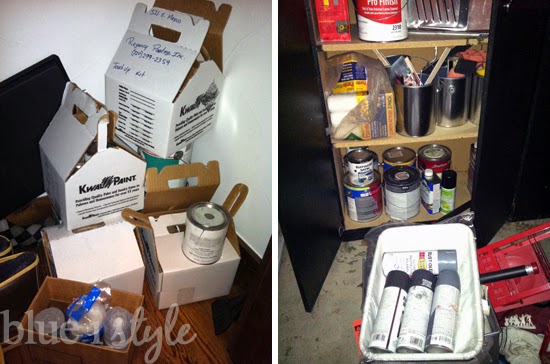
Once my labels were cut and ready, it was time to start transferring paint.  At this point you may be asking yourself, “Why go to all this trouble? Why not just leave the paint in the original cans?”  They say a picture is worth a thousand words – so here is my best answer to that question:

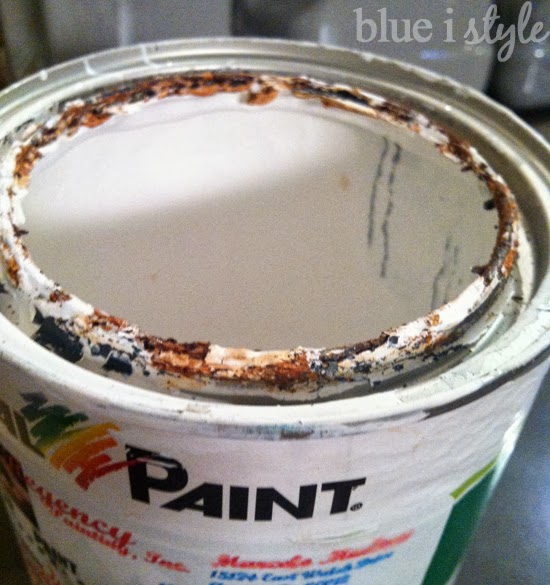
Not only does it look gross, but that rusting can is certainly no good for the paint!  And that particular can of paint is not even that old.  If I were to leave all the paint in the original cans, the cans would continue to rust and ultimately ruin the paint.  My online research indicates that their is really no good solution to stop cans from rusting, so transferring the paint to another storage container will prolong the life of the paint.

When it came to actually transferring the paint from the cans to my plastic canisters, we sat each canister in a cardboard box to protect our kitchen counter from any drips or spills, then we simply poured the paint from one container to the other.

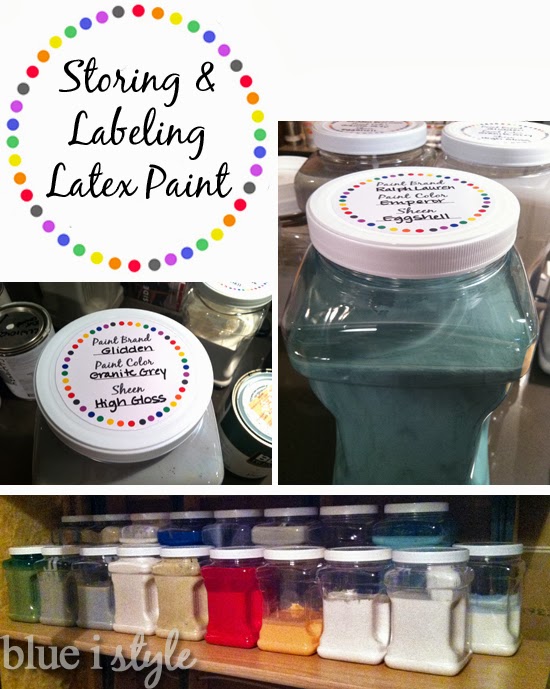
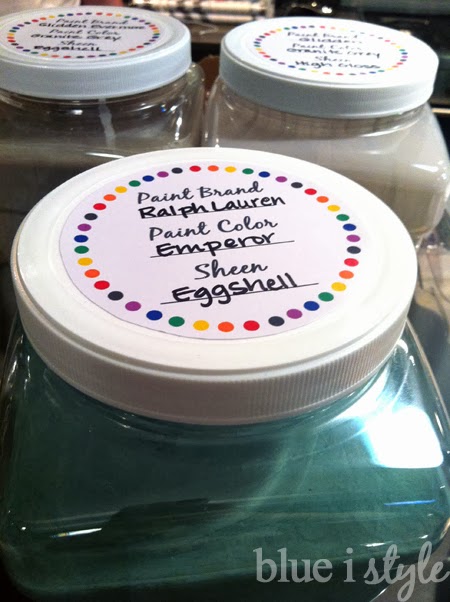
One-by-one we transferred the cans of paint into the canisters and labeled the top of each canister with a sticker indicating its contents, including the brand of paint, paint color, and sheen.  I peeled the backing off of the sticker paper and placed each label in the center of the canister lid, pressing down around the edge to create a good seal.

Alternatively, if you don’t have the time or desire to transfer all of your paint to new containers, you could place a sticker label directly on top of the paint can lid.  Often times, after we’ve poured paint into a paint tray several times, the sides of the paint can become paint covered, making it impossible to read the brand or paint color.  By placing a label on top of the can before storing the can away, you would ensure that you wouldn’t later be guessing about the can’s contents.

Once all of my paint was transferred into the canisters, and all of the lids were labeled, I was so pleased with the results.  Now a quick glance allows me to see the color of the contents and the approximate quantity. Best of all, however, is that my paint is no longer at danger of being ruined by rusting cans.

And just a quick glance at the new paint canisters lined up on a shelf in the utility room illustrates how much less space they take up when compared to the paint cans.

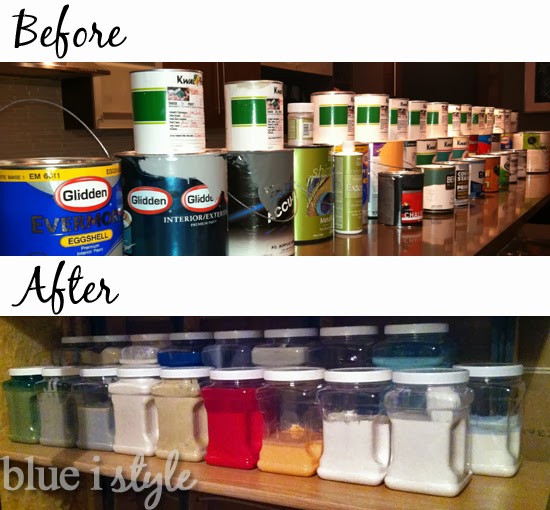
Sorry for the poor quality of the after photo – it’s dark in the utility room.

A few important things to note:  I only transferred my latex (water based) paint into the plastic canisters. I have read that oil-based paint will eventually eat through plastic, so I don’t recommend storing oil-based paint in plastic canisters like these.  Since oil-based paints suffer the same woes from rusting cans, instead consider using glass to store leftover oil-based paints.  Additionally, I will only be storing my latex paint in the utility room.  Oil-based paint, or any other kind of paint that is combustible (including metallic primer and cans of spray paint) should not be stored near the furnace or water heater, so I will be storing these paints elsewhere.  

Next week I’ll be posting more detailed information regarding proper paint storage, as well as how to dispose of paint that has gone bad and how to recycle all those empty paint cans that you’ll be left with after transferring your paint to new containers.  I’ll also be back next week with the final reveal of all of our paint supplies organized on our new utility room shelving.  UPDATE: Click here for the reveal of the organized utility room, which now houses all of our paint and painting supplies.

  • Facebook
  • Twitter

10.03.13

« {diy with style} Making Space for Storage in a Small Utility Room
{organizing with style} A Customized Paint Deck and Paint Reference Charts »

Meet Angela

Angela, the founder of Blue i Style, strongly believes that decor should be functional, organizing can be beautiful, smart DIYs help stretch your budget, and an organized and stylish home can still be practical for life with kids.

Her work has been featured in print in Better Homes & Gardens and 5280 Home magazine, and online by HGTV, the Today Show, Good Housekeeping, and more. She was also named a 2018 Stylemaker by Better Homes & Gardens.

You can reach Angela at angela@blueistyle.com

Get Email Updates!

Thanks for subscribing! Check your email a welcome message and your free organizing eBook!

Get Email Updates!

Plus a bonus free organizing eBook!

COPYRIGHT & PHOTO SHARING POLICY

All text, images, and other content that are part of this blog are the property of Blue i Style, unless otherwise noted. All material is copyright protected.

If you wish to feature one of my projects, feel free to share a single photo (no collaged images, or images with text overlays) as long as the no pin code is used to prevent my image from being pinned from your site.

All features must include credit to Blue i Style with a link back to the original content (not just to the homepage). The project steps, supply list, and/or sources may not be disclosed.

Please read my full content and photo sharing policy to ensure you comply with all guidelines. Failure to do so constitutes copyright violation.

Create At Your Own Risk

Any and all content on this website is for personal use only and created exclusively for inspiration purposes.

Creating with my suggested methods, products used, and tools is at your own risk.

Please ensure you are following proper guidelines with anything used, and you receive professional guidance when necessary.

Read my complete disclosure at: Policies & Disclosures.

Sponsorships & Affiliations

To help fund this blog, I accept some forms of advertising, sponsorships, and affiliate links.

If you buy something that I recommend, you pay the same price, but I may receive a small commission. As always, all opinions are my own.

Blue i Style is a participant in the Amazon Services LLC Associates Program, an affiliate advertising program designed to provide a means for sites to earn advertising fees by advertising and linking to amazon.com.

I use an affiliate marketing service which may automatically put links into some posts, so please assume any/all links may be affiliate links.

Read my full Disclosure Statement.

Copyright © 2025 · Dazzling Theme theme by Restored 316

  • Facebook
  • Twitter
  • Pinterest