• About
    • About Blue i Style
    • Tour Our Home
    • Free Organizing eBook
    • Blogging Resources
  • Work With Me
    • Interior Decor & Organizing Services
    • Partnerships & Collaborations
    • Blogging Resources
  • Features & Press
  • Policies & Disclosures
  • Contact

Blue i Style

Creating an Organized & Pretty, Happy Home

  • Decor
    • Tour Our Home
    • Room Makeovers & Design Plans
    • Decorating Tips & Tutorials
    • Outdoor Decor
    • One Room Challenge
  • Organizing and Cleaning
    • Organizing Tips & Tutorials
    • Organizing By Room
    • Organizing on the Go
    • Cleaning
  • DIY
    • DIY Tips & Tutorials
    • Smart Home & Safety
    • Paint Tips & Projects
    • Crafts
    • Cricut Projects
  • Kids
    • Decor & DIY for Kids
    • Organizing Kids
    • Life With Kids
  • Five Minute Projects
  • Holidays & Entertaining
    • Seasonal & Holiday Decor
    • Entertaining
    • DIY Gifts & Gift Guides
    • Facebook
    • Instagram
    • Pinterest
    • Twitter
    • YouTube

Holidays & Seasons

An Easy DIY Monogram Christmas Wreath

  • Facebook
  • Twitter
When we toured our home before buying it, the kitchen fireplace was one of the first features that captured my heart! I love the stone and the height, and the fact that it’s also open to the backyard is a huge bonus! Almost immediately I envisioned a giant Christmas wreath hanging above the fireplace for the holidays! This year {our eighth Christmas in our home}, I finally managed to make it happen!
DIY Monogram Wreath for Christmas
I am so excited about the monogram wreath I created, and I’m sharing the easy tutorial today as part of the Home for Christmas blog hop hosted by CountryLiving.com! At the end of this post you’ll find links to more than 100 other gorgeous Christmas projects from all over blogland… So get your pinning finger ready!

But don’t run off to check out the other projects just yet! Everyone loves a monogram, right? So let me show you how quick and inexpensive it is to turn a basic wreath into much more of a statement!

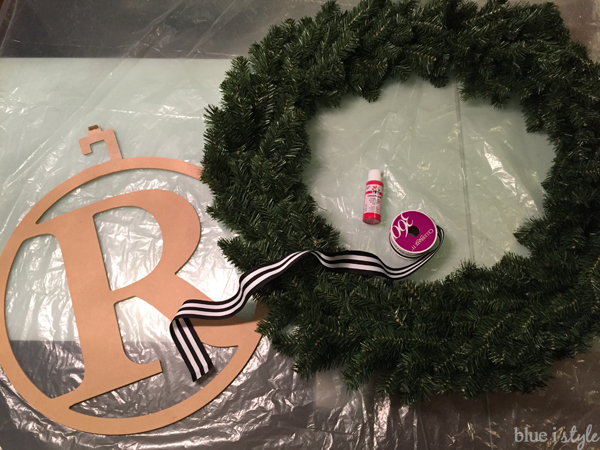
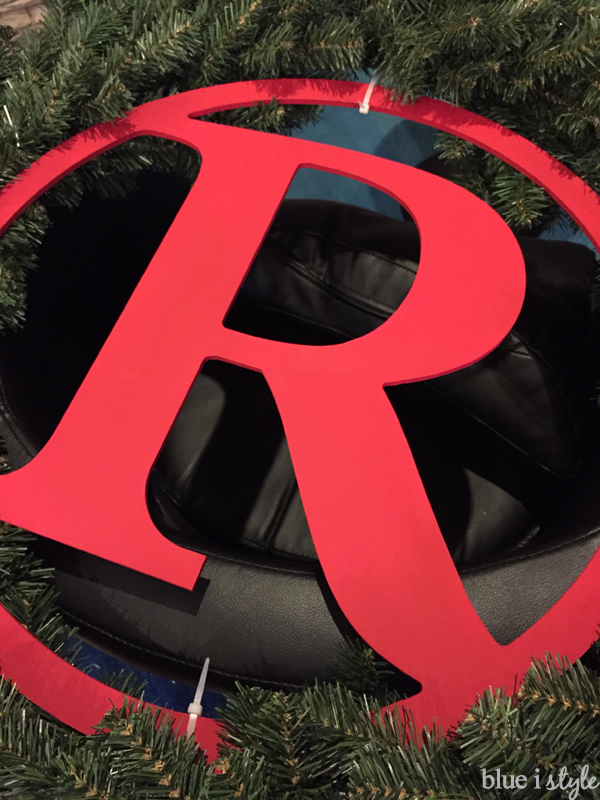
MONOGRAM WREATH SUPPLY LIST
This post contains some affiliate links, denoted by an asterisk(*). If you buy something that I recommend, you pay the same price, but I may receive a small commission.
  • Fiberboard Monogram Letter* from Michaels {$2.79 on sale; $6.99 regular) 
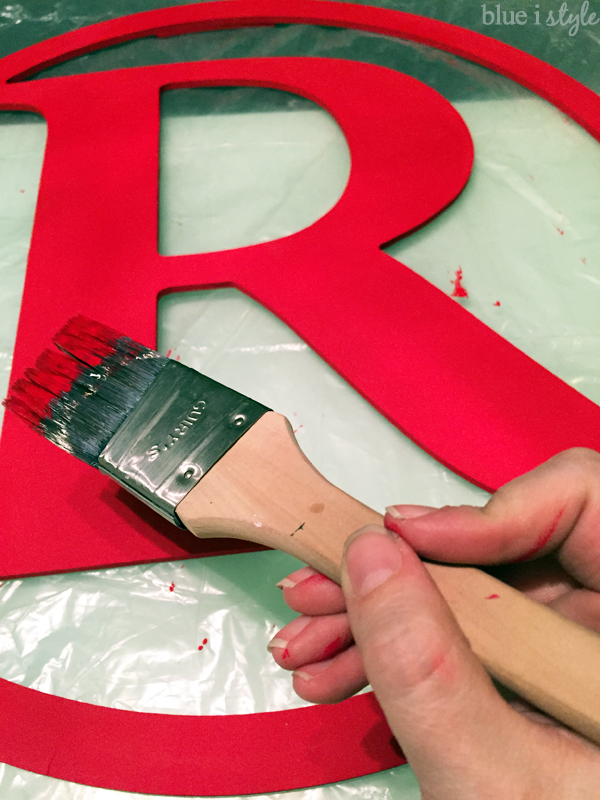
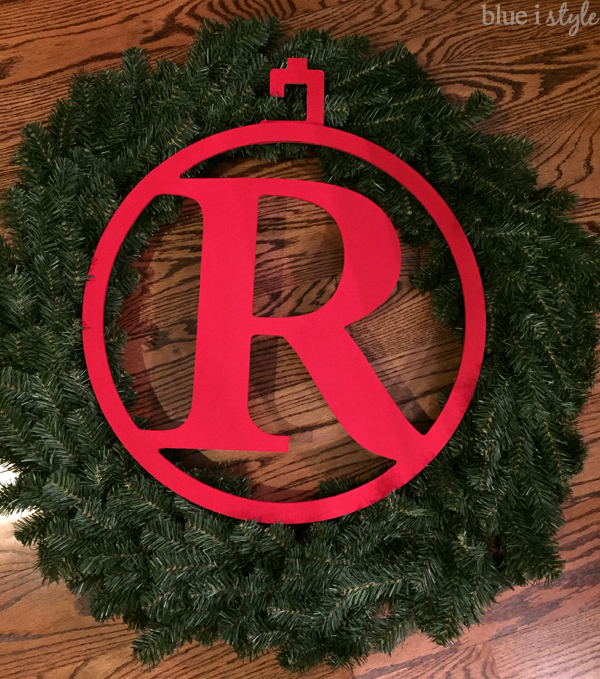
  • Red Acrylic Paint  & Paint Brush {already owned}
  • Wreath with approx. 18″ opening in center {mine is from Michaels; under $15 on sale}
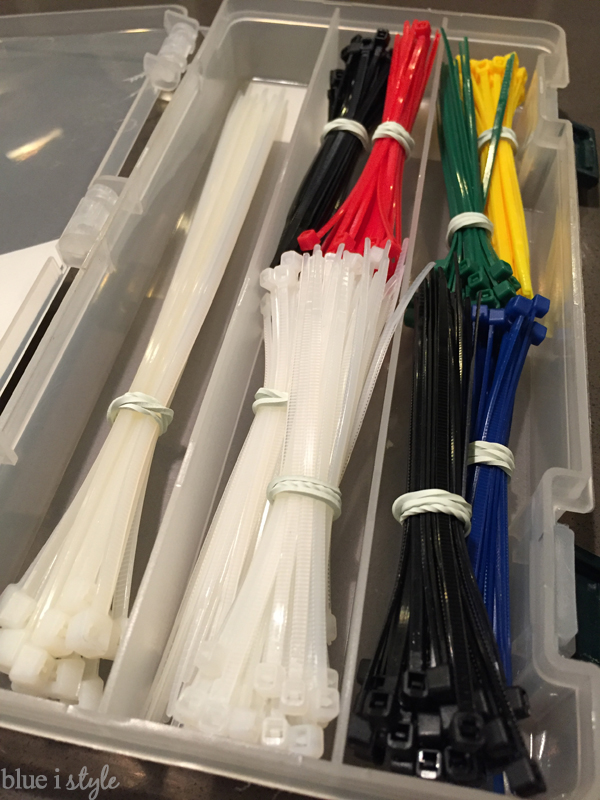
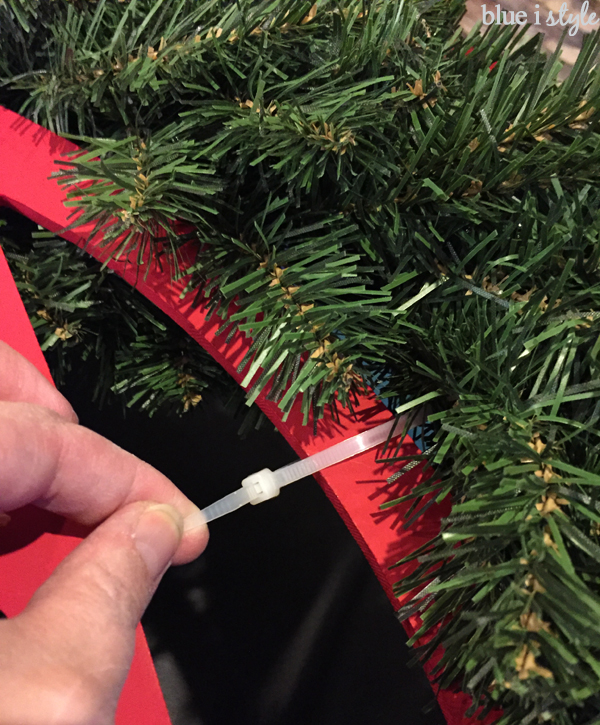
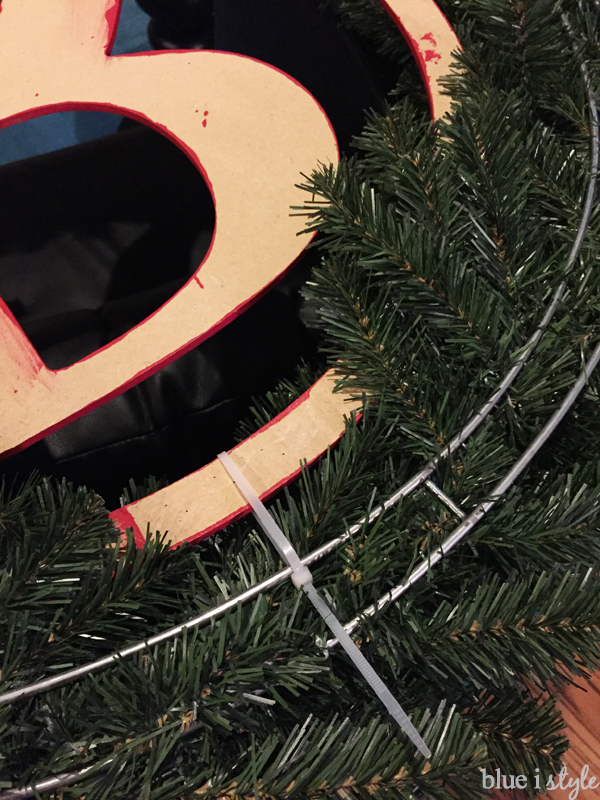
  • 2 8″ Cable Ties* {already owned; Cable Tie Assorted Kit* that I use for many projects}
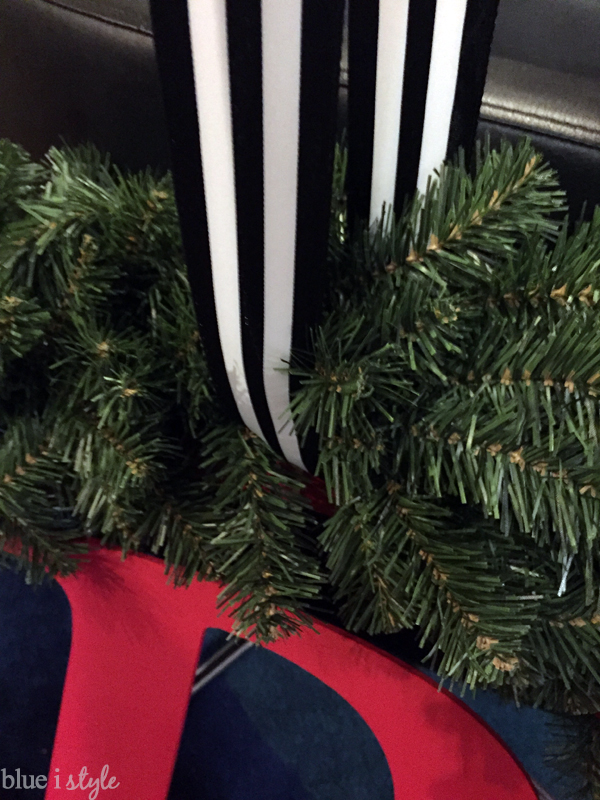
  • Ribbon* {mine is 1.5″ black and white striped ribbon* from Michaels, $4.99}
  • White Ceiling Hook* {$1.47 at Home Depot}

MONOGRAM WREATH TUTORIAL
First off, I want to point out that the fiberboard monogram letters* are listed by Michaels as 14″ – but that is the size of the letter only, not taking into account the circle around it. The full diameter is actually 20 inches. When I began shopping for a wreath, I was looking for one with a 20″ opening, and ended up purchasing an inexpensive wreath {under $30 regular price and under $15 with a sale and coupon} with approximately a 30″ exterior diameter, and approximately an 18″ interior opening.
I began by using a wide paintbrush to paint the R and surrounding circle bright red. I didn’t bother painting the back since the wreath would be hanging against the fireplace.
Once the paint had dried, I laid the wreath on top of the wreath to decide how to attach it to the wreath. {Nope, I didn’t start with a plan…I was pretty much winging it!}
I debated on whether to place the monogram R on top of the wreath or behind the wreath…but ended up liking it best when it was placed right in the middle of the wreath with branches overlapping it from both the front and back. 
I had originally left the fiberboard “hook” attached to the wreath because I thought I might use it to hang the wreath to the metal wire frame on the back of the wreath, but once I determined that wouldn’t work, I used a screwdriver to remove the staples and removed the hook. If I were to do it again, it would have been better to remove the hook before painting the monogram letter.
After thinking about what supplies I had on hand, I decided that cable ties would work well to secure the monogram to the wreath. I grabbed out my Cable Tie Assorted Kit.* 
I had hoped that the 4″ red cable ties would be long enough. Unfortunately they weren’t, so I ended up using the 8″ long clear ties. I positioned the monogram where I wanted it within the wreath, and then loosely attached the cable ties around the metal frame on the back of the wreath.
I then tightened each cable tie a bit, alternating between tightening the top and bottom ties so that the monogram didn’t get pulled two high or two low within the opening of the wreath, but I left them just lose enough that I could still rotate them.
I then flipped the wreath over and rotated the cable ties so that the excess would be hidden behind the wreath and tightened them the rest of the way, and trimmed the tail off so that none stuck up above the top of the wreath.
With the monogram secured to the wreath, all that was left was to hang the wreath. Rather than trying to drive a nail or a hook into the joints of our stacked stone fireplace, I instead wanted to hang the wreath from the ceiling. We installed a white ceiling hook* that is rated to hold up to 50 pounds {much more than we needed for the wreath – but who knows what else we might hang there in the future}.
I then used 1.5″ wide black and white striped ribbon* and looped it around the top of the wreath – but not around the circle of the monogram because I didn’t want it to pull the letter out of place when hung.

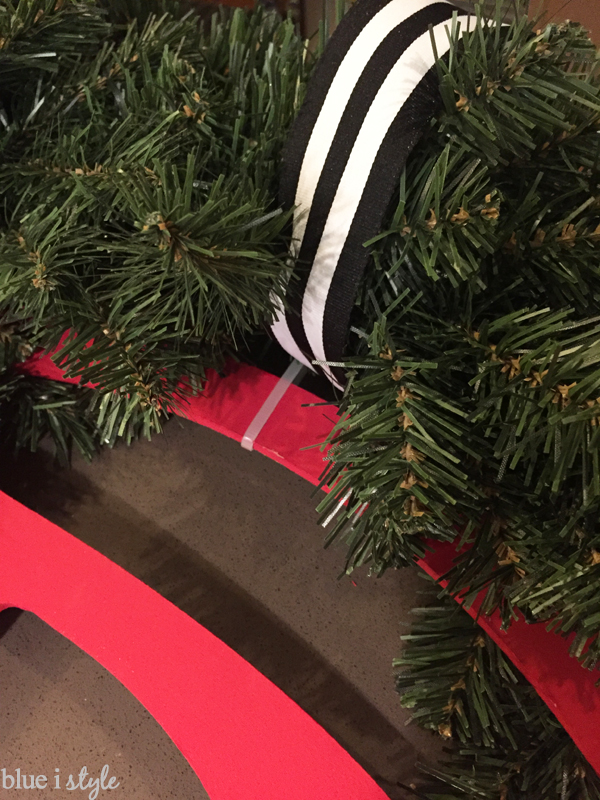
My husband then climbed up on the ladder and held the wreath up so that I could stand back and decide on the right positioning. Once we knew the length of the ribbon, I pulled the ribbon up from both sides of the wreath and tied a triple knot at the top.

I then hung the wreath by placing the hook deep into the knot, ensuring that it was positioned in a way that would not cause the knot to come untied. Finally, I fluffed up the wreath, and adjusted the branches to ensure that the cable ties could not be seen.
Easy DIY Monogram Christmas Wreath
I am loving the way the pop of red on the monogram ties in with the red metal Christmas trees on each side of the fireplace, and the way it contrasts against the blue and teal of the rug in our kitchen sitting area. And the black and white striped ribbon coordinates with lots of other black and white striped Christmas details throughout our main floor.
Easy DIY Monogram Christmas Wreath

The wreath makes this space feel so much more festive, and it’s now the perfect place to enjoy a cup of hot chocolate {or a glass of wine}!

Easy Monogram Wreath for Christmas

I also created some fun new modern Christmas trees for the center of our kitchen table, including two in red to match the monogram wreath.

Monogram Wreath Adds a Traditional Touch to a Modern Kitchen
Monogram Christmas Wreath on stone fireplace

Want to see more easy DIY Christmas decor projects and unexpected color combos? Be sure to stop by to check out my full Modern and Colorful Christmas Home Tour to see our holiday decor across five more rooms of the house! And also check out all the other amazing Christmas projects from other bloggers that are linked up below!

NOW CHECK OUT THE OTHER PROJECTS…

An InLinkz Link-up

Let’s get social!   

  • Facebook
  • Twitter

12.07.15

« {five minute friday} Two Free Printables to Organize Your Holiday Shopping
My Christmas Tree Style: Modern. Graphic. Family. »

Meet Angela

Angela, the founder of Blue i Style, strongly believes that decor should be functional, organizing can be beautiful, smart DIYs help stretch your budget, and an organized and stylish home can still be practical for life with kids.

Her work has been featured in print in Better Homes & Gardens and 5280 Home magazine, and online by HGTV, the Today Show, Good Housekeeping, and more. She was also named a 2018 Stylemaker by Better Homes & Gardens.

You can reach Angela at angela@blueistyle.com

COPYRIGHT & PHOTO SHARING POLICY

All text, images, and other content that are part of this blog are the property of Blue i Style, unless otherwise noted. All material is copyright protected.

If you wish to feature one of my projects, feel free to share a single photo (no collaged images, or images with text overlays) as long as the no pin code is used to prevent my image from being pinned from your site.

All features must include credit to Blue i Style with a link back to the original content (not just to the homepage). The project steps, supply list, and/or sources may not be disclosed.

Please read my full content and photo sharing policy to ensure you comply with all guidelines. Failure to do so constitutes copyright violation.

Create At Your Own Risk

Any and all content on this website is for personal use only and created exclusively for inspiration purposes.

Creating with my suggested methods, products used, and tools is at your own risk.

Please ensure you are following proper guidelines with anything used, and you receive professional guidance when necessary.

Read my complete disclosure at: Policies & Disclosures.

Sponsorships & Affiliations

To help fund this blog, I accept some forms of advertising, sponsorships, and affiliate links.

If you buy something that I recommend, you pay the same price, but I may receive a small commission. As always, all opinions are my own.

Blue i Style is a participant in the Amazon Services LLC Associates Program, an affiliate advertising program designed to provide a means for sites to earn advertising fees by advertising and linking to amazon.com.

I use an affiliate marketing service which may automatically put links into some posts, so please assume any/all links may be affiliate links.

Read my full Disclosure Statement.

Copyright © 2023 · Dazzling Theme theme by Restored 316

  • Facebook
  • Twitter
  • Pinterest