Welcome back to another week of our One Room Challenge laundry/linen closet makeover. We’re at week 4 of this 6 week challenge, and we’ve come to the point in the process where we’re checking some of the more labor intensive items off of the list, but everything is taking a little longer than I’d like and there’s a lot of problem solving and adapting along the way. I call this the “ironing out the kinks” week.

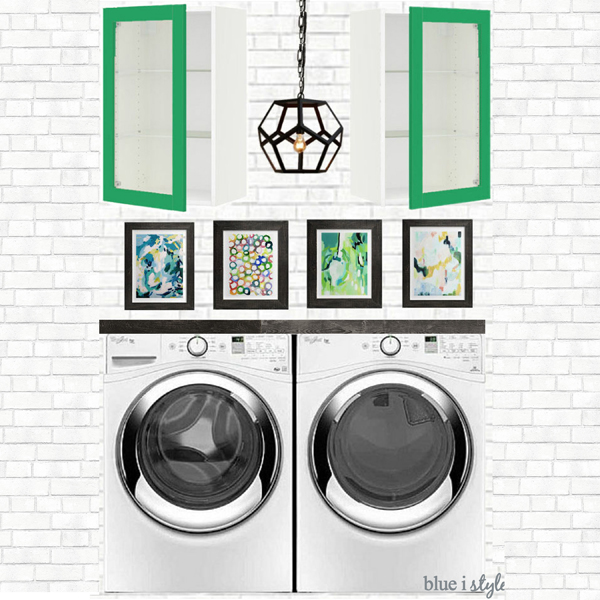
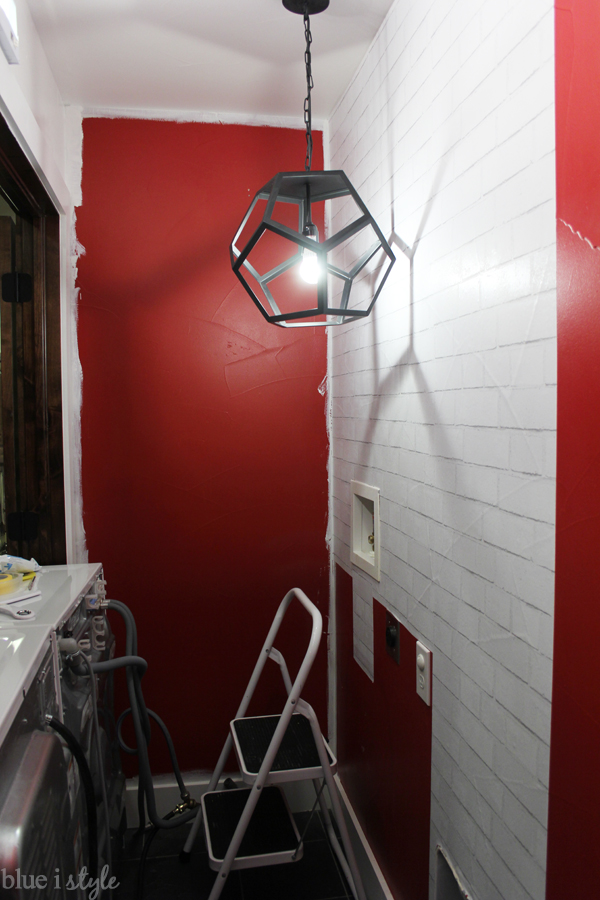
Before I show you what we accomplished this week, let me remind that our laundry “room” is really just a closet which is open the adjacent linen closet. Four weeks ago it was all red…and this is where we are headed:
You can catch up on the past three weeks of the One Room Challenge here:
When we left of last week, I had hung just enough of the wallpaper to give you a glimpse at what it was going to look like, but we still had a lot left to do.
Since measuring out 90 inch lengths of white paper on the floor is hard to do with a two and a three year old running around – not to mention the challenge of trying to attach the very sticky paper on the wall with perfect alignment when kids are climbing up the step ladder behind you – you probably won’t be surprised to hear that I quickly decided to limit my wallpaper work hours to post-bedtime.
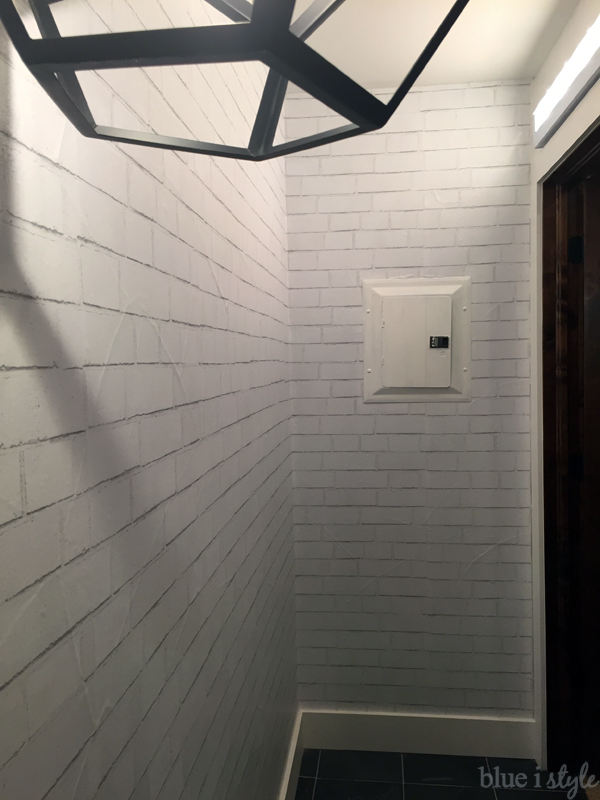
As a result, it took longer than I wanted to finish hanging the wallpaper, but by the end of the weekend, I was finally done!
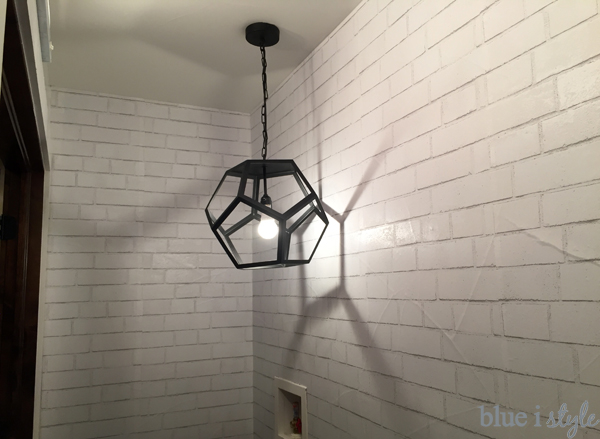
I fell head over heels for this white brick wallpaper when I saw it at the NY Now trade show this summer, and when I reached out to Tempaper about it, they offered me a very generous discount as a sponsor of this project!
Based on the square footage of my space, I needed three rolls of the temporary, removable wallpaper, but I was really hoping to find a way to complete the space using only two rolls of the paper by skimping and not putting any behind the washer and dryer. It took a lot of measuring and pre-planning, and it was cutting it really close… but I managed, just barely, to finish the space without having to open that third roll. Every little bit helps when you’re on a budget, so I’m glad I’ll be able to return that extra roll!
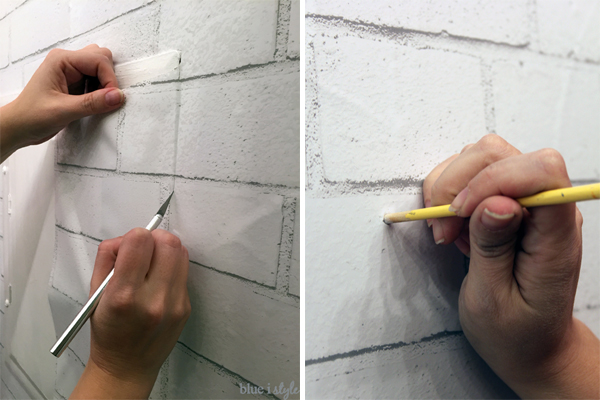
I admitted last week how nervous I was about the process of putting up this wallpaper, but now that it’s done I’m happy to report that it’s a totally doable project! After the makeover is complete, I’ll definitely be sharing a full tutorial with you, including tips for trimming around wall fixtures, and how we kept track of where the holes were for reinstalling the shelving system on the linen closet side.
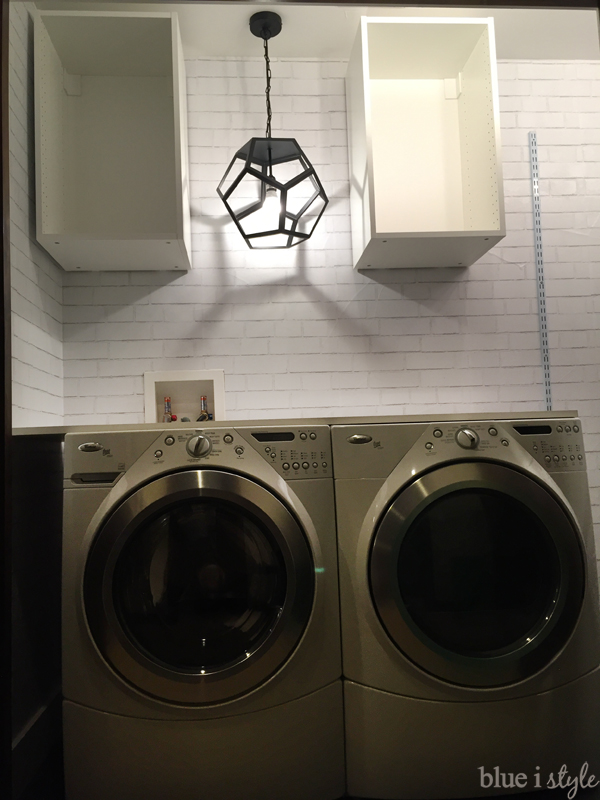
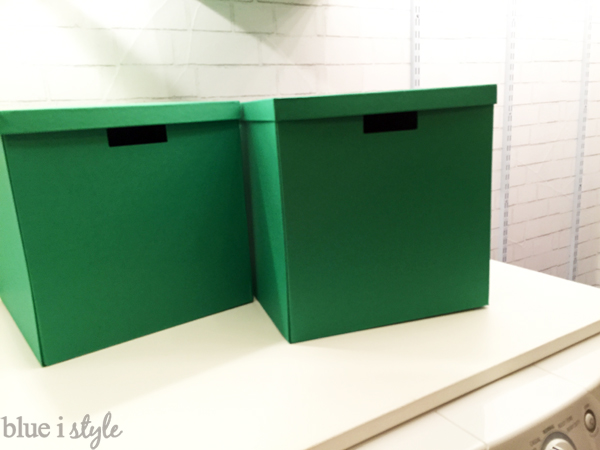
With the wallpaper complete, we were ready to install the cabinets above the washer and dryer. I’ve heard great things about Ikea cabinets, so I reached out to my friends at IKEA Centennial who sponsored my spring ORC project {the under stair playroom} and asked them if they’d like to collaborate again. They said “yes!” and provided me with the cabinets for the laundry room, as well as the gorgeous green boxes that I’ll be using to organize the linen closet {more about those later}.
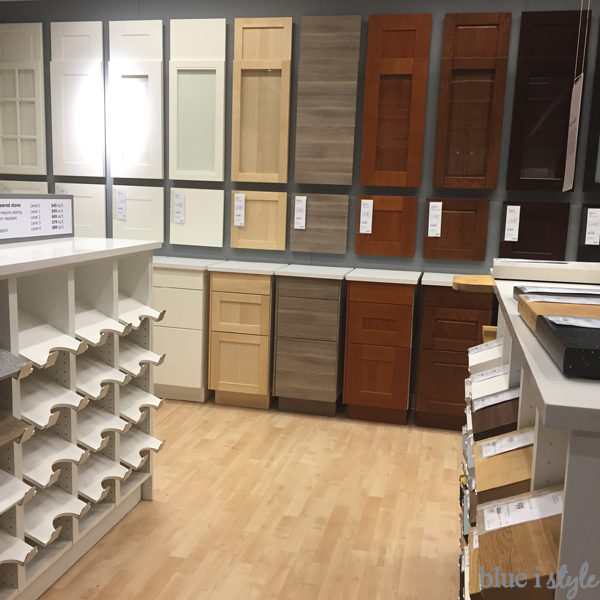
Shopping for cabinets at IKEA was a fun experience, because there are SO many options! I was able to find the perfect height and width to fit on either side of my new pendant light.
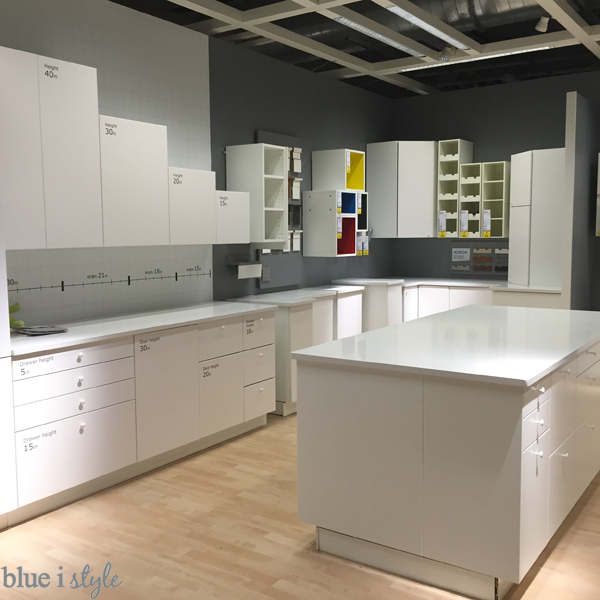
I picked white boxes for cabinets to blend in with the new white wallpaper, and then I selected glass doors with a light birch trim, which I’ll be painting bright green!
But before we talk about paint {the fun part} let’s talk about assembling and installing the cabinets. IKEA assembly sometimes gets a bad rap, but I was pleasantly surprised at how easy the cabinet boxes were to assemble. We laid everything out on the floor of our bedroom, and they came together pretty quickly.
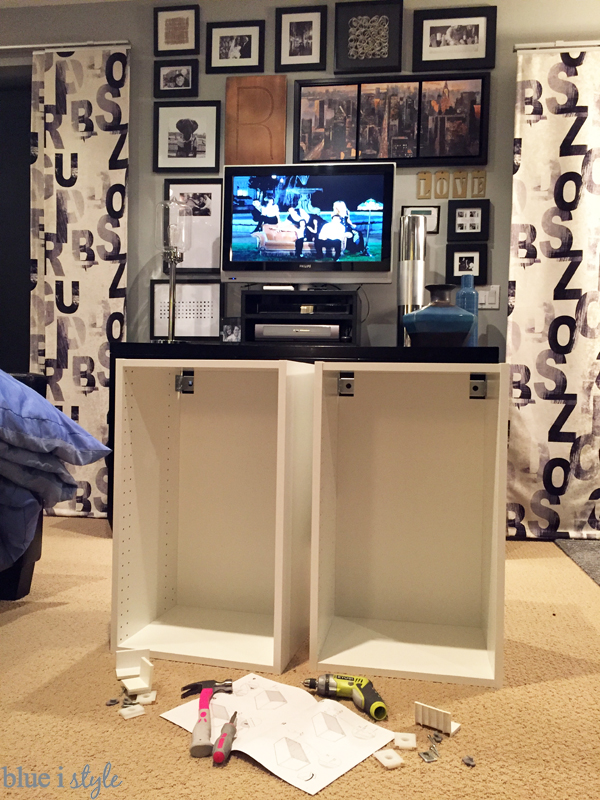
Working on the cabinet assembly for our Fall 2015 ORC room, while watching TV in our Fall 2014 ORC room was a nice way to remind ourselves that all this hard work pays off in the end! And, also, that somethings never change…we’re still watching the same reruns of Friends!
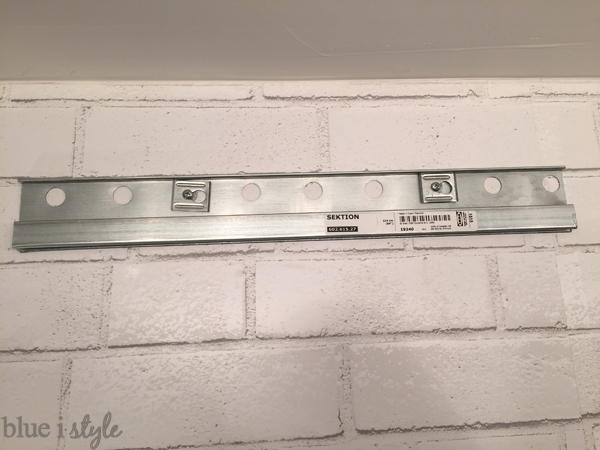
The IKEA cabinets hang from a rail system, which makes the installation pretty easy. The cabinets came with a very long rail – made for hanging an entire kitchen grouping – but since we were only installing two small cabinets set apart from one another, we had to cut the rail down to two short pieces. This can be done with a hacksaw, but we made quicker work of it using a Dremel tool.
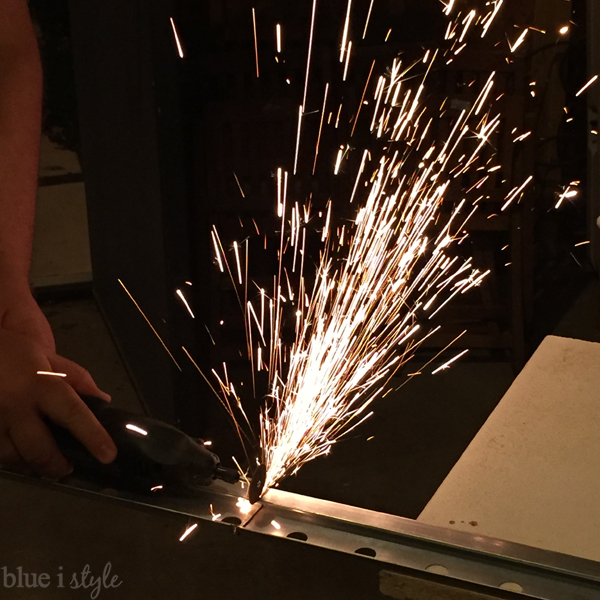
There were sparks flying between hubby and I in the garage last night! You know what they say, “the couple that DIYs together, stays together!” Ok, maybe no one says that, but they should!
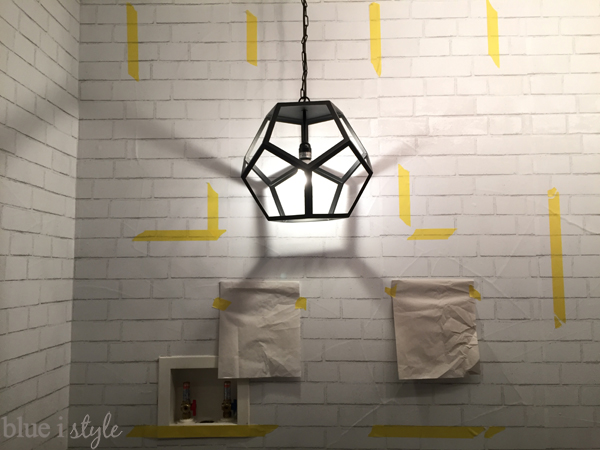
Once the rails were cut to the right length, we had to figure our exactly where to hang them. I used a delicate surface painter’s tape and taped off the height and width of the washer and dryer, the location of the studs, and I even created templates for the size of the art work.
Once we decided how high to hang the cabinets, we were ready to make fast work of installing the rails. Of course, nothing can ever go as planned… Where the studs were located, there also seemed to be something else in the way that prevented the screws from going in! In the end we made it work, and fortunately we had plenty of extra heavy duty anchors on hand.
I’ll share our full IKEA cabinet installation tutorial after the makeover is complete, but for now, a few pictures!
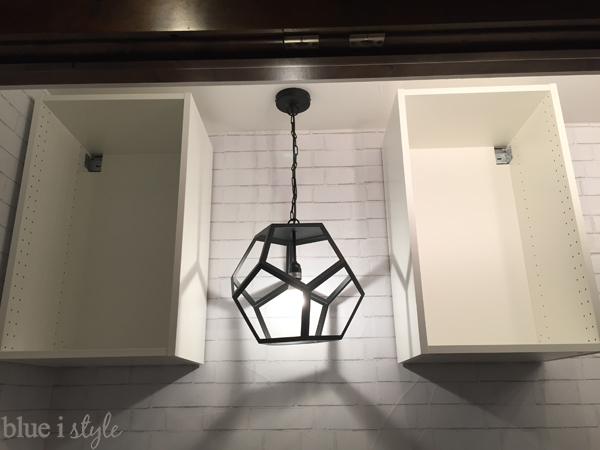
With the cabinets up, we were able to put the washer and dryer back in place…which is a very good thing since they were essentially blocking the entire hallway!
Next up on the agenda is painting the cabinet doors, and I’ve narrowed the color choices down to two – Sherwin Williams Lucky Green or Kilkenny! Yesterday I was totally feeling Lucky, but now I’m leaning a little more Kilkenny {even though I think of South Park every time I say the name…anyone?! …Bueller?!}. Lots of people have been giving me advice about the color selection on Instagram and Facebook, and I’d love to hear your opinion as well! Which green do you like best?
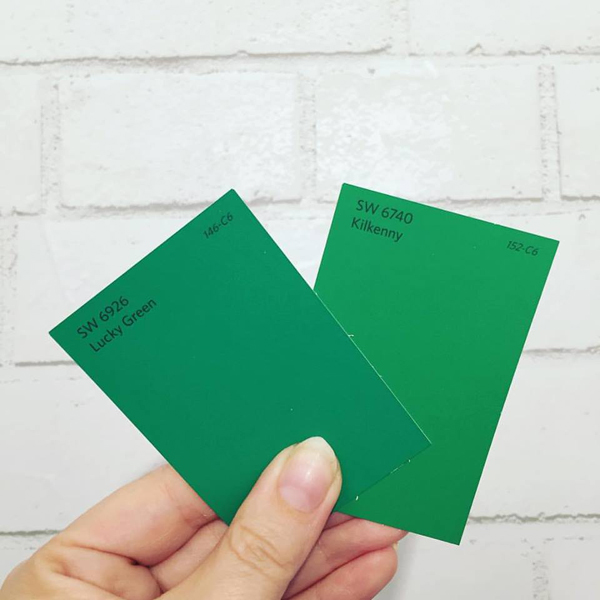
Both green options look good with the IKEA storage boxes that will be going on the linen closet shelves – so I don’t think I can go wrong either way.
Let’s check in and see how we’re doing on the TO DO list, and remind you what’s next…
Brightening up the walls with white brick wallpaperAdding a new pendant for added light and styleAdd a light on the linen closet sideInstall cabinets above the washer and dryer for added storage- Paint and install cabinet doors
- Add cabinet hardware
- Hang updated art
- Give the countertop a higher end look on a low budget
- Create a new place to hang clothes that’s easier to reach
- Utilize the inside of the closet doors for additional storage
- Purge and reorganize the linen closet, making it prettier along the way
Whew! That’s still a lot of items yet to be crossed off, but fortunately each project gets a little less time consuming as we work our way down the list. After I get the cabinet doors painted, next on the agenda is giving the counter top a whole new look.
Thanks for stopping by for this week’s update! Please make sure to visit Calling it Home to check out the updates from the other One Room Challenge participants. These ladies are killing it week after week! Thanks again to Linda for coordinating such a fun event and inviting us all to play along!

Let’s get social!
