Thank you guys so much for all of the love and sweet comments on our graphic glam master bathroom makeover last week! Everyone seemed to especially love my faux marble shelves, so today I’m excited to show you how simple and inexpensive they are to make! Each of the marble shelves in my water closet cost me just about $20 to create, but they look so high end! Even our friends and family who have seen them in person thought they were the real thing until I spilled my DIY secret.
Everyone loves a good IKEA hack, right? My faux marbles shelves begin with the super common IKEA EKBY shelves and brackets. Not only are these shelves a great price at only $17, they were also the perfect choice for this project because of the way the brackets cover the ends of the shelves, which I’ll explain further below. If you don’t have an IKEA in your neck of the woods, you’re in luck because you can also purchase EKBY shelves online!
This post contains affiliate links. If you buy something that I recommend, you pay the same price, but I may receive a small commission.
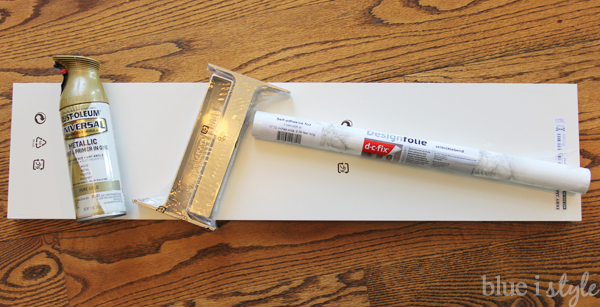
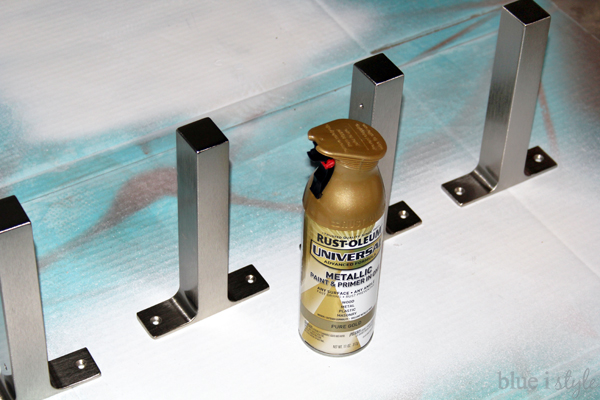
Aside from two shelves and two sets of shelf brackets, the only other supplies for this DIY are one $7 roll of grey marble adhesive film {which is basically contact paper}, and a can of Rust-Oleum Universal Pure Gold spray paint {left over my IKEA LACK table hack a couple of months ago}.
The IKEA EKBY shelves come in two depths – 7.5 inches and 11 inches. The 7.5″ deep shelves were perfect for above the toilet in my water closet, and this size also worked out perfectly because the roll of marble contact paper I had already purchased was 17.5 inches wide, allowing me to wrap the marble paper around the shelf without having to have any seams. If you instead want to use the 11″ deep IKEA EKBY shelves, you’ll want to spend a bit more on a 24″ wide roll of marble contact paper.
Ok, with those details out of the way, let me show you how to cover the shelves…
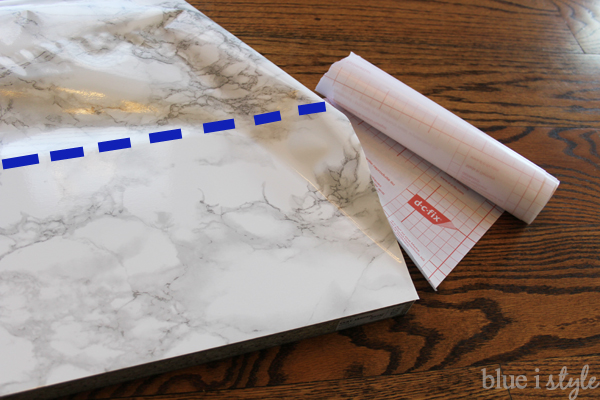
Start by unrolling the marble contact paper on a solid surface. Lay your shelf down, lining up the top and left sides of the shelf with the edges of the paper. Use a pencil to mark the length of the shelf on the back of the paper {which has convenient grid lines that make it easy to mark and cut straight}. Then roll the shelf over by carefully standing it up on its end, maintaining its position on the paper, and then laying the other side of the shelf down on the paper.
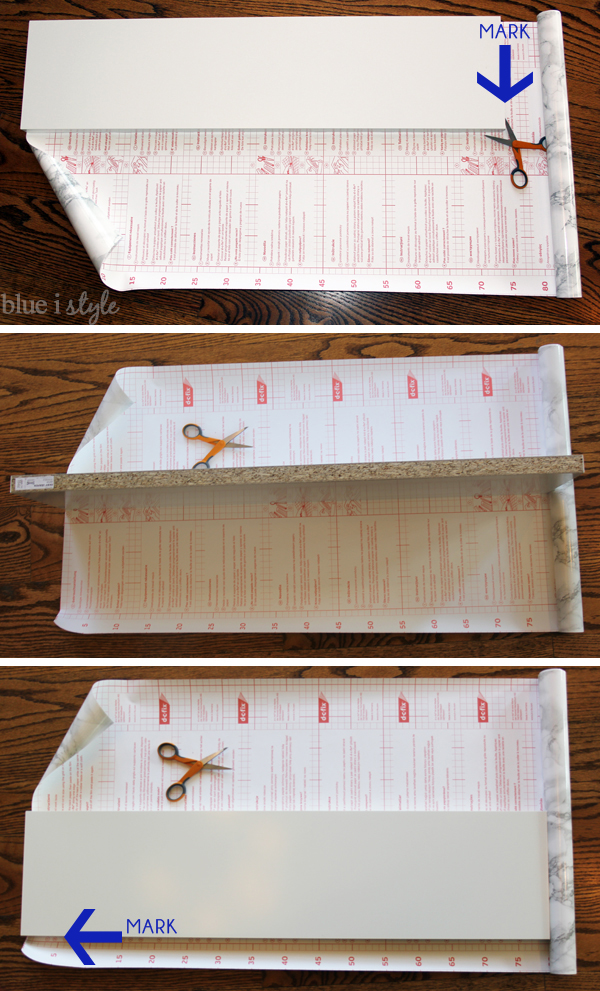
Rolling the shelf over in this way allows you to easily measure how much paper you need to cover the top, front edge and bottom of the shelf. Make a mark on the back of the paper at the bottom of the shelf, and then add an extra inch. Using your two pencil marks, but the marble paper down to size.
Now you are ready to begin wrapping your shelf in contact paper. Sit the shelf down on the floor with the raw edge of the shelf facing you and the finished edge facing away from you. Peel the backing off of one corner of the marble contact paper, line it up with the raw edge corner of the shelf, and stick it down {don’t worry – you’ll able to re-position it if you need to}.
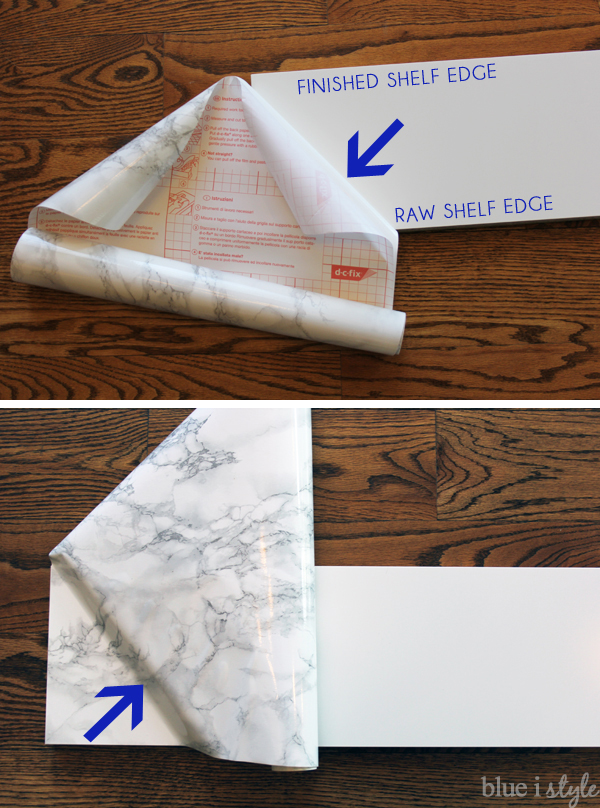
Unroll the marble contact paper and tear off a strip of the backing approximately the width of the top of the shelf, leaving the remainder of the backing on the paper. Slowly press the paper down the top of the shelf, working from left to right and pressing out any bubbles along the way. {In the photo below, the dotted line indicates where I removed the paper backing.}
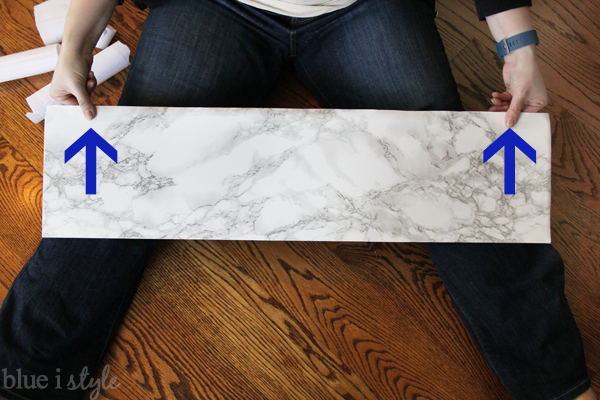
Once the paper is smoothly affixed to the top of the shelf, turn the shelf over {putting the marble side on the ground}. Remove the backing from the remainder of the marble contact paper, being carefully not to the let it stick to itself.
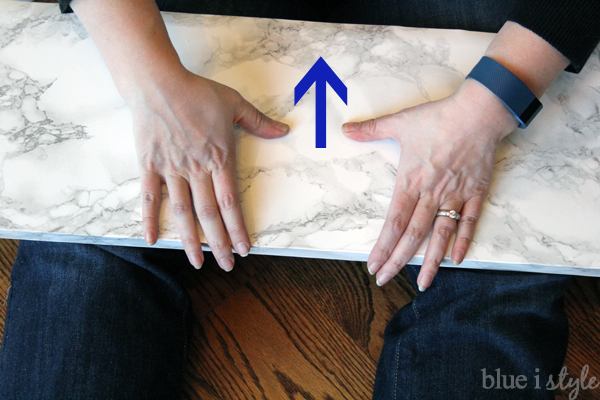
At this point, I found it was easiest to sit on the ground and put the shelf on my lap, with the raw edge side of the shelf facing my stomach. I gripped the contact paper on opposite ends and wrapped it around the finished edge of the shelf, pulling it tight to avoid bubble around the corners, and then stuck the paper down.
This technique actually gave me a nice smooth adhesion, with only a few bubbles under paper here and there. To remove the bubbles, I used by thumbs to move the bubbles toward one of the edges, working them out little by little.
At this point, all of the finished sides of the sides of the shelf were covered in marble, and I had about a half an inch of contact paper left that I wrapped around the back, raw edge of the shelf.

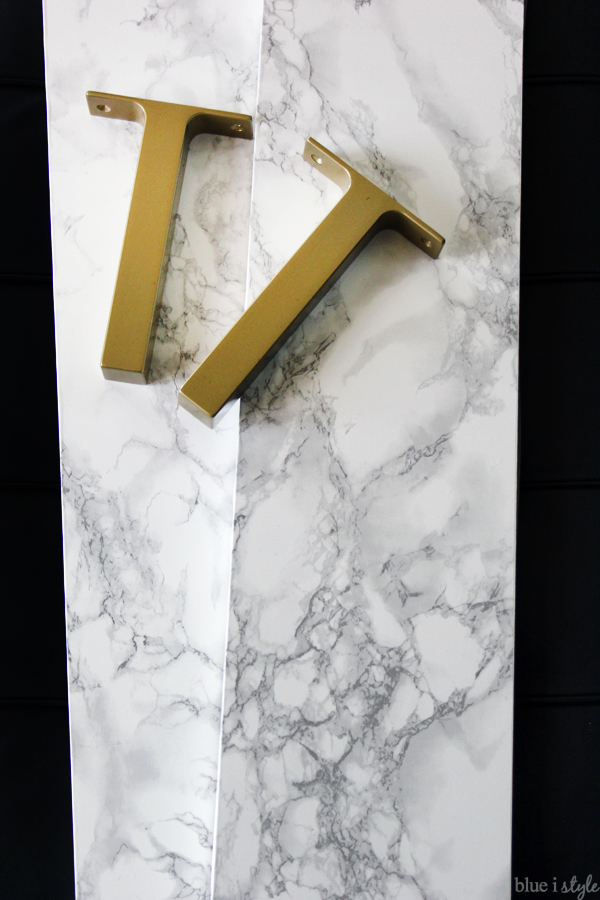
If you wanted your shelf brackets to remain their original silver color, you would be ready to install the shelves at this point. Since I wanted my brackets to be gold {similar to the much pricier marble shelves I recently spotted in a catalog}, I ran out to the garage and gave the brackets a quick coat of gold spray paint.
Now I was ready to install the shelves! As I mentioned before, these brackets are idea for this project because they slide over the raw edges of the shelves, allowing you to create the seamless look of marble without having to try to wrap the raw edges in contact paper.
The shelves were exactly the right length for my water closet space, but the design of these brackets also makes it easy to cut the shelves down if you need them to be shorter. You would simply cut the shelf to your desired size before affixing the marble contact paper, and the brackets would cover the cut ends.
The installation was quick and easy – just a couple of screws on each end of the shelves {we used gold screws rather than the silver the shelf came with}.

And that’s all there is to it! One $7 roll of grey marble adhesive film was all it took to transform both of my shelves, and I still have a little marble paper left over for a future project.
 |
| ART SOURCES: The blue New York and Brooklyn map prints are from Amazon. The other three pieces of art were all provided by Minted, one of my One Room Challenge sponsors {from top to bottom}: Scribbles in Blue by Yao Cheng; Blackbird Chain by Misty Hughes; and Black & White Abstract Spin by Lauren Webster}. |
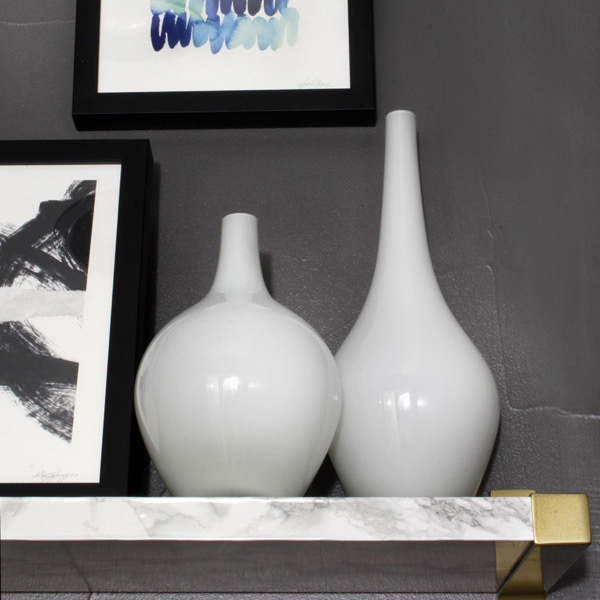
I just love the way the white marble shelves and gold brackets contrast against the dark grey walls! Combined with the tile on the lower half of the water closet, they helped me give the space a completely new, stylish look!

Now that I’ve realized how easy the marble contact paper is to work with, and how gorgeous it looks in person, I seriously find myself eyeing everything in the house wondering what it would look like covered in marble! I know this is one you’re going to want to pin, so be sure to grab the image below to save for later. {You’re welcome, wink wink!}

If you haven’t had a chance to check out our full graphic glam master bathroom makeover, you might want to pop over there now! As much as I adore my DIY marble shelves, they aren’t even my favorite part of the space, and that’s saying a lot. Here’s a little sneak peek…