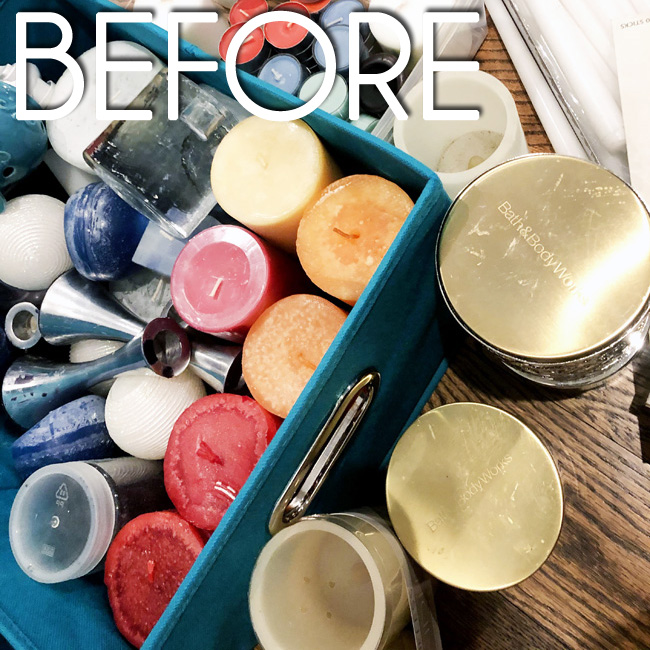
Until recently, I’d never given much thought to how to store candles. Years ago I haphazardly stuck all of our candles into a couple of lidded boxes and put them on the shelves in our entry table. It worked ok… for a while, but eventually I had to admit that I needed to come up with a better candle storage idea.
I like to make simple changes to our decor for each season and holiday, so I have quite a few pillar candles, tapers, votives, and tea lights in various colors. Over the years, as I acquired more candles, I added them to the boxes until they were overflowing. Each time I pulled a box out, I would get frustrated digging around for what I wanted, and then even more frustrated trying to tetris all the other candles back into the box so I could fit the lid on again.
Finally, enough was enough. After considering a few different candle storage ideas, I came up with one that’s working great for me. But, since everyone’s space is unique, I’ve also rounded up some other smart ideas for how to organize candles, which you’ll find at the end of this post.
My Candle Storage Cabinet
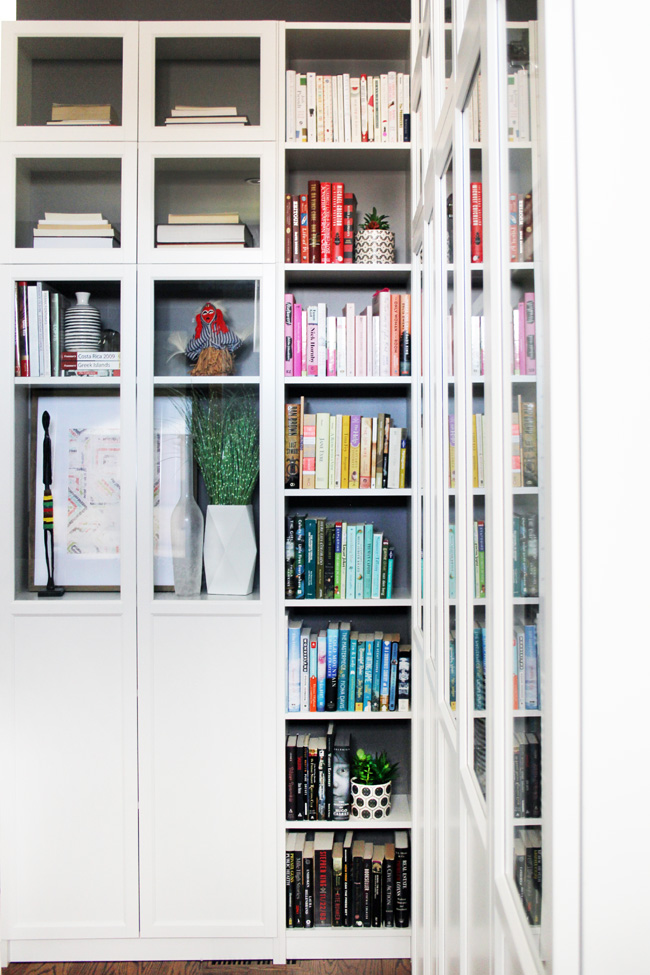
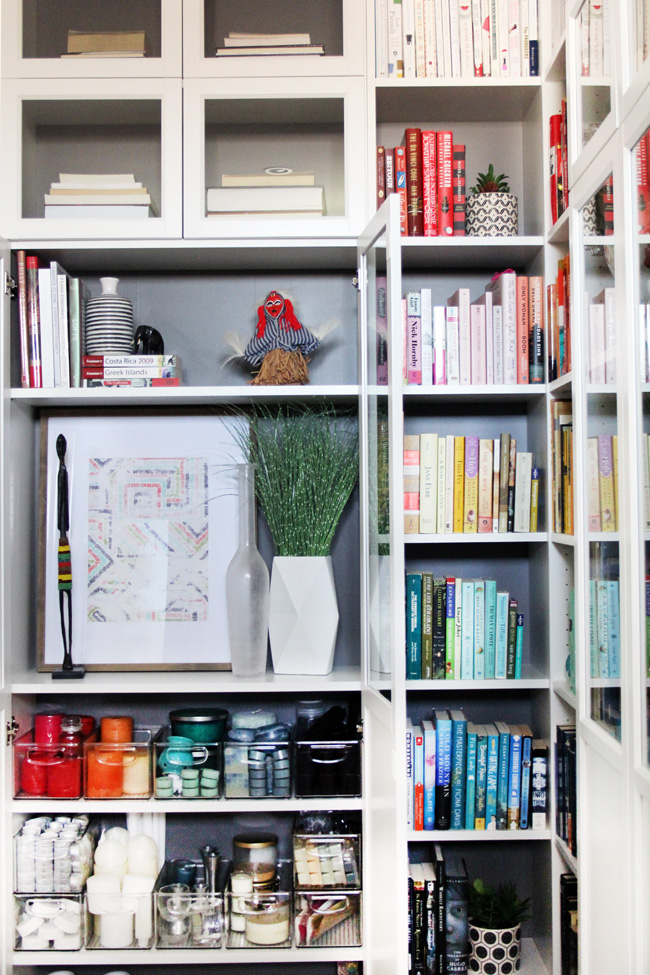
Earlier this year, we installed IKEA Billy bookcases that wrap around the corner of our living room. The bookcase doors are glass on top and solid on the bottom – creating lots of new, enclosed storage space. I knew right away that I wanted to use one section of enclosed shelves to create a dreamy candle storage cabinet.
The first challenge was finding the right storage containers. The bookcases aren’t particularly deep, so I took careful measurements and did quite a bit of looking to find storage bins that would fit well. I discovered that these iDesign Kitchen Binz (affiliate link) were the perfect solution. At 10 inches deep and 6 inches wide, five bins fit perfectly across each shelf.
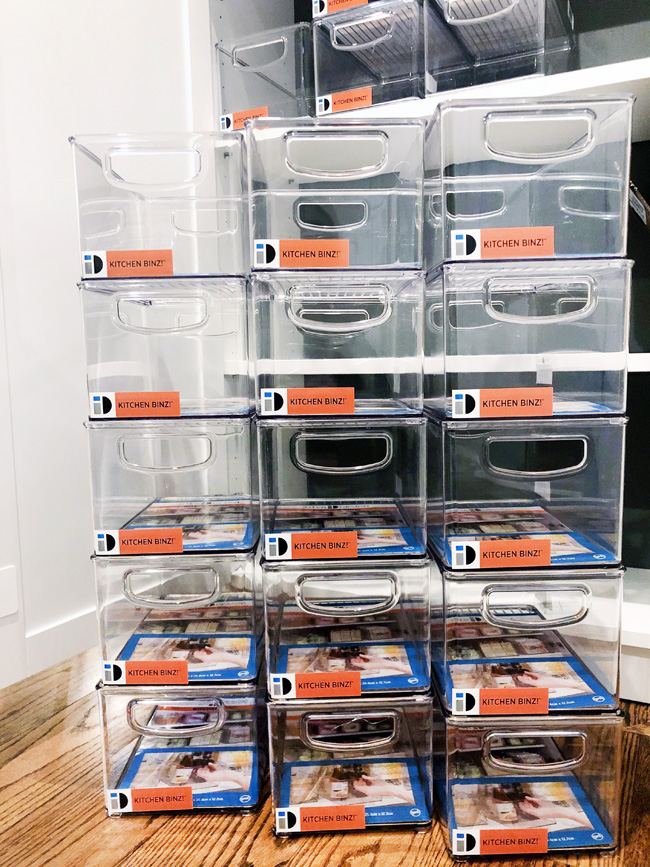
In addition to these clear bins fitting nicely on my shelves, they have several other benefits that make them ideal storage containers for candles:
- Not Too Big – My old, lidded boxes were large enough that lots of candles got stacked on top of each other and I often found myself digging around looking for what I needed. These smaller bins, with fewer candles in each bin, will be much easier for me to keep organized.
- Clear – Whether it’s a specific color of style of candle I need, the clear bins allow me to quickly find exactly what I’m looking for.
- Stacking – These bins are stackable, allowing my to make the most of my shelf space.
How to Organize Candles
- Gather. As is the case with any organizing project, it’s best to start by completely emptying your space and then sorting everything out. In this case, that meant emptying out my old candle storage boxes. I already had all of my candles in one place (it just happened to be one messy place), but if you have candles hidden here and there in various spots around the house, gather them all into one spot.
- Purge. Next, it’s time to decide what stays and what goes. Storage space is precious, and there’s no point in organizing something that you’re never going to use again. I tossed any candles that were damaged, nearly used up, or in a color that no longer matched my decor.
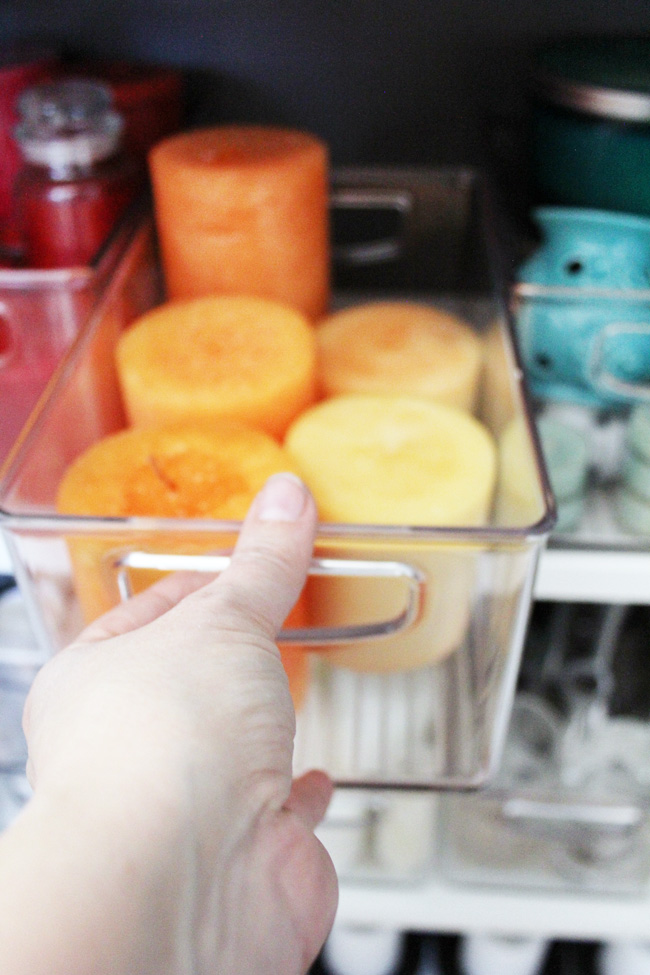
- Sort. Then I was ready to start sorting. Initially I thought I might organize my candles by type – pillar candles in one bin, tapers in another, etc. But once I had everything spread out in front of me, I realized that – for my purposes – it would be better to sort them by color.
Since I use different colors in my decor for each season, it’s very convenient to grab the bin with all of my orange and yellow candles in the fall, or the bin with all of my red candles at Christmas.
When deciding how to organize your candles, think about how you use them throughout the year, and create a system that will make it easy to find what you need, and equally easy to put them away when you’re done!
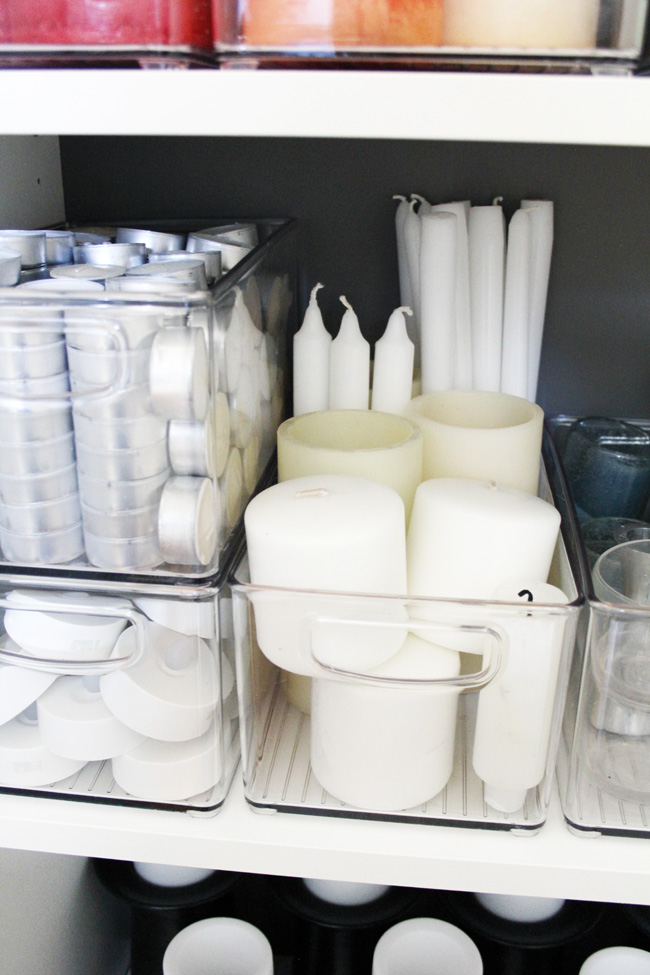
After sorting all of my colorful candles, I moved on to my large collection of white candles. Since I had more than would fit in one bin, I decided that for these it did make sense to sort them by type.
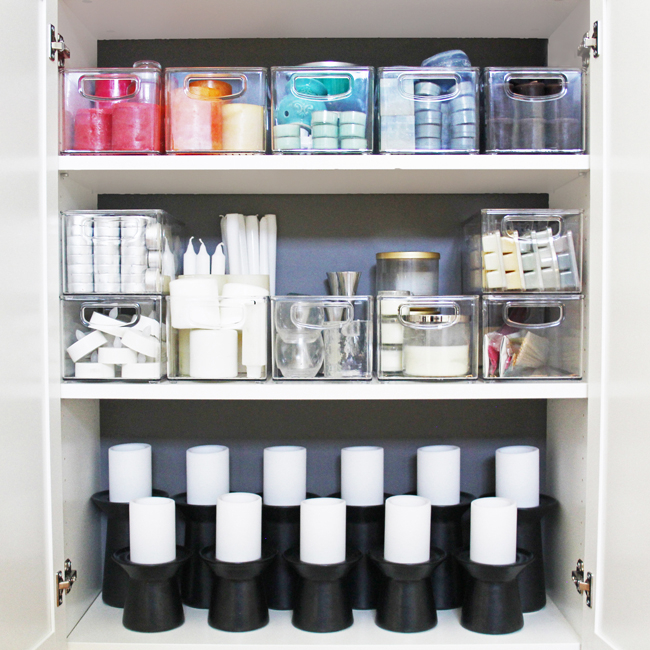
These clear stacking bins turned out to be perfect for votive and tea light candle storage. I filled one bin with my battery-operated votives, and stacked a second bin on top with all of my wax votives. Then I filled a third bin with all of my white pillar candles and tapers.
Finally, I used a few more clear bins to store my small candle holders, my jar candles, and my scented wax cubes.
Since I primarily use candles in candle holders for my decor, I don’t actually have that many jar candles – just a few from Bath and Body Works in my favorite seasonal scents that I replace as soon as they run out. But if you have a lot of jar candles, my friend Melissa has the perfect candle storage solution for you!
Leave Room to Store Candle Holders
I always go back to my 10 key steps for organizing any space – and #4 on the list is to consider how your needs change throughout the year. As I swap out my seasonal decor, one of the biggest problems I always run into is where to store some of my larger items when they aren’t in use – like the candle holders from my dining room table.

I really love these chunky black candle holders, and I leave them on our dining table most of the time. But at Christmas time I swap the candle holders for Christmas trees, and when we’re hosting a party, I often move the candle holders to make room for trays of food or other decor.
I’ve learned the hard way that it’s not that easy to find a spot to tuck 11 large candles holders out the way for a night (or a month). So when I planned out our candle storage cabinet, I opted to leave the bottom shelf empty to provide a convenient spot to store my oversized candle holders when they aren’t on my dining table.
There’s no best way to store candles, and no right way to organize them. What works best for you depends on the type of candles you have, the quantity, and what space you have available for your candle storage.
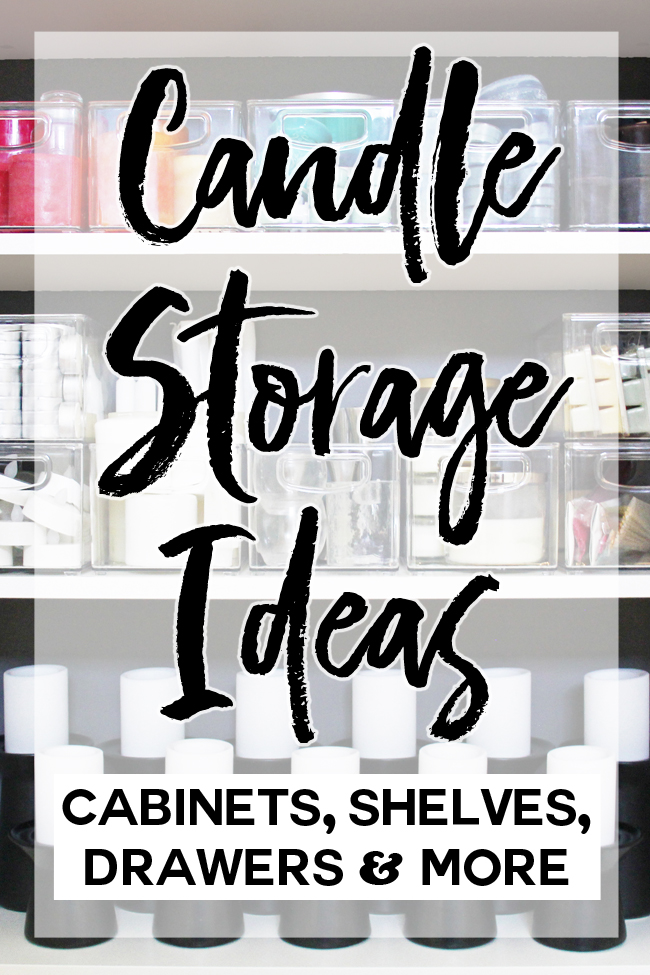
More Candle Storage Ideas
How to Store Candles When Your Shelf and Drawer Space is Limited
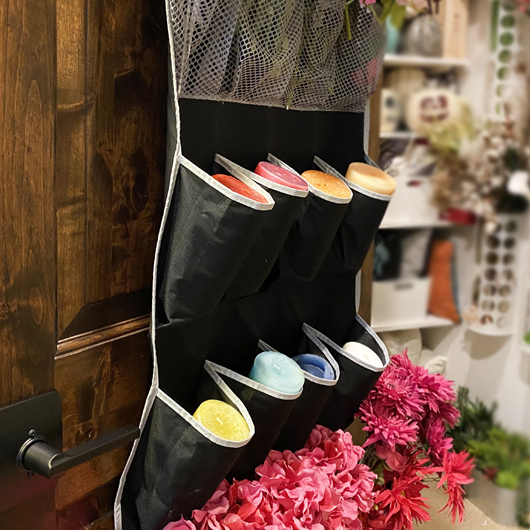
My biggest piece of advice for organizing when you’re short on space is to take advantage of every available nook and cranny, and one of the most commonly overlooked storage spaces is on the back of your closet doors.
I have a hall closet that I use to store most of our holiday and seasonal decor. A shoe bag hanging on the back of the door holds some of my faux flowers, but the pockets are also the perfect size for holding pillar candles!
Click Read More to see 15 other unique ideas for back of door storage throughout the house!
How to Store Jar Candles
If you love scented jar candles, then you've probably discovered that they present a unique storage challenge. Ideally you want to be able to see the labels on each candle to know what scent it is. On a shelf, you'll only be able to see the labels for the front row of jars, and in a drawer, you'll only see the lids rather than the labels.
Add to that the fact the glass jars are fragile... Candles aren't cheap, so you want to both store and protect them. My friend Melissa, over at Polished Habitat, came up with a perfect solution!
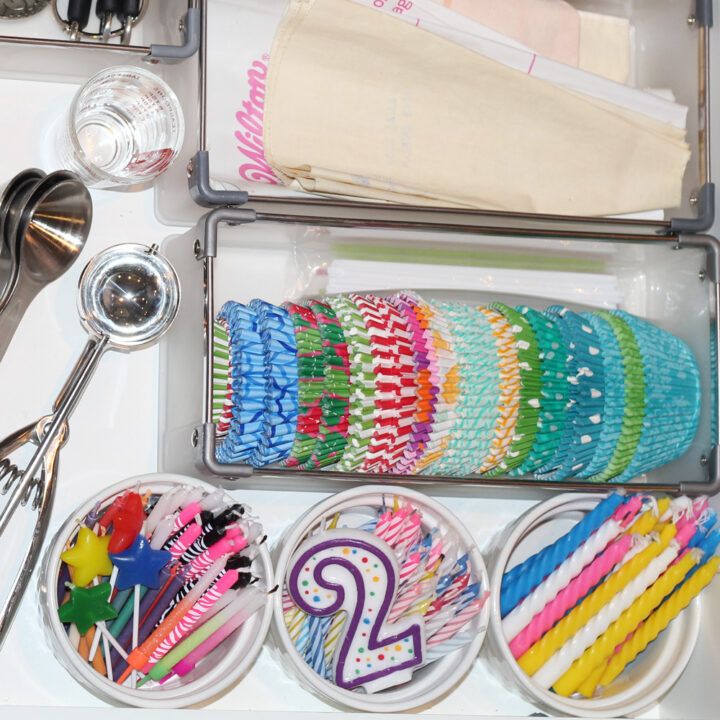
Store Birthday Candles in Your Baking Drawer
Birthday candles are one of those items that seems to multiply around our house. Each time we buy a package, we never end up using all of them (you don't need 12 candles when you're celebrating an 8th birthday). But none the less you wind up buying more when the next birthday rolls around.
A few years back, I created an organized baking drawer to keep everything we need for cupcake baking and cake decorating all in one convenient spot. I used three ceramic ramekins {from the Michael's dollar section} to corral all of my birthday candles into one spot.
Now I can quickly take inventory to see if I have enough candles of a particular color or size before buying more.
This quick little organization solution also encourages us to use up our extras. What kid doesn't love to blow out candles? Use them to celebrate the last day of school before winter break, a great test score, or just because!
Click read more to get all the details of this organized baking drawer.