• About
    • About Blue i Style
    • Tour Our Home
    • Free Organizing eBook
    • Blogging Resources
  • Work With Me
    • Interior Decor & Organizing Services
    • Partnerships & Collaborations
    • Blogging Resources
  • Features & Press
  • Policies & Disclosures
  • Contact

Blue i Style

Creating an Organized & Pretty, Happy Home

  • Decor
    • Tour Our Home
    • Room Makeovers & Design Plans
    • Decorating Tips & Tutorials
    • Outdoor Decor
    • One Room Challenge
  • Organizing and Cleaning
    • Organizing Tips & Tutorials
    • Organizing By Room
    • Organizing on the Go
    • Cleaning
  • DIY
    • DIY Tips & Tutorials
    • Smart Home & Safety
    • Paint Tips & Projects
    • Crafts
    • Cricut Projects
  • Kids
    • Decor & DIY for Kids
    • Organizing Kids
    • Life With Kids
  • Five Minute Projects
  • Holidays & Entertaining
    • Seasonal & Holiday Decor
    • Entertaining
    • DIY Gifts & Gift Guides
    • Facebook
    • Instagram
    • Pinterest
    • Twitter
    • YouTube

Crafts· Holidays & Seasons

A Serving Bowl Becomes a Thanksgiving Turkey

  • Facebook
  • Twitter
You guys probably know by now how much I love coming up with creative ways to upcycle belts. I’ve used them to create hanging shelves, drawer pulls, basket labels, a closet organizer, and even wrapped a belt around a lampshade. But you’ll never believe what I did with belts this time around… I used them to turn a plain serving dish into a Thanksgiving turkey!
Thanksgiving Serving Dish turned Turkey

Seriously cute right?! I’ll show you the just how easy it is to make your own turkey with belt tail feathers, and then at the end of this post, you’ll be able to check out dozens more creative fall projects as part of the Home for Fall blog hop
SUPPLY LIST:
5 Leather Belts (matching or mix & match is fine)
1 1/4″ Waistband Elastic (I used gold elastic from Joann Fabrics)
Fabric-Tac Adhesive
Red, Orange and Yellow Acrylic Paint
Paint Brush
Orange Felt
Black Sharpie
Scissors
Measuring Tape
Flat Sided Serving Bowl


I began by stretching a length of elastic around my serving bowl. I cut a piece long enough to stretch around the bowl with about a half an inch of overlap – you’ll want it to fit pretty tight so that it stays put when placed around the bowl.

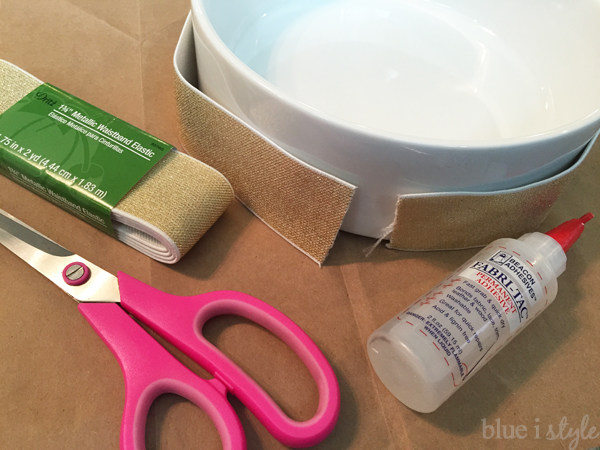
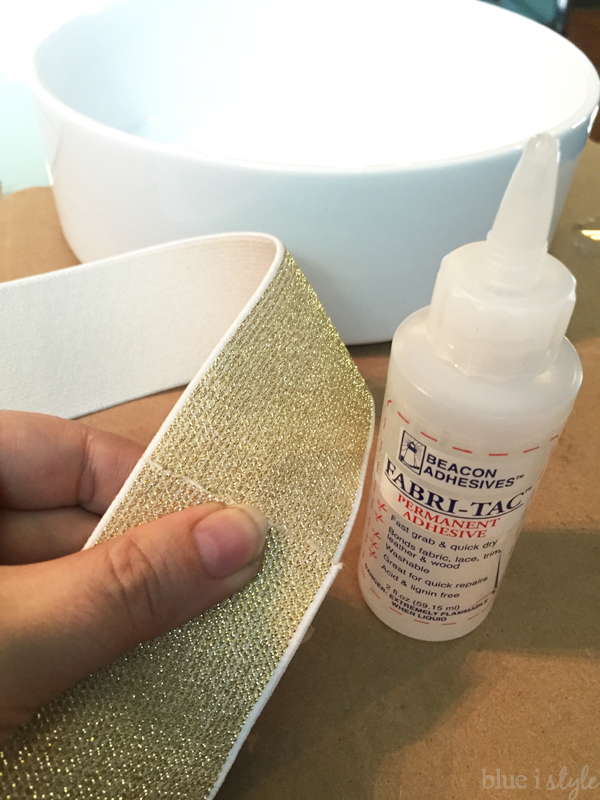
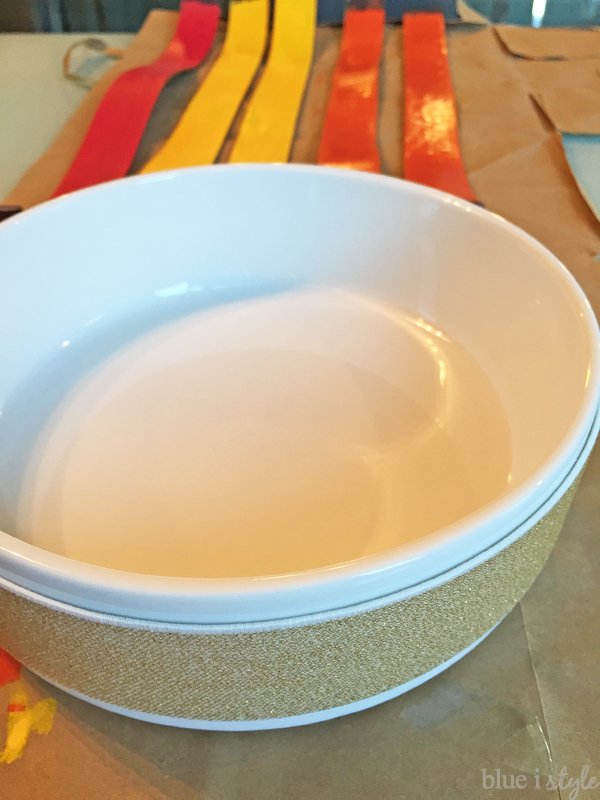
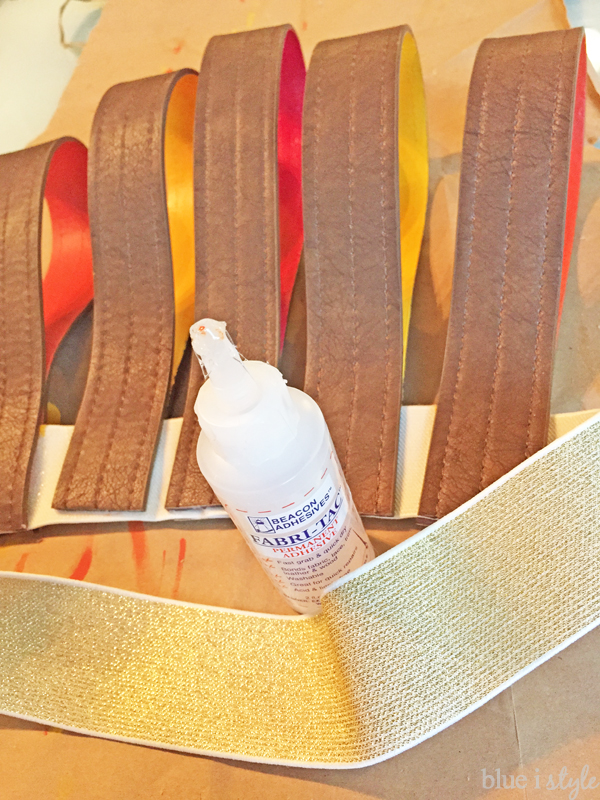
I used Fabri-Tac adhesive to glue the two ends of the elastic together.

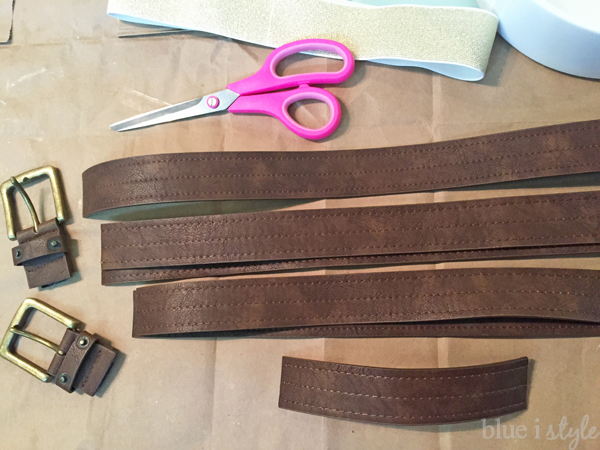
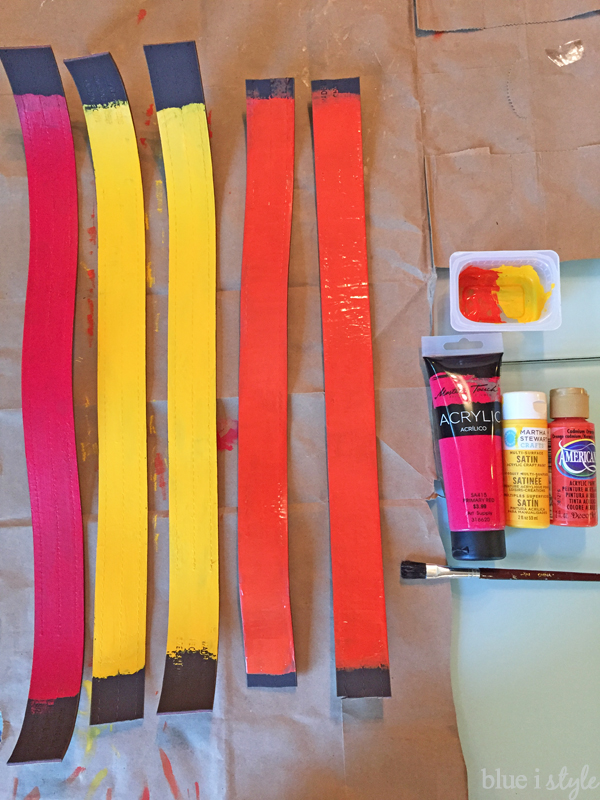
Next, I cut the belts to create the turkey’s five tail feathers and head. The belts I used were left over from prior belt projects, and I had purchased them on clearance at H&M. It would work just as well to purchase mismatched belts from a thrift store.

I wanted the middle tail feather to be the tallest, and for the feathers to get shorter toward the outside. I cut one belt to 22 inches, two belts to 20 inches, and two belts to 18 inches. Then I used left overs from one of the belts to cut a piece 7.5 inches long to use for the head.


To add a little color to my turkey, I decided to paint the back of the belts. This way, when the belts were looped to create the tail feathers, the color on the inside would peek out. I simply used two coats of acrylic paint.

I painted the back of the 22″ belt red, the 20″ belts yellow, and the 18″ belts orange.
Once the paint was dry, I was ready to create the turkey’s tail feathers by attaching the belts to the elastic.

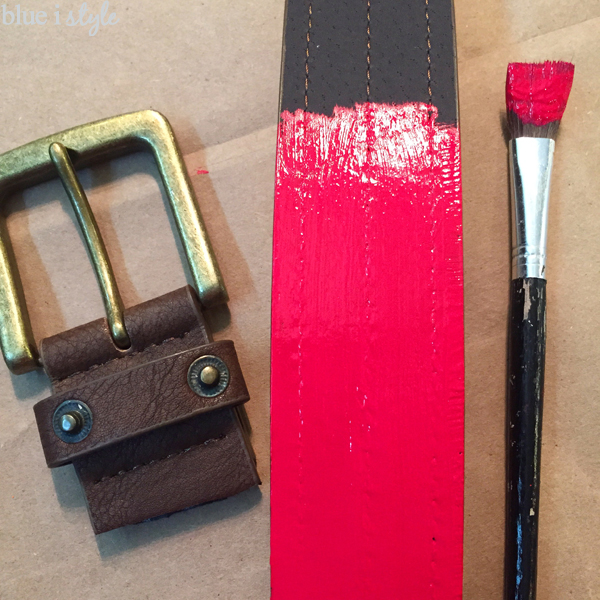
I wanted the center tail feather to cover the overlap in the elastic, so I used Fabri-Tac to glue the red painted belt to the back of the elastic at the point of overlap.

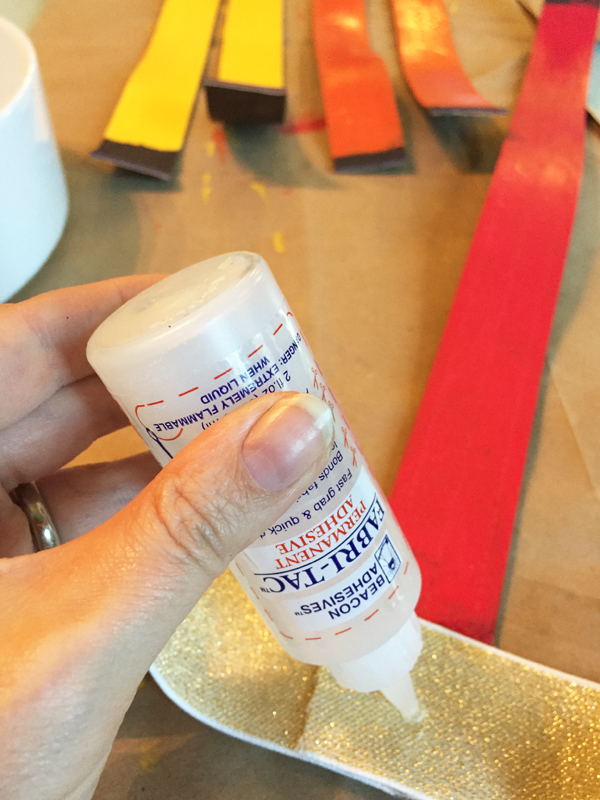
Then added more Fabri-Tac to the front side of the elastic and looped the belt over, applying pressure for a couple of minutes until the glue was dry.

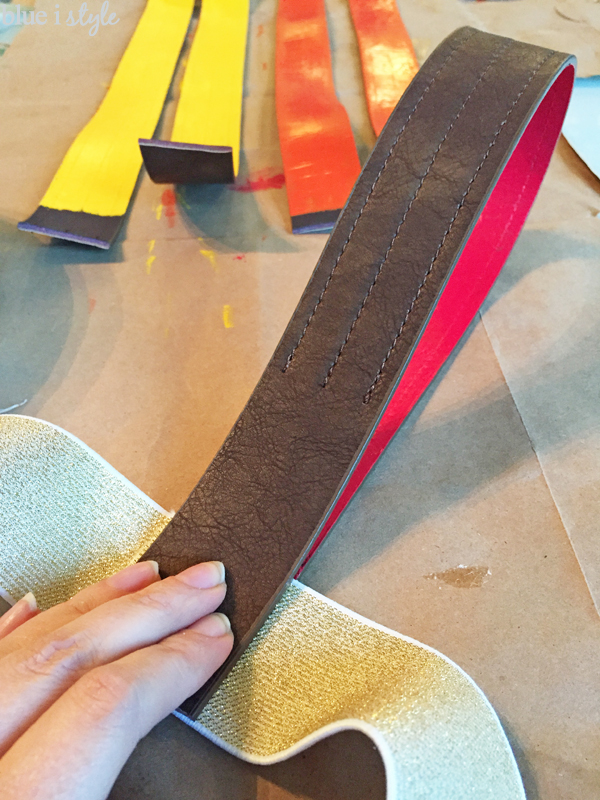
I continued this way until all five belts were affixed to the elastic, each about a quarter of an inch apart.

Finally, I was ready to add the turkey’s head. I glued the shortest strip of belt to the elastic immediately opposite the longest tail feather using the Fabri-Tac adhesive. I used a binder clip to hold the belt in place while the glue dried so that I could work on the turkey’s face.

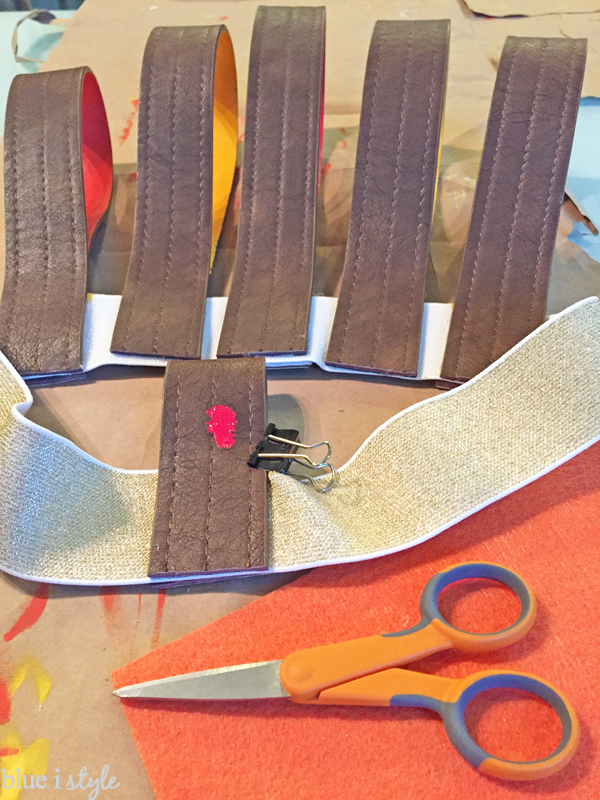
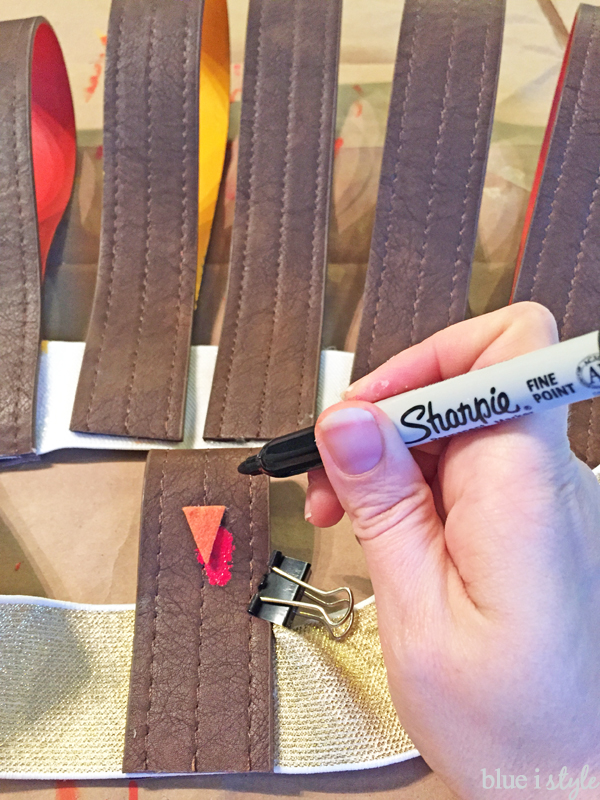
I used red acrylic paint to create a wattle, and then I cut a triangular beak from orange felt and glued it on using Fabri-Tac. Finally, I used a black Sharpie marker to draw in two round, black eyes.

Once the all of the glue was fully dry, I stretched the elastic around my flat-sided serving bowl and filled the bowl with caramel popcorn {one of my favorite treats}.
This was one of those projects that I was worried would be a great idea in my head, but wouldn’t turn out as well as I had imagined. But I’m thrilled with my new turkey serving bowl and I think it is such a fun addition to our fall decor.
Thanksgiving Turkey Serving Bowl
This turkey serving bowl will be perfect to sit our our counter throughout the month of November with snacks inside, and will such a fun way to take a side-dish to each of Thanksgiving gatherings we are invited to this season!
Belts upcycled to create Thanksgiving serving dish
I really love the bright pops of color inside the belted tail feathers. They add just enough color to the turkey without being overwhelming. 
Belt turkey tail feathers

I also am really happy with the texture that the stitching on these belts adds to the look of the turkey’s tail feathers.

Adorable turkey serving bowl made from belts

This was a really quick and easy project, but I’ll be able to use it again year after year!

 Thanksgiving Serving Bowl belts become turkey
Ok, now it’s time to check out the projects that all of the other amazing bloggers created for fall:
An InLinkz Link-up

Let’s get social!   

Linked up at Remodelaholic

  • Facebook
  • Twitter

10.19.15

« {five minute friday} Dry Erase Memo Board
{one room challenge} Lighten the Load: Laundry Room Week 3 Update »

Meet Angela

Angela, the founder of Blue i Style, strongly believes that decor should be functional, organizing can be beautiful, smart DIYs help stretch your budget, and an organized and stylish home can still be practical for life with kids.

Her work has been featured in print in Better Homes & Gardens and 5280 Home magazine, and online by HGTV, the Today Show, Good Housekeeping, and more. She was also named a 2018 Stylemaker by Better Homes & Gardens.

You can reach Angela at angela@blueistyle.com

COPYRIGHT & PHOTO SHARING POLICY

All text, images, and other content that are part of this blog are the property of Blue i Style, unless otherwise noted. All material is copyright protected.

If you wish to feature one of my projects, feel free to share a single photo (no collaged images, or images with text overlays) as long as the no pin code is used to prevent my image from being pinned from your site.

All features must include credit to Blue i Style with a link back to the original content (not just to the homepage). The project steps, supply list, and/or sources may not be disclosed.

Please read my full content and photo sharing policy to ensure you comply with all guidelines. Failure to do so constitutes copyright violation.

Create At Your Own Risk

Any and all content on this website is for personal use only and created exclusively for inspiration purposes.

Creating with my suggested methods, products used, and tools is at your own risk.

Please ensure you are following proper guidelines with anything used, and you receive professional guidance when necessary.

Read my complete disclosure at: Policies & Disclosures.

Sponsorships & Affiliations

To help fund this blog, I accept some forms of advertising, sponsorships, and affiliate links.

If you buy something that I recommend, you pay the same price, but I may receive a small commission. As always, all opinions are my own.

Blue i Style is a participant in the Amazon Services LLC Associates Program, an affiliate advertising program designed to provide a means for sites to earn advertising fees by advertising and linking to amazon.com.

I use an affiliate marketing service which may automatically put links into some posts, so please assume any/all links may be affiliate links.

Read my full Disclosure Statement.

Copyright © 2023 · Dazzling Theme theme by Restored 316

  • Facebook
  • Twitter
  • Pinterest