I pride myself on being pretty well rounded when it comes to the world of arts and crafts, but if there is one thing that I know almost nothing about, it’s cake decorating. I’m not proud of this, especially considering that when I was little my mom was a professional cake decorator and taught cake decorating classes. Now that I have kids, I want to be able to create fun cakes for them like my mom did for my sister and I when we were little. So this year I asked my mom to help me create a simple Elmo cake for Beckett’s second birthday. {I can’t believe that was almost a month ago and I’m just now sharing this…better late than never, right?}
This Elmo cake was about as easy as it could be – and even then, it challenged me. I don’t expect that I’ll ever be a terrific cake decorator, but let’s just say that I have a long, long way to go! But I had so much fun working on this with my mom and learning a couple of basic cake decorating techniques. For those of you who are beginners like me, I thought I’d share a few tips and tricks from my expert mom!
Dying & Thickening Frosting
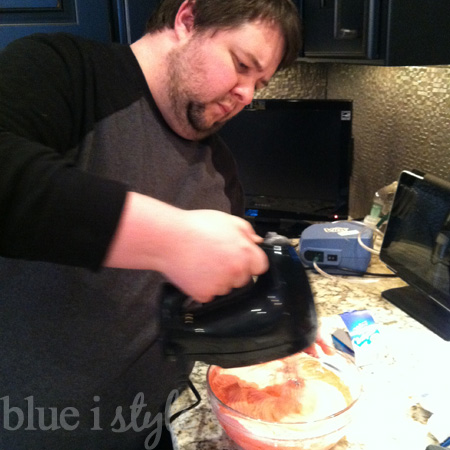
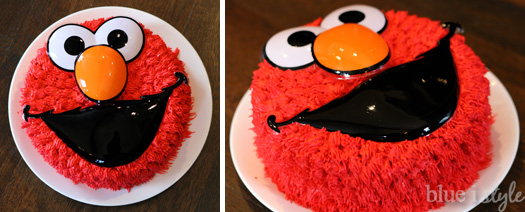
Elmo is, of course, red, but creating truly red frosting requires A LOT of food coloring! Rather than making our own frosting, we opted to buy Betty Crocker Vanilla Frosting and added red food color gel. We started by combining two cans of frosting and in a bowl, and then added the dye. We started by adding half of the container of red gel, but the frosting was still just pink. We continued adding red gel until the container was empty, and the frosting was starting to become red-ish. {Scott even got in on the action, doing the mixing for us.}
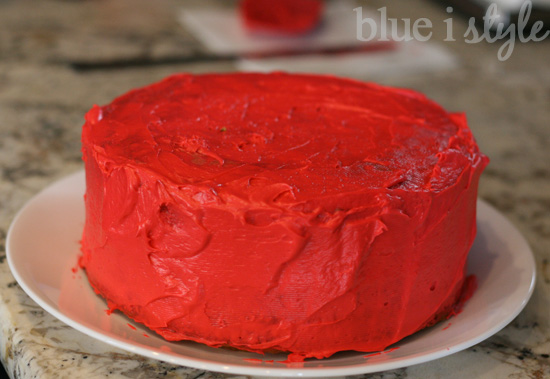
Once we had frosting that was approaching red, we gave our two stacked round cakes an initial, quick layer of frosting.
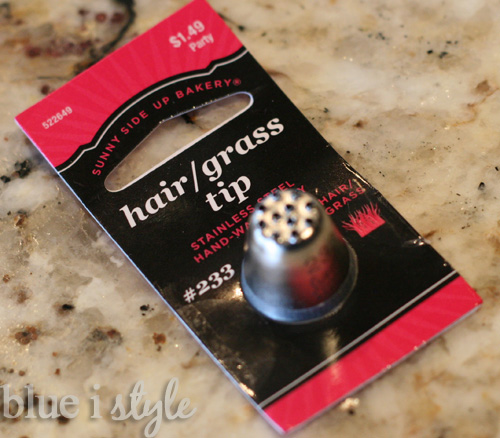
After the initial layer of frosting was on the cake, it was time for me to learn how to use a hair/grass cake decorating tip to create the appearance of Elmo’s fur.
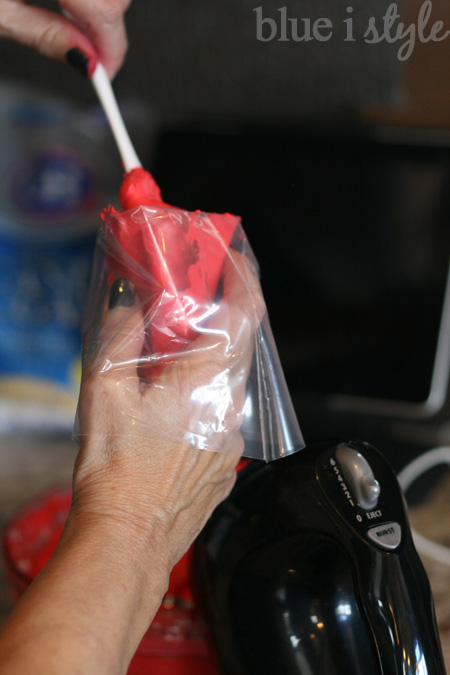
But before moving on to this next step, we needed to thicken up the remaining frosting. The Betty Crocker frosting straight from the can is not thick enough to hold a “hairy” shape, so we mixed in some powdered sugar, adding a bit at a time until the frosting had a thick enough consistency. {Be careful not to add too much powdered sugar, as it makes the frosting much sweeter and can become overwhelming. Start with a little and only add as much as is necessary.} Since the frosting was already not as red as we had hoped, and because the addition of the white powdered sugar had lightened the red color further, we made a quick trip to the store for more red food coloring.
Using a Hair/Grass Tip to Create Frosting Fur
Once the frosting was as red as we could get it, we were ready to create Elmo’s fur. We attached the tip to a disposable cake decorating bag, and then my mom showed me the easiest way to fill the bag with frosting. Rather than trying to hold the bag open at the top (which usually ends up in a mess), simply fold the top half of the bag over your hand and then use a spatula to fill the lower half of the bag.
Now for the real fun – piping the fur onto the cake! This is a pretty basic cake decorating technique, but it took me a while to get the hang of it, and I still need more practice. In the end, my mom did most of the piping so that I could take pictures of the process (and so it would look good!), but I had fun learning. The entire technique can be summed up in five words: squeeze, let go, pull up. The longer you squeeze before pulling up, the longer the hair/fur/grass will be. The part of this I struggled with was the letting go. I kept trying to pull up while still squeezing – don’t do that! We started on the top of the cake, working our way from the center out in concentric circles.
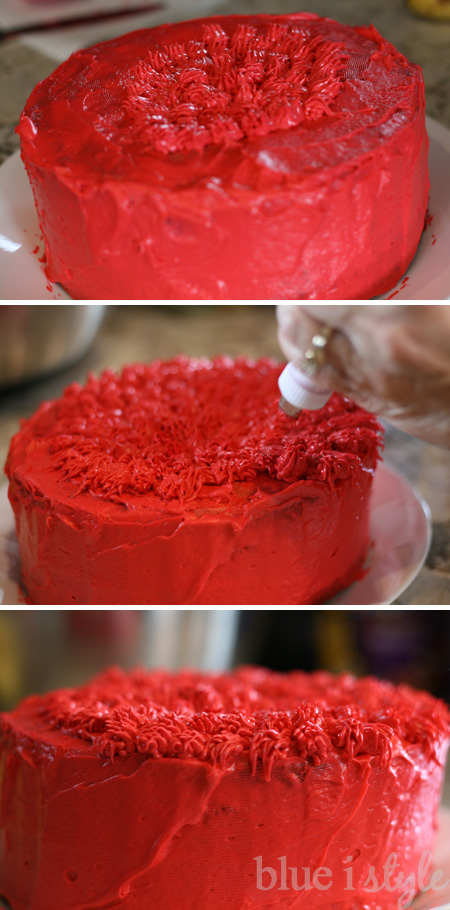
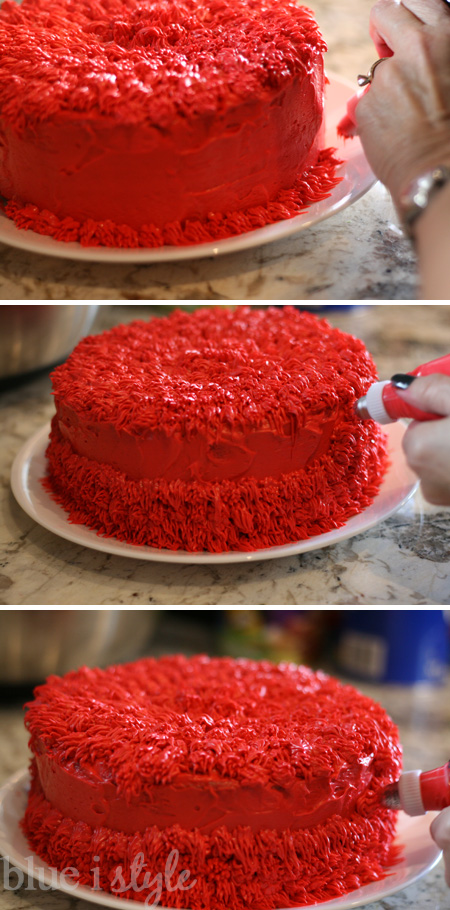
Once the piping on the top of the cake was complete, we moved on to the sides of the cake, starting at the bottom and working our way up toward the top of the cake, one row at a time. Starting at the bottom creates a nice clean look where the cake meets the plate.
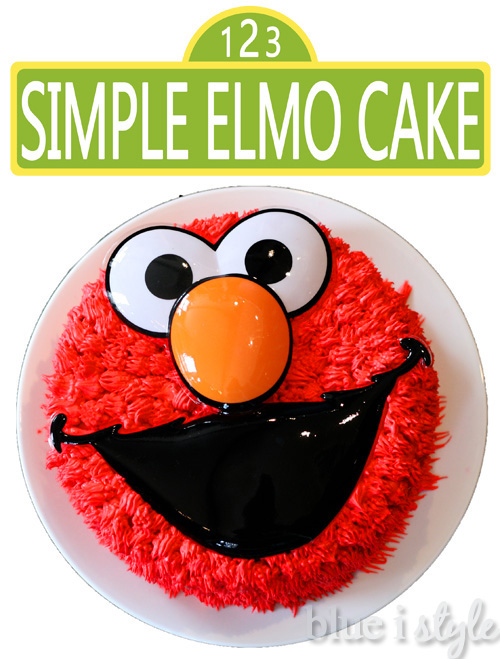
Adding Elmo’s Face (a.k.a. Taking the Easy Way Out)
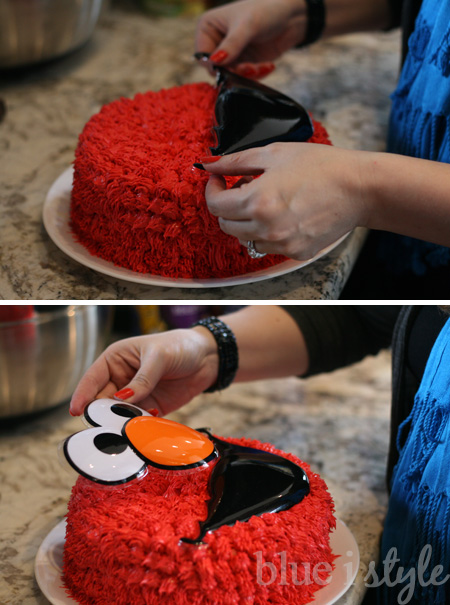
Once all of the entire cake was covered in red “fur,” it was time to add Elmo’s face. This is where I totally cheated from a cake decorating standpoint, because I bought a plastic cake topper from for a whopping $3.25! UPDATE: Unfortunately, it looks like that topper is no longer available, but here is a very similar one {affiliate link}.

I’m sure real cake decorators are rolling their eyes at me right now, but for a beginner, this is a great option! It requires zero skill, but the result looked great and the face cake topper can be used again next year if Beckett and Elmo are still best buds. (They also sell a Cookie Moster cake topper, so I see a furry blue cake in our future as well). I just placed the mouth and eyes on top of the cake, and then pressed down gently to set them into the frosting.
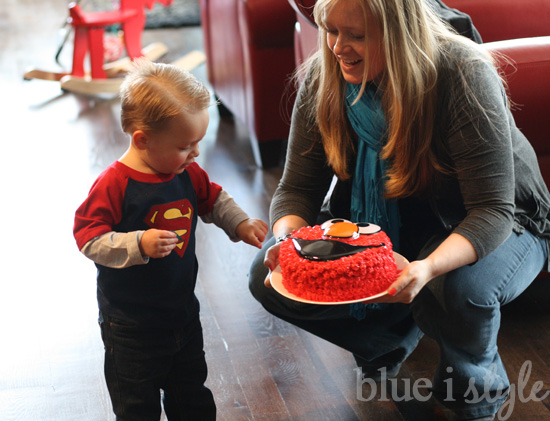
I think the final cake looked pretty darn good, especially considering just how simple it was to create!
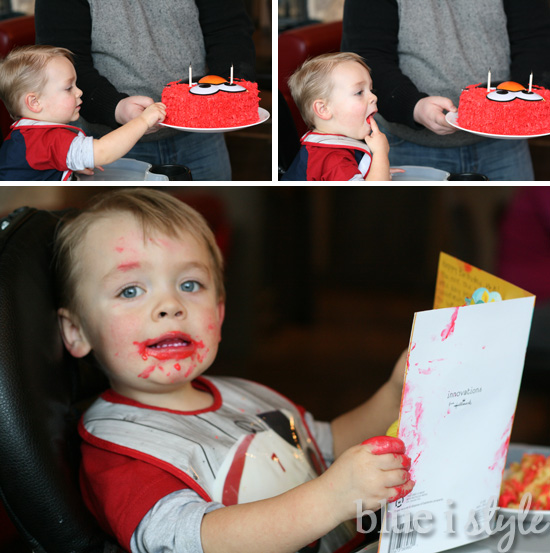
And Beckett definitely approved!
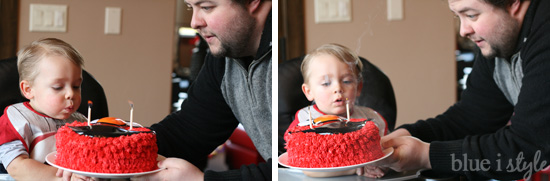
We added two candles to the cake and Beckett blew them out!
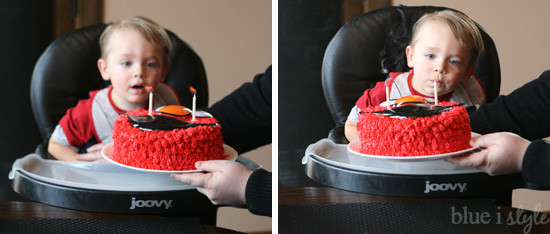
And then we relit them and he blew them out again, and then we relit them and he blew them out again… you get the picture.
Keep in mind that red frosting stains…so don’t be surprised if your kiddos hands and face remain red for a couple of days.
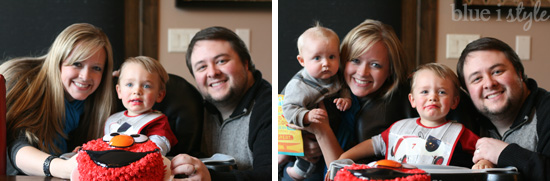
So there you have it – Beckett’s super simple Elmo birthday cake! We made this cake on the day of his actual birthday, and then opted for even simpler Sesame Street cupcakes to feed the 30+ kids who attended his birthday party a couple of weeks later. This also marks the last Sesame Street related blog post you’ll see around here for quite a while {you’re welcome}.

Linked up to: Nap Time Creations Link Inspire; Ladybug Blessings Handmade Tuesdays