• About
    • About Blue i Style
    • Tour Our Home
    • Free Organizing eBook
    • Blogging Resources
  • Work With Me
    • Interior Decor & Organizing Services
    • Partnerships & Collaborations
    • Blogging Resources
  • Features & Press
  • Policies & Disclosures
  • Contact

Blue i Style

Creating an Organized & Pretty, Happy Home

  • Decor
    • Tour Our Home
    • Room Makeovers & Design Plans
    • Decorating Tips & Tutorials
    • Outdoor Decor
    • One Room Challenge
  • Organizing and Cleaning
    • Organizing Tips & Tutorials
    • Organizing By Room
    • Organizing on the Go
    • Cleaning
  • DIY
    • DIY Tips & Tutorials
    • Smart Home & Safety
    • Paint Tips & Projects
    • Crafts
    • Cricut Projects
  • Kids
    • Decor & DIY for Kids
    • Organizing Kids
    • Life With Kids
  • Five Minute Projects
  • Holidays & Entertaining
    • Seasonal & Holiday Decor
    • Entertaining
    • DIY Gifts & Gift Guides
    • Facebook
    • Instagram
    • Pinterest
    • Twitter
    • YouTube

Uncategorized

{decorating with style} DIY Book Page Spiral Art

  • Facebook
  • Twitter

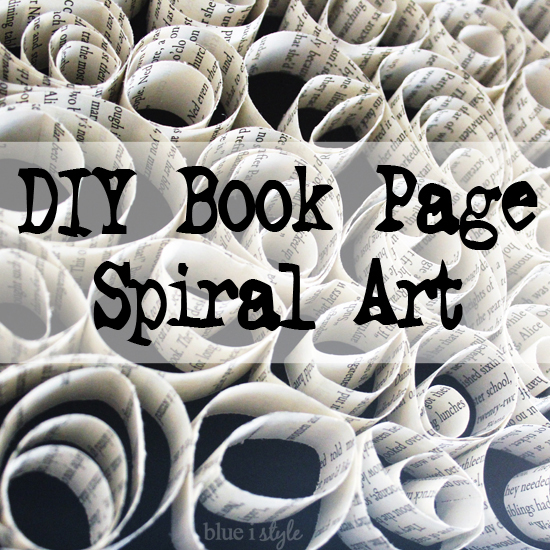
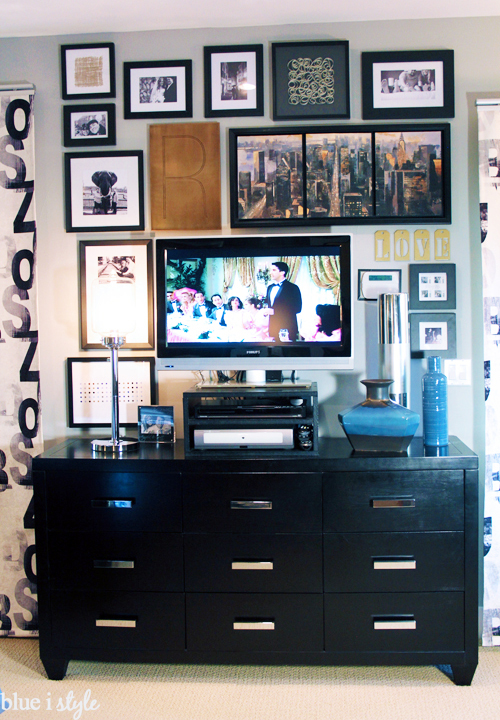
Creating DIY art is one of my very favorite things! I love saving money by making something myself, I like being able to customize art to perfectly suit my space, and I just plain enjoy the creative process. Today I’m excited to share my tutorial for the DIY book page spiral art that you may have noticed in my master bedroom gallery wall.

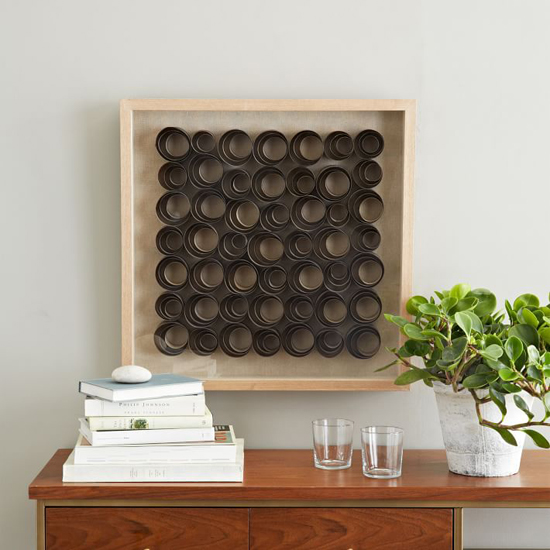
Before I launch into the tutorial, let’s first talk about the inspiration. When I started planning the gallery wall for our new master bedroom, I knew I wanted to include some works of art among the photos in order to give the gallery a more high end and collected feel. While shopping at West Elm, a piece of framed art caught my eye. The spirals totally appealed to my modern sense of style, but the $199 price tag was way out of my budget!

via West Elm

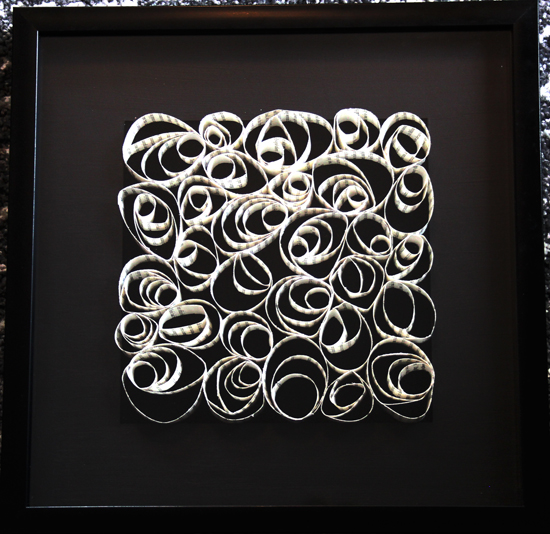
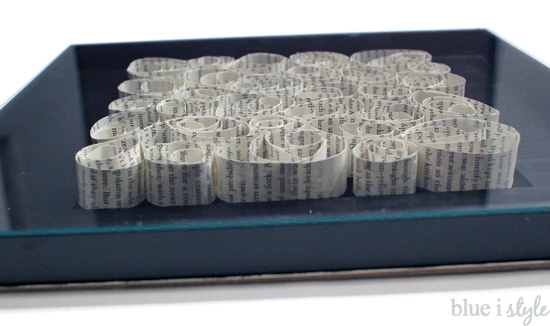
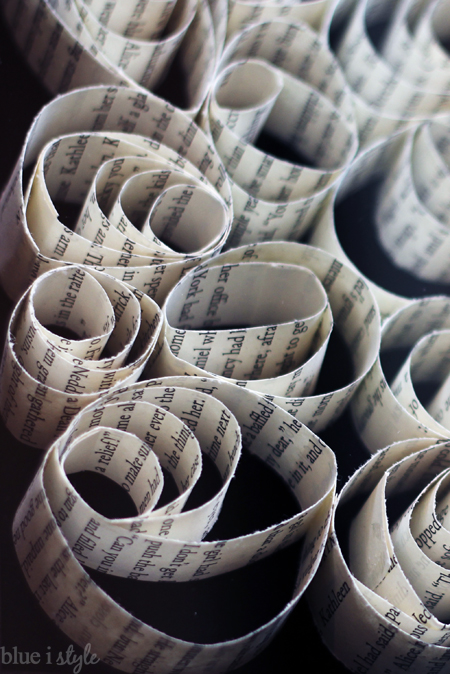
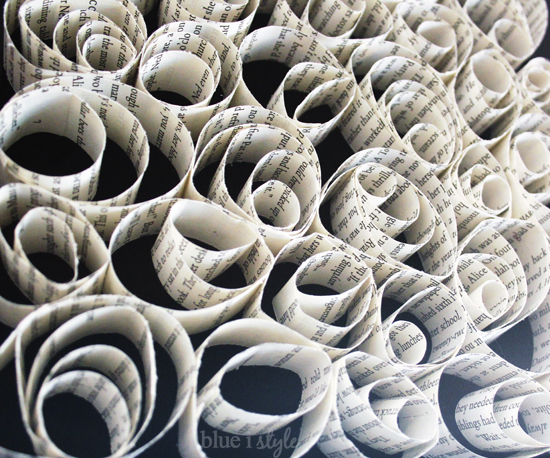
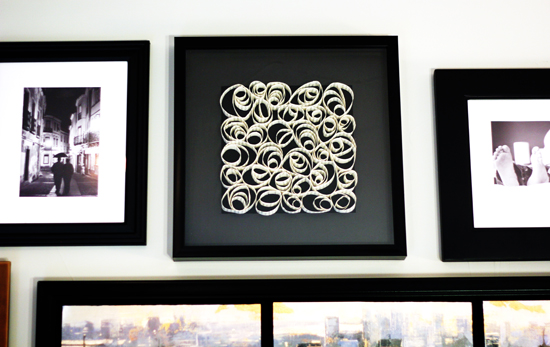
The original was created from thinly shaved pieces of stained ash wood arranged on a linen backdrop – but I knew I could create a similar look in a shadow box using spirals of paper. Since I wanted all of the frames for my gallery wall to be black for consistency, I purchased a black shadow box frame. Rather than creating my spirals from a solid color of paper {which would have looked more like the original}, I instead went for a modern, graphic look by creating my spirals from book pages. To make my book page art a bit funkier, I created elongated, imperfect spirals and chose not to lay them out in perfect rows.

At first glance, replicating the West Elm art seemed simple enough, but do you notice how those spirals all seem to float in the middle – with gap around all the sides? Well, that made it a bit trickier and I had to get creative to mimic that look from the original. My first thought was the somehow adhere the spirals to the back of the frame – but that’s easier said than done when you are talking about gluing something that’s paper thin. I feared that no matter how careful I was, the glue to show and look messy {or wouldn’t stick at all}, so I needed to find another answer. And the solution I came up with was to use an 8×8 mat inside of the 12×12 shadow box frame. I’ll show you how I did it, but let’s start with the complete supply list.
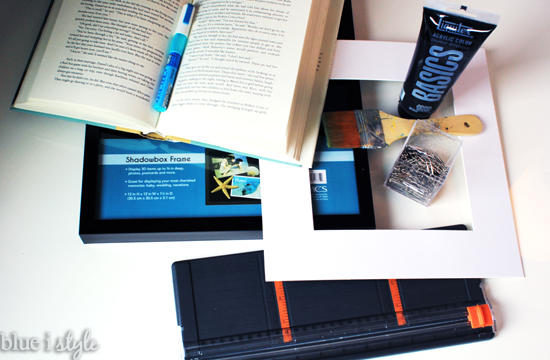
SUPPLY LIST:

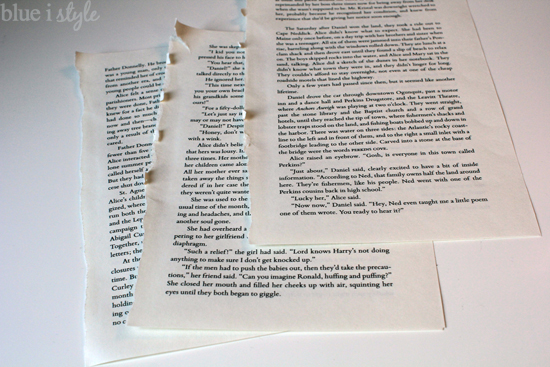
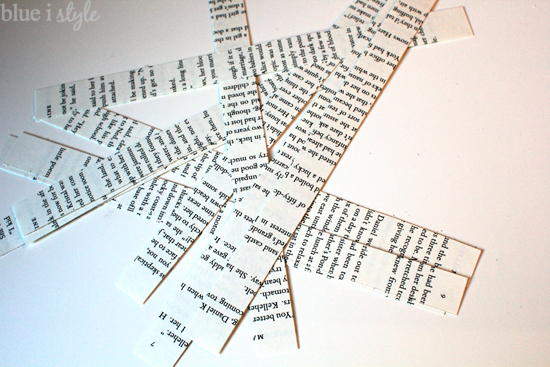
  • Book that you are willing to tear pages out of {I recommend a hard cover book because the pages are thicker}
  • 12×12 shadow box frame {$10 on sale from Target}
  • Mat with an 8×8 opening to fit a 12×12 frame {$4 from Amazon}
  • Black acrylic paint {already owned}
  • Paint brush {already owned}
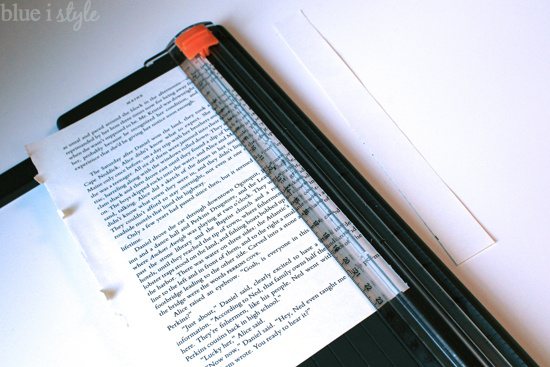
  • Paper cutter {or scissors and a ruler}
  • EK Success Squeeze and Roll Glue Pen {already owned, available from Michaels}
  • Paper clips {a dozen or so}
STEP 1: CREATING BOOK PAGE SPIRALS

To begin, I tore several pages out of a book. Be sure to select pages that have full text on both sides – otherwise you’ll end up with too much white space in your spirals.
I cut off the white margins on the right and left of each page.
Next, I measured the depth of the shadow box from the back of the glass to the back of the frame, which told me how thick I wanted my spirals to be. I cut the book pages into one inch strips.
With all of my strips cut, I was ready to begin creating the spirals. 

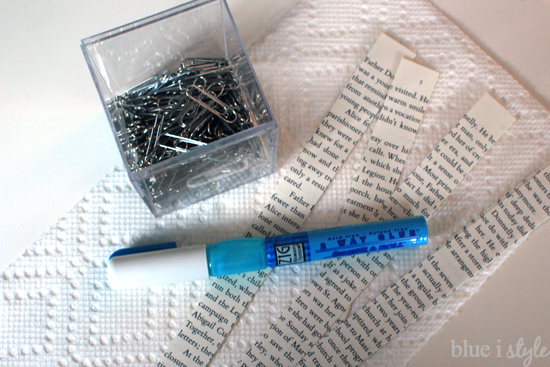
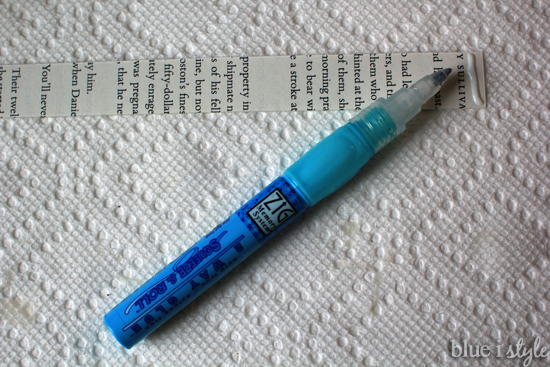
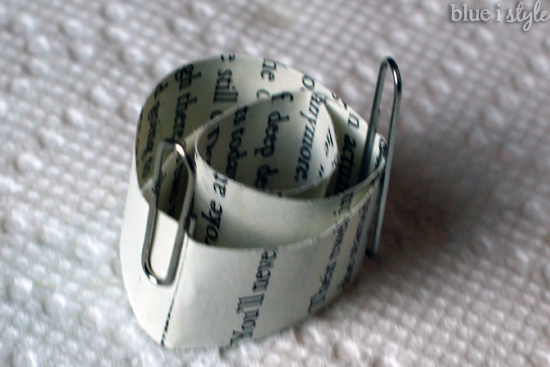
I started by placing a line of glue along one end of a book page strip.

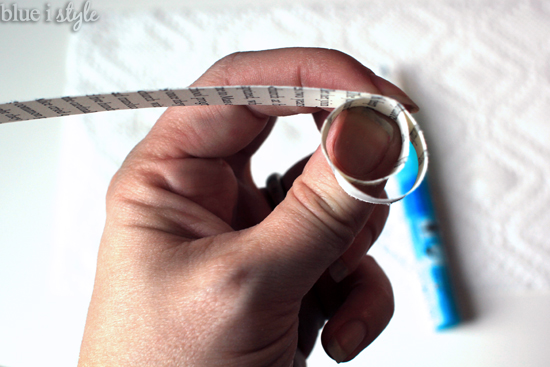
I then rolled the end of the strip over to create a small circle and applied pressure for a few second until the glue stuck. I then added a second line of glue a bit further up the paper.

Again, I wrapped the paper around forming another, slightly larger circle, and squeezed the paper together at the location of the glue until it stuck.

I repeated this process as I worked my way down the strip of paper.

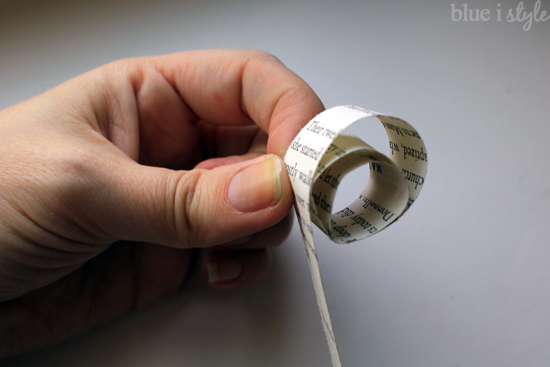
Once I reached the end of the paper, I added a final line of glue to the very end of the strip and wrapped it around the complete the spiral.

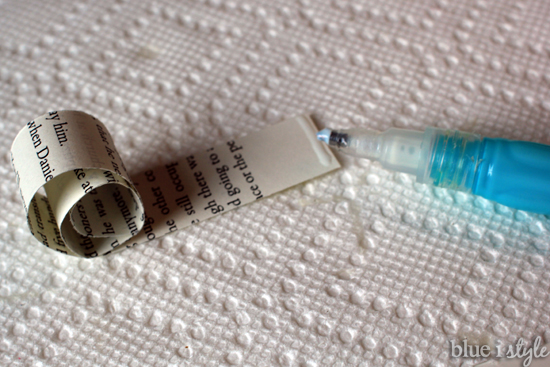
I used two paperclips to hold the spiral together for 10 minutes or so to allow the glue to dry completely.

As I mentioned above, I wanted my spirals to be a bit elongated and irregular to give them a funkier look – so I didn’t always glue them in the same spots. If I had wanted to more closely match the perfect spirals of the West Elm original, I would have been sure to create more uniform, concentric circles by always applying the glue on the same side of the spiral.
I made some of the spirals smaller by cutting the strips shorter before beginning to glue and roll the spiral. After created a dozen or so spirals, I moved on to the next step in order to get a better idea of how many spirals I would need in total.
STEP 2: PREPARING THE FRAME FOR THE SPIRALS

I thought long and hard about how I was going to mimic the look of the original West Elm art – with the spirals floating in the center of the frame. The answer I came up with was to use a mat, and arrange the spirals inside. By doing this, the edge of the mat created just enough of an ledge to hold the spirals in place.
Here’s how it came together. I began by disassembling the shadow box.
After removing the black velvet backer board, I was able to remove the “inner frame” {I don’t know if it has a more official name, but that’s what I’ll call it}. The inner frame is the piece that holds the backer board back from the glass – allowing the space to fill the shadow box.
I laid out the backer board and placed the mat on top to test out my plan.
I discovered that in order for the mat to hold the spirals in place, I needed to turn in bevel side down. 

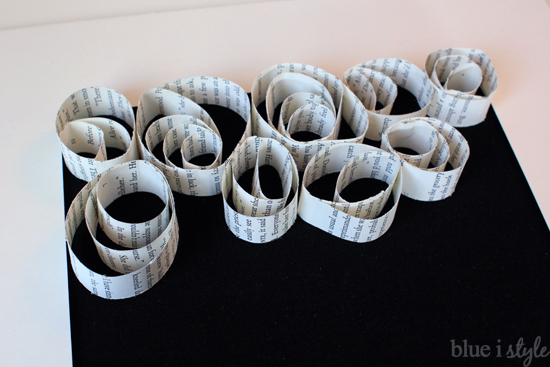
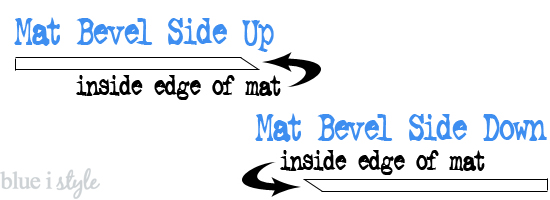
When the mat was bevel side up {which is the standard way to use a mat}, the inside edge of the mat acted like a ramp – allowing the spirals to slide out of place. By instead placing the mat bevel side down, the inner edge of the mat was raised up, creating a barrier that held the spirals perfectly in place. 

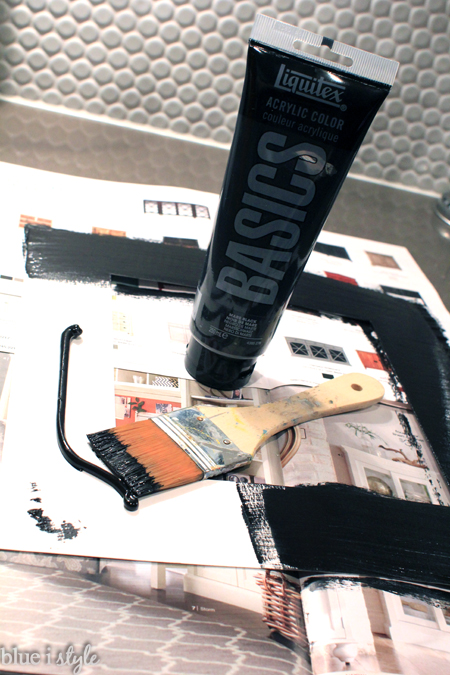
I had purchased a white mat because it was much cheaper than a custom black mat, so I simply painted the back of the mat with black acrylic paint. I was working quickly and didn’t want to spend a lot of time getting set up to paint, so I just tore out a couple of pages for a magazine to keep the counter clean, and squeezed the paint directly on to the mat, using my brush to spread it around and smooth it out.

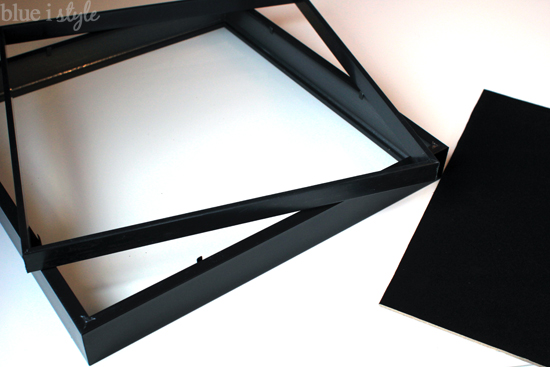
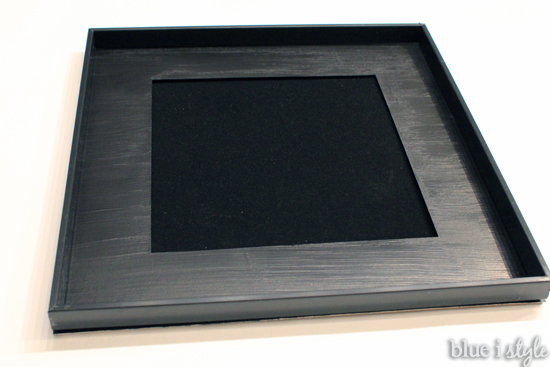
Once the paint dried, I was ready to assemble to frame pieces. 

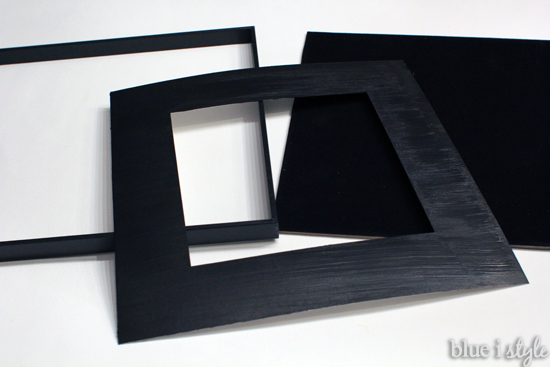
I laid the black mat {bevel side down} on top of the black velvet backer board. Then I laid the “inner frame” on top of the mat.

STEP 3: LAYING OUT THE SPIRALS

Finally, I began to layout the spirals in the center of the mat. I continued to create more spirals – some larger and some smaller – until I had enough to fill the space inside the mat.

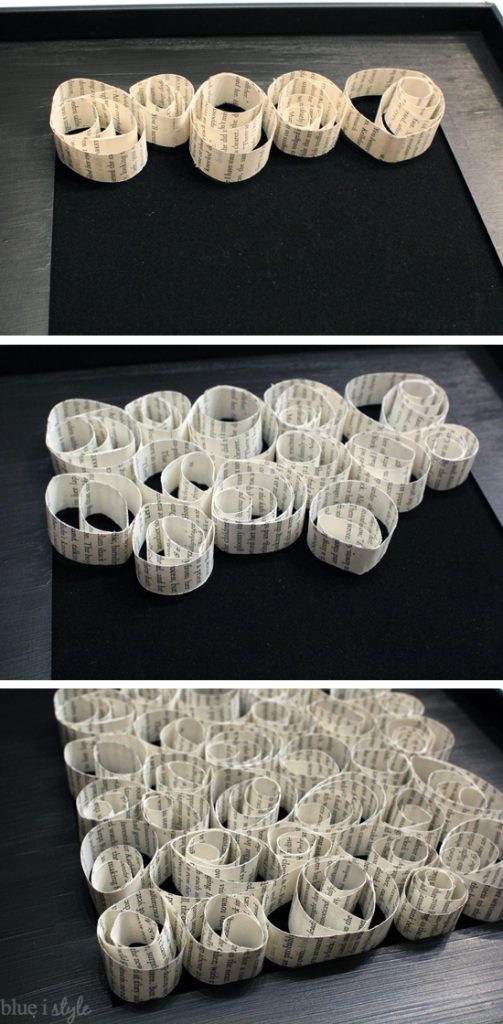
 As you can see in the photo above, the edge of mat holds the spirals in place. Once I was happy with the layout of the all the spirals, I place the frame’s glass on top of the inner frame so that the spirals were then sandwiched below the glass.

Finally, my husband carefully lifted up the entire thing, making sure to keep the inner frame, mat and glass in place, so that the spirals wouldn’t shift. While he held it, I slid the outer frame down over it and bent the metal tabs on the back into the place to hold the frame securely together.

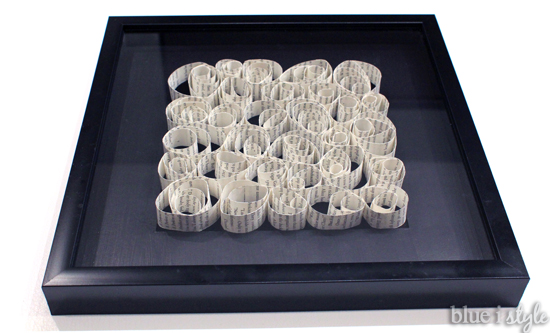
And there you have it, my West Elm inspired DIY book page spiral art, which cost only a fraction of the cost of the original work of art.

I think this book page art looks best when viewed from an angle because it allows you to really appreciate the writing on the spirals. 

For that reason, I chose to hang the book page spiral art high on my gallery wall, so that you can really appreciate the spirals when looking up at it.

I also DIY’d several other pieces of art for the gallery wall. Using the links below, you’ll find details about each of those art projects, as well as all of the other projects that went into the making of our master bedroom makeover.

  • Facebook
  • Twitter

11.11.14

« {five minute friday} Framed Photo Stamps
{seasonal style} Reverse Those Jack O’Lanterns for Thanksgiving »

Meet Angela

Angela, the founder of Blue i Style, strongly believes that decor should be functional, organizing can be beautiful, smart DIYs help stretch your budget, and an organized and stylish home can still be practical for life with kids.

Her work has been featured in print in Better Homes & Gardens and 5280 Home magazine, and online by HGTV, the Today Show, Good Housekeeping, and more. She was also named a 2018 Stylemaker by Better Homes & Gardens.

You can reach Angela at angela@blueistyle.com

Get Email Updates!

Thanks for subscribing! Check your email a welcome message and your free organizing eBook!

Get Email Updates!

Plus a bonus free organizing eBook!

COPYRIGHT & PHOTO SHARING POLICY

All text, images, and other content that are part of this blog are the property of Blue i Style, unless otherwise noted. All material is copyright protected.

If you wish to feature one of my projects, feel free to share a single photo (no collaged images, or images with text overlays) as long as the no pin code is used to prevent my image from being pinned from your site.

All features must include credit to Blue i Style with a link back to the original content (not just to the homepage). The project steps, supply list, and/or sources may not be disclosed.

Please read my full content and photo sharing policy to ensure you comply with all guidelines. Failure to do so constitutes copyright violation.

Create At Your Own Risk

Any and all content on this website is for personal use only and created exclusively for inspiration purposes.

Creating with my suggested methods, products used, and tools is at your own risk.

Please ensure you are following proper guidelines with anything used, and you receive professional guidance when necessary.

Read my complete disclosure at: Policies & Disclosures.

Sponsorships & Affiliations

To help fund this blog, I accept some forms of advertising, sponsorships, and affiliate links.

If you buy something that I recommend, you pay the same price, but I may receive a small commission. As always, all opinions are my own.

Blue i Style is a participant in the Amazon Services LLC Associates Program, an affiliate advertising program designed to provide a means for sites to earn advertising fees by advertising and linking to amazon.com.

I use an affiliate marketing service which may automatically put links into some posts, so please assume any/all links may be affiliate links.

Read my full Disclosure Statement.

Copyright © 2025 · Dazzling Theme theme by Restored 316

  • Facebook
  • Twitter
  • Pinterest