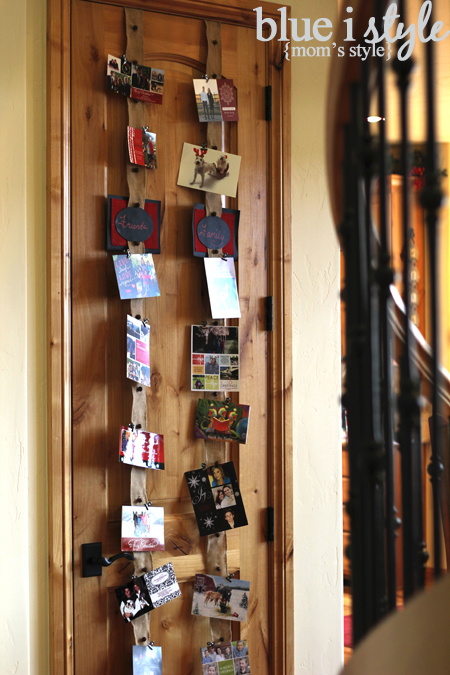
It’s a safe bet that Christmas cards will start showing up in your mailbox as soon as next week, so I wanted to share another fun and fast project to get you ready! Last week, I showed you how I dress up and fill up my Christmas card display with scrapbook paper while waiting for cards to arrive in the mail, and today I’m sharing the adorable display my mom created in just five minutes using burlap and chalkboard fabric! {To learn more about my mom and her style, you can read my introduction here.}
Supply List:
Roll of wired edge burlap ribbon with bells {from Hobby Lobby}
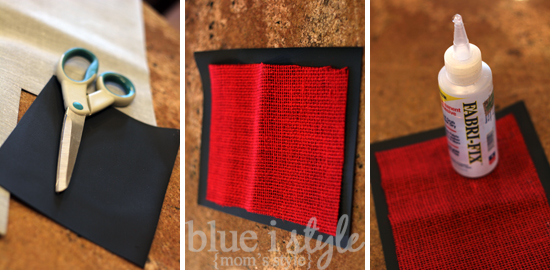
Red burlap fabric {from JoAnn Fabric}
Chalkboard fabric {from JoAnn Fabric}
Fabric-Fix Permanent Adhesive {from Hobby Lobby}
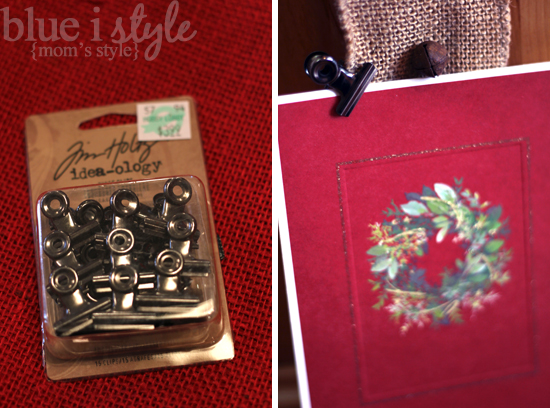
Clips {from Hobby Lobby}
Bistro Chalk Marker {from Hobby Lobby}
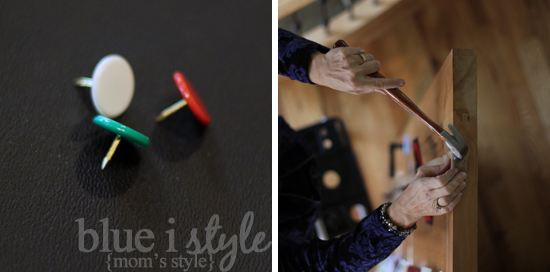
Flat top thumb tacks {any hardware store}
To begin, measure the height of the door that you want to hang your card display on, and cut a piece of the wired edge burlap ribbon the same length.

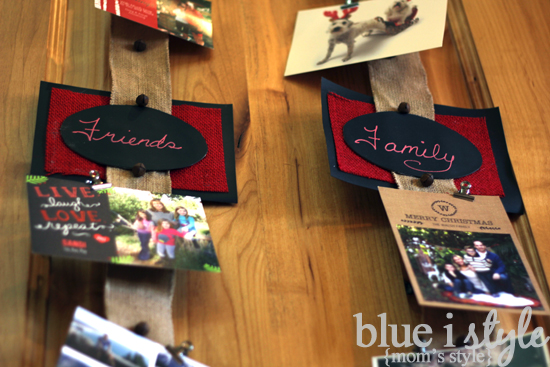
Next, cut an oval from your chalkboard fabric to create the label for the Christmas card display. An oval box of Kleenex makes a perfect template that is sized just right to fit between the bells on the burlap ribbon. Trace the oval onto the back of the chalkboard fabric, and cut it out.
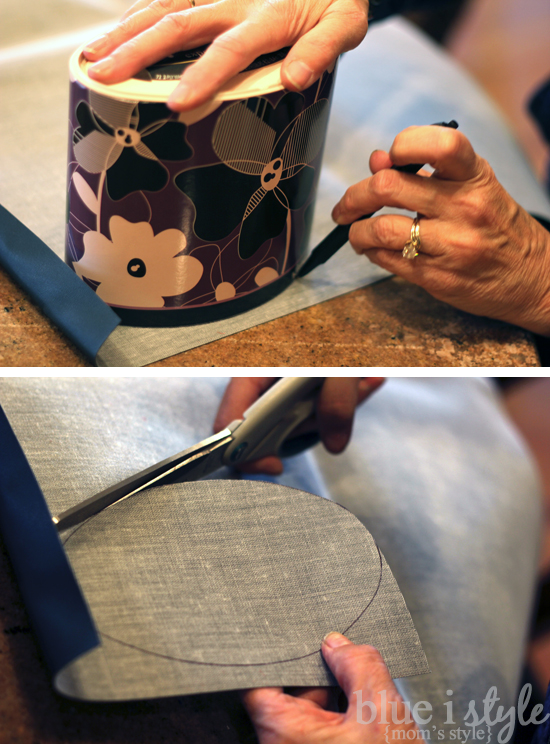
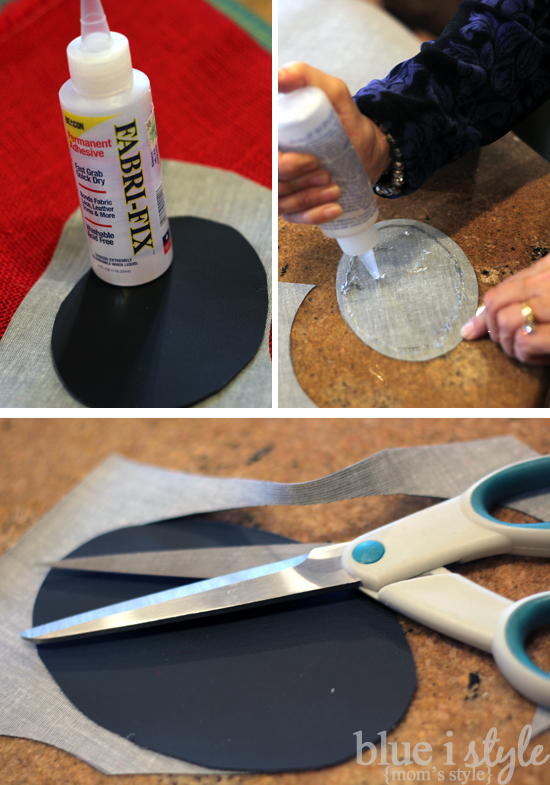
Because the chalkboard fabric is quite lightweight, my mom found it is best to use two layers of the fabric, glued back to back, in order to create a sturdy label for the Christmas card display. To make sure the ovals line up perfectly, the best method is cut a larger rectangle of chalkboard fabric and glue the first oval to the rectangle, using a fabric adhesive like Fabri-Fix {note that hot glue won’t stick to the backing on the chalkboard fabric}. After the glue has dried {in just a minute or two}, cut the rectangle down to an oval using the first oval as your template.
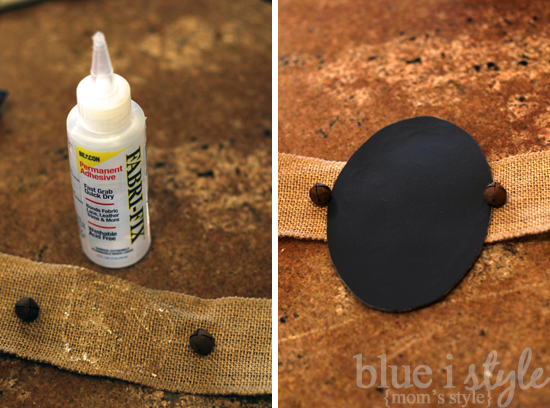
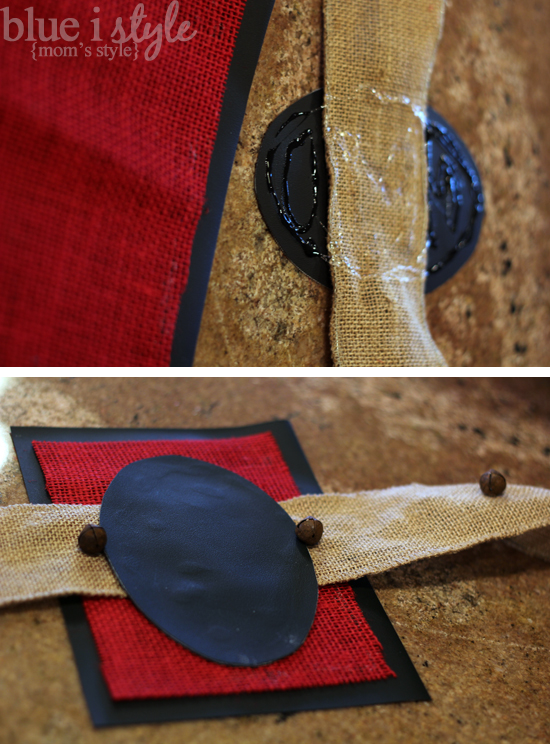
With your two chalkboard ovals glued back-to-back for stability, glue the ovals to the burlap ribbon, between two bells, and located at approximately the location that will be at eye level when the burlap in hung on your door.
At this point, your Christmas card display could be complete, but to dress it up a bit more, my mom added two rectangles of chalkboard fabric and red burlap fabric behind the chalkboard oval. Cut a 6×8″ rectangle of chalkboard fabric and a 5×7 rectangle of red burlap, and glue the two together using the same Fabri-Fix glue.
Finally, glue the rectangles to the chalkboard oval and the back side of the burlap ribbon.
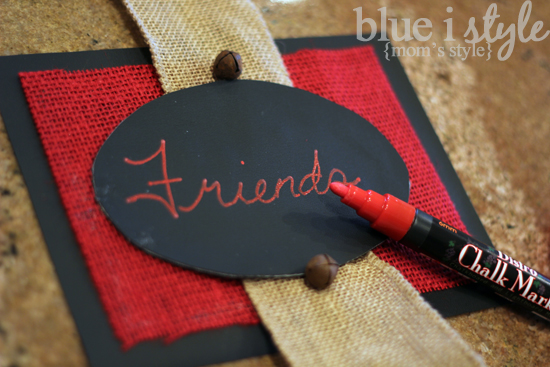
The Christmas Card display is now complete. This really is a five minute project! All that’s left to do is to write on your chalkboard label and hang the ribbon from the top of a door. My mom made two of these, one for cards from family and the other for cards from friends, so she labeled them accordingly using a red Bistro Chalk Marker.
The easiest way to hang your card display on your door {mom my hung hers on your coat closet door} is by hammering two flat-head thumb tacks into the top edge of the door. Fold over about an inch of burlap so that you are hammering through two layers – this will make it more durable once you add the weight of the Christmas cards to your display. The tiny holes created by the thumbtacks won’t be a problem, because no one will ever see the top edge of your door. Just be sure that you use tacks with totally flat heads, otherwise they’ll rub against the door frame when you close the door.
Now all that’s left is the clip on your Christmas cards as they arrive! My mom picked up a package of Jim Holtz brand small clips from Hobby Lobby, but you could use any clips that fit your style. Just make sure the clips aren’t too small to hold the weight of the cards.
There you have it! A very quick and stylish way to display all of your Christmas cards!
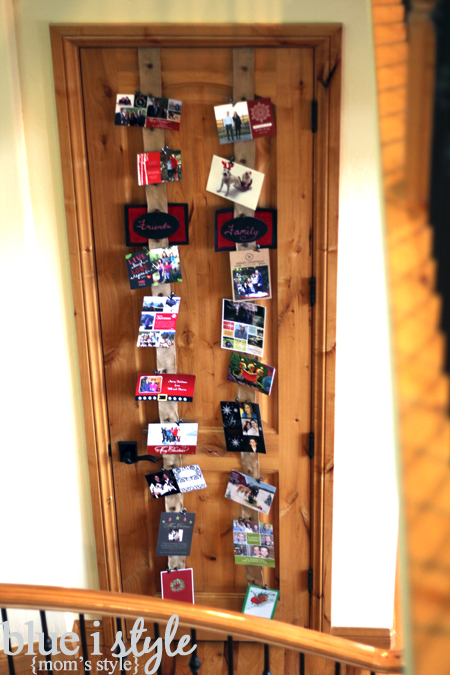
This project could easily be changed to fit your personal style using any variety of ribbon, fabric and clips. The possibilities are endless!
Christmas will be here before we know it, so if you are looking for even more holiday inspiration, look no further! Here are some of my favorite holiday projects: