• About
    • About Blue i Style
    • Tour Our Home
    • Free Organizing eBook
    • Blogging Resources
  • Work With Me
    • Interior Decor & Organizing Services
    • Partnerships & Collaborations
    • Blogging Resources
  • Features & Press
  • Policies & Disclosures
  • Contact

Blue i Style

Creating an Organized & Pretty, Happy Home

  • Decor
    • Tour Our Home
    • Room Makeovers & Design Plans
    • Decorating Tips & Tutorials
    • Outdoor Decor
    • One Room Challenge
  • Organizing and Cleaning
    • Organizing Tips & Tutorials
    • Organizing By Room
    • Organizing on the Go
    • Cleaning
  • DIY
    • DIY Tips & Tutorials
    • Smart Home & Safety
    • Paint Tips & Projects
    • Crafts
    • Cricut Projects
  • Kids
    • Decor & DIY for Kids
    • Organizing Kids
    • Life With Kids
  • Five Minute Projects
  • Holidays & Entertaining
    • Seasonal & Holiday Decor
    • Entertaining
    • DIY Gifts & Gift Guides
    • Facebook
    • Instagram
    • Pinterest
    • Twitter
    • YouTube

Uncategorized

{diy with style} Campaign Style Desk Makeover with a Dry Erase Top

  • Facebook
  • Twitter
Thank you to Rust-Oleum  for sponsoring this post. As always all opinions are my own. You can read my full disclosure statement here.
A few months ago a neighbor posted on our neighborhood website that he was putting an oak desk in the alley – free to the first taker. I knew it would be a perfect piece to make over for my upcoming Drab to Fab feature at the Denver Home Show, so I asked my husband to run by on his lunch hour and load it in the car. I need to track that neighbor down, because I bet he wouldn’t recognize that desk anymore!

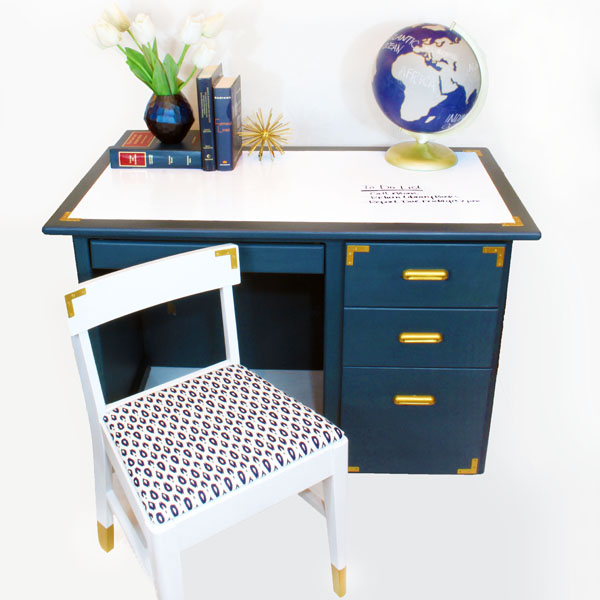
Pretty fab, right?! I shared all the details of the DIY chair makeover yesterday, and today I’m going to walk you through the 4 steps that transformed the desk from brown and blah to gold and glam!

SUPPLIES:
  • Rust-Oleum Chalked Paint in Deep Navy
  • Rust-Oleum Chalked Protective Topcoat, Matte Clear
  • Rust-Oleum Metallic Accents Gold Flake {2 oz size}
  • Rust-Oleum Metallic Accents Satin Clear protective top coat
  • Zinsser Bulls Eye 123 Primer
  • Rust-Oleum Dry Erase Paint
  • 8 Stainless Steel Flat Corner Angle Brackets
  • 32 #5 1/2″ flat head screws
TOOLS:
  • Paint Brush
  • Painter’s Tape
  • Stir Sticks
  • 2 small, dense foam rollers
  • Small, soft art paint brush
  • Drill
  • Screwdriver

STEP 1: CHALK PAINT & PROTECTIVE TOP COAT

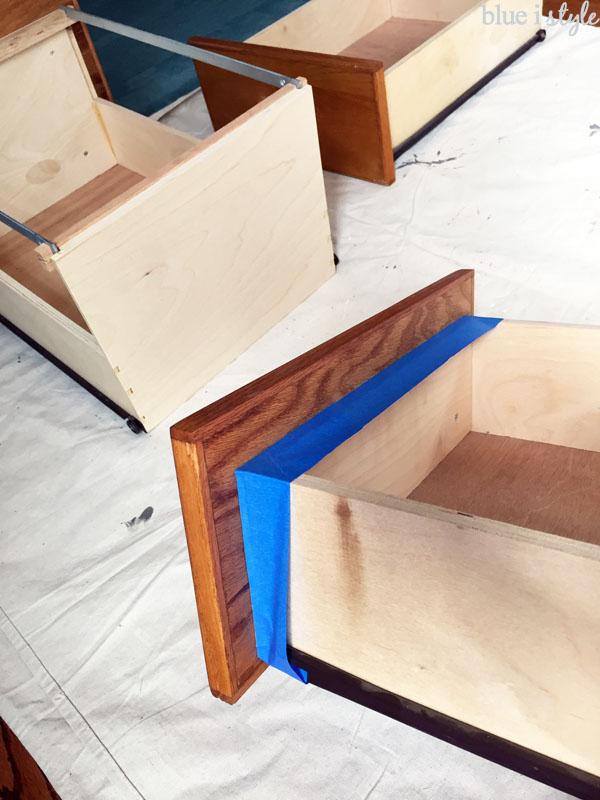
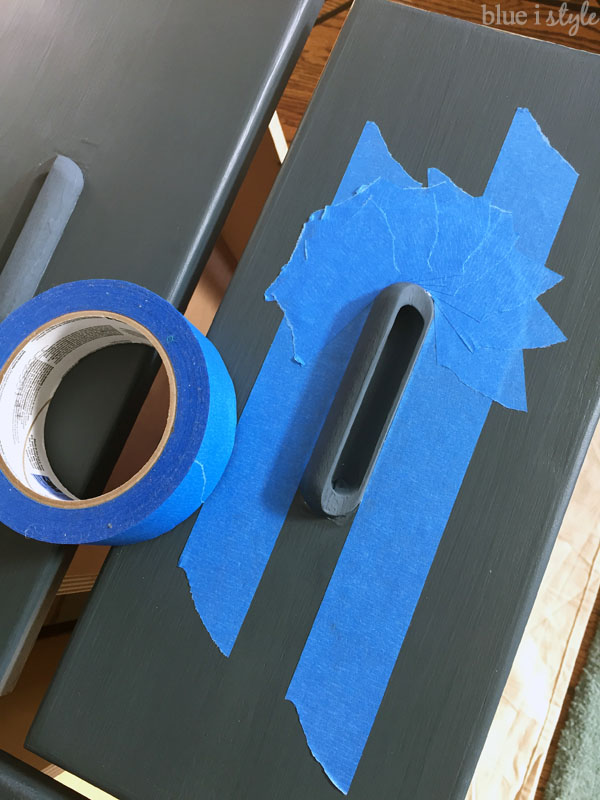
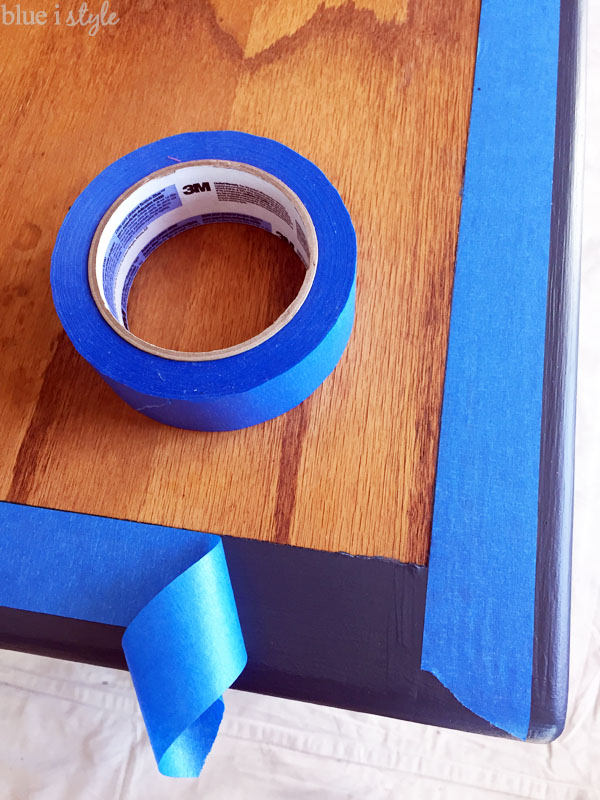
The desk was totally functional and didn’t require any repairs, but it was just begging for a new look. And since I decided to use Rust-Oleum’s Chalked paint, it didn’t even require any prep work, other than a little bit of painter’s tape. I removed the three desk drawers and taped off the drawer fronts.

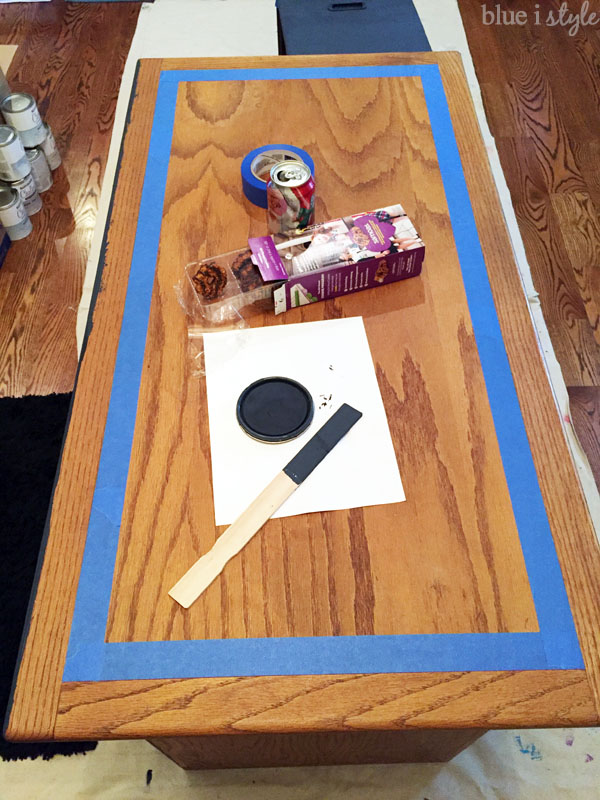
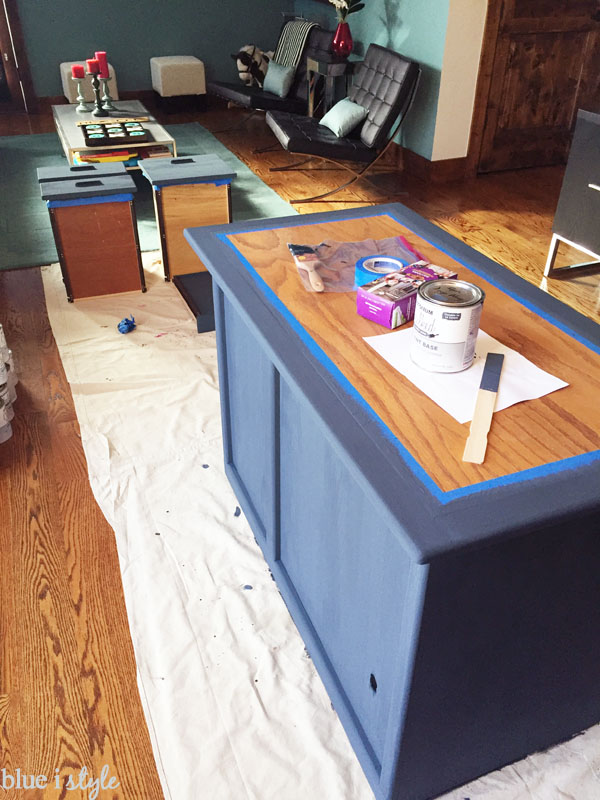
I also taped off a rectangle on the desktop – since the center of the desktop would later get a few coats of dry erase paint.

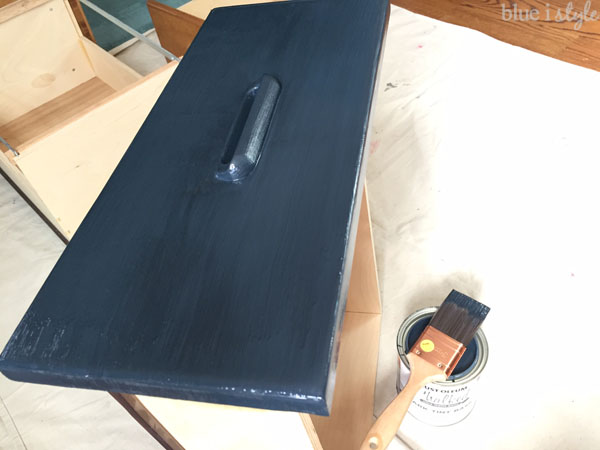
Then I was ready to paint. I popped open the can, oohed and aahed at the gorgeous shade of Deep Navy, and got to work.

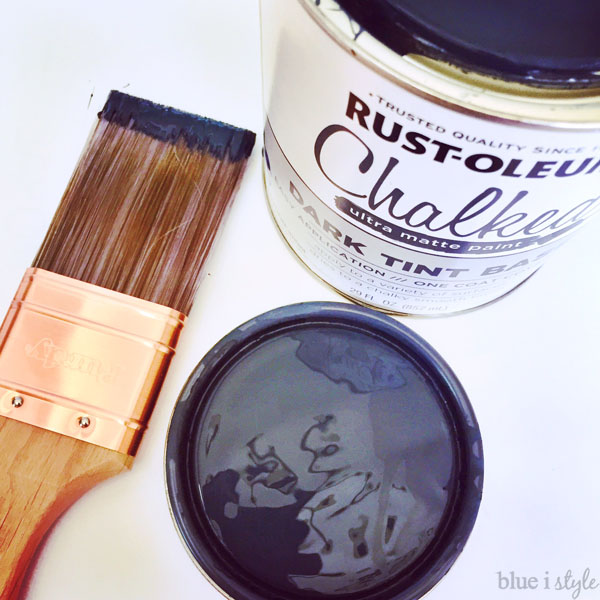
I had worked with a different brand of chalk paint once before, and had a lot of trouble with too many visible brush strokes. I was so happy to see right away how nicely the Rust-Oleum Chalked paint went on. Nice and thick, with great coverage, and the brushstrokes seem to disappear as the paint dries!

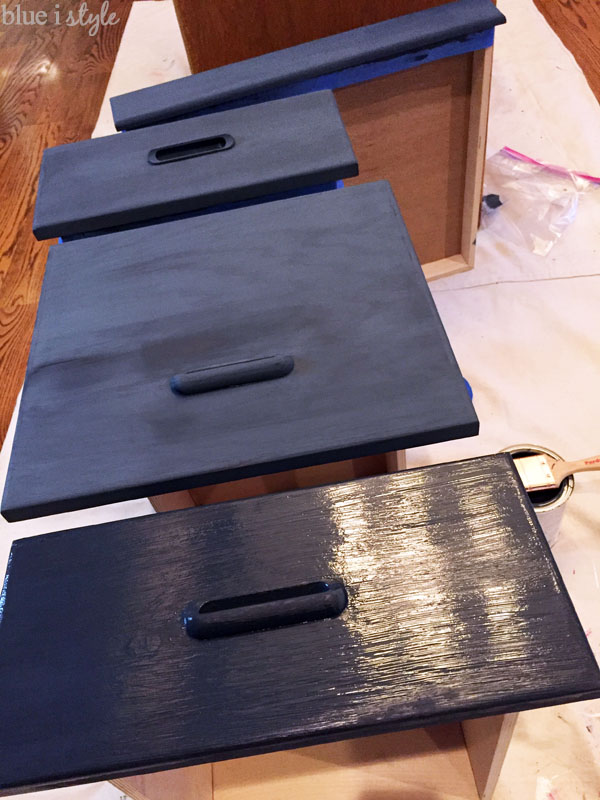
I definitely recommend working in long strokes, and keeping all your brush strokes in the same direction. But that’s really all you need to know to get great coverage with this Chalked paint. As the paint starts to dry, you may worry that it looks streaky, but that’s because some areas have dried faster than others. Just be patient and let the paint dry completely. When dry, the paint will be a bit lighter in color, and has a very dry appearance.

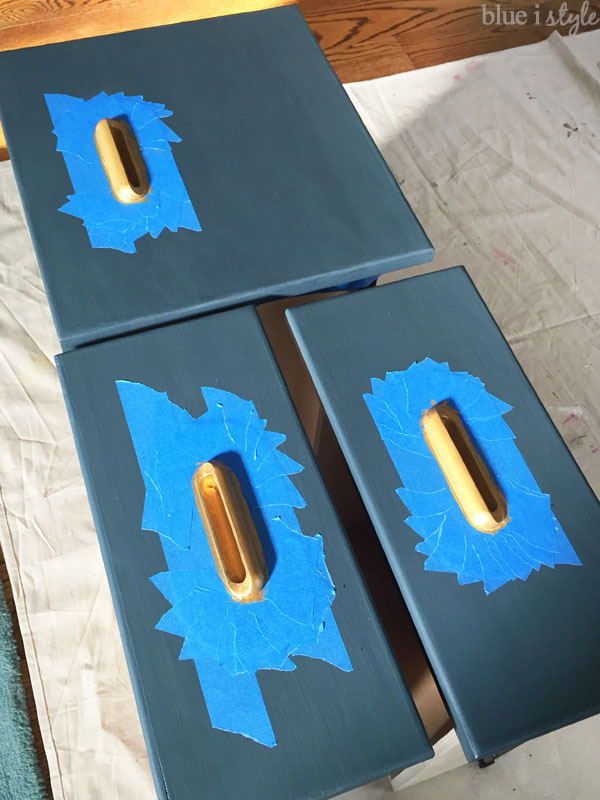
In the photo below the back drawer is dry, the middle drawers are about half way dry, and the front drawer is freshly painted. {Ignore the grainy-ness, that’s just because it’s a poor iPhone photo, not the paint.}

I was really impressed with the coverage after just one coat of paint, but I went ahead and gave it a full second coat to cover just a few areas where the paint had soaked in to the grain of the wood. 
Then I was ready to add the Chalked Protective Topcoat, which adds a clear matte finish that adds protection and durability to the chalk paint, and also darkens and enhances the color. You can see the difference in the photo below… the drawer on the left has a the protective topcoat, and the one on the right does not.
I originally planned to replace the drawer handles with stylish knobs, until I realized there was no way to remove them. Instead, I decided to paint them gold. I thought the gold paint might cover better over the chalk paint, rather than the raw wood of the desk, so I painted right over the handles with the blue chalked paint. But then I covered the handles with tape before adding the protective topcoat.
STEP 2: GOLD METALLIC DRAWER HANDLES

After the protective topcoat was dry, I removed the tape covering the handles and then taped around the handles. Since the handles are rounded on the ends, I used lots of small pieces of overlapping tape to create a mimic the curves.

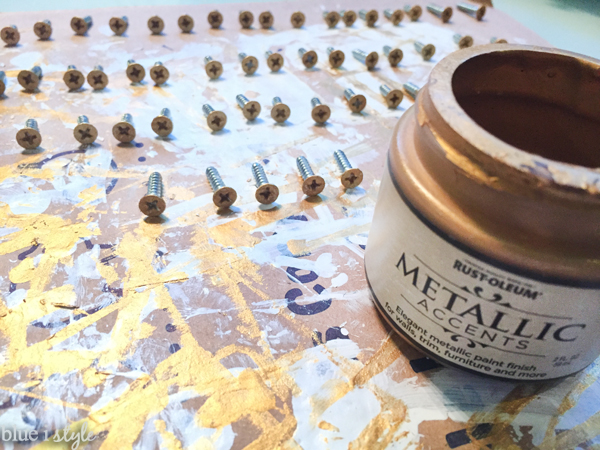
I used Rust-Oleum’s Metallic Accents paint in Gold Flake and a soft art brush to paint the desk handles. I already raved about this paint in yesterday’s post – where I used it for the gold dipped chair legs, but I’ll rave a little more. This paint is so much fun to work with, gives great coverage, and best of all, it really looks like gold! 

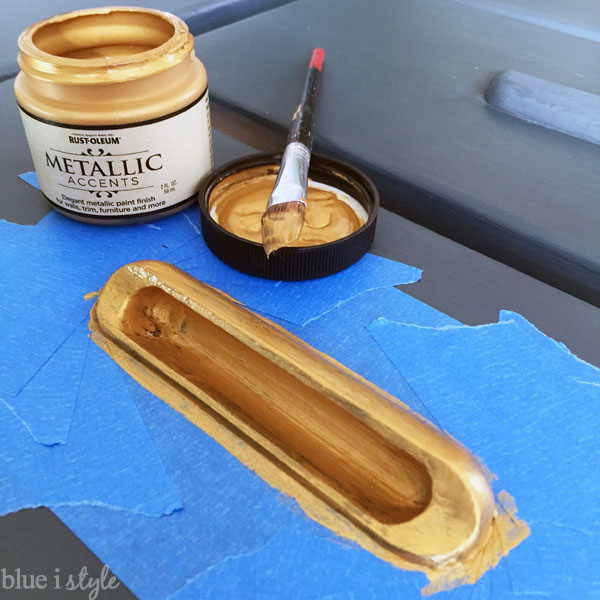
I did three thin coats of the gold paint, and then, to make the handles durable, I applied the recommended Rust-Oleum Satin Clear protective top coat {although I failed to snap a photo of this step}.

STEP 3: DRY ERASE PAINT

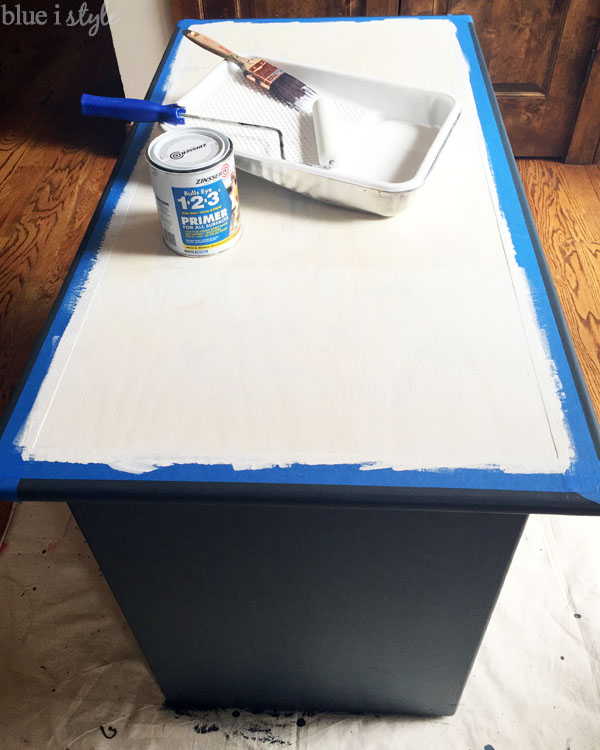
For quite a while, I’ve been trying to come up with the perfect project to try Rust-Oleum’s dry erase paint, and what could be cooler than a desktop that also serves as a memo board or calendar?!

I used painter’s tape to tape off the center of the desk. Then I applied a very thin line of the Chalked clear protective topcoat along the edge of the tape where it met the unpainted wood. This created a seal ensuring that none of the dry erase paint could bleed under the tape and onto the navy border.

Be sure to carefully read all the instructions on the dry erase paint kit. Before applying dry erase paint to a wood surface {or over dark colored paint} it is recommended that you prime the surface to ensure good adhesion and coverage.I used Kinsser Bulls Eye 123 Primer and applied two coats with a small, dense foam roller.

Once the primer was dry, I was ready to start on the dry erase paint. This is unlike any paint product I’ve ever worked with before, so be sure to read the directions carefully! The kit includes a small can of “activator,” and a large can of “base.” After stirring each individually, you combine the two and mix thoroughly with a stir stick. Once they are mixed, the paint must be used within one hour. I applied three coats with a dense foam roller, each about 20 minutes apart.

The only downside to the dry erase paint is that you can’t keep the left overs for another project. One dry erase paint kit is enough to cover about a 7 foot by 7 foot area {with multiple coats}, and since my desktop was much smaller than that, quite a bit went unused. But after an hour, the paint is no longer good. I wish that I’d had planned ahead and had another project or two lined up to paint at the same time so that I could have taken advantage of this awesome paint rather than wasting the remainder.

Be sure to wait a full three days to let the dry erase paint cure before writing on it with dry erase markers for the first time! Once the paint is properly cured, you’ll be able to write on it and then wipe it away with a soft cloth… over, and over, and over again.

How to create a dry erase desktop

You all know I love finding ways to combine style and function, and what could be more functional than a desktop that you can make notes on. I can’t tell you how many times I’ve been on a phone call and scrambled for a piece of paper to write a note on. And as a constant list maker, this is such an upgrade from the sticky notes I normally have all over my desk.

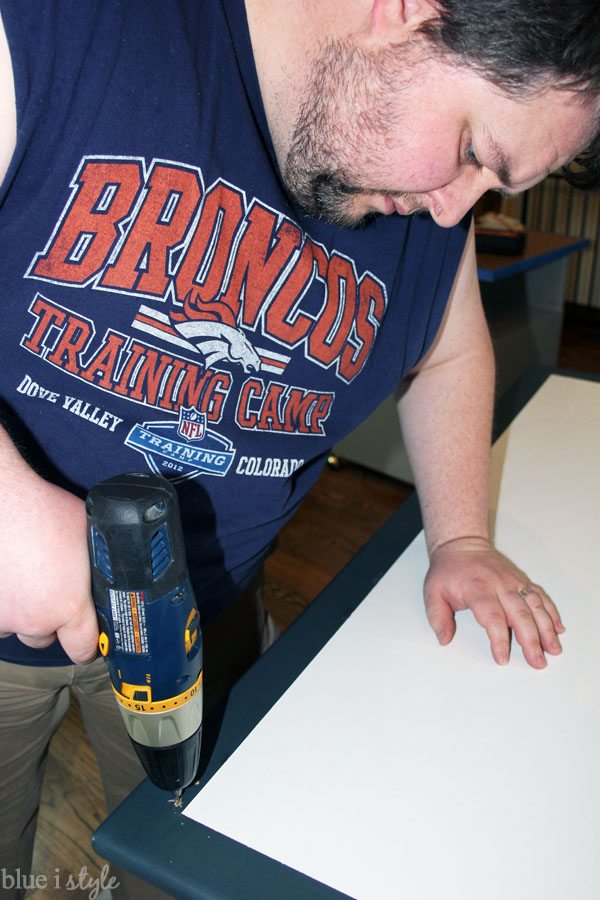
STEP 4: CAMPAIGN HARDWARE

With the desk totally painted, I debated on whether to call it finished, or to add some gold campaign hardware for a little more bling. I was really torn, so I took to my Facebook page and asked for your opinions. {Don’t follow me on Facebook?! Why not?!}

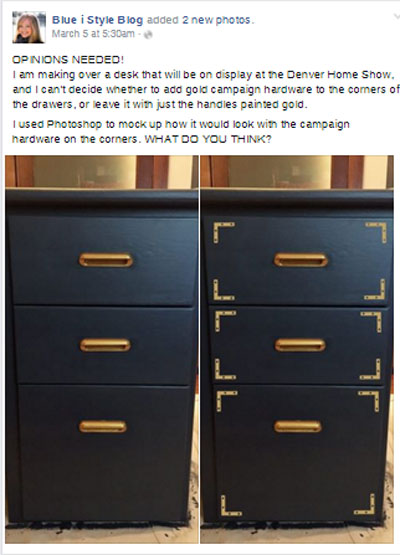
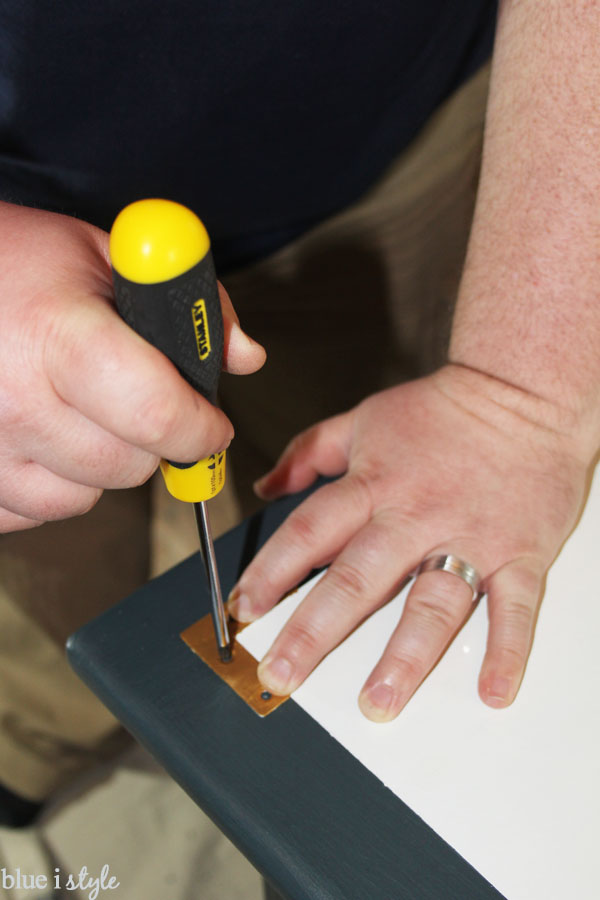
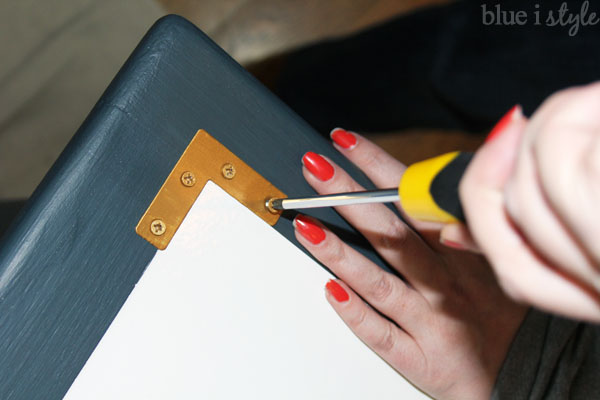
I was hoping you guys would give me a clear yay or nay on the campaign hardware, but it was about a 50-50 split. But we came up with a great compromise! Rather than installing four corner braces on each drawer – which some of you thought would be too busy, we installed only four total corner braces, framing out the bank of drawers.

Desk drawers campaign hardware
I could have bought gold campaign hardware, but stainless steel corner brackets were cheaper. By priming and painting them myself with the Metallic Accents paint I was able to make them perfectly match the drawer handles.

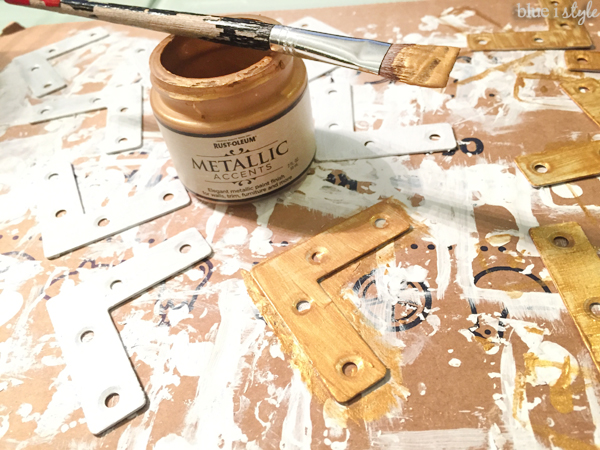
Of course, this meant I also had to paint the screw heads to match, but that was quick and easy.

I had been trying to think of a way to add a little gold to the desktop as well, so I laid out four more of the campaign corners where at the border between the navy and the dry erase paint. I loved the look!! I sat down in the chair to see if the hardware on the desktop would hinder the ability to work at the desk, but since they are placed so far out toward the corners of the desk – they didn’t seem like they’d pose any problems. 
To install the campaign hardware, we pressed a screwdriver into each hole to mark the locations for the screws. 
Then we drilled a small pilot hole at each screw location.
When we installed the matching campaign hardware on the chair, we made the mistake of trying to use an electric screwdriver, but it kept stripping the screws. So on the desk we made sure to just screw them in by hand.
I LOVE how the gold campaign hardware looks on the desktop! It really finishes the desk and pulls everything together!
Dry erase desktop gold campaign hardware
I am over the moon with how this desk transformation turned out! 
Campaign Desk Makeover Gold
I’ll definitely never look at a boring piece of oak furniture the same way again… it has so much potential!
And check out how great that gold dipped chair looks next to the desk! The glossy white lacquer of the chair really helps the white dry erase desk top make sense, and the coordinating campaign hardware makes them feel even more like a perfect pair! The chalkboard globe I painted for my son looks just perfect on the desk – even the gold outline of the continents looks like it was designed to match!
Campaign and Gold Dipped Desk Chair Makeover
Here’s one last look at the before and after of these two pieces, which went from brown and blah to gold and glam!
Navy and Gold Campaign Desk Dry Erase Desktop
So, for those keeping track, that’s two furniture makeovers down and two to go! Next week I’ll show you how I’ve hacked an IKEA LACK side table, and how I’ve turned a cheap printer stand into a rolling bar cart. And, if you are in the Denver area, you can see all four pieces on display at the Denver Home Show the weekend of March 18-20! I’ve even got discounted tickets for you!
Linked up at Remodelaholic
  • Facebook
  • Twitter

03.11.16

« {link party} The Creative Circle – Week 56
{seasonal style} Hello Spring Home Tour »

Meet Angela

Angela, the founder of Blue i Style, strongly believes that decor should be functional, organizing can be beautiful, smart DIYs help stretch your budget, and an organized and stylish home can still be practical for life with kids.

Her work has been featured in print in Better Homes & Gardens and 5280 Home magazine, and online by HGTV, the Today Show, Good Housekeeping, and more. She was also named a 2018 Stylemaker by Better Homes & Gardens.

You can reach Angela at angela@blueistyle.com

Get Email Updates!

Thanks for subscribing! Check your email a welcome message and your free organizing eBook!

Get Email Updates!

Plus a bonus free organizing eBook!

COPYRIGHT & PHOTO SHARING POLICY

All text, images, and other content that are part of this blog are the property of Blue i Style, unless otherwise noted. All material is copyright protected.

If you wish to feature one of my projects, feel free to share a single photo (no collaged images, or images with text overlays) as long as the no pin code is used to prevent my image from being pinned from your site.

All features must include credit to Blue i Style with a link back to the original content (not just to the homepage). The project steps, supply list, and/or sources may not be disclosed.

Please read my full content and photo sharing policy to ensure you comply with all guidelines. Failure to do so constitutes copyright violation.

Create At Your Own Risk

Any and all content on this website is for personal use only and created exclusively for inspiration purposes.

Creating with my suggested methods, products used, and tools is at your own risk.

Please ensure you are following proper guidelines with anything used, and you receive professional guidance when necessary.

Read my complete disclosure at: Policies & Disclosures.

Sponsorships & Affiliations

To help fund this blog, I accept some forms of advertising, sponsorships, and affiliate links.

If you buy something that I recommend, you pay the same price, but I may receive a small commission. As always, all opinions are my own.

Blue i Style is a participant in the Amazon Services LLC Associates Program, an affiliate advertising program designed to provide a means for sites to earn advertising fees by advertising and linking to amazon.com.

I use an affiliate marketing service which may automatically put links into some posts, so please assume any/all links may be affiliate links.

Read my full Disclosure Statement.

Copyright © 2025 · Dazzling Theme theme by Restored 316

  • Facebook
  • Twitter
  • Pinterest