• About
    • About Blue i Style
    • Tour Our Home
    • Free Organizing eBook
    • Blogging Resources
  • Work With Me
    • Interior Decor & Organizing Services
    • Partnerships & Collaborations
    • Blogging Resources
  • Features & Press
  • Policies & Disclosures
  • Contact

Blue i Style

Creating an Organized & Pretty, Happy Home

  • Decor
    • Tour Our Home
    • Room Makeovers & Design Plans
    • Decorating Tips & Tutorials
    • Outdoor Decor
    • One Room Challenge
  • Organizing and Cleaning
    • Organizing Tips & Tutorials
    • Organizing By Room
    • Organizing on the Go
    • Cleaning
  • DIY
    • DIY Tips & Tutorials
    • Smart Home & Safety
    • Paint Tips & Projects
    • Crafts
    • Cricut Projects
  • Kids
    • Decor & DIY for Kids
    • Organizing Kids
    • Life With Kids
  • Five Minute Projects
  • Holidays & Entertaining
    • Seasonal & Holiday Decor
    • Entertaining
    • DIY Gifts & Gift Guides
    • Facebook
    • Instagram
    • Pinterest
    • Twitter
    • YouTube

One Room Challenge

Doubling Our Dining Room Storage

  • Facebook
  • Twitter
It’s week 3 of the One Room Challenge makeover of our dining area, and with our chair crisis averted, things are finally moving along. We still have some decisions to make, and a lot of work to do, but I’m really happy with where things are headed. Unfortunately, I can’t say the same for everyone in the family!

This post contains affiliate links. If you purchase something I recommend, you’ll pay the same price, but I may receive a small commission.

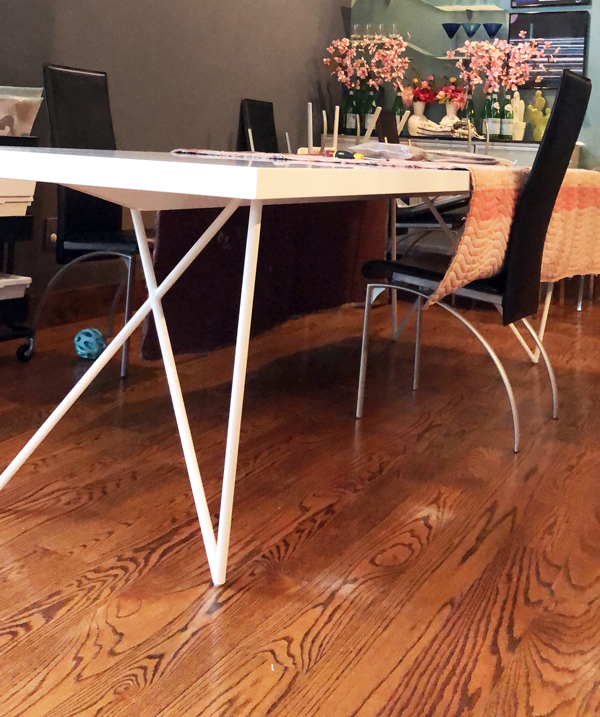
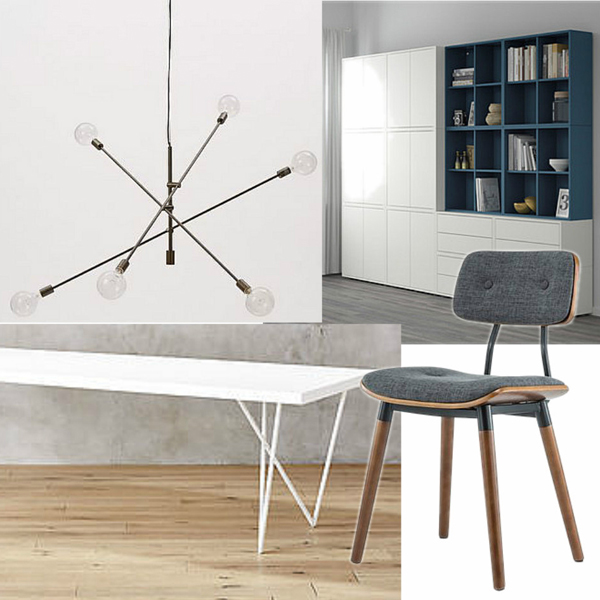
Last week, I showed you the table we chose for the kitchen dining area. The goal was to find a long thin table that could seat 8 daily, and 10 when needed. The table I picked is 104″ long {even longer than our old table}, yet I somehow thought it was a good idea to save money on delivery by picking it up from the warehouse myself. My dad and I measured the space in his Yukon and thought it would fit, but we didn’t factor in the size of the packaging. So when we got to the warehouse, the box was about 6 inches too long. Fortunately, the employees were super nice and helped us unpackage the table top right there on the loading dock. We wrapped it in a moving blanket to protect it and then slid it back into the car. It fit with less than an inch to spare. Phew! {Or Phewffff, as my 6 year old says.}


Seeing the new table with the old chairs made me even more eager to get new, gray dining chairs. At long last, the chairs we’d been waiting on for 6 months finally arrived, and just in time for us to host a dinner party… because that’s what everyone does in the middle of a major makeover, right? Not once, but twice, in fact, because I’m hosting book club this weekend as well.
With the new table and chairs in place, it was time to replace the glass and metal sideboard that matched the old furniture.
The curved glass shelves were looking pretty dated, and they just didn’t provide the functional storage the we really need. I was happy to see this space as a blank slate…
The boys, on the other hand, weren’t so thrilled when they got home from soccer to see what I had done!
These boys love their house and don’t like change. They were already mad that we got rid of their kitchen table and chairs… but taking down the wall of glass shelves was just one step too far. I know they’ll come around… eventually!
With the space cleared, it was time to decide what would replace it. To keep this overall project on budget and maximize the storage potential of this wall, I decided that IKEA was my best bet. I love the configuration of the IKEA EKET cabinets in this inspiration photo…
…but unfortunately my wall isn’t wide enough for that much storage. I knew I wanted to stick with a two-toned combo and a mix of open and closed shelving and drawers. We used IKEAs online design tool to visualize the options, and we initially decided on for sets of cabinets with doors, and one open cubical shelf.
But after thinking about it some more, I really wanted some drawers. So we made another trip back to IKEA, assembled a set of drawers, and came up with this configuration option. It looks even better with the doors and drawers in place, of course.
I like the simple lines of this cabinetry, but I’ll probably add some handles to dress it up just a bit.
The one thing I didn’t take into account when I first chose this cabinetry is how shallow it is. My old sideboard was nice and deep – deep enough for large serving platters, for example. I’m going to have to rearrange some of the kitchen cabinets to fit the oversized pieces in a different place, but in the end, this IKEA cabinet set up still gives me way more storage than I had before. And a girl can never have enough storage, right?! Especially in the kitchen!
That’s all of got for today. I’ll have some updates and lighting and tile next week!
  • Facebook
  • Twitter

10.17.18

« Better Homes & Gardens Stylemaker Event
How to Make a Family Fire Safety Plan + Free Printable »

Meet Angela

Angela, the founder of Blue i Style, strongly believes that decor should be functional, organizing can be beautiful, smart DIYs help stretch your budget, and an organized and stylish home can still be practical for life with kids.

Her work has been featured in print in Better Homes & Gardens and 5280 Home magazine, and online by HGTV, the Today Show, Good Housekeeping, and more. She was also named a 2018 Stylemaker by Better Homes & Gardens.

You can reach Angela at angela@blueistyle.com

Get Email Updates!

Thanks for subscribing! Check your email a welcome message and your free organizing eBook!

Get Email Updates!

Plus a bonus free organizing eBook!

COPYRIGHT & PHOTO SHARING POLICY

All text, images, and other content that are part of this blog are the property of Blue i Style, unless otherwise noted. All material is copyright protected.

If you wish to feature one of my projects, feel free to share a single photo (no collaged images, or images with text overlays) as long as the no pin code is used to prevent my image from being pinned from your site.

All features must include credit to Blue i Style with a link back to the original content (not just to the homepage). The project steps, supply list, and/or sources may not be disclosed.

Please read my full content and photo sharing policy to ensure you comply with all guidelines. Failure to do so constitutes copyright violation.

Create At Your Own Risk

Any and all content on this website is for personal use only and created exclusively for inspiration purposes.

Creating with my suggested methods, products used, and tools is at your own risk.

Please ensure you are following proper guidelines with anything used, and you receive professional guidance when necessary.

Read my complete disclosure at: Policies & Disclosures.

Sponsorships & Affiliations

To help fund this blog, I accept some forms of advertising, sponsorships, and affiliate links.

If you buy something that I recommend, you pay the same price, but I may receive a small commission. As always, all opinions are my own.

Blue i Style is a participant in the Amazon Services LLC Associates Program, an affiliate advertising program designed to provide a means for sites to earn advertising fees by advertising and linking to amazon.com.

I use an affiliate marketing service which may automatically put links into some posts, so please assume any/all links may be affiliate links.

Read my full Disclosure Statement.

Copyright © 2025 · Dazzling Theme theme by Restored 316

  • Facebook
  • Twitter
  • Pinterest