• About
    • About Blue i Style
    • Tour Our Home
    • Free Organizing eBook
    • Blogging Resources
  • Work With Me
    • Interior Decor & Organizing Services
    • Partnerships & Collaborations
    • Blogging Resources
  • Features & Press
  • Policies & Disclosures
  • Contact

Blue i Style

Creating an Organized & Pretty, Happy Home

  • Decor
    • Tour Our Home
    • Room Makeovers & Design Plans
    • Decorating Tips & Tutorials
    • Outdoor Decor
    • One Room Challenge
  • Organizing and Cleaning
    • Organizing Tips & Tutorials
    • Organizing By Room
    • Organizing on the Go
    • Cleaning
  • DIY
    • DIY Tips & Tutorials
    • Smart Home & Safety
    • Paint Tips & Projects
    • Crafts
    • Cricut Projects
  • Kids
    • Decor & DIY for Kids
    • Organizing Kids
    • Life With Kids
  • Five Minute Projects
  • Holidays & Entertaining
    • Seasonal & Holiday Decor
    • Entertaining
    • DIY Gifts & Gift Guides
    • Facebook
    • Instagram
    • Pinterest
    • Twitter
    • YouTube

Outdoor Decor

Modern Summer Backyard Tour

  • Facebook
  • Twitter
Summer seems to be flying by, and we are trying to soak up every minute of it! And our backyard is pretty much our favorite place to be these day!

This week, I’m joining a phenomenal group of bloggers for tours of our outdoor spaces! This Garden Party blog hop is hosted by the fabulous Ursula of Home Made by Carmona, and I’m excited to help kick things off today. At the end of the post, you’ll find links to the other outdoor tours, and I promise you are not going to want to miss these {I’ll be adding more links as the week goes on}!

Some of you may have seen my early summer backyard tour a couple of months ago, but I’m excited to share some updated photos. The last time around, I had just planted everything. Now the plants have had time to grow, and the backyard looks much more the way it’s meant to be {a little more green}.
Let me start with a little context, especially for those who are new around here. If you’ve stopped by from one of the other Garden Party tours, WELCOME! This is our house, in all it’s modern glory. What I refer to our as our backyard is actually on the right side – between the house and our detached garage.
It may be hard to tell in the photo, but our house is raised up quite a bit from the sidewalk. While the sloped grass that makes up our front yard is quite nice for lounging on, that same slope made the backyard less functional that we wanted – especially once our kids came along and needed a flat, grassy area to run and play.
Plus, over the years, the slope of the yard had also created a bit of an unslightly rock slide situation along the fence line. The rocks on the inside of the fence had continued to push against it, cause the bottom to bow. And the rocks on the outside of the fence were constantly spilling out onto the sidewalk. We ween’t exactly winning over the neighbors with this curb appeal.

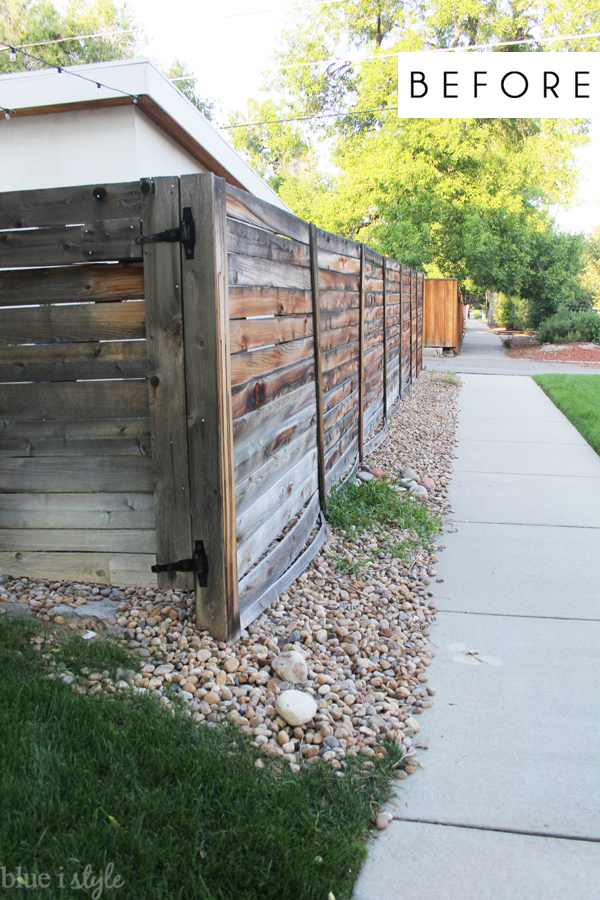
Last year, we saved up all our pennies and hired a landscaper to build a retaining wall to level out the backyard. By having the wall faced in the same stone that’s on our house, it truly looks like it was always meant to be this way. Adding the retaining wall and new fence also allowed us to create a much needed enclosure for our trash, recycling, and compost cans back along the alley.

backyard retaining wall
Here’s a little flash back to the way the backyard looked the first summer that we lived in the house {eight years ago}. Don’t be deceive by how flat it appears… from the edge of the garage to the fence line on the right, it was a significant slope. Just ask our three year old who used to stumble and roll every time he ran that direction.

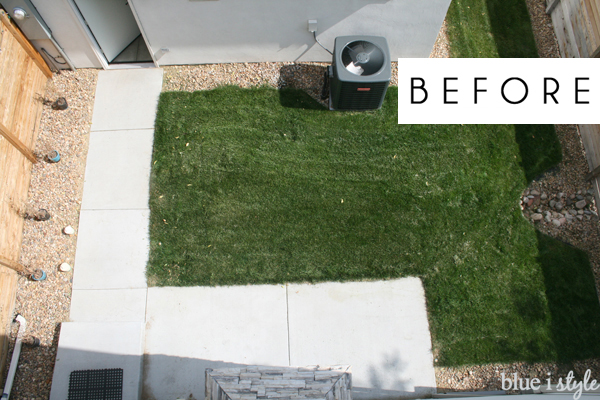
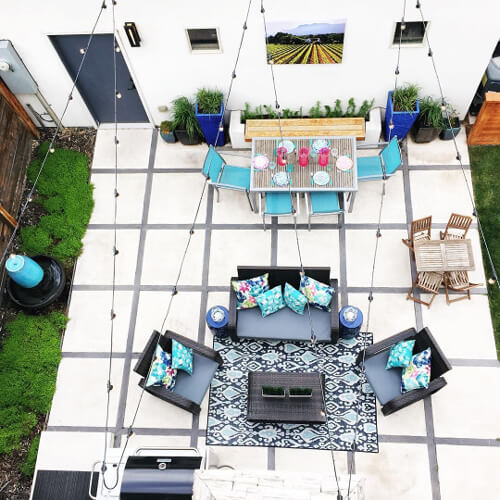
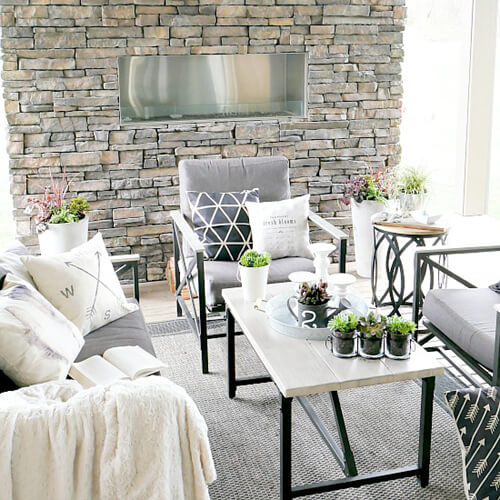
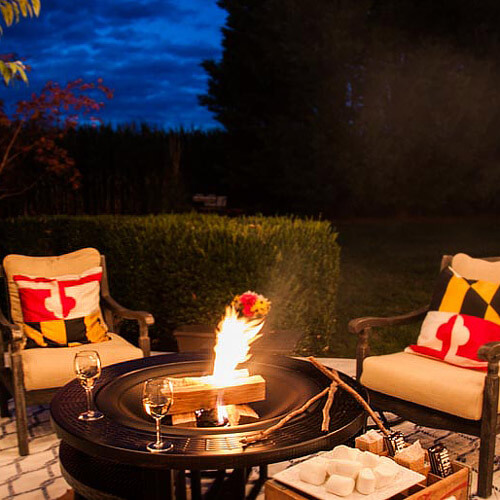
It’s a small yard – but it’s actually not too bad for an urban neighborhood. The stone rectangle that you see at the bottom center of the photo is an indoor/outdoor fireplace that is shared without kitchen. It was a major selling point when we first toured the house, but after we moved in, we realized that the tiny concrete patio in front of the fireplace wasn’t big for any furniture to actually enjoy the fireplace.

We immediately knew that we’d need to expand the patio to create plenty of space for dining and entertaining, but we also wanted to preserve some space for the “future kids” {who are now very much real at three and four years old}.

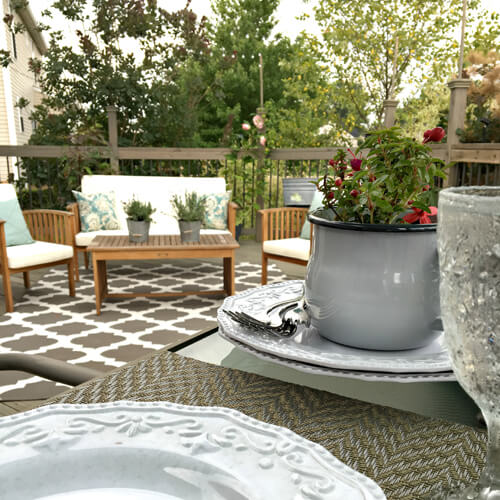
And here’s a look at the our backyard in it’s current state. It’s come together bit by bit over the last seven years, and I finally feel like we can call it done!

Small urban backyard outdoor living room
Obviously, there have been a lot of changes, but I’ll point out the highlights. We created an expanded patio to fill the space between the house and the garage; removed the expanse of beige rock along the left fence line, and replaced it with ground cover to add some green; relocated the air conditioning unit just around the corner of the house and added a small screen to make it less of a focal point; created a dedicated play space for the kids to the right of the garage, complete with a cute arbor entrance; and, or course, strung lights between the house and the garage.
Air conditioning unit screen to hide AC
This summer, the kids’ space got a major upgrade… they went from small plastic slide, to full scale clubhouse, with sandbox below and climbing wall on the back. I’ll admit that I had visions of building them a super modern playhouse, but I feared they would outgrow it before I got it built, so we opted for the standard wooden playground model. While it’s not as cool as Mom would have liked, the kids couldn’t be happier. It was just an added bonus that it turned out to be an perfect match with the fence.
small backyard play area
Ok, so now that you have the basic lay of the land, and you can appreciate just how far this space has come, let’s take a closer look at the patio…
Patio Decorating Ideas
Our ultimate goal was to create an outdoor living room that would feel like a true extension of our indoor living space. Somewhere that we could enjoy daily as a family, but that would also allow us to entertain friends and neighbors.
We wanted to create separate lounging and dining areas, and the placement of the fireplace really dictated the furniture arrangement. We snagged this couch, chair and coffee table set for a fantastic end of season clearance price shortly after moving into the house … and then stored it in the garage until we were finally able to create a patio to fit it. Speaking of which – now is the perfect time to start shopping if you want new outdoor furniture without the big price tag! I saw some amazing clearance prices on super stylish patio sets {affiliate link} when I was wandering around Target last week!
Outdoor Fireplace
Last summer, we got hit by a crazy intense and sudden hail storm. I tried to run outside to move all the furniture cushions in to the garage, but after getting pelted for a minute or so, I had to give up and seek shelter inside. The hail literally shredded the fabric on our couch and chair cushions. I looked for replacements, but they are an unusual size and nothing I could find in local stores would fit the furniture. I got a quote for having the cushions professionally reupholstered, and nearly fainted at the price tag. Finally, the frugal DIYer in me kicked in, and I came up with a cheapo, new-sew solution to recover the cushions.
How to Create an Outdoor Living Room
Behind the lounge-like seating area, we created a separate dining space. To make the very most of the space – and to add some interest to the giant white stucco garage wall – we had a planter bench built in, which provides seating for one side of the patio table.
Planter bench for patio dining table
I was obsessed with the idea of this bench for the first moment, but once it was a reality, the question of what to plant behind the bench had us stumped! We looked at some climbing vine options, but nothing really appealed to us. And we thought about a tall grass of some sort – but the tall, straight growing varieties were rather sharp and pokey – not ideal for sitting against. And the softer, tall growing grasses were much too floppy, and would have quickly overtaken the bench.
After much searching, we stumbled upon a plant called Elegant Feather that ticked all the boxes. It grows straight and tall, but it’s incredibly soft! It’s also very fast growing, which is another big plus since we have to replant it each year. When I shared photos of the backyard in May, we had just planted the Elegant Feather and the stalks were barely tall enough to be seen above the top of the bench…
Planter bench
Two months later, and the Elegant Feather has come along way, baby!
Planter bench
We’ve flanked both sides of the planter bench with large, colorful pots, and carefully selected plants that would also be soft for brushing up against as you take your seat at the table, and that wouldn’t attract too many bees to our dining area. The tall blue posts have Carax Ice Dance {a dense, spreading sedge that stays pretty short}. The middle, gray pots, are filled with a variety of feather reed grass that we chose for its soft, arching blades. And the small, teal pots are filled with Sea Thrift, a low clumpy grass-like foliage with thin stems that produce globes of bright pink flowers {which fade out, and are replaced with new blooms a few times each summer}.
Create an outdoor living room
Along the fence between our yard and our neighbor, we opted to plant only ground cover. We wanted add some green to this side of the yard, but also wanted to preserve the space for setting up banquet tables for buffets when we host parties. We chose fast spreading lemon thyme. In addition to making the entire yard smell great without attracting bees, it’s also rumored to be good for repelling mosquito.
Ground cover to repel mosquitoes near a fountain
While the planter bench, Elegant Feather, and colorful pots help give the wall of the garage some interest and purpose, I’ve long been searching for a piece of art to hang on this wall to further break off the sea of white stucco. After years of searching, I could never find any outdoor art I really liked, so this summer I found a super simple way to create my own weatherproof art.
waterproof outdoor art
I printed a photo from our recent trip to Cape Town, South Africa, and then waterproofed the canvas. Watch my quick tutorial video for weatherproofing art, and then read the rest of the details in this post.
To add some color to our outdoor dining table, I hit up the Target dollar section. I scored three pink candle hurricanes {I love battery-operated flameless candles because they don’t blow out in the breeze}, and I bought a couple sets of colorful, Ikat melamine plates.
Ikat dining plates

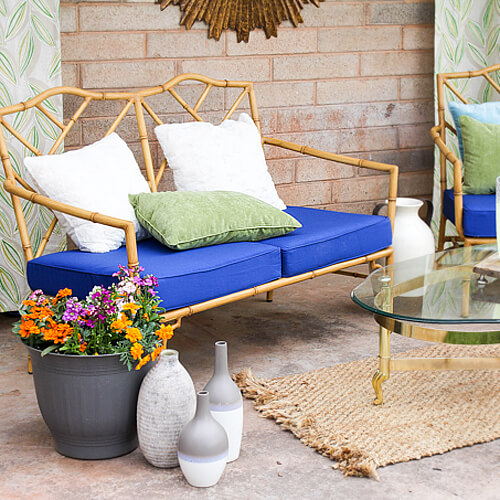
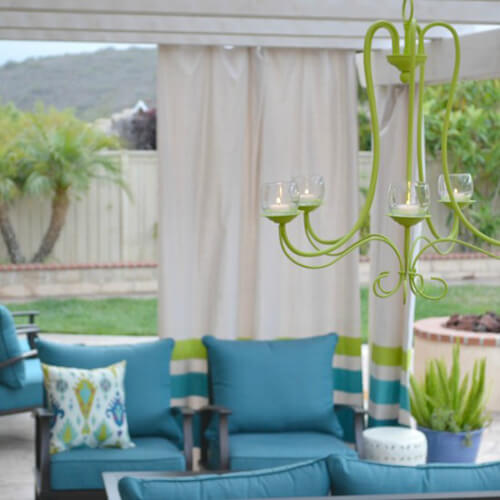
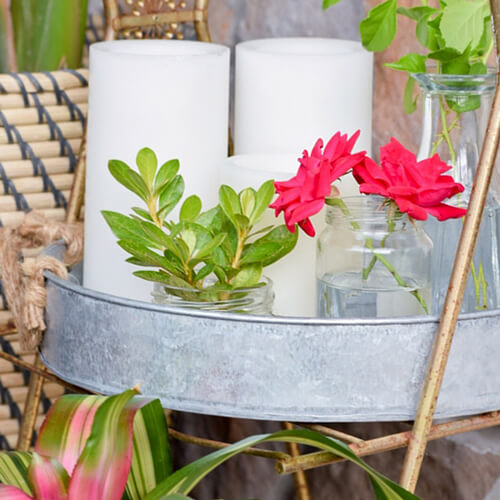
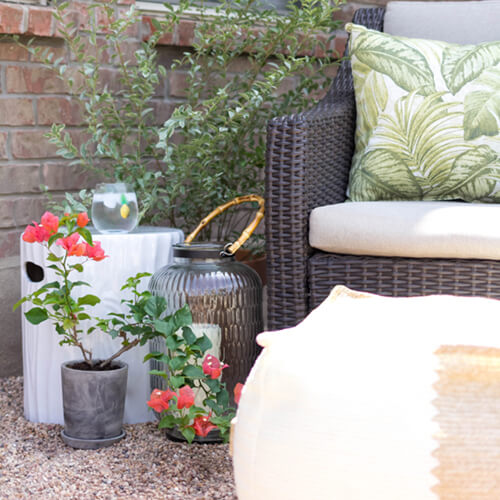
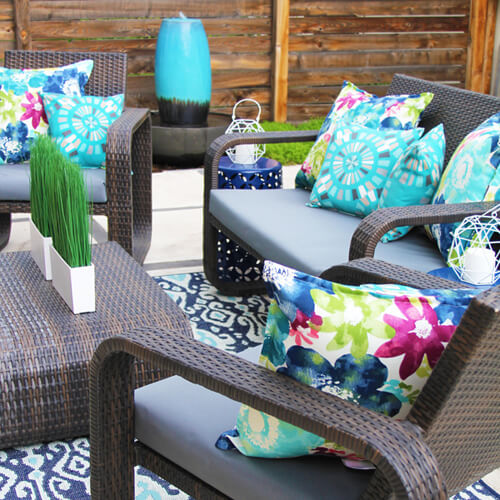
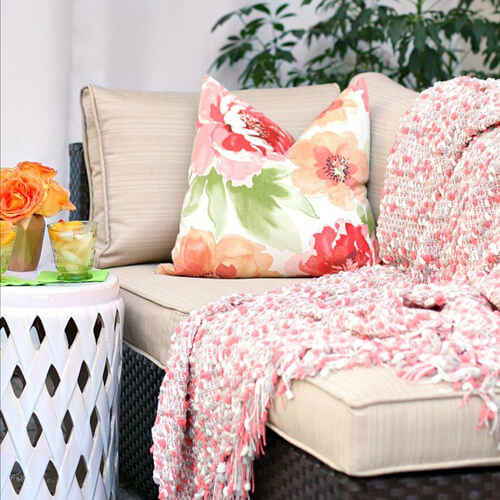
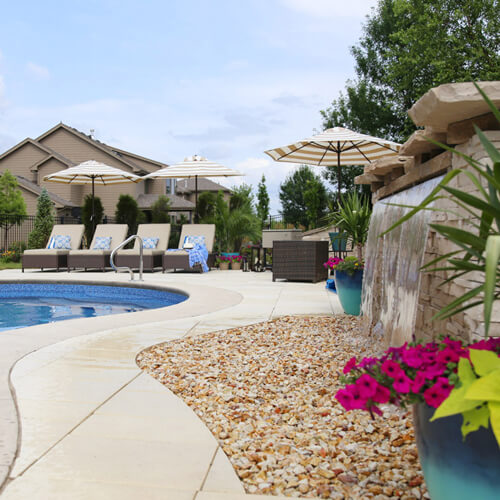
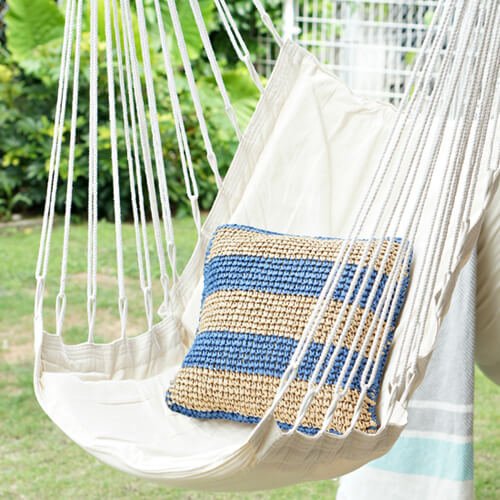
I love how the pops of orange and pink contrast against all the blues in the backyard!

Ikat outdoor plates
You may have noticed that the kids have their very own, little dining table. When it’s just the four of us eating dinner, we all sit at the big table together, but the small table is perfect for play dates, or when we have a bigger group to entertain.
Patio dining for adults and kids
The kids also like to get in on the cooking action with their own miniature version of dad’s BBQ {affiliate link}.
Kids toy BBQ
For the first time this summer, I also added an outdoor rug to help define the “living room” seating area. I love this Ikat rug, but I wish I’d ordered one size larger. Update: This rug had a good run for four summers {which, considering I paid $20 for it, was fantastic}, but this year it needed to be replaced. After lots of looking, I finally ordered a 6×9 of this teal lattice rug {affiliate link}, which I think will look great, and larger size will fit perfectly!
Outdoor living room
I also added two bright blue metal plant stands {affiliate link} on either side of the couch this summer. They work perfectly as side tables, but can also be used as extra seating when we are entertaining.
Outdoor living room couch rug
I really LOVE everything about our backyard, but if I were forced to pick one favorite element, it would have to be the sting lights that zig zag between the house and the garage!
Outdoor living room and dining room
When the sun begins to sun sets, these lights create the perfect glow and ambiance! We wanted the light installation to be permanent {we didn’t want to rehang them each year, and wanted them to be able to withstand the snow each winter}, so we chose commercial grade string lights and hung them with guidewires. You can read my full string light installation tutorial for all the DIY details.
Commercial grade patio string lights
Sitting on the couch, under the string lights, with the fire on, and a bottle of wine is pretty much the perfect place to spend a summer night after the kids have gone to bed! Add the sound of the fountain, and it’s hard not to be lulled to sleep.
String lights and outdoor fireplace
Thanks for stopping by to check out our little piece of backyard heaven! There are four more stops on today’s Garden Party Tour! 
 
 
Click on the photo links below to visit each one, and then stop back each day this week for links to more fabulous outdoor spaces…
  • Facebook
  • Twitter

07.18.16

« How to Weatherproof Art for the Outdoors
Organized Car Kit for Families On the Go »

Meet Angela

Angela, the founder of Blue i Style, strongly believes that decor should be functional, organizing can be beautiful, smart DIYs help stretch your budget, and an organized and stylish home can still be practical for life with kids.

Her work has been featured in print in Better Homes & Gardens and 5280 Home magazine, and online by HGTV, the Today Show, Good Housekeeping, and more. She was also named a 2018 Stylemaker by Better Homes & Gardens.

You can reach Angela at angela@blueistyle.com

Get Email Updates!

Thanks for subscribing! Check your email a welcome message and your free organizing eBook!

Get Email Updates!

Plus a bonus free organizing eBook!

COPYRIGHT & PHOTO SHARING POLICY

All text, images, and other content that are part of this blog are the property of Blue i Style, unless otherwise noted. All material is copyright protected.

If you wish to feature one of my projects, feel free to share a single photo (no collaged images, or images with text overlays) as long as the no pin code is used to prevent my image from being pinned from your site.

All features must include credit to Blue i Style with a link back to the original content (not just to the homepage). The project steps, supply list, and/or sources may not be disclosed.

Please read my full content and photo sharing policy to ensure you comply with all guidelines. Failure to do so constitutes copyright violation.

Create At Your Own Risk

Any and all content on this website is for personal use only and created exclusively for inspiration purposes.

Creating with my suggested methods, products used, and tools is at your own risk.

Please ensure you are following proper guidelines with anything used, and you receive professional guidance when necessary.

Read my complete disclosure at: Policies & Disclosures.

Sponsorships & Affiliations

To help fund this blog, I accept some forms of advertising, sponsorships, and affiliate links.

If you buy something that I recommend, you pay the same price, but I may receive a small commission. As always, all opinions are my own.

Blue i Style is a participant in the Amazon Services LLC Associates Program, an affiliate advertising program designed to provide a means for sites to earn advertising fees by advertising and linking to amazon.com.

I use an affiliate marketing service which may automatically put links into some posts, so please assume any/all links may be affiliate links.

Read my full Disclosure Statement.

Copyright © 2025 · Dazzling Theme theme by Restored 316

  • Facebook
  • Twitter
  • Pinterest