• About
    • About Blue i Style
    • Tour Our Home
    • Free Organizing eBook
    • Blogging Resources
  • Work With Me
    • Interior Decor & Organizing Services
    • Partnerships & Collaborations
    • Blogging Resources
  • Features & Press
  • Policies & Disclosures
  • Contact

Blue i Style

Creating an Organized & Pretty, Happy Home

  • Decor
    • Tour Our Home
    • Room Makeovers & Design Plans
    • Decorating Tips & Tutorials
    • Outdoor Decor
    • One Room Challenge
  • Organizing and Cleaning
    • Organizing Tips & Tutorials
    • Organizing By Room
    • Organizing on the Go
    • Cleaning
  • DIY
    • DIY Tips & Tutorials
    • Smart Home & Safety
    • Paint Tips & Projects
    • Crafts
    • Cricut Projects
  • Kids
    • Decor & DIY for Kids
    • Organizing Kids
    • Life With Kids
  • Five Minute Projects
  • Holidays & Entertaining
    • Seasonal & Holiday Decor
    • Entertaining
    • DIY Gifts & Gift Guides
    • Facebook
    • Instagram
    • Pinterest
    • Twitter
    • YouTube

Uncategorized

{one room challenge} Garage Makeover Week 3: The Halfway Point + A GIVEAWAY

  • Facebook
  • Twitter
Week 3 marks the middle of the One Room Challenge. YIKES! We’ve been making good progress, but I have a lot left that I need to do {and even more that I want to do} in the final three weeks. This is the point in the project where the to do list starts to feel a bit overwhelming, but these weekly ORC update posts are great at helping me to appreciate all that has been accomplished.
To appreciate how far we’ve come, check out all the before photos and plans in the Week 1 and Week 2 One Room Challenge posts.

This post contains affiliate links. If you buy something I recommend, you pay the same price, but I may receive a small commission.

When I left off last week, we were just finishing up the garage floor and trying to settle on an organizing plan for the space. Now the floor is completely done! And it’s gorgeous! I mean, seriously! Those reflections! Can you even?!
I’ve been getting a lot of questions about this floor {both online and in real life – the neighbors are totally fascinated by it}, and I shared all the details, including a detailed tutorial, earlier this week.

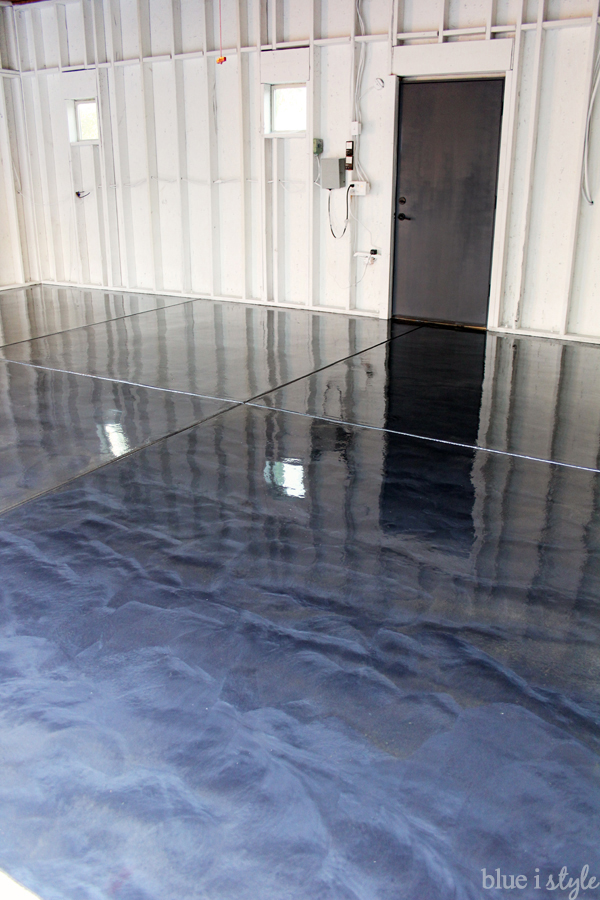
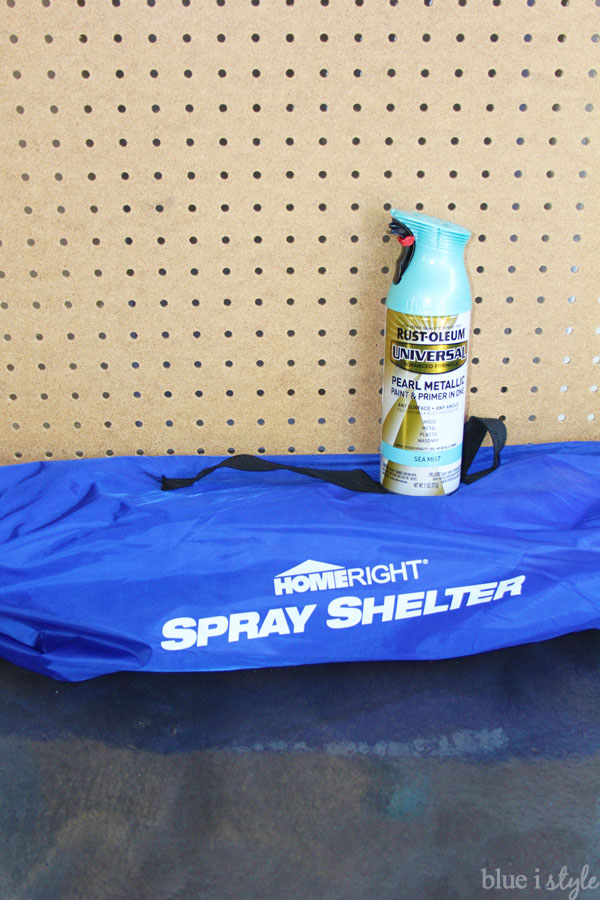
I’m totally obsessed with the new floor, but I’ll admit selecting this finish did give me pause when I first started planning the garage makeover. Our garage has always been rather dark and depressing… but it was a worry-free work zone {you know, before it got to overrun with junk}. I could spray paint to my heart’s content without worrying about the floor or walls. So when I thought about painting the walls white and refinishing the floor, I was a bit nervous that I’d be making the garage less functional and that I would hesitate to do projects out of concern that I’d mess up my pretty space.

Then I remembered learning about an awesome product launched by Home Right last year – a Spray Shelter that allows you to spray paint without worrying about over-spray. I realized that if I have this concern about painting without messing up the garage, I’m probably not the only one. I reached out to Home Right and asked if they would be willing to sponsor a post and let me test out the Spray Shelter so I could tell you all about it. They not only said yes, they also told me they’ve now have Small Spray Shelter perfect for a lot of the smaller, quick painting projects I do. Best of all, they even offered to give away one of each to a lucky reader!
I already had a couple of projects I wanted to spray paint for the garage makeover, so this week I got a chance to use both spray shelters for the first time. Let’s start with the original, larger spray shelter. Based on super compact bag, so I wasn’t sure how big to expect the assembled shelter to be.
I figured it would be plenty big to paint the pegboard for our new workbench, but you guys, this Spray Shelter is big enough for a decent-sized piece of furniture!
Large HomeRight Spray Shelter
I haven’t camped since I was a kid, but I remember pitching a tent to be a stress-inducing experience with poles going everywhere. I worried that getting the Spray Shelter up might be the same way, but it was actually so easy! Scott and I did it together, but now that I’ve done it once, I could definitely do it alone next time. 
The key is to have a big enough space to work in because the poles are very long. If you don’t have enough room in the garage, you could easily assemble it in the driveway and then move it into the garage to paint {or in my case, the alley since I don’t have a driveway}. Or if you prefer to work outside, the shelter comes with stakes to secure it to grass or dirt, and the mesh front flap helps to stop paint from drifting in the wind and keeps out leaves and bugs.
Large HomeRight Spray Shelter
I laid a tarp out below the shelter to protect the floor, and was able to get full inside to paint my pegboard. 
I also had a small wood box to paint, which I’ll be using to organize some of the smaller items on the top of our workbench. This was the perfect size project for the Small Spray Shelter, which comes in that small round pouch.
I unzipped the pouch, removed the large rubber band around the shelter, and it literally just popped right open! It doesn’t get any quicker and easier than that.
Small HomeRight Spray Shelter
Since it was my first time using it, I decided to lay out a piece of plastic below the Small Spray Shelter for extra floor protection, but now that I’ve done it once, I don’t think I would need the extra tarp below it next time.
HomeRight Small Spray Shelter
This Small Spray Shelter is a perfect size for most of the projects I do on a day to day basis, and I love that there is no set up time at all. So quick and easy!
BE SURE YOU MAKE IT TO THE BOTTOM OF THIS POST WHERE YOU CAN ENTER TO WIN BOTH SIZES OF SPRAY PAINT SHELTERS FROM HOME RIGHT!
While I was working on my spray paint projects, Scott and my dad were tackling a big project of their own. I’ve talked a few times about the fact that we painted the raw studs in the garage white because wallboarding the entire garage wasn’t in the budget or the timeline. But once I started working on the organizing plans, we ran in to a bit of snag…

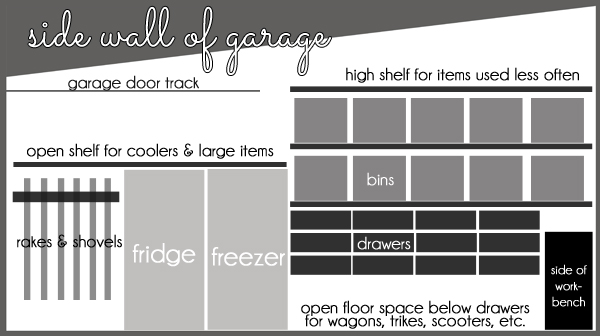
My grand plan was to install hanging drawers on one portion of the “storage wall” to keep the floor space below the drawers for kids’ stuff, like wagons, trikes, and scooters. The plan looked great, but when I started pricing out drawer options from a few different stores, I realized that none of the standard drawer sizes wouldn’t fit perfectly between the studs. In order to install the tracks for the drawers, the wall would need wall board. Womp Womp!

So the choice was to scrap the hanging drawers or wallboard this one wall. Abandoning the drawer plan would put us right back to square one in terms of having lots of items cluttering the floor in front of our storage. On the other hand, wallboarding that one wall would also allow us to insulate it, which would be better in the long run for the fridge and freezer that are also going on this wall.

Fortunately my dad has done some wallboard work in the past, so he came over and helped Scott knock out this project.

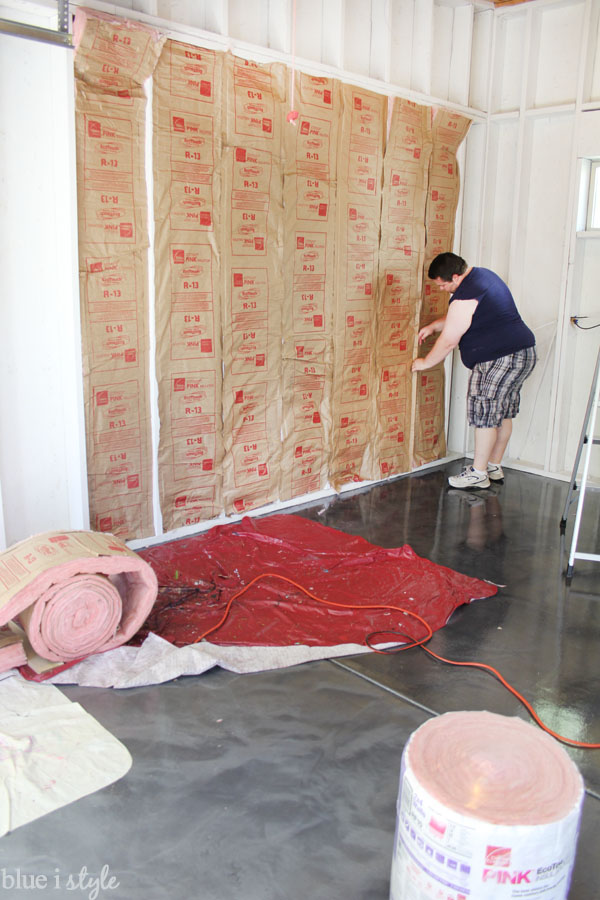
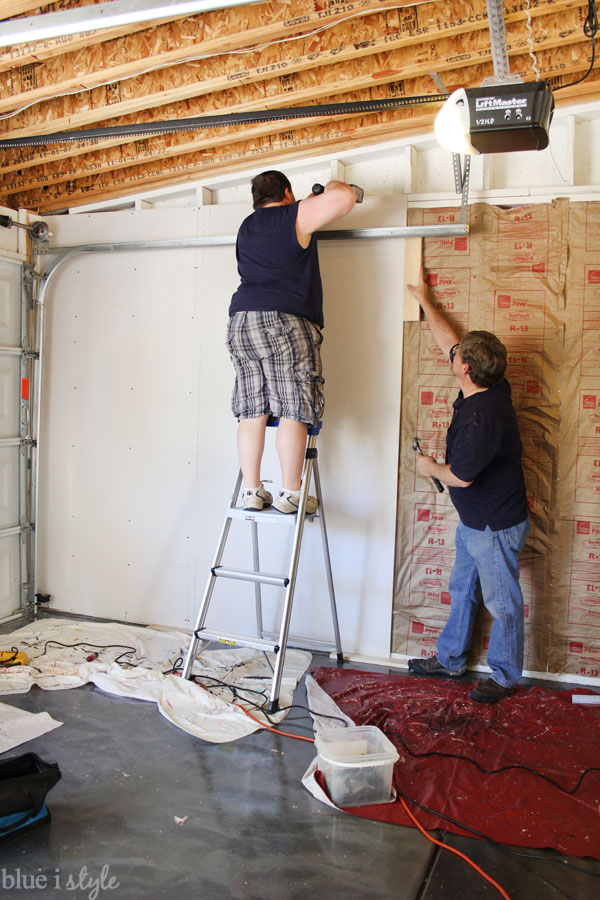
When you guys accomplish something that wasn’t on your to do list, do you add it to the list just so you can check it off? You can sure bet that we added insulation and wallboard to the to do list at the end of that day, and checked it off with a big red “X”!

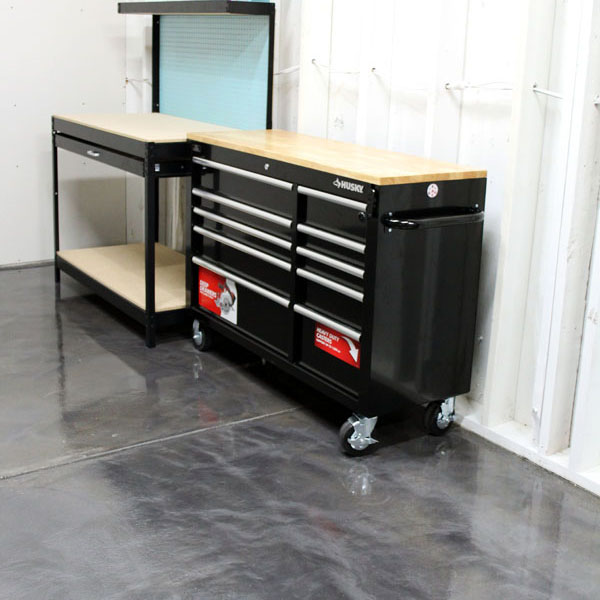
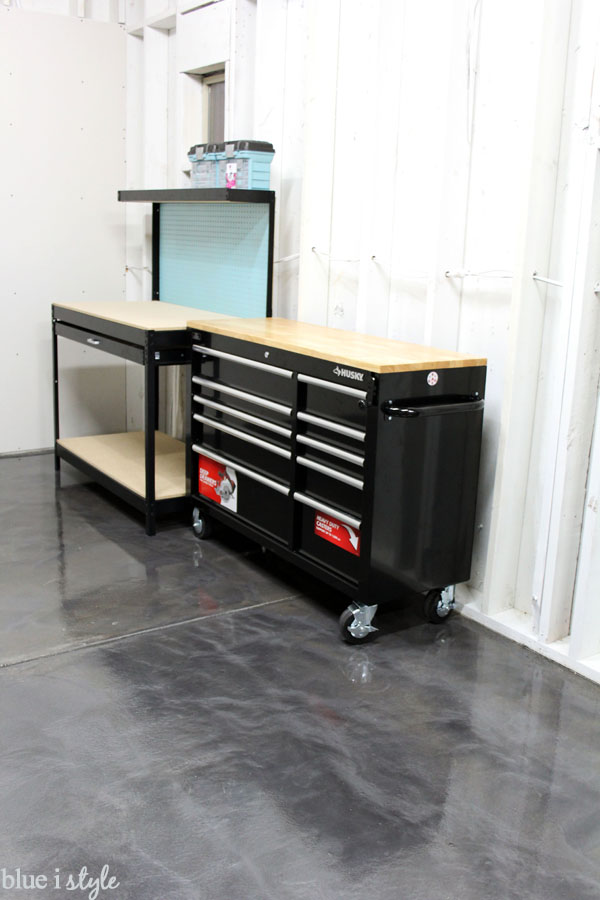
Once the pretty aqua metallic paint on my peg board dried, we finished assembling our stationary workbench and put both the workbenches in place.

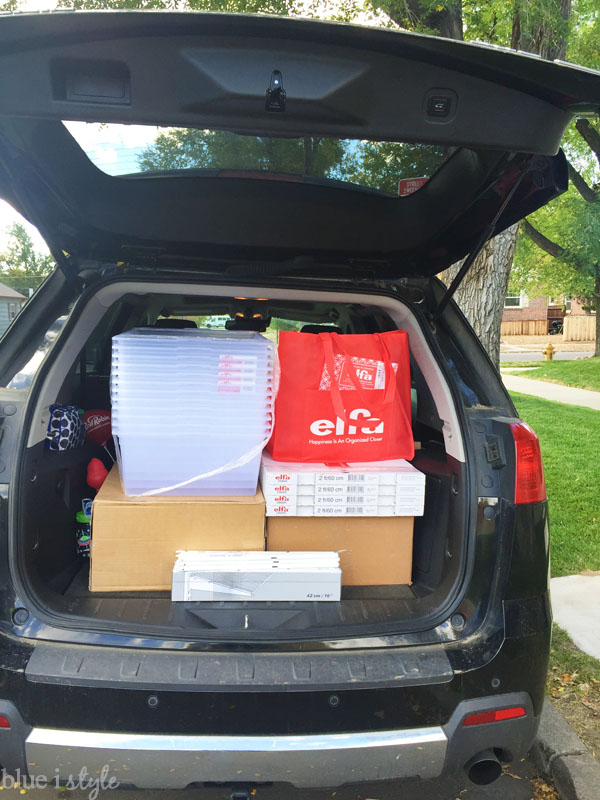
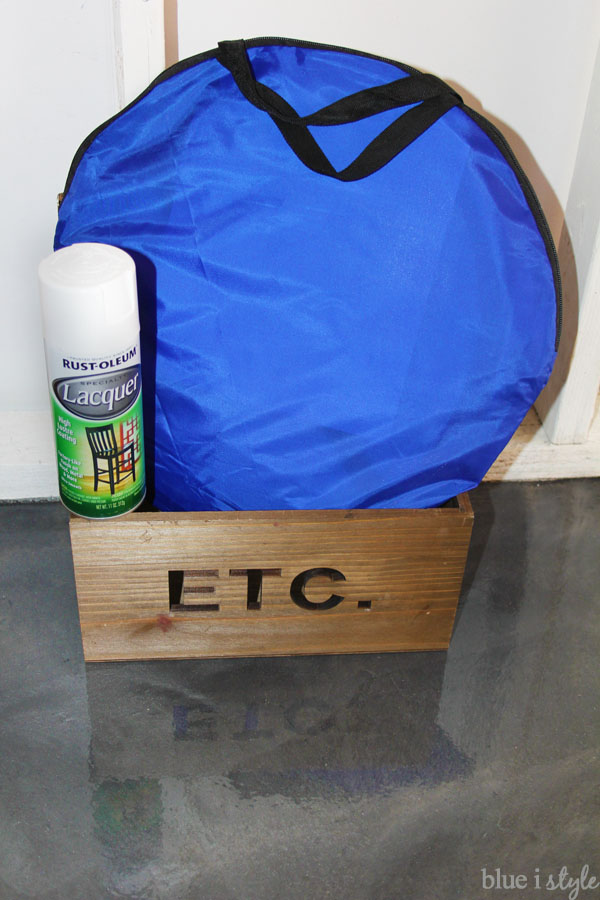
While were busy getting the wall ready to make the hanging drawers feasible, I almost missed out of the drawer and shelving sale that I was counting on to keep the budget in check. Thank goodness for a text alert from the store reminding me that the sale only had hours left! I ran over and ordered my drawers and picked up all the components a few days later. Of course they are still in the back of my car waiting to be installed, but at least I got them for 25% off!

The last thing to report for this week is that our fridge and freezer were delivered yesterday. Look at those pretty white doors? They are about to become my art palette. I’ve still got a few ideas that I’m playing around with, but I can guarantee that they won’t look like this come reveal day.
Now that we’ve created this bright and clean space to work with, it’s time to start filling it up. By next week I hope to be showing you a garage with a whole lot more function and some organization starting to take shape!
Thanks for sticking with me through these weekly garage updates! Now comes the fun part – giving stuff away! Could you use these Home Right Spray Shelters? 
Spray paint in the garage without the mess
Home Right wants to send you one of each! Enter to win…
a Rafflecopter giveaway
AND, if you pop over to my garage floor tutorial that I posted earlier in the week, you might just find another big giveaway waiting for you!  

Finally, don’t forget to visit Calling it Home to see how all of the other One Room Challenges spaces are coming together at this, the mid-way point!
  • Facebook
  • Twitter

10.20.16

« {seasonal style} Simple DIY Dia de los Muertos Wreath
{seasonal style} My Modern Glam Christmas Decor Wish List »

Meet Angela

Angela, the founder of Blue i Style, strongly believes that decor should be functional, organizing can be beautiful, smart DIYs help stretch your budget, and an organized and stylish home can still be practical for life with kids.

Her work has been featured in print in Better Homes & Gardens and 5280 Home magazine, and online by HGTV, the Today Show, Good Housekeeping, and more. She was also named a 2018 Stylemaker by Better Homes & Gardens.

You can reach Angela at angela@blueistyle.com

Get Email Updates!

Thanks for subscribing! Check your email a welcome message and your free organizing eBook!

Get Email Updates!

Plus a bonus free organizing eBook!

COPYRIGHT & PHOTO SHARING POLICY

All text, images, and other content that are part of this blog are the property of Blue i Style, unless otherwise noted. All material is copyright protected.

If you wish to feature one of my projects, feel free to share a single photo (no collaged images, or images with text overlays) as long as the no pin code is used to prevent my image from being pinned from your site.

All features must include credit to Blue i Style with a link back to the original content (not just to the homepage). The project steps, supply list, and/or sources may not be disclosed.

Please read my full content and photo sharing policy to ensure you comply with all guidelines. Failure to do so constitutes copyright violation.

Create At Your Own Risk

Any and all content on this website is for personal use only and created exclusively for inspiration purposes.

Creating with my suggested methods, products used, and tools is at your own risk.

Please ensure you are following proper guidelines with anything used, and you receive professional guidance when necessary.

Read my complete disclosure at: Policies & Disclosures.

Sponsorships & Affiliations

To help fund this blog, I accept some forms of advertising, sponsorships, and affiliate links.

If you buy something that I recommend, you pay the same price, but I may receive a small commission. As always, all opinions are my own.

Blue i Style is a participant in the Amazon Services LLC Associates Program, an affiliate advertising program designed to provide a means for sites to earn advertising fees by advertising and linking to amazon.com.

I use an affiliate marketing service which may automatically put links into some posts, so please assume any/all links may be affiliate links.

Read my full Disclosure Statement.

Copyright © 2025 · Dazzling Theme theme by Restored 316

  • Facebook
  • Twitter
  • Pinterest