• About
    • About Blue i Style
    • Tour Our Home
    • Free Organizing eBook
    • Blogging Resources
  • Work With Me
    • Interior Decor & Organizing Services
    • Partnerships & Collaborations
    • Blogging Resources
  • Features & Press
  • Policies & Disclosures
  • Contact

Blue i Style

Creating an Organized & Pretty, Happy Home

  • Decor
    • Tour Our Home
    • Room Makeovers & Design Plans
    • Decorating Tips & Tutorials
    • Outdoor Decor
    • One Room Challenge
  • Organizing and Cleaning
    • Organizing Tips & Tutorials
    • Organizing By Room
    • Organizing on the Go
    • Cleaning
  • DIY
    • DIY Tips & Tutorials
    • Smart Home & Safety
    • Paint Tips & Projects
    • Crafts
    • Cricut Projects
  • Kids
    • Decor & DIY for Kids
    • Organizing Kids
    • Life With Kids
  • Five Minute Projects
  • Holidays & Entertaining
    • Seasonal & Holiday Decor
    • Entertaining
    • DIY Gifts & Gift Guides
    • Facebook
    • Instagram
    • Pinterest
    • Twitter
    • YouTube

Crafts· Holidays & Seasons

Glam White DIY Christmas Trees

  • Facebook
  • Twitter

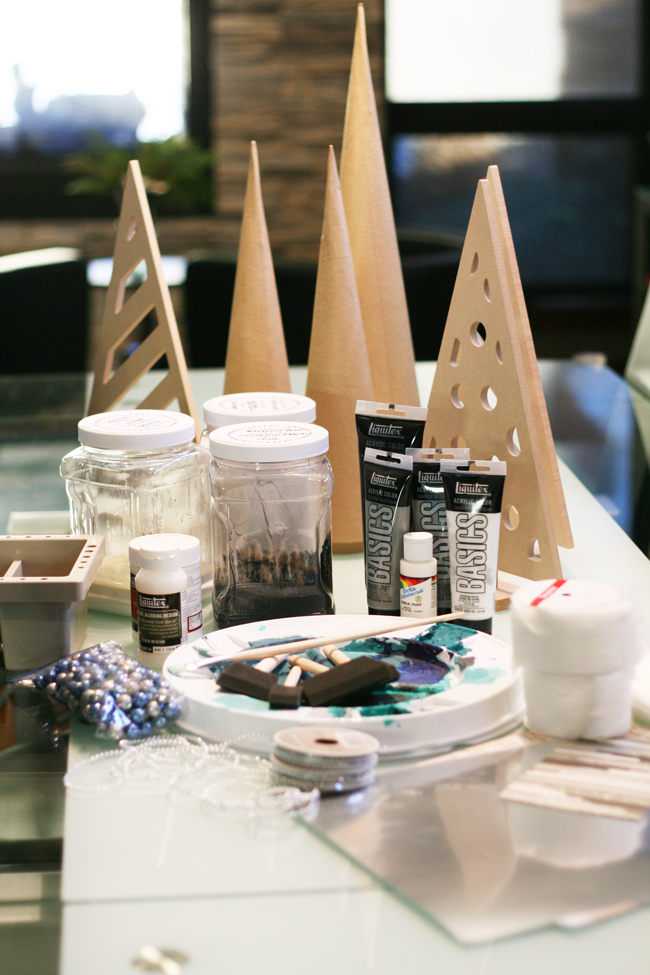
A while back, my mom bought me a variety of unfinished paper mache and wood cutout Christmas trees from Hobby Lobby knowing that I would have fun figuring out a creative way to decorate them. I stalled and stalled and didn’t do anything with these Christmas tree crafts for a couple of years – not because I didn’t have any ideas, but because I had too many ideas and couldn’t make a decision. Does anyone else have this same problem?  I call it craft indecisiveness!

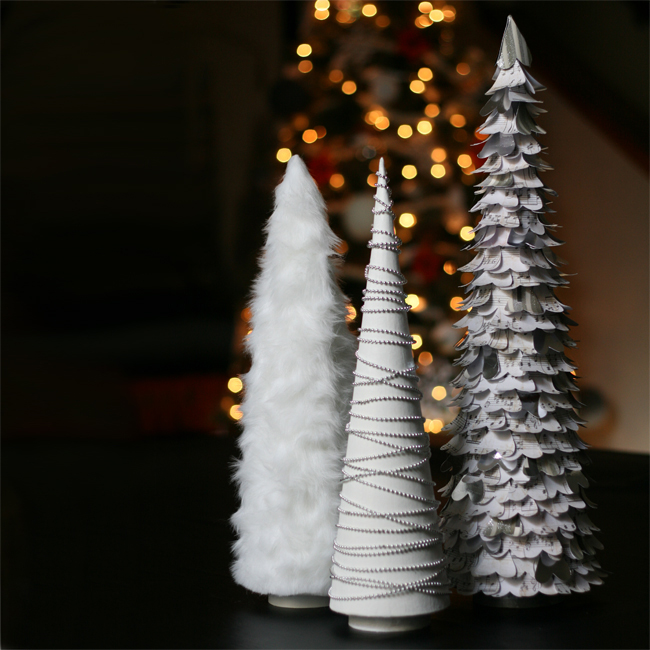
Finally I realized that I could use my indecisiveness to my advantage by creating six distinctly different DIY Christmas Trees – three cones, and three flat wood Christmas trees.  Today I want to share three simple tutorials for decorating paper mache cones from Hobby Lobby to create glam Christmas decorations on a major budget

I started my DIY Christmas Tree project the same way most craft projects start in my house – by pulling together paints, scrapbook papers, ribbons, and various other supplies from around my house and piling them all in the center of the kitchen table. After staring at the supplies for a while, I decided to start with the paper mache cone-shaped Christmas trees.

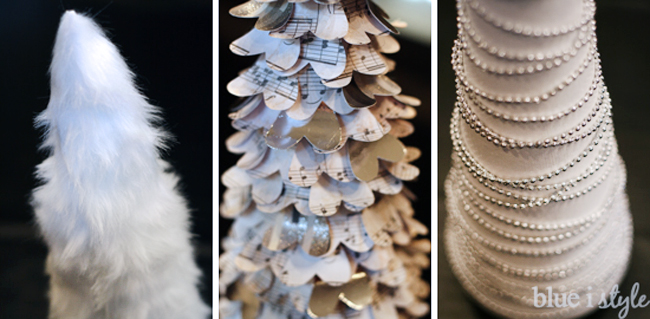
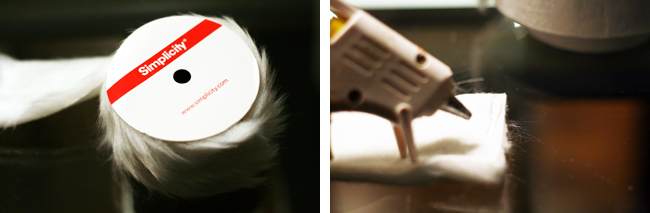
DIY Fur Christmas Tree.  Let’s begin with the Christmas tree that I covered in white fur ribbon, which I purchased at Michael’s. Since the base of the tree would remain exposed, I started by giving the tree a coat of white acrylic paint. I unrolled all nine yards of the fur ribbon and cut strips the right length, then used my hot glue gun to begin attaching the fur strips to the tree.

I was concerned about maintaining the narrow, pointed shape of the top of the tree, so I knew I couldn’t have six strip of thick fur overlapping at the very top of the tree. Instead I started by affixing three strips of fur that were only about three quarters of the height of the tree.  I spaced these strips evenly around the tree, leaving room between each to affix three more full length strips of fur ribbon.

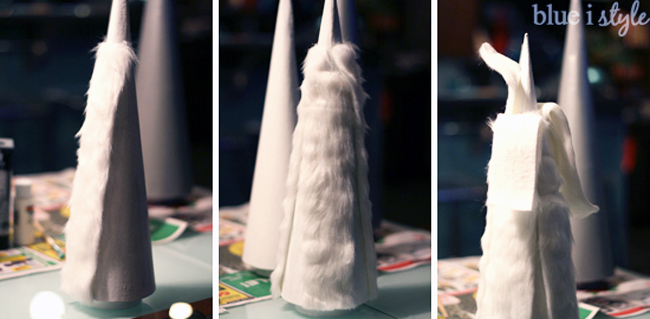
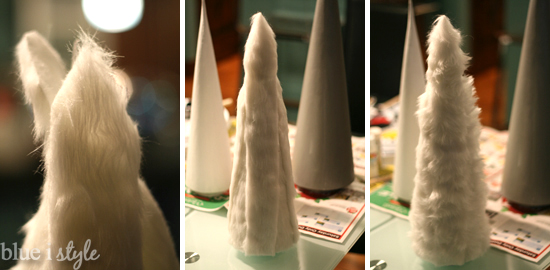
With the final three strips of fur glued to the lower part of the tree, I used a scissors to cut the top of each strip into a point.  I then finished gluing these three fur strips to the top of the tree. The tree initially looked odd because of the different layers of the overlapping strips of fur, but as soon as I fluffed up the fur with the fingers, the tree really took shape and looked perfect.

DIY Bead Garland Christmas Tree.  Next I decided to wrap one of the Christmas trees in a silver bead garland that I purchased from Michael’s (also on the ribbon aisle).  I started by painting the tree white, and, to achieve a glossy finish, I combined my white acrylic paint with some Liquitex Gloss Gel that I had in with my painting supplies.

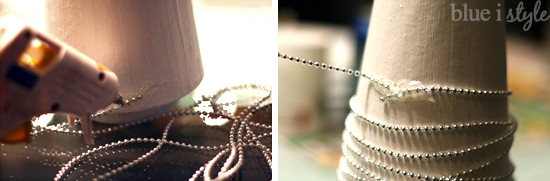
Once the paint was dry, I began wrapping the tree with the silver bead garland, using hot glue to affix the end of the first string of beads. The spot where I glued the initial strand of beads became the “back” of the tree. As I added additional strands of beads, I ensured that each started and stopped at the back of the tree so that, when placed on my mantel, none of the hot glue will be visible. In total, I used about eight and a half yards of bead garland to wrap the tree from top to bottom.

DIY Paper Heart Christmas Tree.  I wanted to cover the third Christmas tree in some music note scrapbook paper that I already owned, though I wasn’t sure the best way to go about this. I thought about attaching strips of paper around the tree and then fringing the paper, but I was concerned that the music notes wouldn’t read if the paper was fringed. Instead, I decided to get my Cricut Christmas craft on. I pulled out my Cricut machine (this was a few years ago when I was still using the original Cricut before updating to the Cricut Explor) and cut hundreds of elongated hearts.
After cutting all of the music note hearts, I decided that the tree would be more interesting if I mixed in some fancy papers that would add a little sparkle to the tree.  I sifted through my scrapbook papers and cut more hearts from silver metallic paper, as well as from paper that had stripes of beige, white, black and silver glitter.


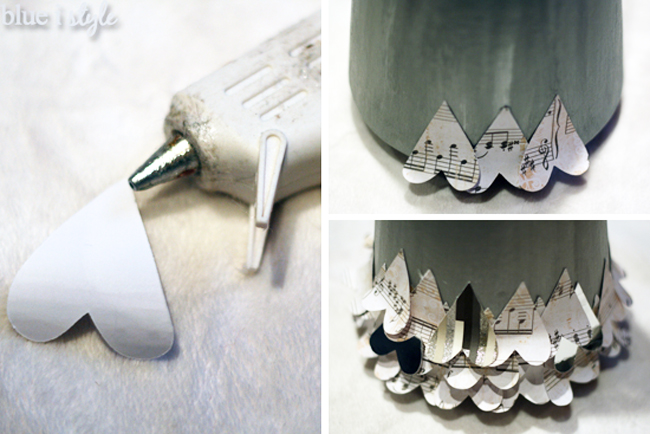
Since I knew that the paper mache base of the tree would most likely show through between the scrapbook paper hearts, I started by painting the tree with two coats of silver metallic acrylic paint. Then, before attaching the hearts to the tree, I curled each around a pencil. Rather than curing them one by one, I found that it worked well to stack up three to four hearts and curl them all at once. Then I would glue those hearts to the tree before curling three or four more.

I started at the bottom of tree, and used a dot of hot glue at the point of each heart and a dot of hot glue in the center of each heart. I worked my way around the tree, one row at a time.  On each row, I overlapped the edges of the hearts, and each row also overlapped the row below.

It was a time consuming process to glue nearly 400 hearts to the tree – about five re-runs of Friends to be specific. Once I finally reached the very top of the tree, I used the pencil to curl the final three hearts in around themselves, rather than curling them so that the rounded ends flipped up. This made the final hearts easier to glue in place and maintained the shape of the point of the tree top.
I am so excited about how these tree DIY Christmas trees turned out! Each one is so unique, but I think they look especially great when grouped together.
It’s amazing what happens when you stop procrastinating, spread out all your craft supplies, and just get to work!
DIY White Christmas Tree Decorations
My painted, chipboard Chirstmas trees also turned out beautifully. It’s amazing how a few paper mache cones from Hobby Lobby and a few chipboard Christmas trees turned into a chic white Christmas mantel display with these DIY Christmas Tree crafts! I’m just over here singing, “I’m dreaming of an orange and white Christmas…”
Glam and Modern White Christmas Mantel Display Orange Wall
Be sure to pin the image below so you can find your way back to these simple DIY tutorials for decorating paper mache cones from Hobby Lobby to create glam Christmas decorations on a major budget! And then click over to see how I painted my wood Christmas trees cutouts for more DIY white Christmas decorations!
Glam White DIY Christmas Decorations
  • Facebook
  • Twitter

12.05.18

« Gift Guide: Rehearsal Survival Kit for Musicians
DIY Map Ornaments »

Meet Angela

Angela, the founder of Blue i Style, strongly believes that decor should be functional, organizing can be beautiful, smart DIYs help stretch your budget, and an organized and stylish home can still be practical for life with kids.

Her work has been featured in print in Better Homes & Gardens and 5280 Home magazine, and online by HGTV, the Today Show, Good Housekeeping, and more. She was also named a 2018 Stylemaker by Better Homes & Gardens.

You can reach Angela at angela@blueistyle.com

Get Email Updates!

Thanks for subscribing! Check your email a welcome message and your free organizing eBook!

Get Email Updates!

Plus a bonus free organizing eBook!

COPYRIGHT & PHOTO SHARING POLICY

All text, images, and other content that are part of this blog are the property of Blue i Style, unless otherwise noted. All material is copyright protected.

If you wish to feature one of my projects, feel free to share a single photo (no collaged images, or images with text overlays) as long as the no pin code is used to prevent my image from being pinned from your site.

All features must include credit to Blue i Style with a link back to the original content (not just to the homepage). The project steps, supply list, and/or sources may not be disclosed.

Please read my full content and photo sharing policy to ensure you comply with all guidelines. Failure to do so constitutes copyright violation.

Create At Your Own Risk

Any and all content on this website is for personal use only and created exclusively for inspiration purposes.

Creating with my suggested methods, products used, and tools is at your own risk.

Please ensure you are following proper guidelines with anything used, and you receive professional guidance when necessary.

Read my complete disclosure at: Policies & Disclosures.

Sponsorships & Affiliations

To help fund this blog, I accept some forms of advertising, sponsorships, and affiliate links.

If you buy something that I recommend, you pay the same price, but I may receive a small commission. As always, all opinions are my own.

Blue i Style is a participant in the Amazon Services LLC Associates Program, an affiliate advertising program designed to provide a means for sites to earn advertising fees by advertising and linking to amazon.com.

I use an affiliate marketing service which may automatically put links into some posts, so please assume any/all links may be affiliate links.

Read my full Disclosure Statement.

Copyright © 2025 · Dazzling Theme theme by Restored 316

  • Facebook
  • Twitter
  • Pinterest