• About
    • About Blue i Style
    • Tour Our Home
    • Free Organizing eBook
    • Blogging Resources
  • Work With Me
    • Interior Decor & Organizing Services
    • Partnerships & Collaborations
    • Blogging Resources
  • Features & Press
  • Policies & Disclosures
  • Contact

Blue i Style

Creating an Organized & Pretty, Happy Home

  • Decor
    • Tour Our Home
    • Room Makeovers & Design Plans
    • Decorating Tips & Tutorials
    • Outdoor Decor
    • One Room Challenge
  • Organizing and Cleaning
    • Organizing Tips & Tutorials
    • Organizing By Room
    • Organizing on the Go
    • Cleaning
  • DIY
    • DIY Tips & Tutorials
    • Smart Home & Safety
    • Paint Tips & Projects
    • Crafts
    • Cricut Projects
  • Kids
    • Decor & DIY for Kids
    • Organizing Kids
    • Life With Kids
  • Five Minute Projects
  • Holidays & Entertaining
    • Seasonal & Holiday Decor
    • Entertaining
    • DIY Gifts & Gift Guides
    • Facebook
    • Instagram
    • Pinterest
    • Twitter
    • YouTube

Crafts· Holidays & Seasons

DIY Map Ornaments

  • Facebook
  • Twitter
I love to travel and I have a bit of an obsession with maps! Years ago I came across a set of gold landmark ornaments that I just couldn’t pass up, and I decided then and there that one day I would have a travel-themed Christmas tree. I began looking for a Christmas ornament to bring home as a souvenir from each country we visit. And I also thought it would be really fun idea make a set of DIY map ornaments to commemorate each of our travel destinations.


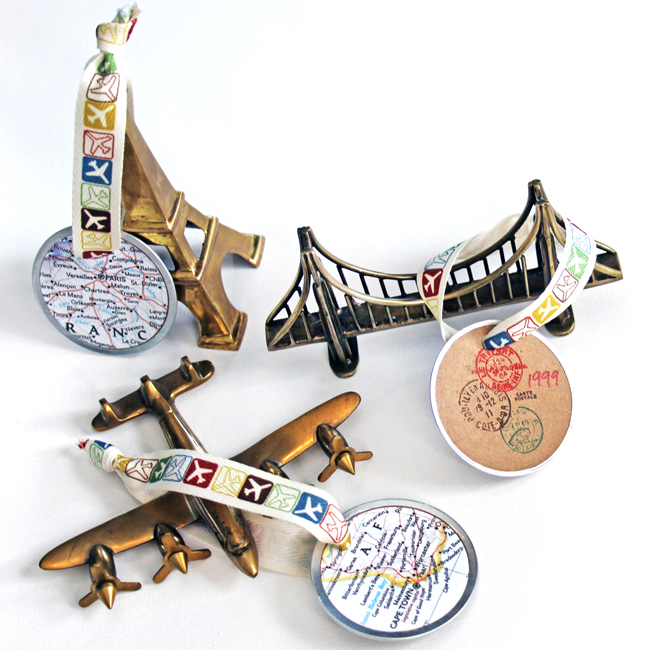
I considered a lot of different way to create my travel map ornaments, but my number one priority was making them simple enough that it will be easy to add more over the years as we check more cities and countries off of our travel bucket list.

SUPPLY LIST
*This post contains affiliate links. If you buy something I recommend, you pay the same price, but I may receive a small commission.
 
{1} Fiskars Round and Round Squeeze Punch – X-Large
{2} Standard hole punch
{3} Tres Port Postal Rubber Stamp
{4} EK Success Squeeze and Roll Glue Pen
{5} Red Sharpie
{6} Recollections Brush Markers
{7} Airplane Twill Ribbon, The Paper Studio {from Hobby Lobby}
{8} 2.25′ Metal Edged Paper Tags
In addition to these supplies, I obviously needed maps of each of our travel destinations. For this, I simply copied maps out of my National Geographic Family Reference Atlas, but if you don’t own an atlas, you could just as easily print maps from the Internet. I copied the maps onto white cardstock weight paper.
I planned to affix one map to each round kraft paper tag, and originally assumed that I’d have to cut each circle with scissors, being very precise to get the size just right. But as I was printing the maps, it dawned on me that I owned several Fiskars squeeze punches in different sizes of circles. I was thrilled to find that my 2 inch squeeze punch cut a circle exactly the right size to fit just inside the metal rim of the round kraft paper tags.
In addition to being a major time saver, my favorite part about the squeeze punch is that it allowed me to see exactly what I was going to cut before cutting it. I was able to position the map within the center of the punch, ensuring that the city names I wanted were visible.

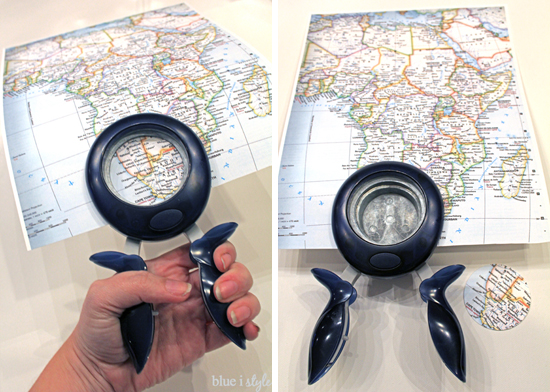
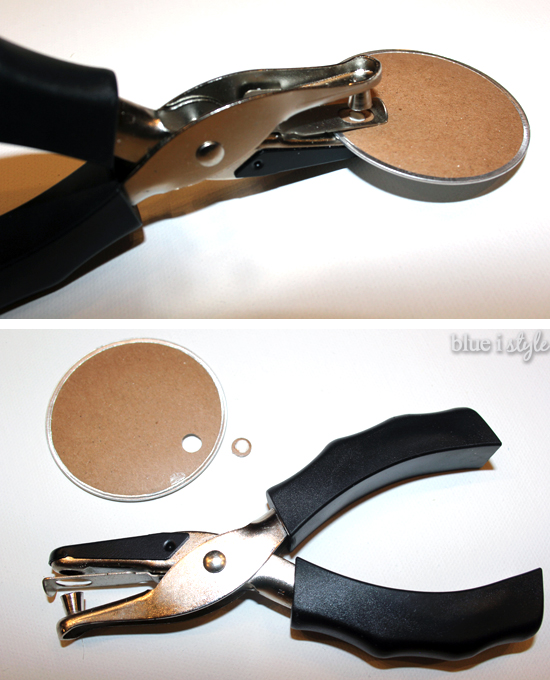
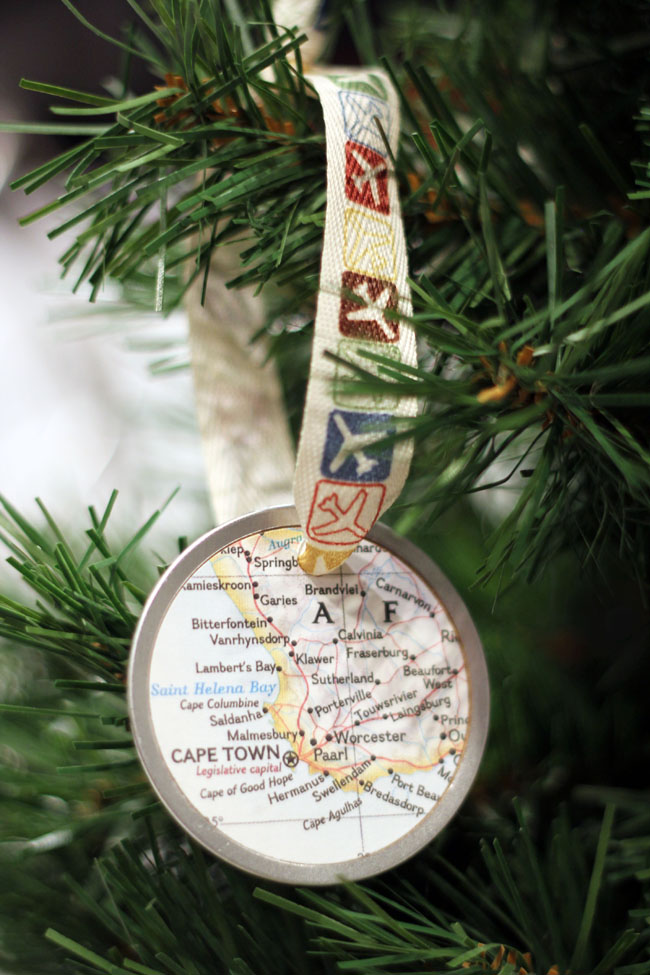
In the photo above, I was cutting a circle from the very bottom of the map to document our recent trip to Cape Town, but when I needed to cut a circle from a location not along the edge of the paper, I simply used scissors to cut the paper down until the section I wanted could fit within the frame of the squeeze punch.

As I cut my map circles, I also kept in mind that I would be punching a hole in the top center of each to add the ribbon for hanging. With that in mind, I was careful not to position the names of important cities near the top center of the circles.

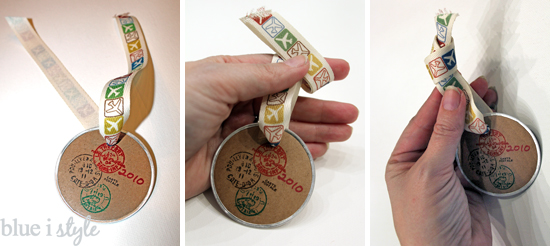
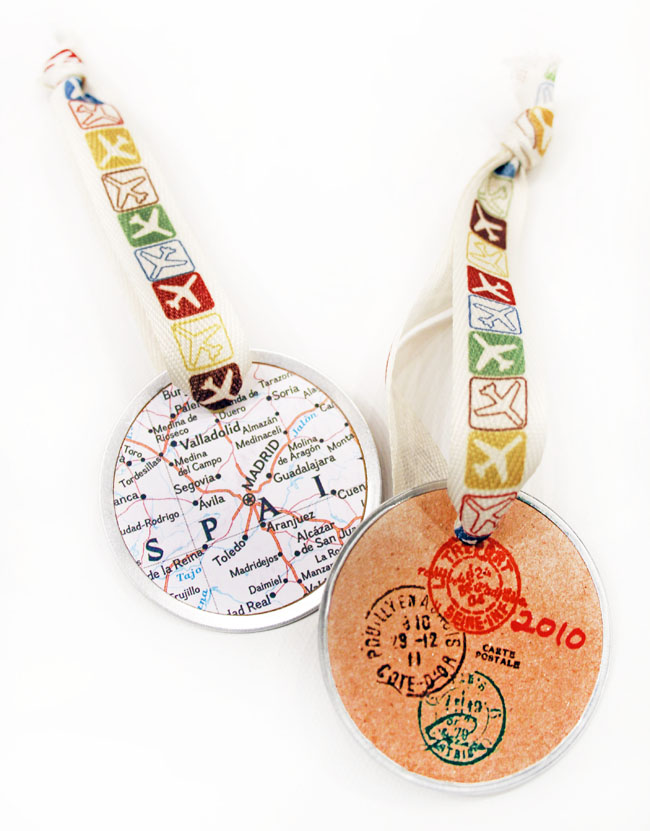
Once I finished cutting all of my maps, I began gluing them to the craft paper tags using an acid free glue pen {which won’t cause the paper to discolor over time}. Each tag has a metal rim around the edge, but the rim is wider on one side than the other {in the photo below, the side with the thinner rim is at the top, and the thicker rim below}. The maps fit perfectly inside the thicker rim, so I had to pay attention to glue them to the correct side of each tag.


After affixing the maps to the tags, I had to punch a hole through each in order to later add the ribbon for hanging. I used a standard hole punch and lined it up with the original, slightly smaller, hole on the blank side of each tag.
With the maps on one side of tags, I decided to use the reverse side to note the year that we traveled to each destination. But the year alone seemed a bit boring, so I picked up a rubber stamp at Hobby Lobby with three postmarks {which, because they are not quite legible, also remind me of passport stamps}.
I recently experimented with hand-coloring rubber stamps {when I made stamped place cards}, and my Recollections brush markers worked so well that I decided to use them again for this project. I colored each post mark in a different color – red, brown and green {and I opted not to color the signature across the bottom of the stamp}.


Three important tips to keep in mind when hand coloring a rubber stamp: (1) After coloring, but before stamping, you have to “huff” on the stamp {blow hot air on it with an open mouth} to re-moisten the ink in order to get nice, vibrant colors; (2) Re-color after each stamp; and (3) When you are done stamping, baby wipes work well to remove all of the excess ink and ensure that the stamp does not get stained.

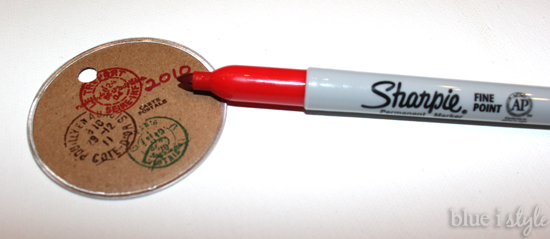
I then used a red Sharpie to write in the travel year corresponding to each map next to the red postmark stamp.

Finally, I added a piece of ribbon to each ornament for easy hanging. I was thrilled to find some adorable airplane ribbon at Hobby Lobby for only $.99 per 2 yard roll. I stocked up on quite a few rolls, so I’ll be able to use the same ribbon when I make more of these ornaments in the future. I tied a simple knot by wrapping the ribbon around my finger and then pulling the ends through the loop. I pulled each knot tight and then trimmed off the excess leaving just a bit of ribbon poking out of the top. As of now, the ribbon doesn’t seem to be fraying, but if the ends of the ribbon do begin to fray, I’ll add a bit of FrayCheck to keep them looking nice.


These ornaments were so simple to make, but I really love the way they turned out! They are prefect for commemorating each of our travel destinations and documenting the year of each trip. I bought extra of the tags and ribbon, so I’ll be able to quickly and easily make a new ornament each time we travel.

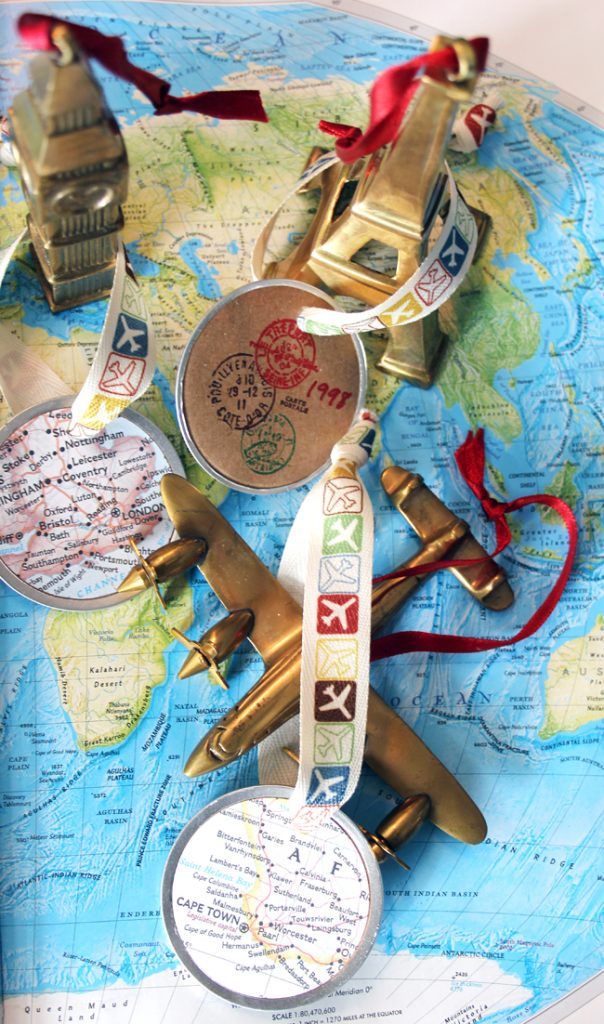
As the years go by, it will be so fun to reminisce about our adventures as we hang each of these map ornaments on a travel themed tree!

These small ornaments will pair perfectly with my set of gold landmark ornaments!
Be sure to pin the image below so you can find you way back to this easy, DIY map ornament tutorial when you’re ready to make them for yourself, or to give a gift!
DIY Map Ornaments for Travel Christmas Tree

Now that you’ve seen my travel map ornaments, you might want to check out this post with 35 other handmade ideas for trimming your tree from some of your favorite bloggers!

  • Facebook
  • Twitter

12.10.18

« Glam White DIY Christmas Trees
Modern Gallery Wall Idea: Photos with Rounded Corners »

Meet Angela

Angela, the founder of Blue i Style, strongly believes that decor should be functional, organizing can be beautiful, smart DIYs help stretch your budget, and an organized and stylish home can still be practical for life with kids.

Her work has been featured in print in Better Homes & Gardens and 5280 Home magazine, and online by HGTV, the Today Show, Good Housekeeping, and more. She was also named a 2018 Stylemaker by Better Homes & Gardens.

You can reach Angela at angela@blueistyle.com

Get Email Updates!

Thanks for subscribing! Check your email a welcome message and your free organizing eBook!

Get Email Updates!

Plus a bonus free organizing eBook!

COPYRIGHT & PHOTO SHARING POLICY

All text, images, and other content that are part of this blog are the property of Blue i Style, unless otherwise noted. All material is copyright protected.

If you wish to feature one of my projects, feel free to share a single photo (no collaged images, or images with text overlays) as long as the no pin code is used to prevent my image from being pinned from your site.

All features must include credit to Blue i Style with a link back to the original content (not just to the homepage). The project steps, supply list, and/or sources may not be disclosed.

Please read my full content and photo sharing policy to ensure you comply with all guidelines. Failure to do so constitutes copyright violation.

Create At Your Own Risk

Any and all content on this website is for personal use only and created exclusively for inspiration purposes.

Creating with my suggested methods, products used, and tools is at your own risk.

Please ensure you are following proper guidelines with anything used, and you receive professional guidance when necessary.

Read my complete disclosure at: Policies & Disclosures.

Sponsorships & Affiliations

To help fund this blog, I accept some forms of advertising, sponsorships, and affiliate links.

If you buy something that I recommend, you pay the same price, but I may receive a small commission. As always, all opinions are my own.

Blue i Style is a participant in the Amazon Services LLC Associates Program, an affiliate advertising program designed to provide a means for sites to earn advertising fees by advertising and linking to amazon.com.

I use an affiliate marketing service which may automatically put links into some posts, so please assume any/all links may be affiliate links.

Read my full Disclosure Statement.

Copyright © 2025 · Dazzling Theme theme by Restored 316

  • Facebook
  • Twitter
  • Pinterest