• About
    • About Blue i Style
    • Tour Our Home
    • Free Organizing eBook
    • Blogging Resources
  • Work With Me
    • Interior Decor & Organizing Services
    • Partnerships & Collaborations
    • Blogging Resources
  • Features & Press
  • Policies & Disclosures
  • Contact

Blue i Style

Creating an Organized & Pretty, Happy Home

  • Decor
    • Tour Our Home
    • Room Makeovers & Design Plans
    • Decorating Tips & Tutorials
    • Outdoor Decor
    • One Room Challenge
  • Organizing and Cleaning
    • Organizing Tips & Tutorials
    • Organizing By Room
    • Organizing on the Go
    • Cleaning
  • DIY
    • DIY Tips & Tutorials
    • Smart Home & Safety
    • Paint Tips & Projects
    • Crafts
    • Cricut Projects
  • Kids
    • Decor & DIY for Kids
    • Organizing Kids
    • Life With Kids
  • Five Minute Projects
  • Holidays & Entertaining
    • Seasonal & Holiday Decor
    • Entertaining
    • DIY Gifts & Gift Guides
    • Facebook
    • Instagram
    • Pinterest
    • Twitter
    • YouTube

Decorating Tips & Tutorials

Modern Gallery Wall Idea: Photos with Rounded Corners

  • Facebook
  • Twitter
When you have a large space to fill, scale is key! We have a lot of high, skinny windows throughout our house, and figuring out how to fill the space below them has been one of my biggest design challenges. In the kitchen dining area, I left the wall blank for ten years because all the art I tried just looked dwarfed by the scale of the wall. Finally, I came across an inspiration photo of an office where an entire wall was filled with three rows of oversized, black and white photos and it occurred to me that I could create a similar look with two rows of large framed photos below the window in our dining area.
Dining Room Gallery Wall

DETERMINING YOUR FRAME SIZE AND LAYOUT

I love the look of floor to ceiling gallery walls. Of course, in this instance I couldn’t go all the way to the ceiling because of the high window, but I did want to fill as much of the wall space as possible.Start by measuring both the width and height of the space you want to fill, but don’t forget to take into account things like light switches and electrical outlets. I originally wanted to take my gallery wall all the way down to the baseboards, but realized I needed to stop a bit higher to avoid covering the outlet that you can see in the photo below.

Dining Room Black and White Gallery Wall
Once you have your measurements, start shopping for frames options. For a gallery wall of this style, don’t go smaller than 16″x20″ frames, and the bigger the better.

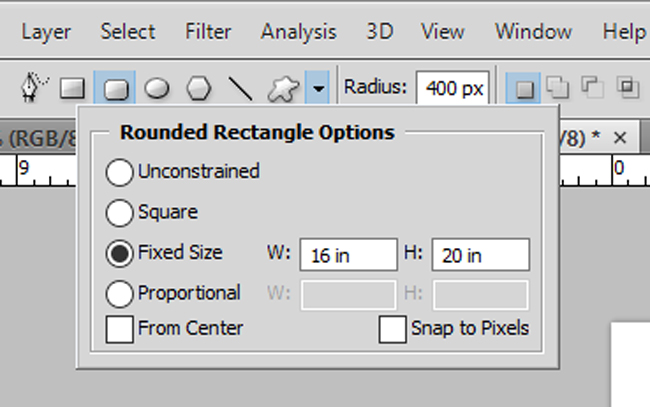
Measure the outer dimensions of the frames. Remember that the size listed on the frame will be the size of photo it holds, not the size of the frame taking into account the frame width and mat. Take a measuring tape with you, and measure the outside dimensions of each frame. Then use the calculator on your phone to determine how many frames of that size you could fit across your wall, and what space that would leave between the frames. Aim to fill as much of the wall space as possible, leaving no more than a few inches of space between each frame. I ended up with 20″ x 24″ frames and 16″ x 20″ photos.

Stick with Even Rows. For a gallery wall of this scale, stick with frames lined up in even rows and columns. More organic or staggered gallery wall layouts can be beautiful, but they don’t work as well when you are aiming to fill a floor to ceiling space. {Read tips for creating an organic gallery wall around a television}
Where to buy large frames for a gallery wall. When buying lots of large frames for a large gallery wall, the cost can add up quickly.  I thought about buying the frames at IKEA because the price is always right, but then I remembered that large frames at IKEA have thin plastic in place of glass. While I don’t mind this for some purposes (it’s actually ideal in a kids’ room, for example), I’ve noticed that you can often see a bit of a ripple in the plastic when it catches the light. I was afraid this would detract from the sophisticated and streamlined look I was after, so I needed frames with rigid glass rather than plastic. I found the best balance of price and quality at Michaels, where they put their wall frames on sale for 50% off fairly frequently. These are the frames I ended up buying.

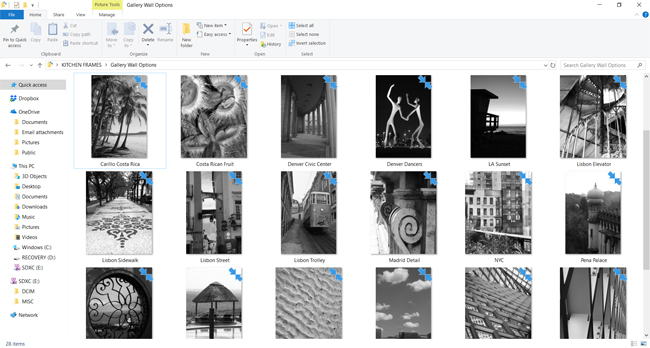
CHOOSING PHOTOS FOR A MODERN GALLERY WALL

I wanted my gallery wall to have a modern and sophisticated, streamlined look, so I opted to convert all my photos to black and white. I love family photos, but they feel more appropriate to me in family rooms, bedrooms, and even hallways. For dining areas or more formal spaces, I prefer photos that double as art. Images with graphic elements and architectural details are ideal for making a statement without requiring you to look to closely at each photo in order to appreciate it.
Kitchen Gallery Wall Black and White Photos
The idea of choosing photos can feel overwhelming, but it doesn’t have to be. Start by creating a new folder on your computer and call it something like “Gallery Wall Options.” Then begin quickly scanning through your folders of photos from your travels. Looking through photos at thumbnail size is a great way see which photos have elements that catch your eye right away. If a photo needs to be viewed larger to appreciate it, it’s probably too busy for your modern gallery wall. When a photo catches your attention as a good possibility, copy the photo and paste it into your “Gallery Wall Options” folder. Move quickly and don’t overthink it at this point.
Once you have a bunch of photo options copied over to your new folder, you can start to narrow it down further. Since I knew I wanted all of my photos to be black and white, I went ahead and converted all of the photos before forming any opinions. Once I could see all of them together in black and white, I was able to start picking out the photos with the best contrast and composition.
Using photos that you’ve taken will make the gallery wall much more personal and meaningful, and will make it a conversation starter. Just make sure that the photos you choose are high resolution, so that they will remain crisp when printed at a large size. And don’t forget that, when working with high res images, you can always crop in closer on a detail of the photo.

ROUNDED PHOTO CORNERS FOR A CUSTOM LOOK

To give my gallery wall a more custom look, I wanted the corners of the photos to be rounded. My first thought was to have mats custom cut with rounded corners, but for 10 mats of this size, it was going to be too expensive for my budget.
How to DIY Photos with Rounded Corners for Modern Gallery Wall
Since I couldn’t afford to get custom mats cut, I instead used Photoshop to round the corners of the photos before printing them. Then I trimmed the excess white from the corners of the photos and mounted the photos on top of mat board to achieve the same look without the custom price tag. I’ll show you exactly how I did it, step by step.
Use Photoshop to Round the Corners of Photos. I’ll show you how I rounded the corners of my photos in Photoshop, because that’s the photo editing program I use, but I am certain you can do the same thing in most photo editing software.
Start by opening your photo and adjusting the dimensions to the size you want to print your photo (for me, this was 16″ x 20″). Created a new image (CTRL+N) that you’ll call “Rounded Corners Template” and set the dimensions to the same size.
Then select the “Rounded Rectangle Tool” …
… and use the “Rounded Rectangle Options” to set the fixed size to the same as your photo (for me, this was 16″ x 20″). Then set the radius of the rounded corners – you can play around with the radius size until you get the exact look you like. I chose a rounded corner radius of  400 px.
With those settings, draw a black rounded corner rectangle onto the white background.

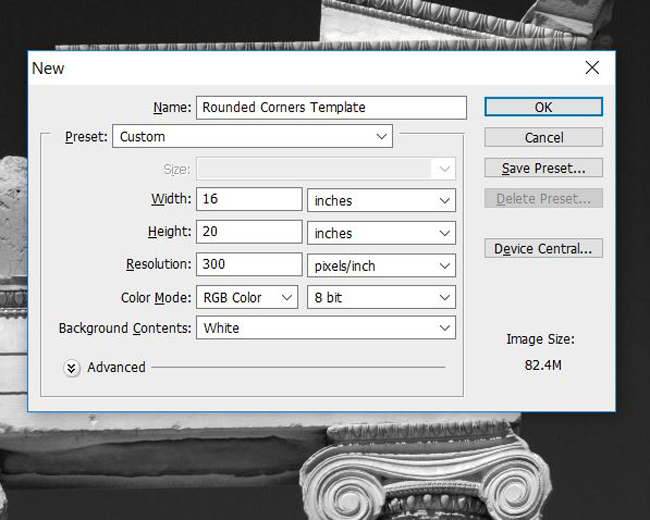
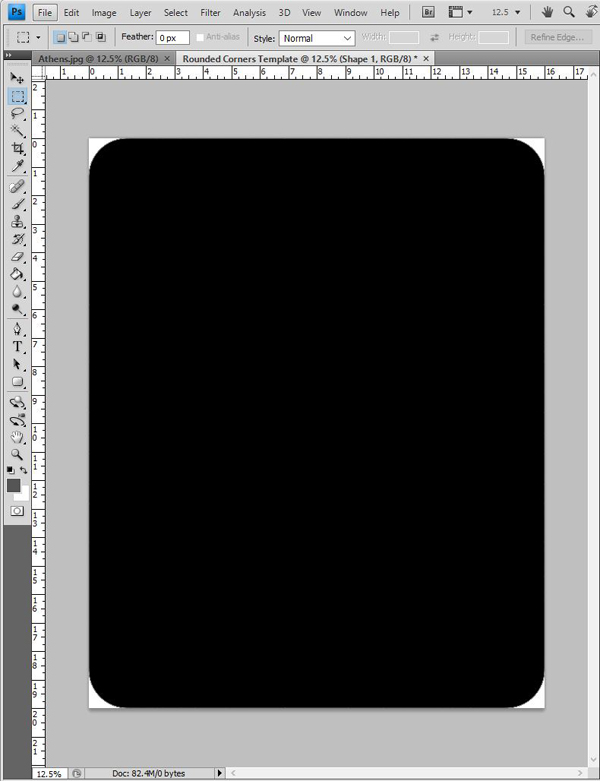
Under the “Layer” menu at the top of the Photoshop window, choose “Flatten Image” to merge the black and white layers together.

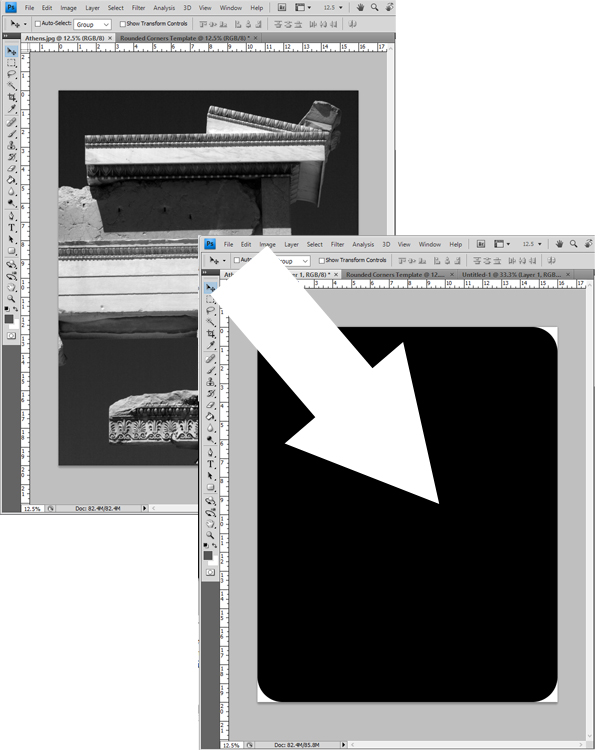
Now click CTRL+C to copy this rounded corner rectangle template, and then paste it on top of the photo that you resized in the first step.

Finally, select the Magic Eraser Tool …
And click on the black rounded corner rectangle erase the black and reveal your photo behind it. The only thing that now remains of the top layer are the white corners.

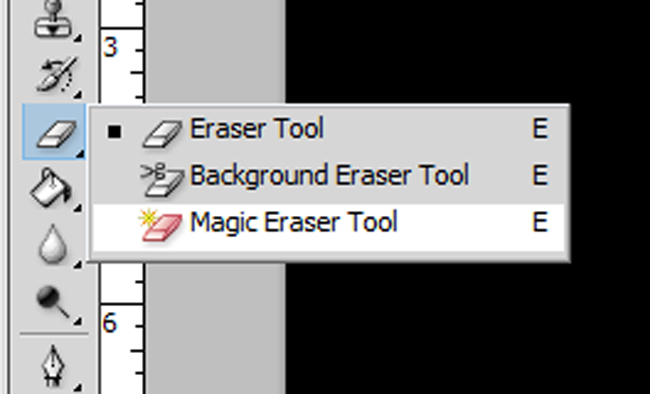
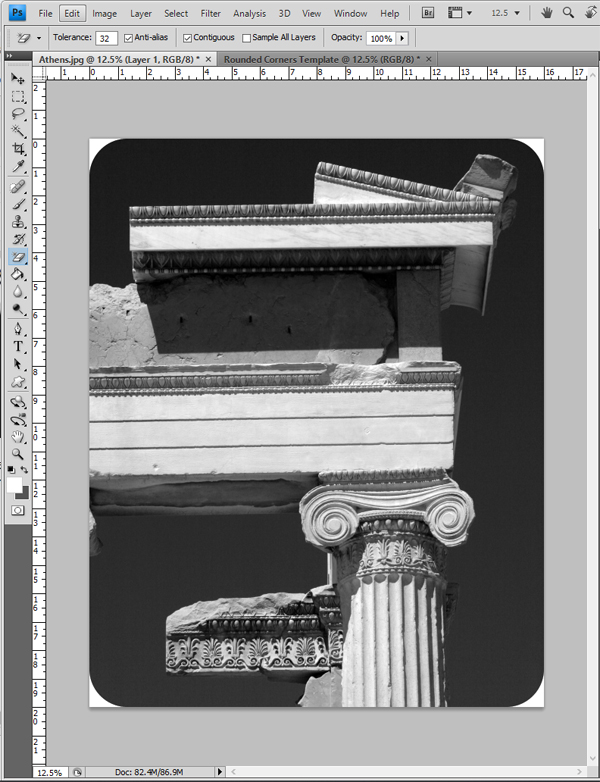
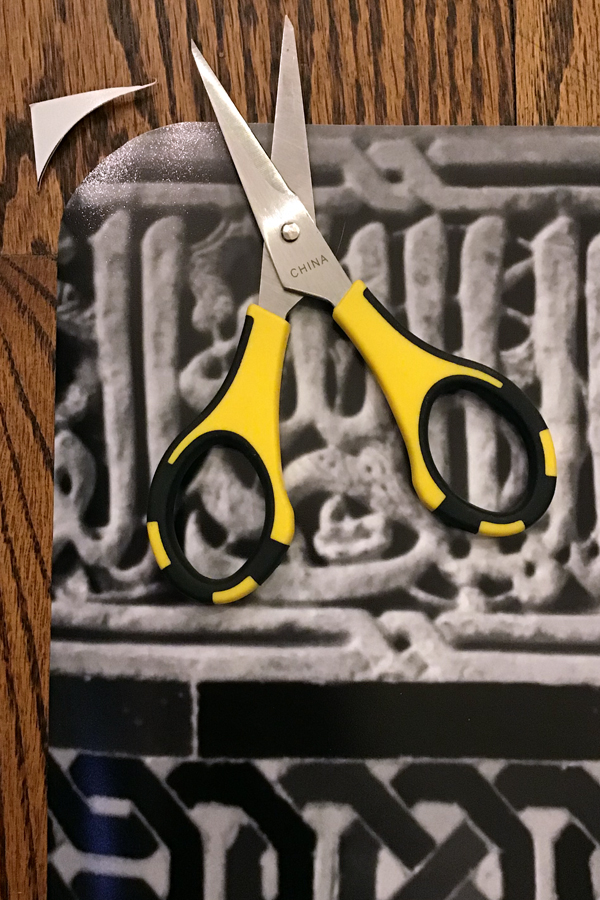
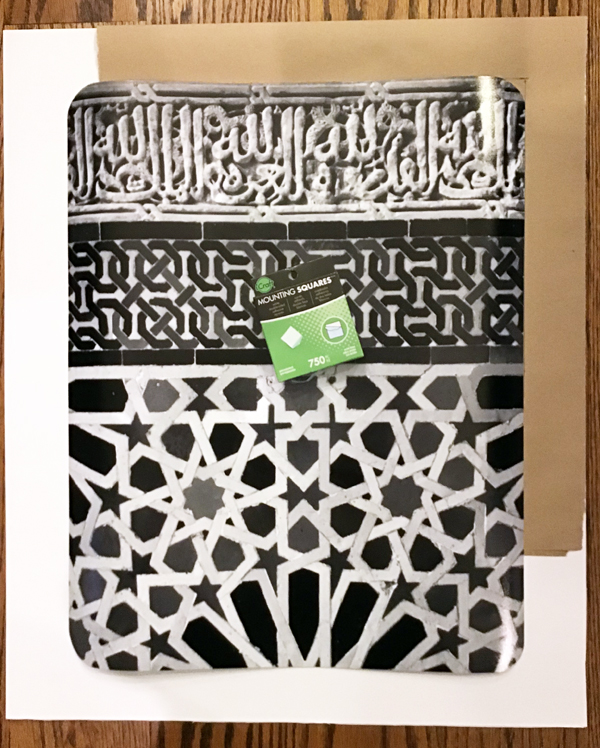
Save your photo, and it’s ready to be printed. Repeat these steps for each photo – paste the black rounded rectangle template on top of each photo, use the magic eraser tool to erase the black and leave just the white corners, save, and print.

Print the Photos. I printed all of my photos at my local camera store (Mike’s Camera) because I knew they’d produce the high quality prints I wanted and I could pick them up the next day. You can also print large photos at your local drug store, or order them online through a site like Shutterfly.
Trim the Photos. I used a pair of sharp, fine tip scissors to carefully trim the white corners from each photo, leaving me with perfectly rounded corners. If you don’t want to go to the trouble of adding these white corners in Photoshop, you could certainly just print the photos and “free hand” the round corners, but photo prints this size are not cheap, and I didn’t want to take any chance of messing them up, or not having the corners look smooth and symmetrical.
Cut Mat Board to Fit Frames. Rather than adding mats around my photos, I planned to mount my photos on top of white mat board. I bought 5 large, white mat boards from Hobby Lobby and was able to cut each in half to fit perfectly inside the frames.
Position Photos on Mat Boards. Next, I need to find a way to position each photo exactly in the center of the mat board. My mat board was four inches larger than my photo, so I needed to position the photo with two inches around it in each direction. To make it quick and easy, and to avoid measuring every time, I decided to make a template. I used the piece of brown kraft paper that was wrapped around my roll of photos when I picked them up from the store, and I used a ruler to measure and mark two inches in from the top and the side of the paper.
Mount the Photos to the Mat Board. I lined my kraft paper template up with the top right corner of the mat board and then lined the top right corner of the photo up with the pencil line. Then I used photo mounting squares to attach the bottom corners of the photo to the mat board. With those corners secured in place, I removed the template, and added more mounting squares to the center and top of the photo. I used a total of 8 to 10 mounting squares per photo. The mounting squares are acid free, so they won’t damage the photo over time.
Frame the Photos and Hang the Frames. Once all of the photos were attached to the mat boards, I put the mats into the frames and I was ready to hang my gallery wall. I’ll do another post in the near future about the easiest way to hang frames in perfectly straight rows.

Hanging a gallery wall below the windows was the perfect solution for this space!
Cover a full wall in a gallery wall of black and white photos
Now instead of just seeing a big blank wall when you look across the dining table, the view is so much more interesting. I especially love the way the black and white photos and white mats look against the dark gray dining room walls. The mats provide just the right amount of contrast, while the monochromatic in black and white give the dining room a very sophisticated feel.
How to print photos with rounded corners for modern gallery wall
Save the image below to Pinterest so you can find you way back to these gallery wall tips and instructions for creating the rounded corners. You can also follow my Gallery Walls with Style board on Pinterest for more modern gallery wall ideas.
Modern Gallery Wall Ideas Black and White Galley Wall
  • Facebook
  • Twitter

12.20.18

« DIY Map Ornaments
Inexpensive Wreath Storage Idea »

Meet Angela

Angela, the founder of Blue i Style, strongly believes that decor should be functional, organizing can be beautiful, smart DIYs help stretch your budget, and an organized and stylish home can still be practical for life with kids.

Her work has been featured in print in Better Homes & Gardens and 5280 Home magazine, and online by HGTV, the Today Show, Good Housekeeping, and more. She was also named a 2018 Stylemaker by Better Homes & Gardens.

You can reach Angela at angela@blueistyle.com

Get Email Updates!

Thanks for subscribing! Check your email a welcome message and your free organizing eBook!

Get Email Updates!

Plus a bonus free organizing eBook!

COPYRIGHT & PHOTO SHARING POLICY

All text, images, and other content that are part of this blog are the property of Blue i Style, unless otherwise noted. All material is copyright protected.

If you wish to feature one of my projects, feel free to share a single photo (no collaged images, or images with text overlays) as long as the no pin code is used to prevent my image from being pinned from your site.

All features must include credit to Blue i Style with a link back to the original content (not just to the homepage). The project steps, supply list, and/or sources may not be disclosed.

Please read my full content and photo sharing policy to ensure you comply with all guidelines. Failure to do so constitutes copyright violation.

Create At Your Own Risk

Any and all content on this website is for personal use only and created exclusively for inspiration purposes.

Creating with my suggested methods, products used, and tools is at your own risk.

Please ensure you are following proper guidelines with anything used, and you receive professional guidance when necessary.

Read my complete disclosure at: Policies & Disclosures.

Sponsorships & Affiliations

To help fund this blog, I accept some forms of advertising, sponsorships, and affiliate links.

If you buy something that I recommend, you pay the same price, but I may receive a small commission. As always, all opinions are my own.

Blue i Style is a participant in the Amazon Services LLC Associates Program, an affiliate advertising program designed to provide a means for sites to earn advertising fees by advertising and linking to amazon.com.

I use an affiliate marketing service which may automatically put links into some posts, so please assume any/all links may be affiliate links.

Read my full Disclosure Statement.

Copyright © 2025 · Dazzling Theme theme by Restored 316

  • Facebook
  • Twitter
  • Pinterest