Your laundry room is a hard working space, but it doesn’t have to be all business and no pleasure. I find the chore of doing laundry much more bearable in a pretty space, which is why I worked hard to strike a balance between beauty and function when designing the plans for my recent laundry closet makeover.
When I drew up the initial design for the space, I envisioned hanging four framed paintings above the washer and dryer, but below the cabinets. However, I quickly realized a kink in my plans… the inset in the wall with the faucets and hoses was right where I wanted the art to be. But once I get a picture in my head of how I want something to look, I’m pretty stubborn about it, so I had to find a way to hide the hoses!

Because I had covered the walls of the laundry closet in removable wallpaper, I wanted to use the same wallpaper to hide the hoses. I though about just cutting a piece of the wallpaper, leaving the backing on, and affixing it in front of the hoses – but the wallpaper/backing alone felt a little too flimsy for the job, and had a tendency to curl up rather than hanging nicely. Instead, I knew I needed to attach the wallpaper to something. My considered using fabric of some sort, since I new fabric would drape well, but after testing several pieces, I realized the wallpaper just wouldn’t stick well to any kind of fabric.
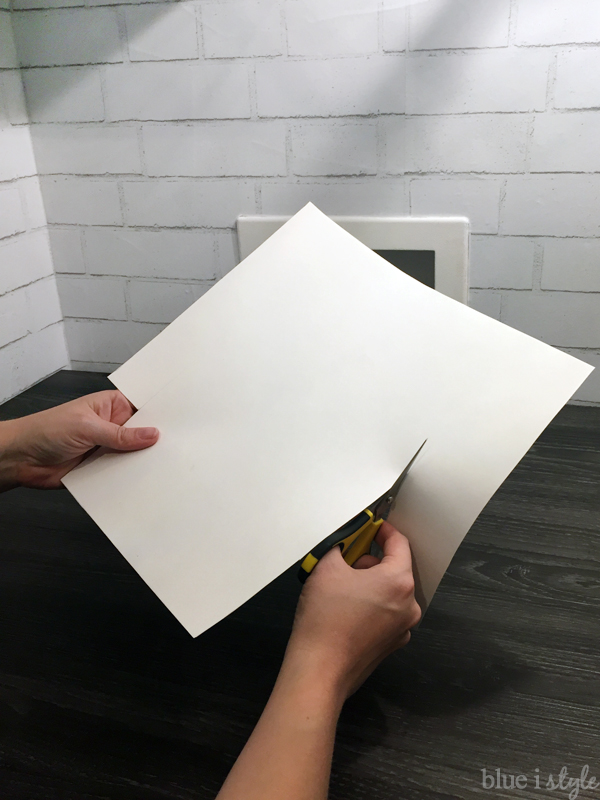
Finally, I decided to use a large piece of medium-weight tagboard that we had around the house left over from doing art projects with the boys. Once I confirmed that the paper was large enough to cover the opening, I took specific measurements of the box for the inset, and drew this same sized rectangle on the tagboard.
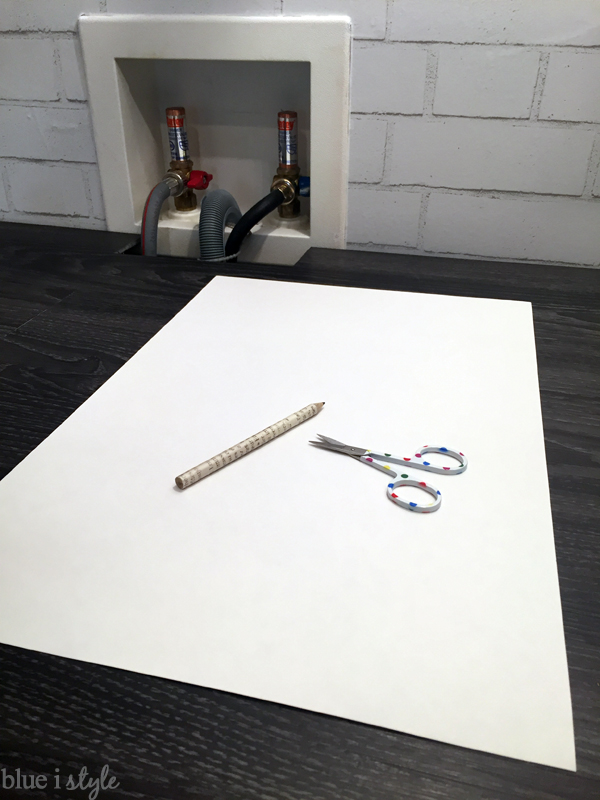
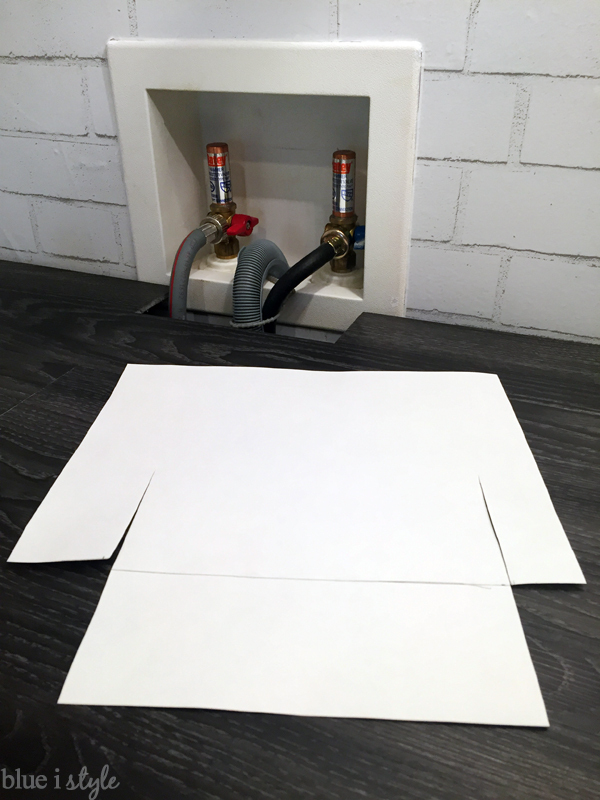
Before cutting out the rectangle I had drawn, I paused to think about how the paper was going to hang in front of the hoses. I determined that the paper should sit flush with the box on the right and left of the hoses, and that a longer flap of paper in the center should pop forward in front of the hoses. This center flap would need to be long enough to tuck under the edge of the countertop in order to stay in place. I took measurements and then cut the tagboard accordingly.
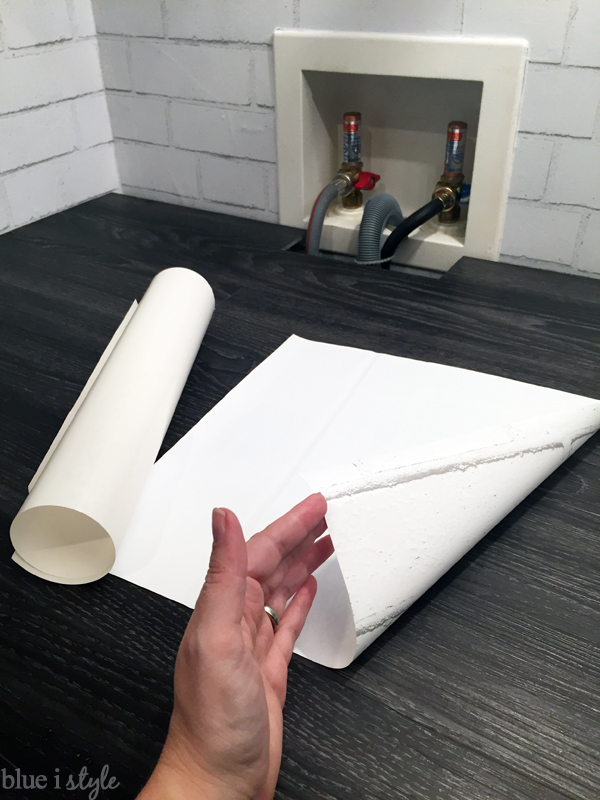
I then held the tagboard in place to make sure that my plan would work. IT DID!

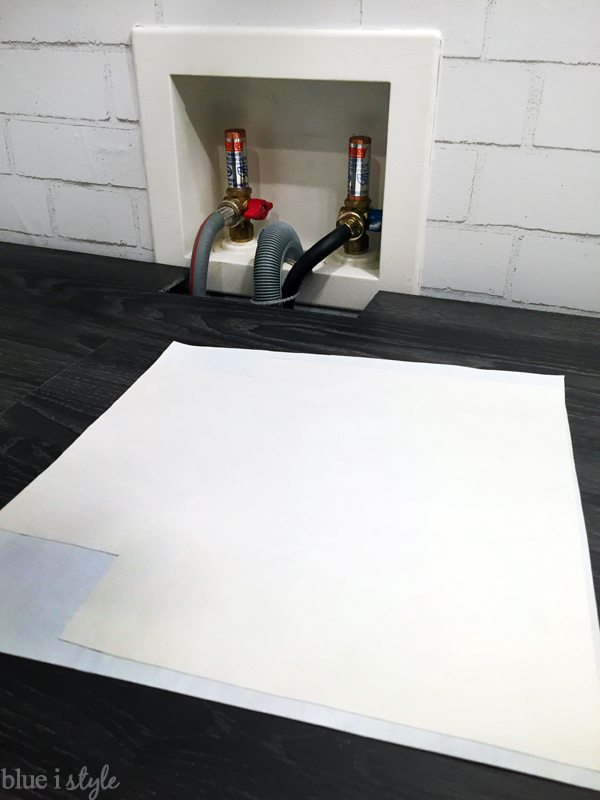
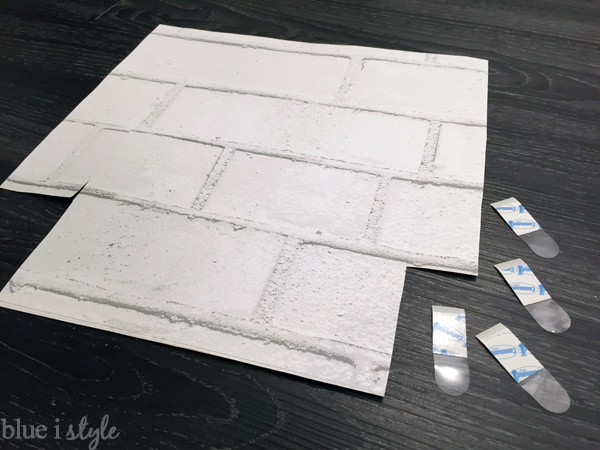
Once I had the paper cut to fit the space just right, I was ready to covet it in the same brick wallpaper that is on the walls. I cut a piece of wallpaper a bit larger than the tagboard.
I peeled off the back of the wallpaper, and then I laid the tagboard down on the sticky side of the wallpaper.
I then carefully trimmed off the excess wallpaper around the edges of the tagboard.

Once all the excess wallpaper was trimmed off, I also used the scissors to cut two slits in the wallpaper {in line with those already in the tagboard} to create the center flap.
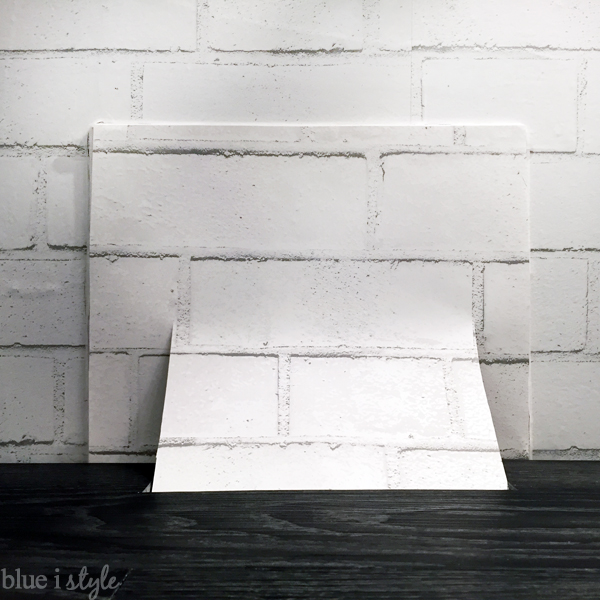
The final decision I had to make was how to affix the paper to the faucet and hose opening. I decided to use small, clear 3M Command strips because I knew they would hold securely, and I could leave the clear pull tabs sticking out for later removal.
I put one Command strip in each of the four corners {none on the flap}, and then secured it to the frame around the faucet and hose box. Once it was up in place, the clear pull tabs sticking out became nearly invisible.
Not only did this simple little DIY do a great job of hiding my hoses…
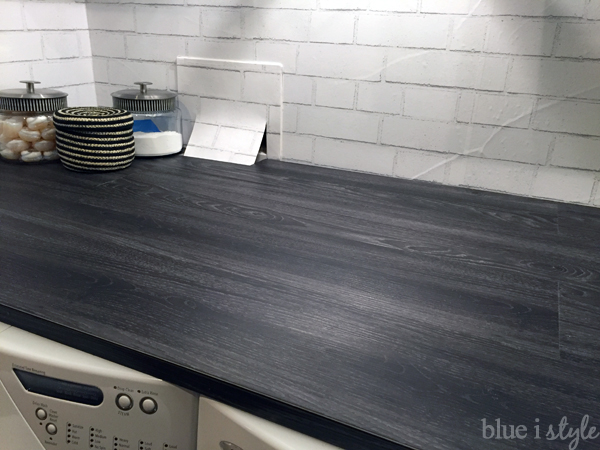
…it also allowed me to hang the artwork right where I wanted it – including overlapping the hose inset!

Be sure to check out the full laundry closet reveal to see more photos and more DIY and organizational details!

MAKE IT WORK FOR YOUR SPACE:
Obviously my solution {covering the tagboard with the brick wallpaper} was specific to my space, but this same idea could work in any laundry room by simply painting the tagboard the same color as your walls.
Don’t have the right paint on hand or want something more decorative? Use a pretty fabric instead of
tagboard. If the fabric frays when cut {as most due} hem the edges either using a sewing machine, or no-sew hemming tape. Because fabric hangs nicer than paper, you probably don’t need to cut the slits that I did. If fabric is you preference, check out how this blogger did it!

Let’s get social!

Linked up at Remodelaholic