• About
    • About Blue i Style
    • Tour Our Home
    • Free Organizing eBook
    • Blogging Resources
  • Work With Me
    • Interior Decor & Organizing Services
    • Partnerships & Collaborations
    • Blogging Resources
  • Features & Press
  • Policies & Disclosures
  • Contact

Blue i Style

Creating an Organized & Pretty, Happy Home

  • Decor
    • Tour Our Home
    • Room Makeovers & Design Plans
    • Decorating Tips & Tutorials
    • Outdoor Decor
    • One Room Challenge
  • Organizing and Cleaning
    • Organizing Tips & Tutorials
    • Organizing By Room
    • Organizing on the Go
    • Cleaning
  • DIY
    • DIY Tips & Tutorials
    • Smart Home & Safety
    • Paint Tips & Projects
    • Crafts
    • Cricut Projects
  • Kids
    • Decor & DIY for Kids
    • Organizing Kids
    • Life With Kids
  • Five Minute Projects
  • Holidays & Entertaining
    • Seasonal & Holiday Decor
    • Entertaining
    • DIY Gifts & Gift Guides
    • Facebook
    • Instagram
    • Pinterest
    • Twitter
    • YouTube

Crafts· Five Minute Friday· Gift Ideas

Interchangeable Beaded Watch Bands Make a Quick Gift

  • Facebook
  • Twitter
DIY Interchangeable Beaded Watch Bands
I was shopping at JoAnn Fabric a while back… or, more accurately, I was browsing JoAnn walking up and down every aisle. Anyway, I came across a display of watch faces and coordinating beaded watch bands. They were cute, but none of the watch band options really fit my style.

I was about to walk away empty handed, but then I saw it… a black and white stripes that remind me of Kate Spade, and a half price sign! How could I not buy a black and white striped watch face for only $10?! But I still didn’t like any of the watch bands that went with these watches… so I decided to make my own! 
I decided that as long as I was at it, I might as well make a few different watch bands so that I could change things up from time to time! And while I was at it I saw a cute polka dotted watch that I knew my sister would love. In the end, I left the store with three watch faces and five sets of beads.
I had done a little beading and jewelry making in the past, but not much, so I was pleasantly surprised at how fast and easy it was to make my own interchangeable watch bands. Each one took my less than five minutes to make!
SUPPLY LIST

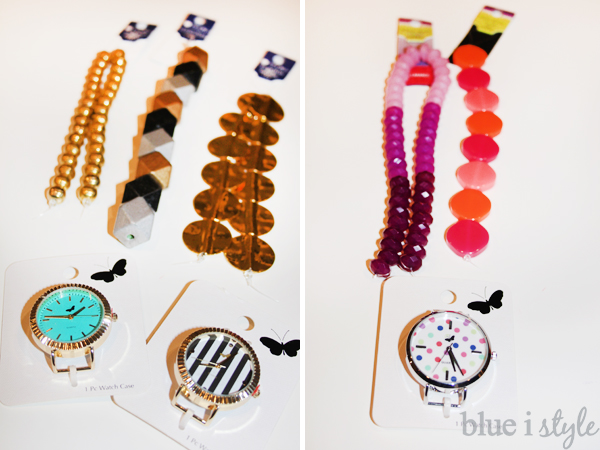
In addition to purchasing your choice of watch faces and beads, you will need the following supplies to make your own custom, interchangeable watch bands.
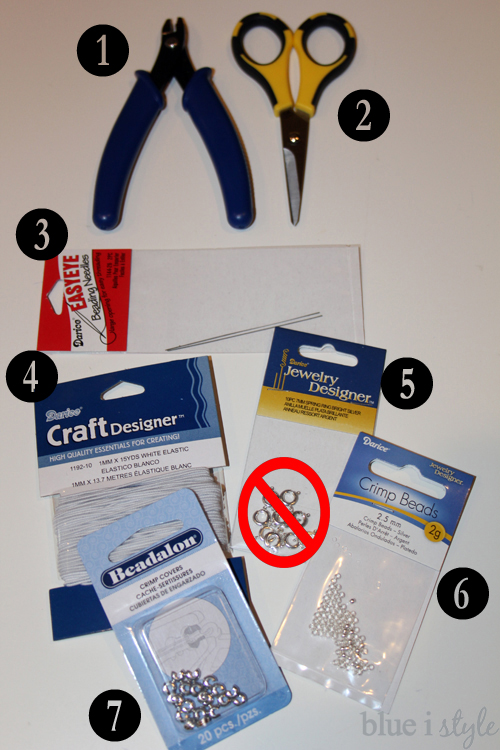
  • (1) Crimping Pliers
  • (2) Scissors
  • (3) Beading Needles
  • (4) White Elastic Beading Cord
  • (5) 12 mm Lobster Clasps in your choice of gold or silver
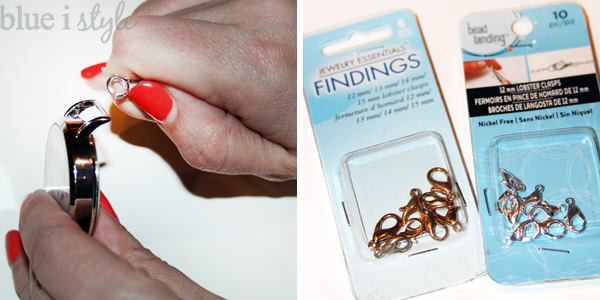
    • I originally purchased standard spring ring clasps, but they didn’t work. See below…
  • (6) Crimp Beads in your choice of gold or silver
  • (7) Crimp Covers (optional, but recommended)

After beading my first watch band I discovered that the spring ring clasps I had originally purchased did not have a large enough opening to fit over the bar of the watch face. OOPS! I ended up back at the store purchasing 12 mm lobster clasp replacements that I worked perfectly!

One another note on the supplies. I originally purchased some gold elastic cord that I planned to use on the gold beaded watch bands. However, the holes in the gold beads were very small, and when I tried to pull the gold elastic cord through the beads, it ended up looking like this. 
If you purchase beads with bigger holes, gold or silver elastic cord might work just fine, but I ended up using the white elastic cording for all of the watch bands I made.
STEP BY STEP

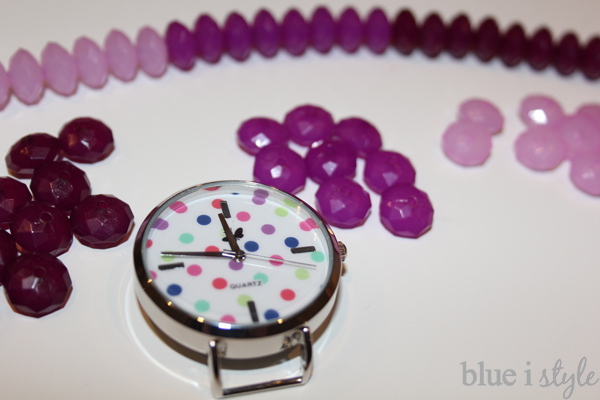
Once you have chosen your watch face and beads, and gathered all of your beading supplies, you are ready to begin.

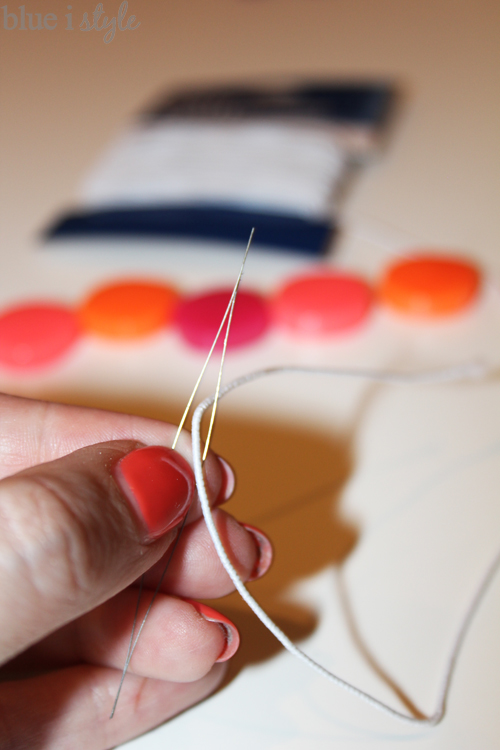
Cut a long length of white elastic cord {probably four times as long as necessary to go around your wrist to give you enough excess to work with}. Thread the elastic cord through your beading needle.

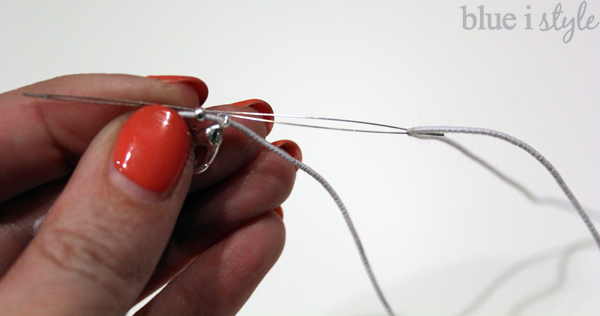
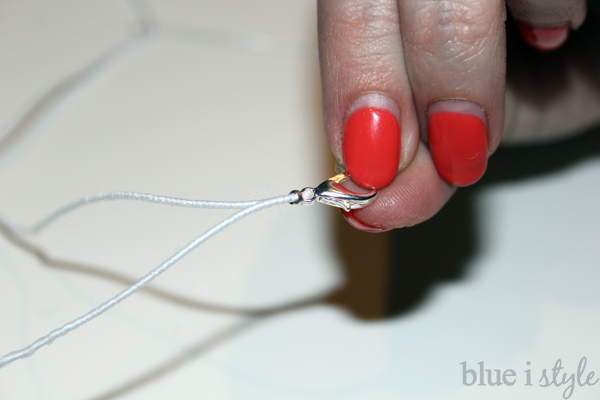
Begin by pulling the needle and cord through on crimp bead followed by one lobster clasp. Then loop the cord around the lobster clasp and pull the needle and cord back through the lobster clasp. It will fit very tightly, but the length of the needle will allow you the leverage necessary to pull it through.

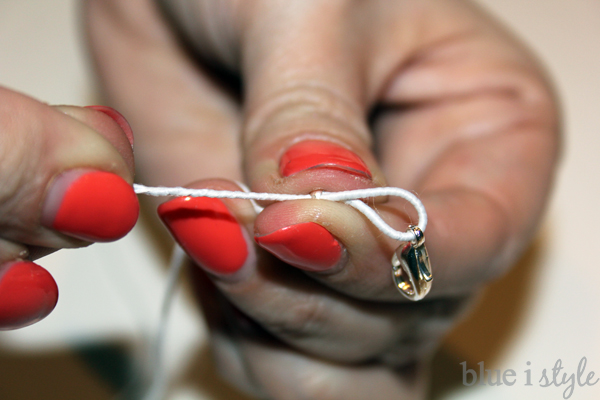
Once you have the cording pulled back through the crimp bead, grip the crimp bead between your fingers and pull on the one end of the cord to slide the crimp bead up to the clasp.

With the crimp bead as close to the lobster clasp as possible, use your crimping pliers to squeeze the crimp bead until it is flattened.

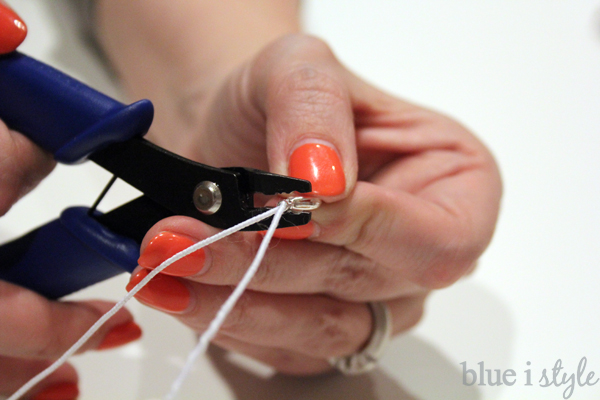
The crimping pliers have two sets of notches. To “crimp” the crimp bead, you want to place it in the notch furthest from the tip, and then squeeze down with the pliers. Apply firm pressure, but don’t squeeze too hard or you could break the crimp bead.

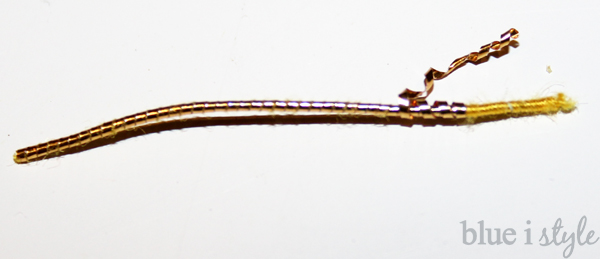
Once the bead is crimped, it will look like this:

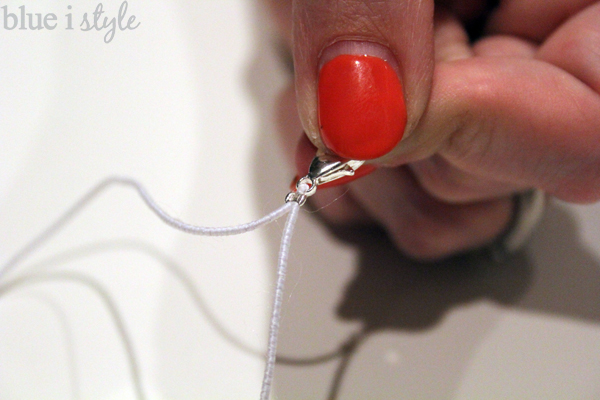
Using a crimp cover is optional, but it will give your finished watch band a nice, more professional look. Grip the crimp cover in the front notch of the pliers, and then slide the crimp cover over the crimped bead.

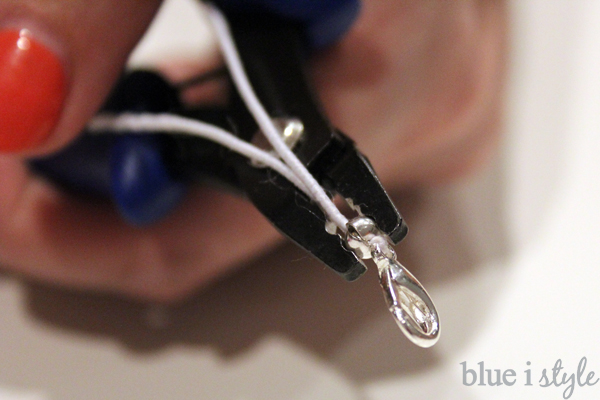
Gently squeeze the crimp cover {using the front notch of the pliers} to close the crimp cover around the crimp bead. If you apply too much pressure, the crimp cover will become misshapen. Consistent, gentle pressure will close the cover while maintaining it’s rounded shape.

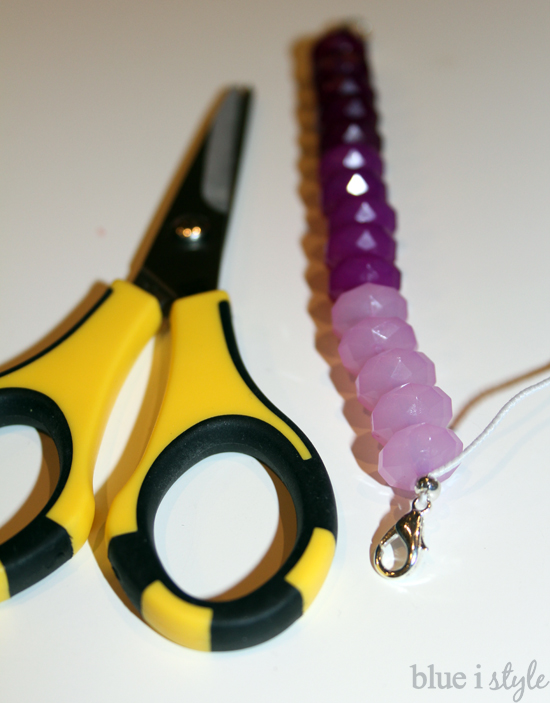
Once the crimp cover is in place, you are ready to add the beads. String the beads on to you elastic cord.

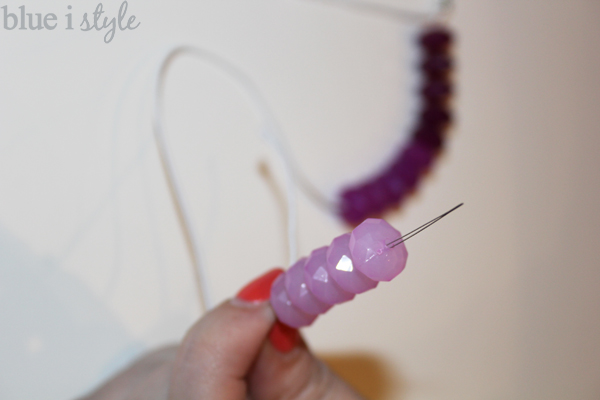
As you add your beads, check the length by wrapping the beads around your wrist. Remember the watch face will take up quite a bit of space, so the beads only need to reach about 2/3 to 3/4 of the way around your wrist.

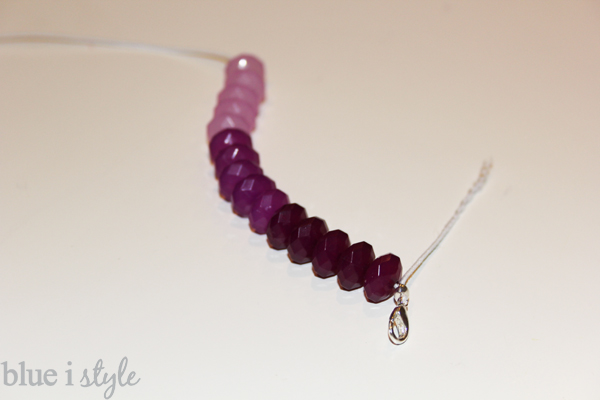
When you are happy with the length of your beads,  you are ready to add a clasp to the other end. Once again, string on a crimp bead and a claps, and then pull the elastic cord back through the crimp bead.

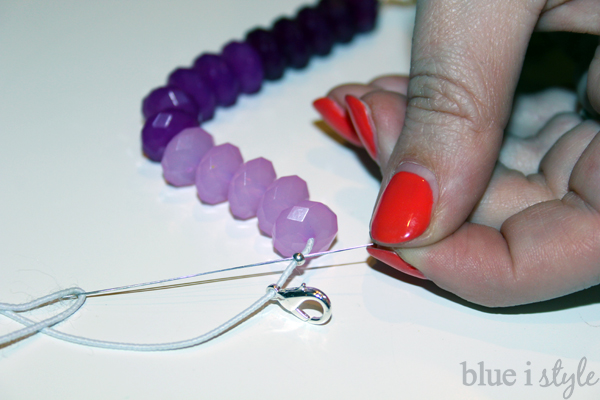
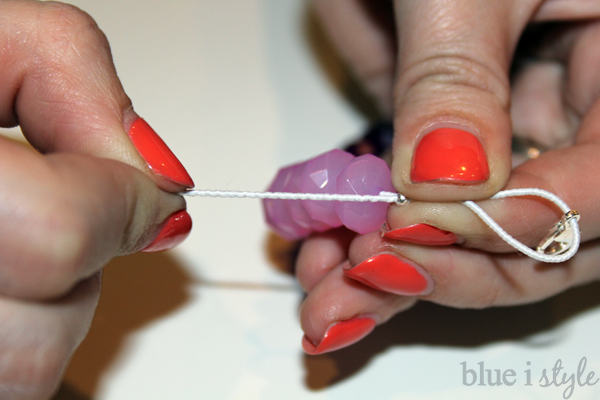
Grip the crimp bead between your fingers and pull on the one end of the cord to pull the excess cord through the crimp bead. Continue to pull the cord through until the crimp bead sits flush against your decorative beads, and the clasp sits flush against the crimp bead.

When the crimp bead and clasp are properly positioned, repeat the steps above for crimping the crimp bead and covering it with a crimp cover.

Then final step is to trim off the excess elastic cord with a pair of sharp scissors.

And that’s it! In less than five minutes you’ve created a custom watch band that’s ready to be clasped on to your watch face. I made this purple watch band for my sister, and after attaching it to the watch, I decided it would look even better doubled up, so I beaded a second, matching purple strand. I also made her a pink and orange watch band as a second option for wearing with her cute polka dotted watch face.
DIY Pink and Purple Interchangeable watch bands with polka dotted watch
I just love the way these watch bands for my sister turned out! It’s so easy to clip them on and off of the watch face, allowing her to match her watch to her outfits this summer.
Puple & Pink DIY Beaded Watch Bands
Polka dotted watch with beaded watch bands
Of course, it was my obsession with a black and white striped watch face that started this all, so of course I also made a few for watch bands for myself. I also picked a pretty teal watch face {my favorite color}, so I ended up making two different gold watch bands that coordinate well with both watches, and I also made a fun, chunky beaded band in with gold, silver and black beads, allowing me to mix and match with both gold and silver jewelry.
DIY Interchangeable Gold Beaded Watch Bands
I am over the moon with the way my gold, interchangeable watch bands turned out!
Gold Beaded Watch Bands

For a long time, I stopped wearing watches and relied on my phone for the time, but now that I have these fun new watches that look more like jewelry, I want to wear a watch every day!

DIY Beaded Watch Bands that look like Jewelry

Now that I know how easy it is to make my own interchangeable watch bands, I am eager to head back to JoAnn Fabric to pick up a couple more watches and some more stylish beads. I think the silver watch with the navy blue face is next on my wish list! And I’ll definitely be making some of these as gifts as well!!

Let’s get social!   

  • Facebook
  • Twitter

06.05.15

« {link party} The Creative Circle – Week 18
{decorating with style} Touring the Denver Life Magazine Designer Showhouse »

Meet Angela

Angela, the founder of Blue i Style, strongly believes that decor should be functional, organizing can be beautiful, smart DIYs help stretch your budget, and an organized and stylish home can still be practical for life with kids.

Her work has been featured in print in Better Homes & Gardens and 5280 Home magazine, and online by HGTV, the Today Show, Good Housekeeping, and more. She was also named a 2018 Stylemaker by Better Homes & Gardens.

You can reach Angela at angela@blueistyle.com

Get Email Updates!

Thanks for subscribing! Check your email a welcome message and your free organizing eBook!

Get Email Updates!

Plus a bonus free organizing eBook!

COPYRIGHT & PHOTO SHARING POLICY

All text, images, and other content that are part of this blog are the property of Blue i Style, unless otherwise noted. All material is copyright protected.

If you wish to feature one of my projects, feel free to share a single photo (no collaged images, or images with text overlays) as long as the no pin code is used to prevent my image from being pinned from your site.

All features must include credit to Blue i Style with a link back to the original content (not just to the homepage). The project steps, supply list, and/or sources may not be disclosed.

Please read my full content and photo sharing policy to ensure you comply with all guidelines. Failure to do so constitutes copyright violation.

Create At Your Own Risk

Any and all content on this website is for personal use only and created exclusively for inspiration purposes.

Creating with my suggested methods, products used, and tools is at your own risk.

Please ensure you are following proper guidelines with anything used, and you receive professional guidance when necessary.

Read my complete disclosure at: Policies & Disclosures.

Sponsorships & Affiliations

To help fund this blog, I accept some forms of advertising, sponsorships, and affiliate links.

If you buy something that I recommend, you pay the same price, but I may receive a small commission. As always, all opinions are my own.

Blue i Style is a participant in the Amazon Services LLC Associates Program, an affiliate advertising program designed to provide a means for sites to earn advertising fees by advertising and linking to amazon.com.

I use an affiliate marketing service which may automatically put links into some posts, so please assume any/all links may be affiliate links.

Read my full Disclosure Statement.

Copyright © 2025 · Dazzling Theme theme by Restored 316

  • Facebook
  • Twitter
  • Pinterest