It seems like just about everyone I know has an Ikea Expedit bookshelf {or it’s new replacement the Kallax} somewhere in their home. These bookshelves are very basic, which makes them very versatile! The price is low, but the possibilities are endless! I’ve seen them used {very stylishly} as dining room banquet seating, entertainment stands, room dividers, office storage, playroom storage benches, changing tables, laundry room storage, and bar/buffet storage, just to name a few.
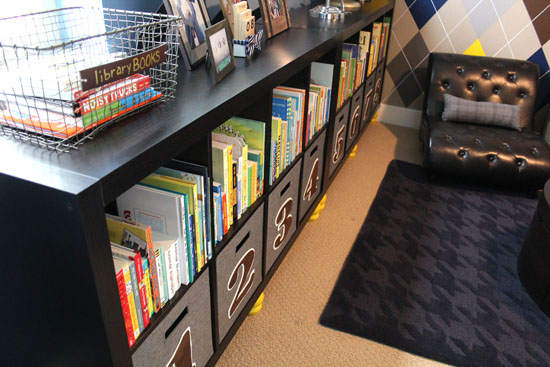
We bought our first Expedit bookshelf for our ombre striped nursery, and used it in the traditional way – for books. When we started planning Beckett’s new room, I wanted to give the space a sophisticated library/lounge feel. I envisioned an entire wall of low shelves that would house books and toys, and the Expedit was the obvious choice in terms of both function and affordability – and two of the shelves laid side by side would stretch the full width of the room. But I wanted to find a way to “dress up” the bookshelves to make them better fit with the toddler-sized button tufted chairs that served as the inspiration for the entire room design.
The solution was to give the bookshelves a leg up … or rather a foot up!
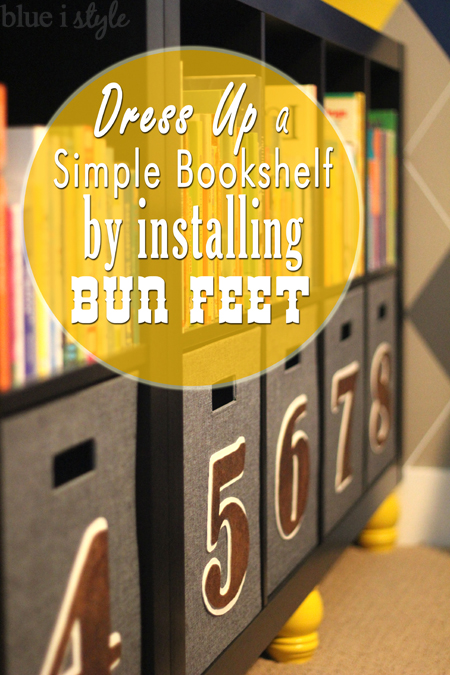
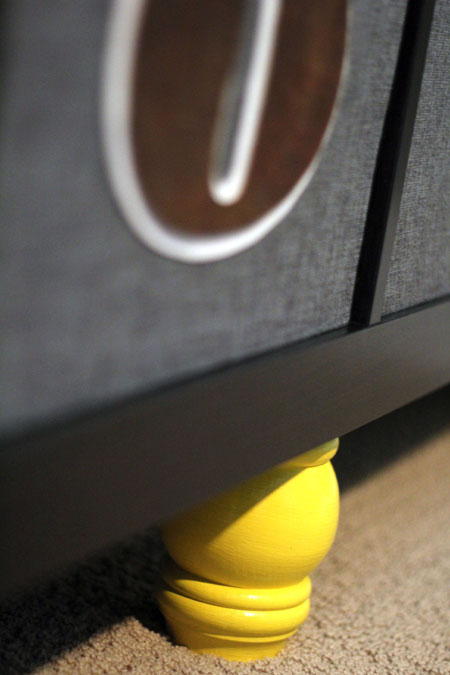
I wanted the bookshelves to appear a bit more formal, so I selected very traditional shaped bun feet, but added a youthful feel by painting them an unexpected bright yellow {to tie in with the yellow in the argyle wall}.

This is a crazy simple DIY project, but it makes a big impact, so I thought I’d share a quick tutorial.
There are a lot of bun foot options out there – from simple rounded feet, to very intricately turned feet. After shopping around a bit, I discovered that bun feet can be a bit pricey, but I found the style of feet I wanted for $6.98 each at Lowe’s {and then I saved with a coupon}.
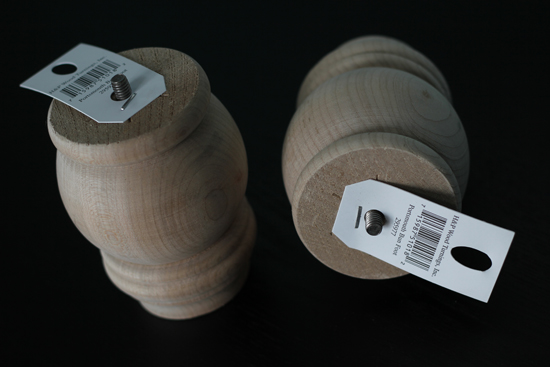
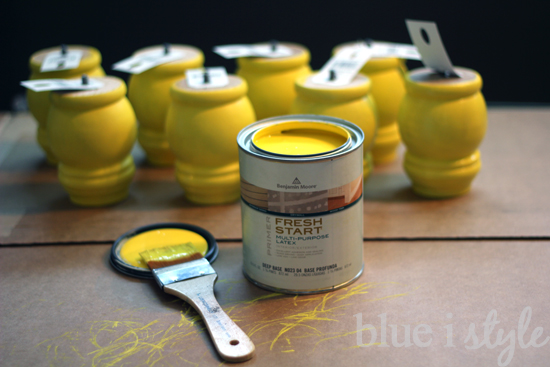
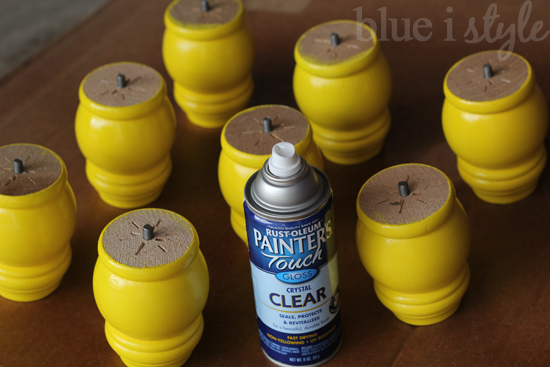
I purchased 12 unfinished 4 inch “classic” bun feet, and then primed them with a yellow tinted primer and painted them Benjamin Moore Yellow {yes, that really is the full color name}.
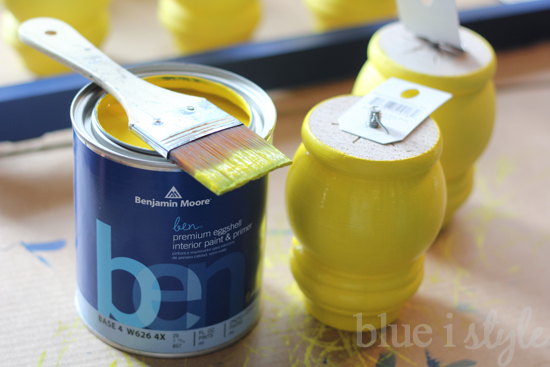
I finished off the bun feet with a coat of Rustoleum Painter’s Touch Crystal Clear sealer in Gloss.
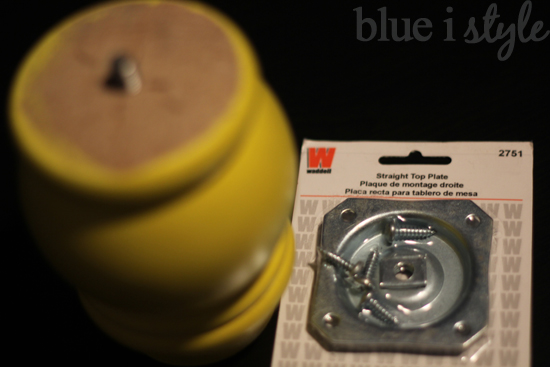
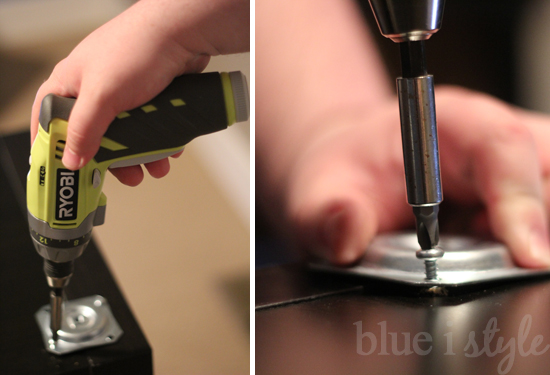
Once the feet were painted and sealed, it was time to install them on the bookshelves. I purchased the Waddle brand of straight top plates at Lowe’s for about $1.50 each. They also sell angled plates for different kinds of installations {such as attaching legs to stools or kitchen chairs}. Double check to make sure you are buying the ones appropriate to your project as the packaging is nearly identical.
We flipped our bookshelves upside down and measured to determine our desired placement for each foot. When placing the top plates, it’s important to keep in mind that the top of the bun foot is larger than the plate, as illustrated in this photo:
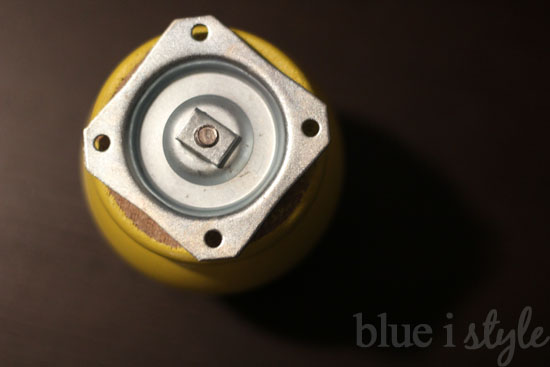
Because of this size difference, if you were to place the plate directly at the corner of the bookshelf, the top of the bun foot would sit out past the edge of the shelf when installed. Instead, you’ll want to move the plate in a bit to accommodate for the size difference.
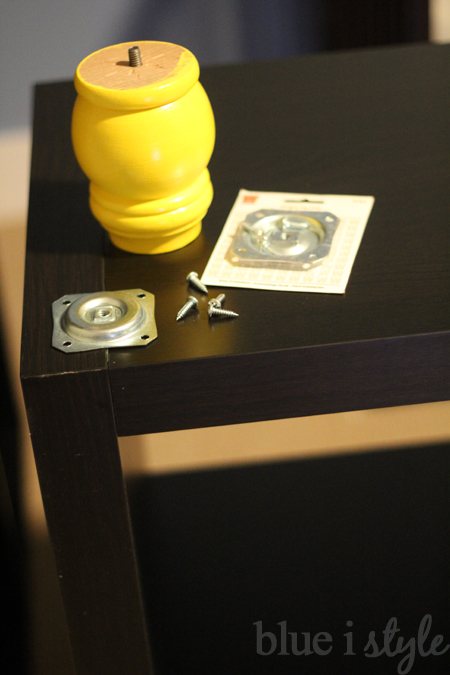
Once we had the positioning down, my husband installed the screws that came with top plates.
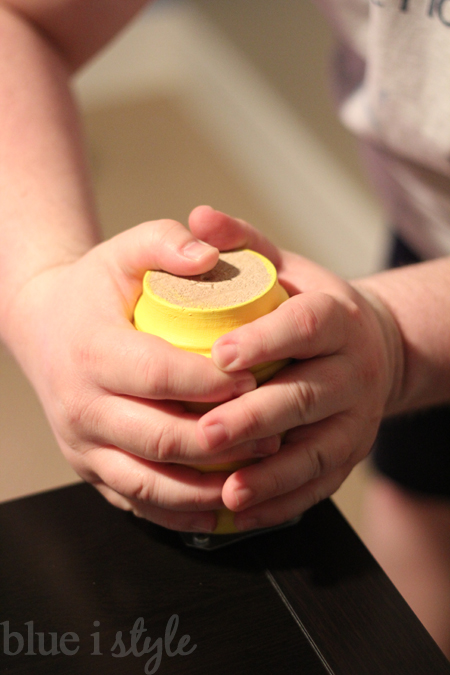
With the top plates were affixed, the only thing left to do was to screw the bun feet in to the plates. I got each one started, and then my husband tightened them down further.
I love our bright yellow bun feet! This easy DIY project really makes such a big impact, and it gives very basic bookshelves so much style.
With the variety of feet available at you local hardware store, you could easily change things up to achieve any look you are after.
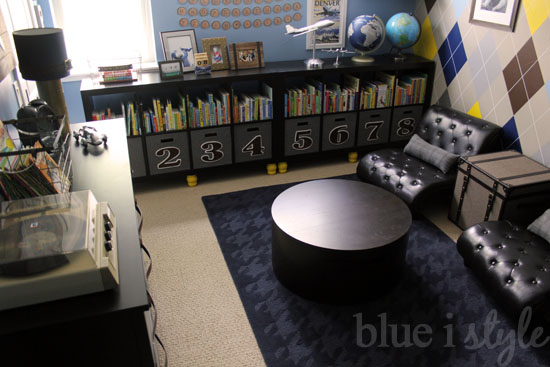
We used 12 bun feet for these two bookshelves that span the full width of the room, but for most projects you would only need 4 feet, making this a very affordable way to change the look of your furniture.
The links below include all of the other projects that went into the creation of the Vintage Preppy Little Gentleman’s Lounge: