This is a sponsored post written by me on behalf of Cricut. All opinions are 100% mine. Cricut has long been established as the ultimate crafting tool! And while I get my craft on from time to time, I've always used my Cricut cutting machine primarily for organizing. While I love my Cricut Explore Air (and am coveting a Cricut Maker for it's ability to cut even more materials), the truth is that both machines are much more powerful than what I need for the majority of my projects. I love ... View the Post
Search Results for: label/adhesive vinyl
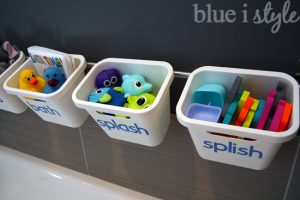
{organizing with style} Tutorial for Creating Vinyl Labels for Bathtub Toy Storage
Thanks to all those who checked out my recent project to create stylish tub toy storage in our guest bathroom. As promised, I am back to give you the details on how I made the labels for the storage bins. These labels are made from adhesive-backed vinyl, which can be purchased at many craft stores as well as online. This is the same kind of vinyl that can be used to create wall quotes and other kinds of wall decals. It sticks well, but can easily and safely be removed at ... View the Post
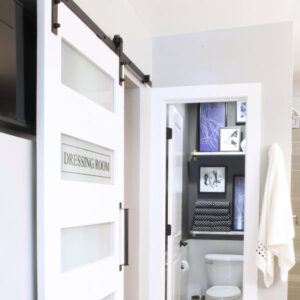
How to Create a Custom Door Label with Cricut
A year after completing the makeover of our master bathroom, the barn door on our closet remains one of my favorite details of the space! Based on your comments, it seems to be one of your favorite features as well. Over time, a lot of you have asked me how we added the "Dressing Room" label to the barn door, so today I wanted to share the easy DIY tutorial. I created this custom door label using my Cricut electronic cutter, which is one of the most versatile and fun tools I own for decor, ... View the Post
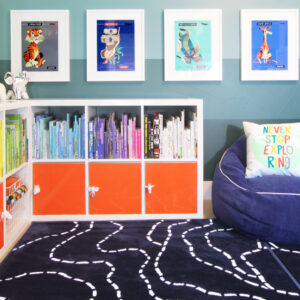
Bookshelf Makeover Without Paint: An Ikea Hack
I think it's safe to say that I have no fear of color. Especially when it comes to decorating kids' rooms, I say, the more color the better! BUT I also have my practical side, and I'm passionate about creating kids' spaces that can grow with them {I even wrote a post with tips for designing a boy's room that grows with him}. So when I wanted to add some vibrant color to the bookshelf in my sons' new shared bedroom, I didn't want to do anything too permanent. Rather than painting the doors of ... View the Post
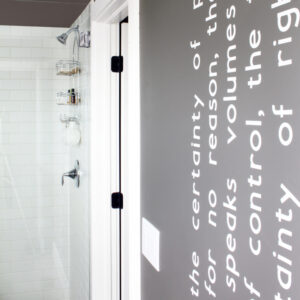
How to Create Wall Words Using Cricut
This is a sponsored post written by me on behalf of Cricut. All opinions are 100% mine. This post also contains affiliate links. If you purchase something I recommend, you'll pay the same price, but I may receive a small commission. A few years ago, when asked to describe my home style in three words, I came up with MODERN. GRAPHIC. FAMILY. While "family" isn't a style in the traditional sense, to me it means creating a home that tells my family's unique story. As a result, our decor ... View the Post
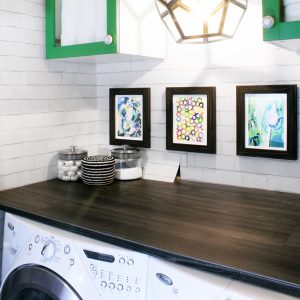
DIY Wood Plank Laundry Room Countertop
When we started planning our laundry closet makeover, I had my heart set on adding a countetop over the washer and dryer, and I found a laminate counter option I loved that looked like wood planks. But when I got the quote back, the price was WAY more than I wanted to spend, so I came up with a very budget friendly option to create the look of a wood plank countertop for under $100! Today I'm sharing the tutorial for this easy and affordable DIY countertop, which would also make a great ... View the Post
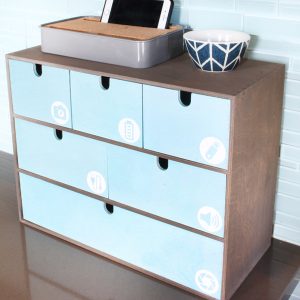
Charger Cord Organizer with Custom Icon Labels
Technology has become such an essential part of our every day lives that I feel like I'm totally drowning in cords, cables, and chargers lately! The kitchen is the heart of our home, and I typically wind up working at the kitchen table rather than my home office in order to be closer to the kids, so I was desperately in need of a charger cord organizer to contain and organize all of technology in this space. I finally came up with a phone charger organizer that is not only functional, but ... View the Post
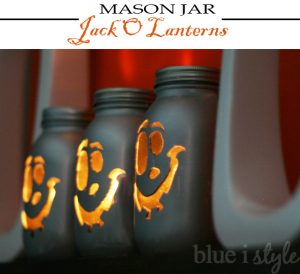
{seasonal style} Mason Jar Jack OLanterns
Ok, folks, I'm finally jumping on board the mason jar band wagon! Over the last year or two, I've seen a lot of mason jar Jack O Lanterns on Pinterest, but they've all had black faces and the light has shown through translucent paint or paper covering the remainder of the jar. I love all of these, but wanted to do something a bit different - so I opted for an opaque paint on the jar with the light shining through the unpainted eyes, nose, and mouth. I decided to take a ... View the Post
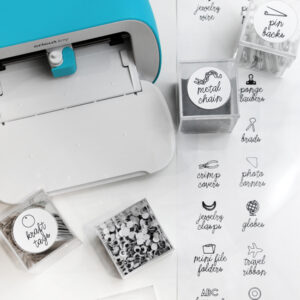
Cricut Gift Guide for Those Who Love Home Decor & Organization
I am so grateful to my friends at Cricut for sponsoring this gift guide. If you purchase something I recommend, you'll pay the same price, but I may receive a small commission. People often ask me about my favorite DIY supplies and tools, and hands down, my go to for all of my decorating and organizing projects is my Cricut electronic cutting machine. Whether you're shopping for a friend or relative, or thinking of treating yourself this holiday season, giving the gift of Cricut is ... View the Post

Reusable Monogram Gift Tags Made with Cricut
I am so grateful to my friends at Cricut for sponsoring this holiday DIY project. A couple of years ago, I used my Cricut to make numbered gift tags for the 24 books that we wrap every holiday season for the boys to open each night leading up to Christmas. I loved how they turned out and, ever since, I've been wanting to make some reusable gift tags for all of our family Christmas presents. I once again used my Cricut and created some simple DIY monogram gift tags. I made a set of ... View the Post

DIY Dollhouse Makeover
There are those presents that the kids lose interest in right away (womp womp), and others that are still favorites years later (parenting WIN!). A few years ago, I did a last minute DIY dollhouse makeover for my boys, transforming an off-the-shelf dollhouse into a mini-me version of our own home, and years later, the boys (now 4.5 and almost 6) still play with it all the time and show it to everyone who comes over! When we were little, my mom created several dollhouses for my sister and me. ... View the Post
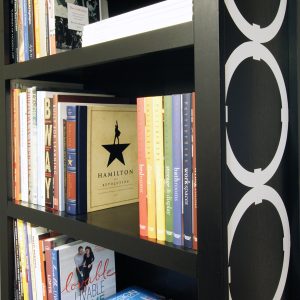
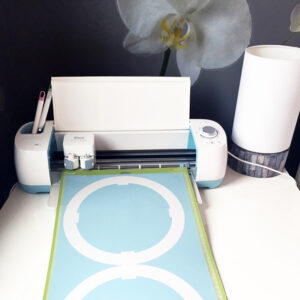
Easy Bookshelf Style Upgrade
About a year ago, I added a bookshelf to our second floor hallway, but I've never really loved it. It was budget friendly, and it's perfectly functional, but it's not super stylish. I have big plans to transform this bookshelf though with some simple changes, and I'll be sharing each step. Today - in part one of the makeover - I've added a vinyl detail down the side of the bookshelf, and I'm excited to show you how easy it is to do! Thank you to Cricut for sponsoring this post, and thank ... View the Post
- 1
- 2
- 3
- …
- 14
- Next Page »